
The Correct DJI Pocket 4 Video Settings
In this blog, I’ll share my video settings for the DJI Pocket 4. I’ve been using this little camera since launch for my travels and YouTube channel, and I’ve developed a streamlined workflow. If you’ve just picked one up or want to learn something new, this is the right blog for you.
Scope
This isn’t intended to be a complete user manual. Instead, I’m sharing the essential settings I use to get the best video quality from the Pocket 4. This guide only covers video settings.
Resolution and Frame Rate
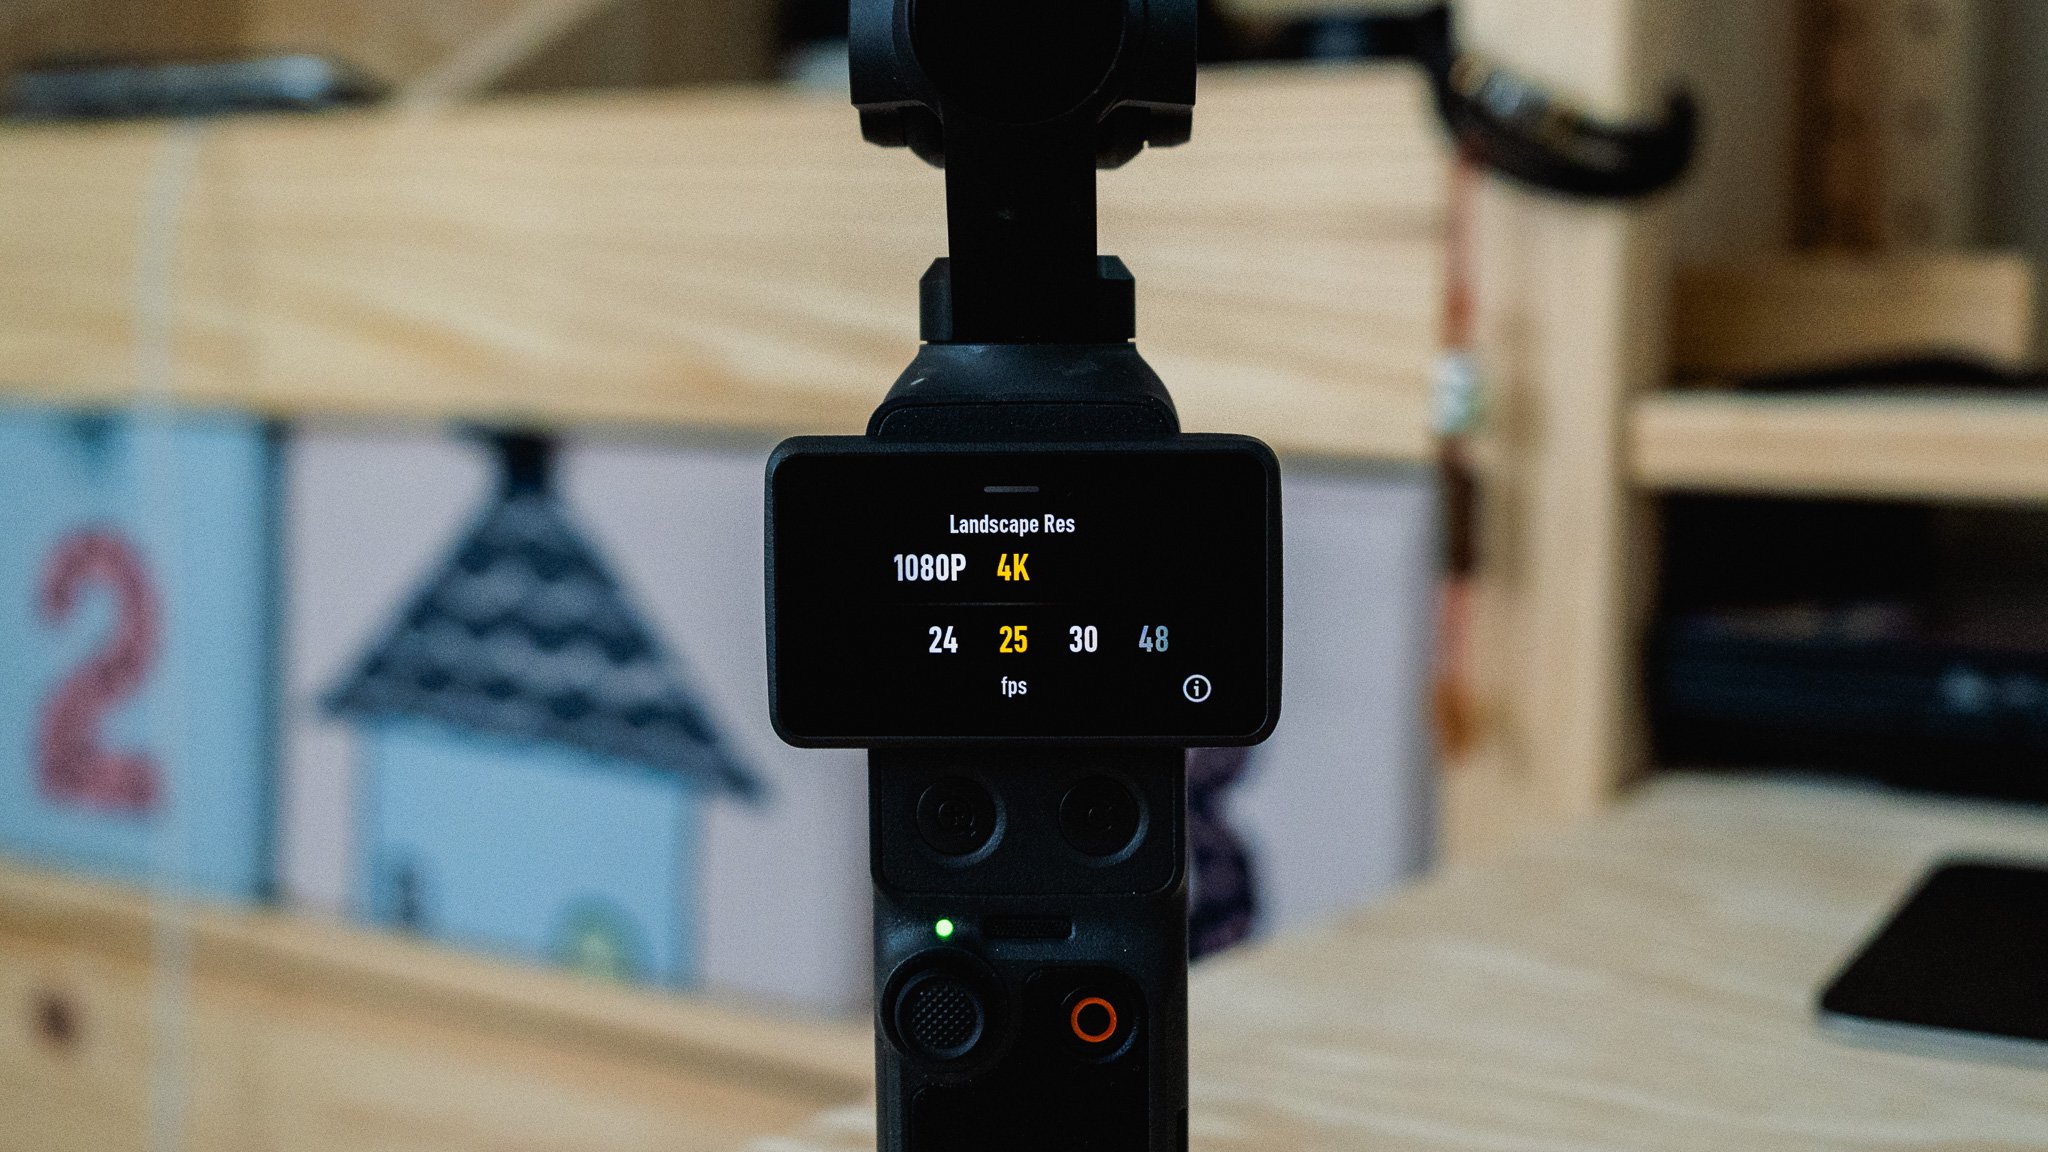
I shoot in 4K at 25 frames per second. This helps me avoid issues with flickering lights caused by the 50Hz electrical frequency used here in Europe. If you’re in America, Japan, or one of a few other countries, you’ll most likely shoot at 24fps, as you run on 60Hz.
Both 24 and 25fps are commonly used for more cinematic-looking footage, while 30fps can produce slightly smoother results. If you want the smoothest video possible, consider shooting at 50 or 60fps.
I personally feel that 30fps is the sweet spot. However, given that I already have more than 8TB of footage shot at 25fps, I won’t be changing now.
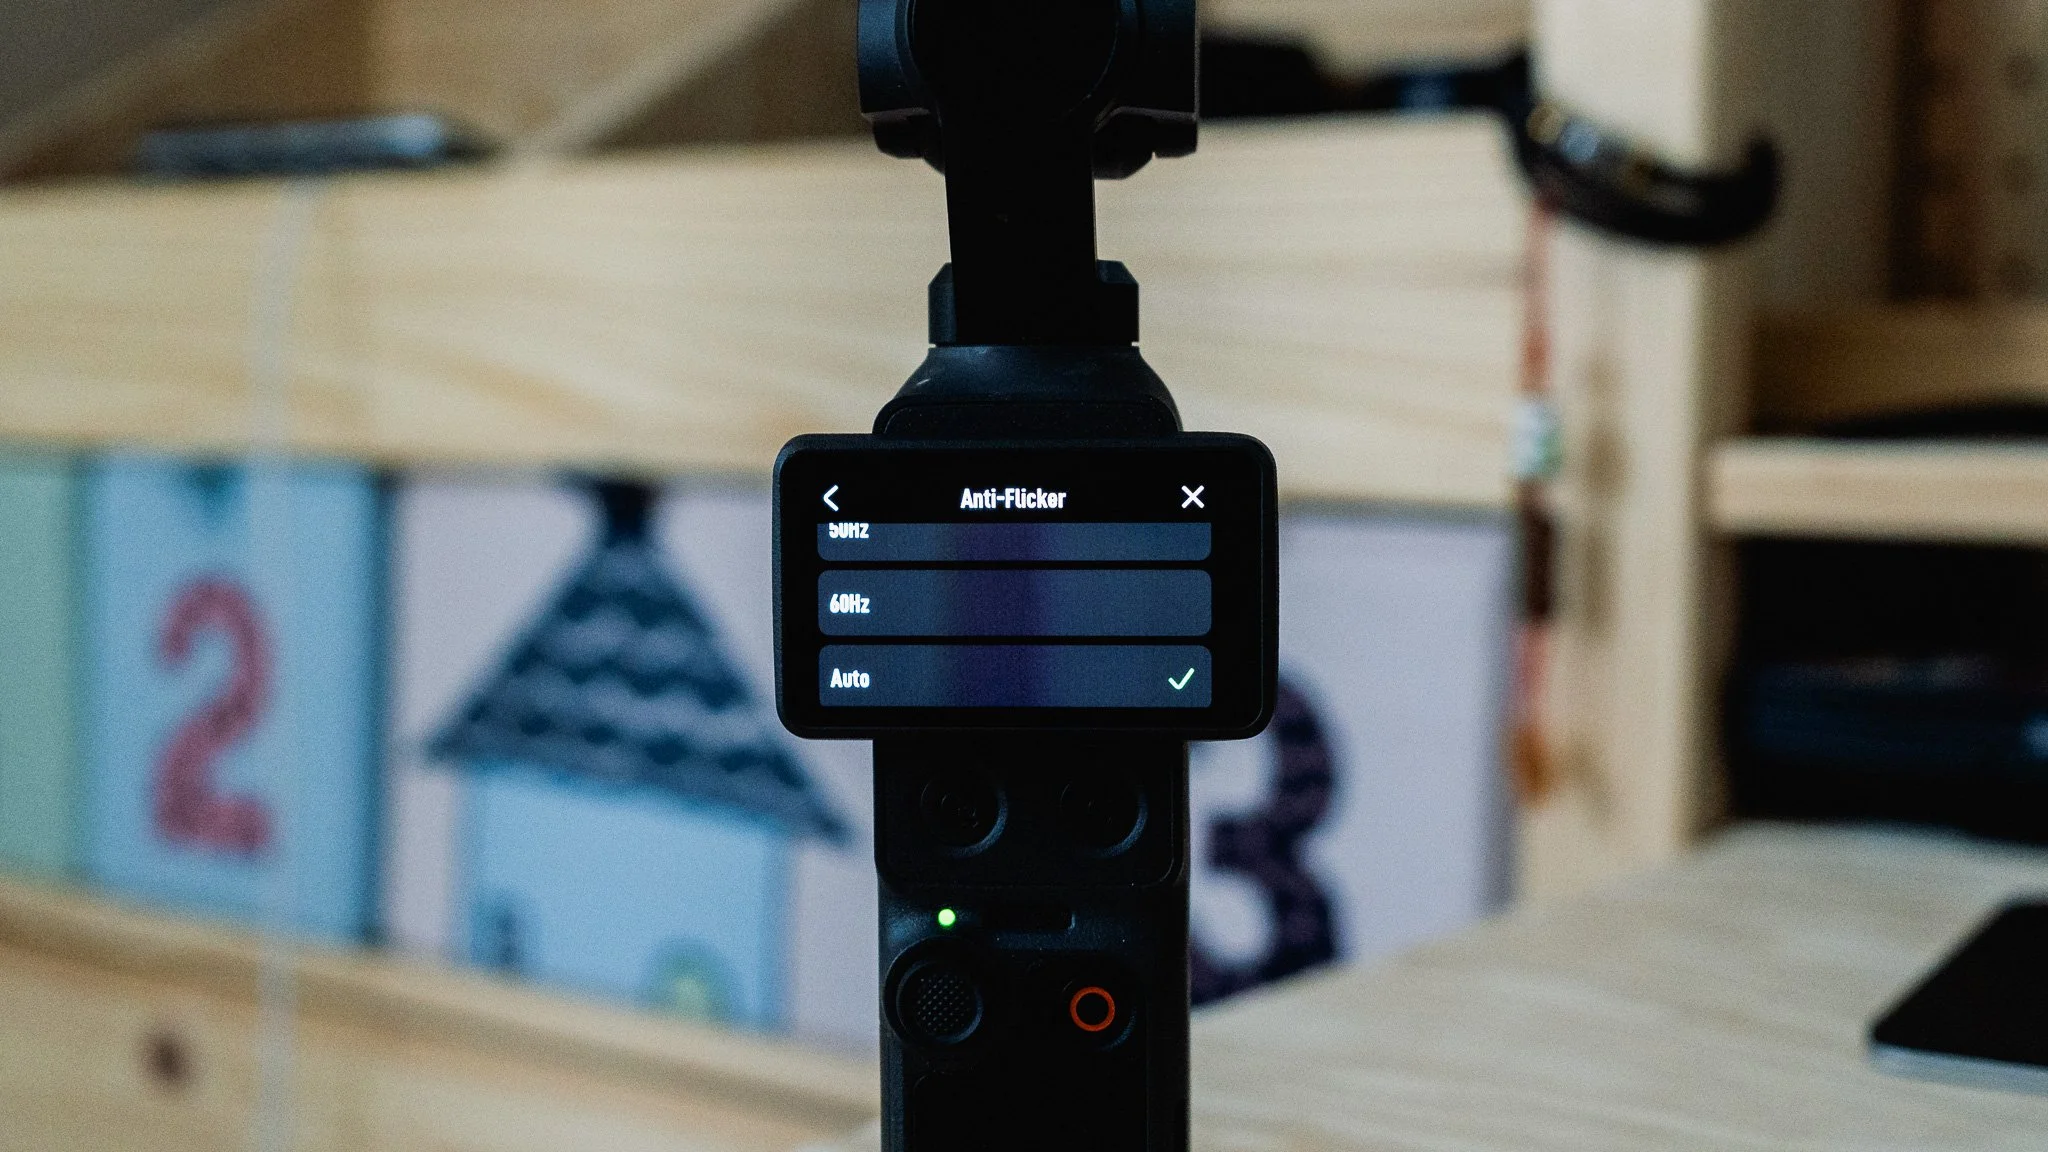
The camera also has a built-in anti-flicker setting, which should automatically adjust the shutter speed to reduce flickering. I leave this set to Auto.
Picture Profile
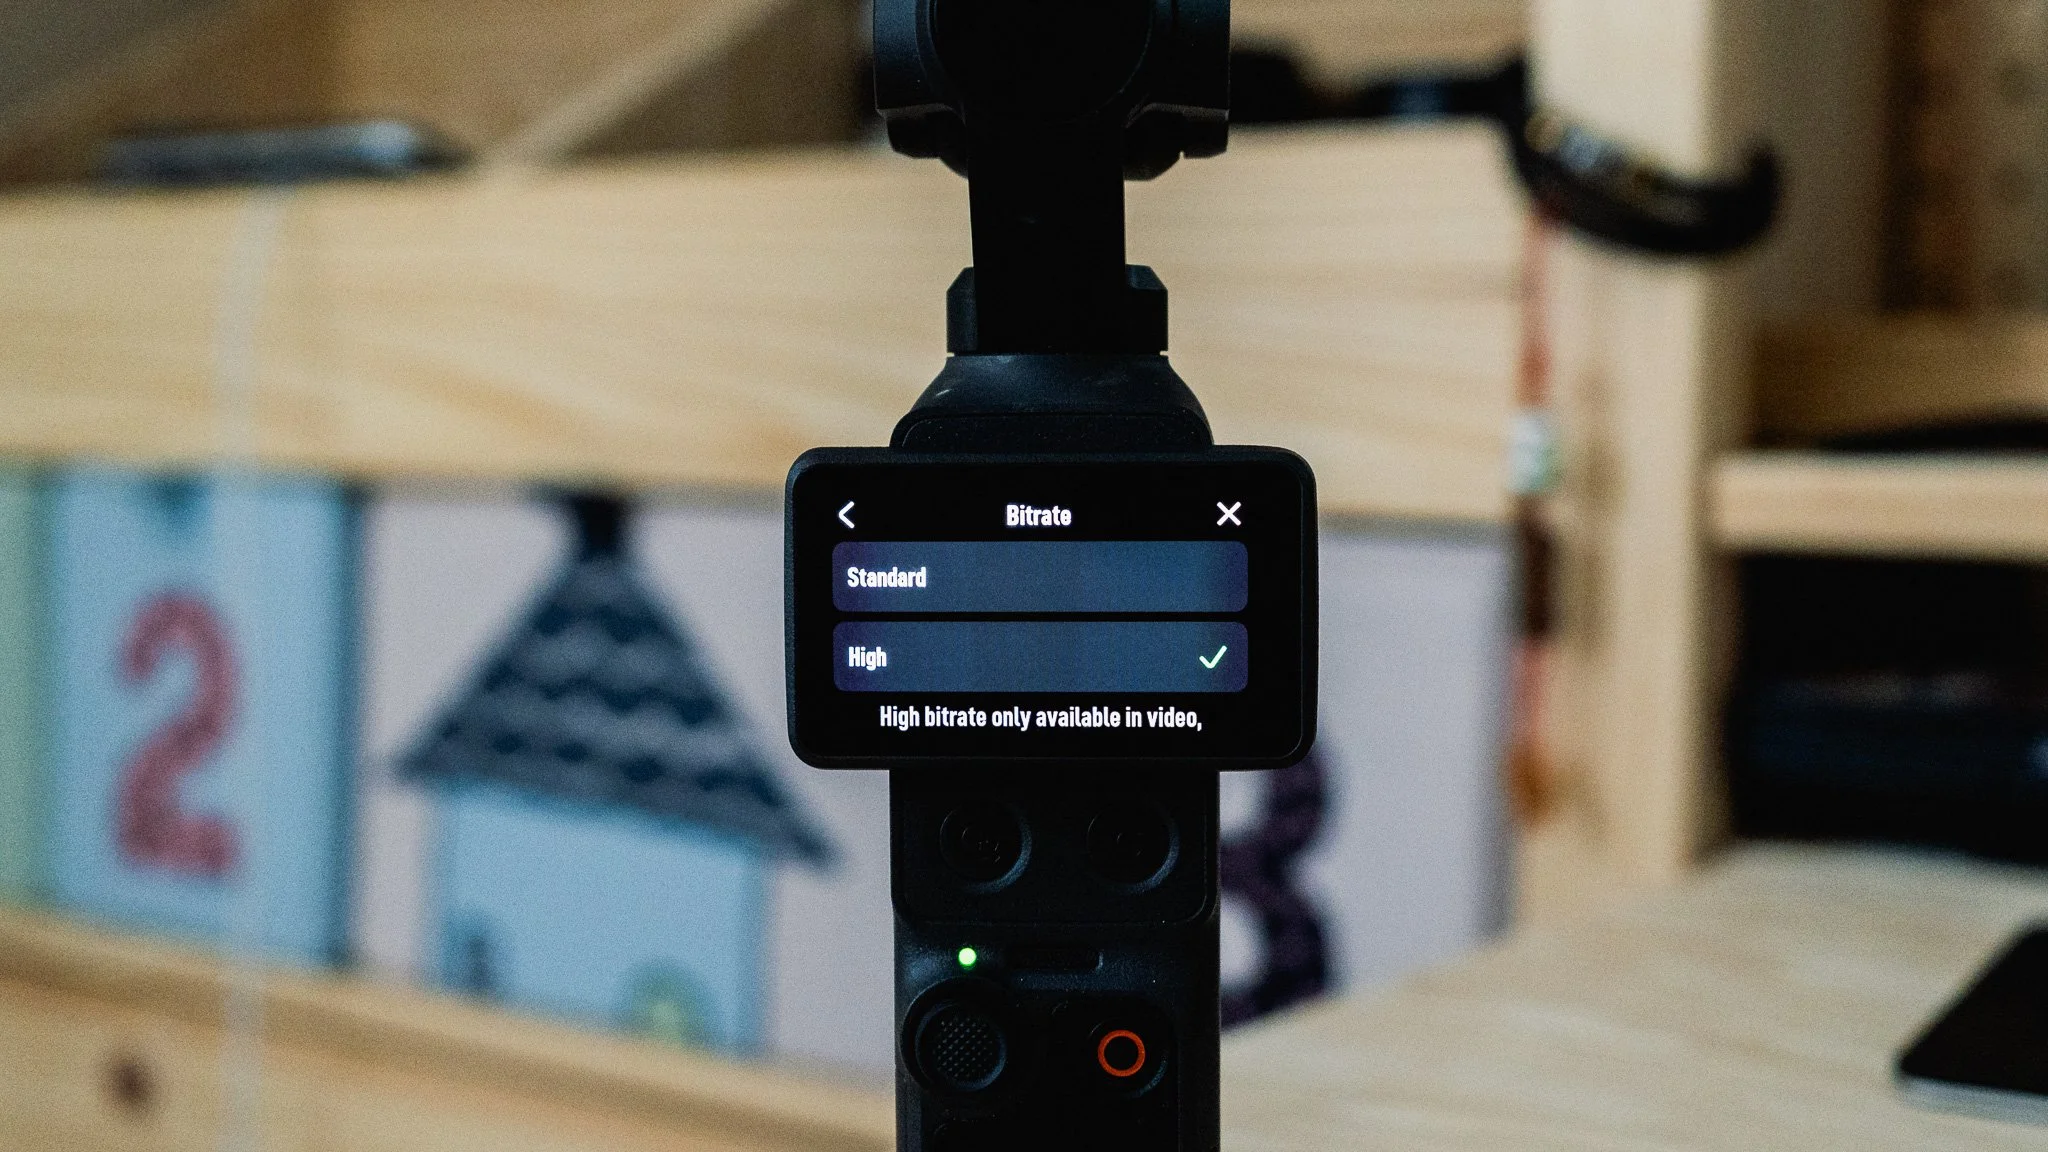
The first thing we need to do is change the bitrate to High. This will produce larger files, but it also gives you higher-quality footage with more flexibility for colour grading. You can find this option in the general settings menu.
Next, return to the main screen and swipe in from the right-hand side to open the picture settings. Make sure you enable Pro mode by tapping the PRO icon in the top-right corner.
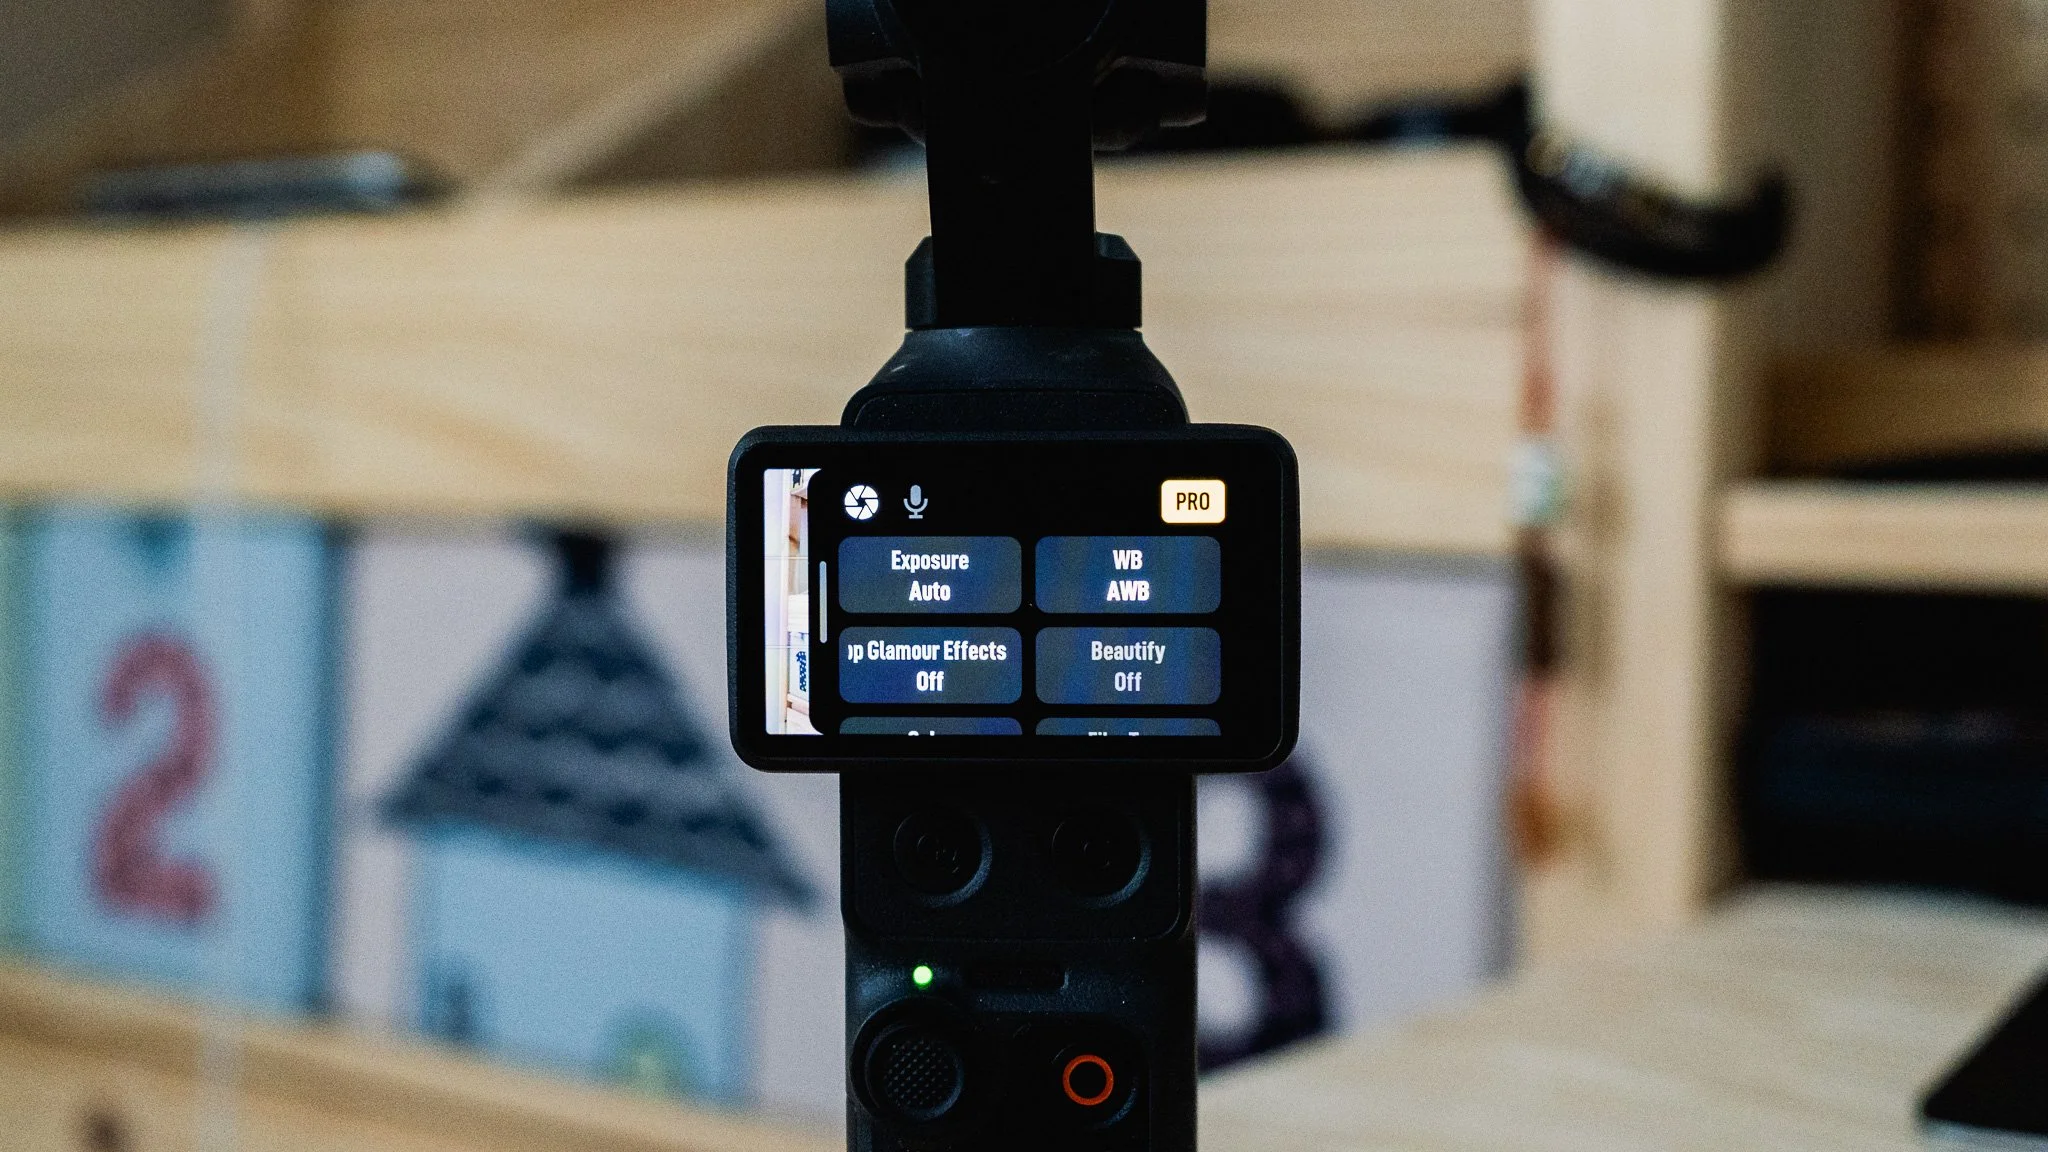
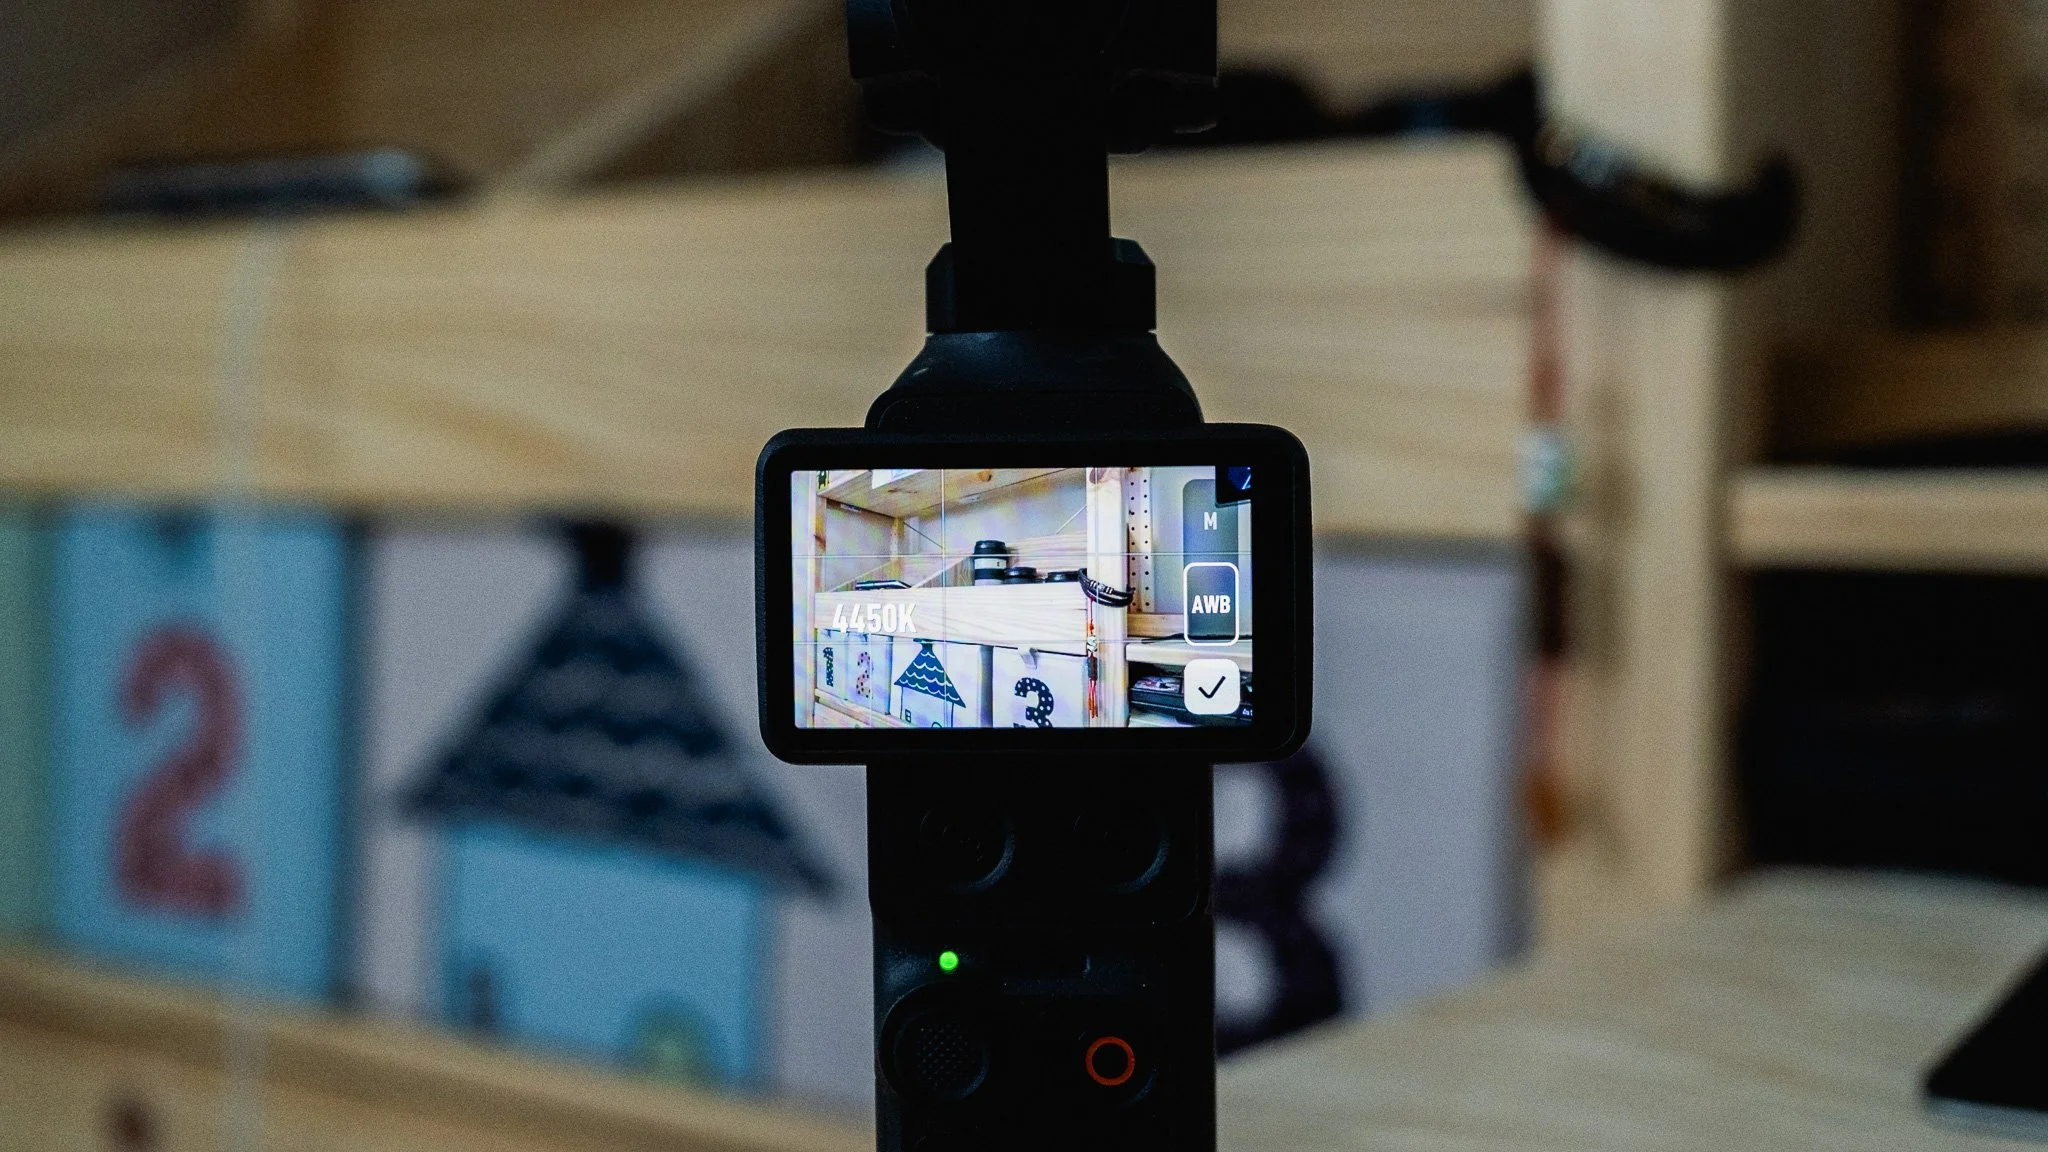
We’ll leave exposure alone for now, as I’ll cover that later. As for white balance, I honestly leave it set to Auto 99% of the time. I find the camera to be accurate and stable. Of course, if I’m recording a long take or shooting in lighting conditions that can make automatic white balance less reliable, such as at sunset, I’ll switch to manual and adjust it accordingly.
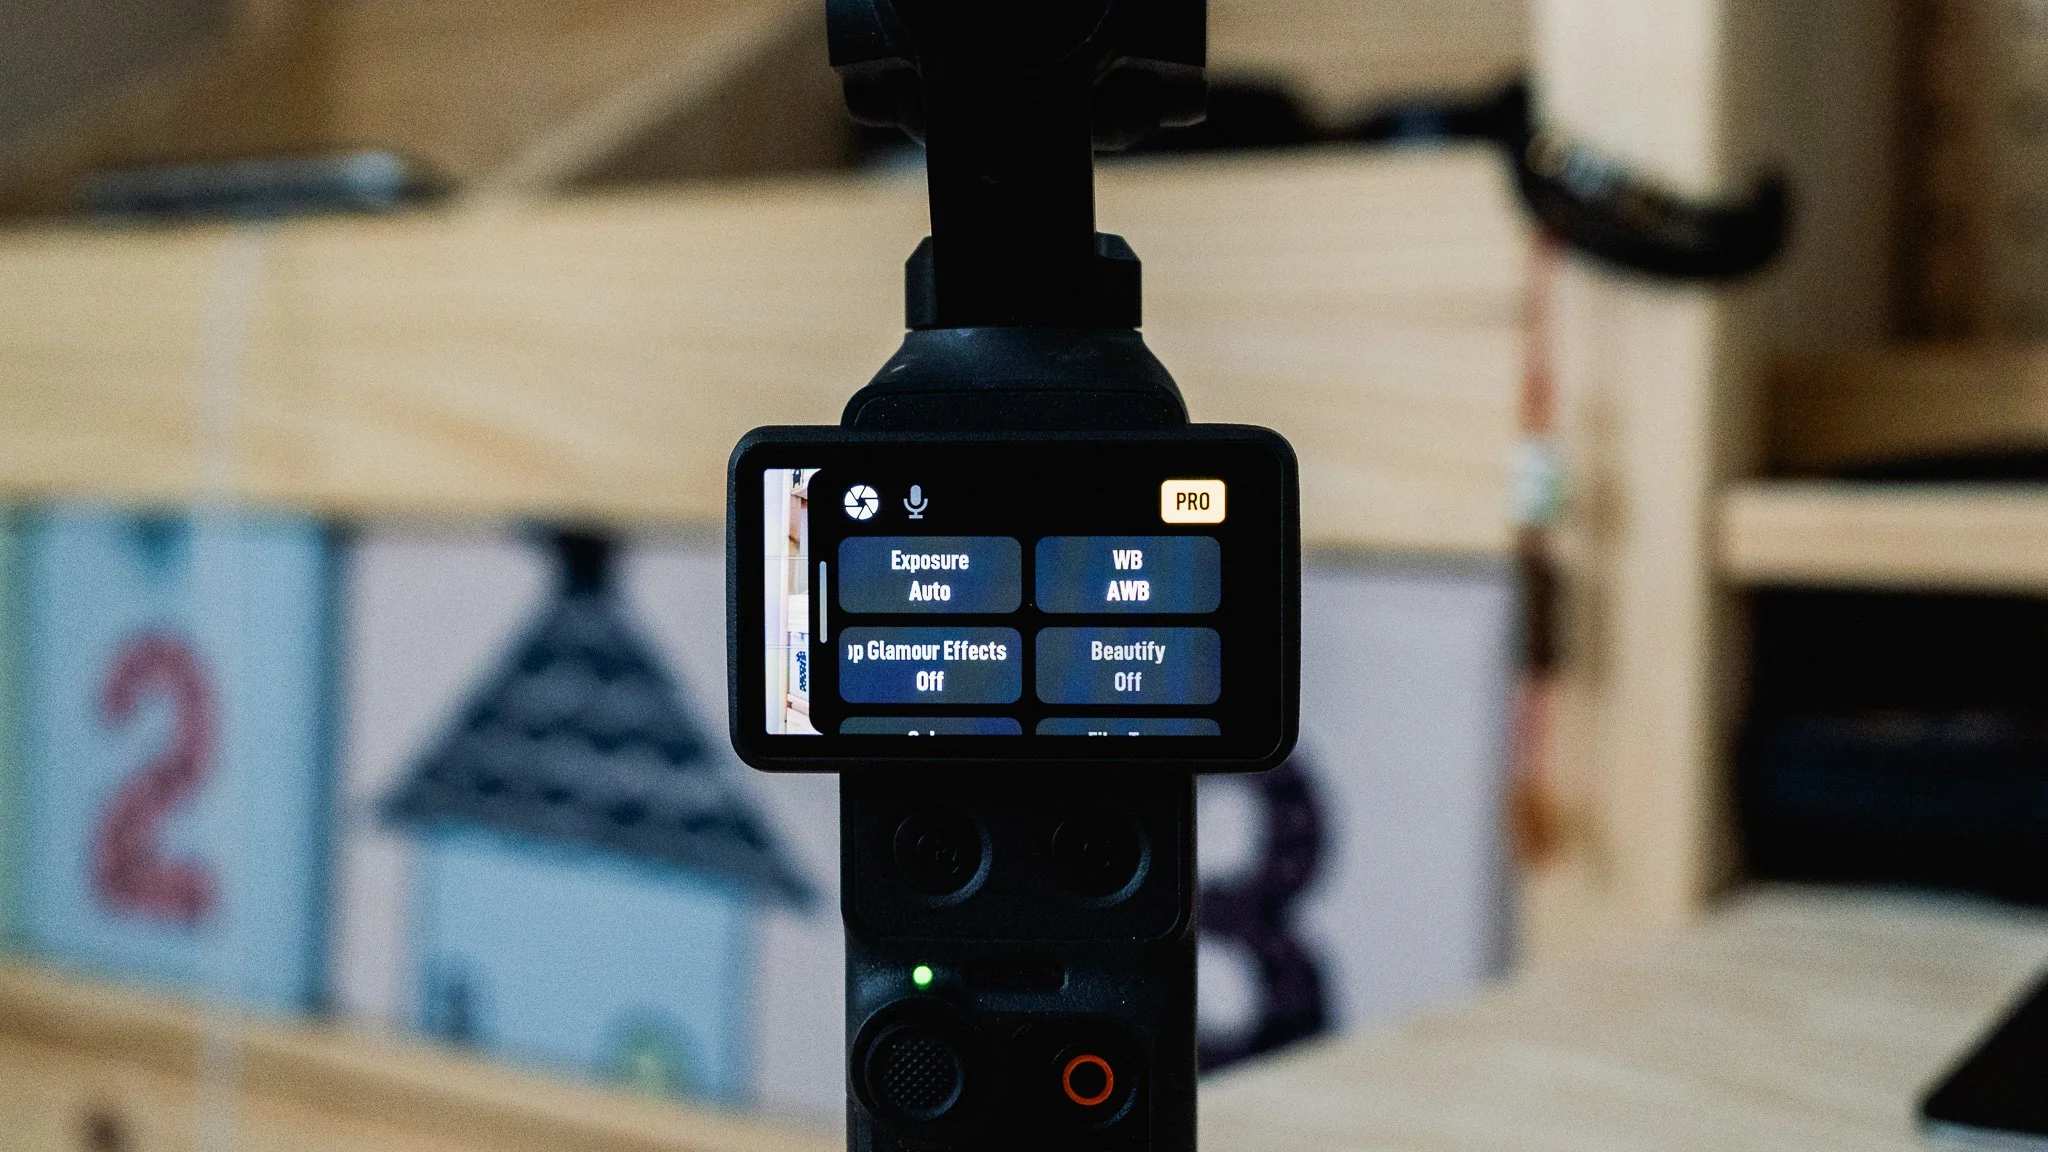
I turn off Glamour Effects because I don’t want the image to look strange or unnatural. I want the cleanest, most stripped-back footage possible. The same applies to Beautify and Film Tone.
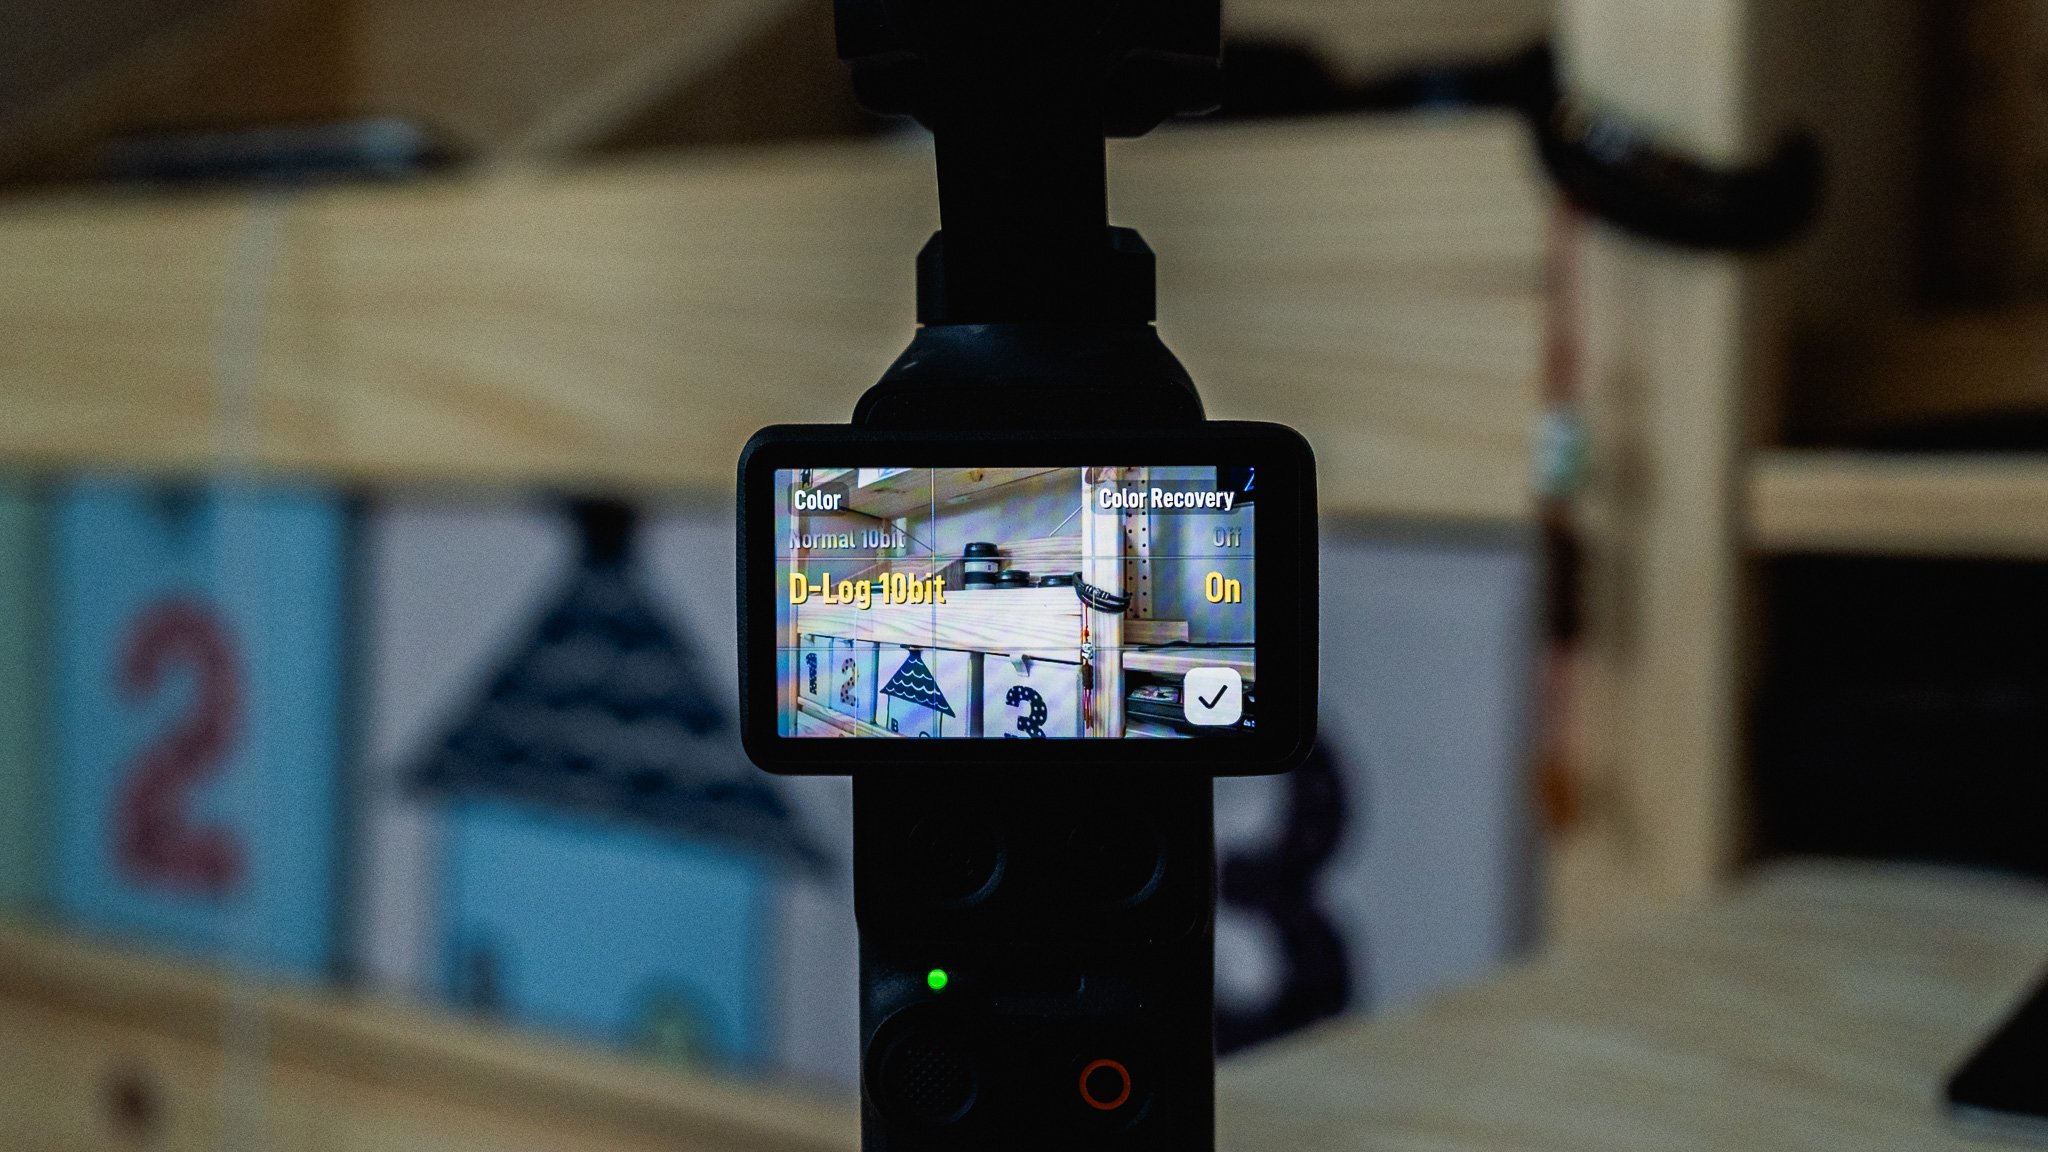
I set the colour profile to 10-bit D-Log for grading later. Even if you don’t want to colour-grade your footage manually, you can download DJI’s official conversion LUT from its website. Apply it in editing software such as Final Cut Pro, and you’ll get a higher-quality image with more dynamic range and greater flexibility for making meaningful adjustments.
I leave Colour Recovery enabled to give me a higher-contrast preview. This only affects the preview and has no impact on the recorded footage.
We’ll leave the focus settings alone for now, as I’ll cover those shortly. I enable Breathing Compensation. As the lens changes focus between subjects that are close to the camera and those that are farther away, the field of view can shift slightly. This setting applies a small crop to minimise that change and make it less distracting.
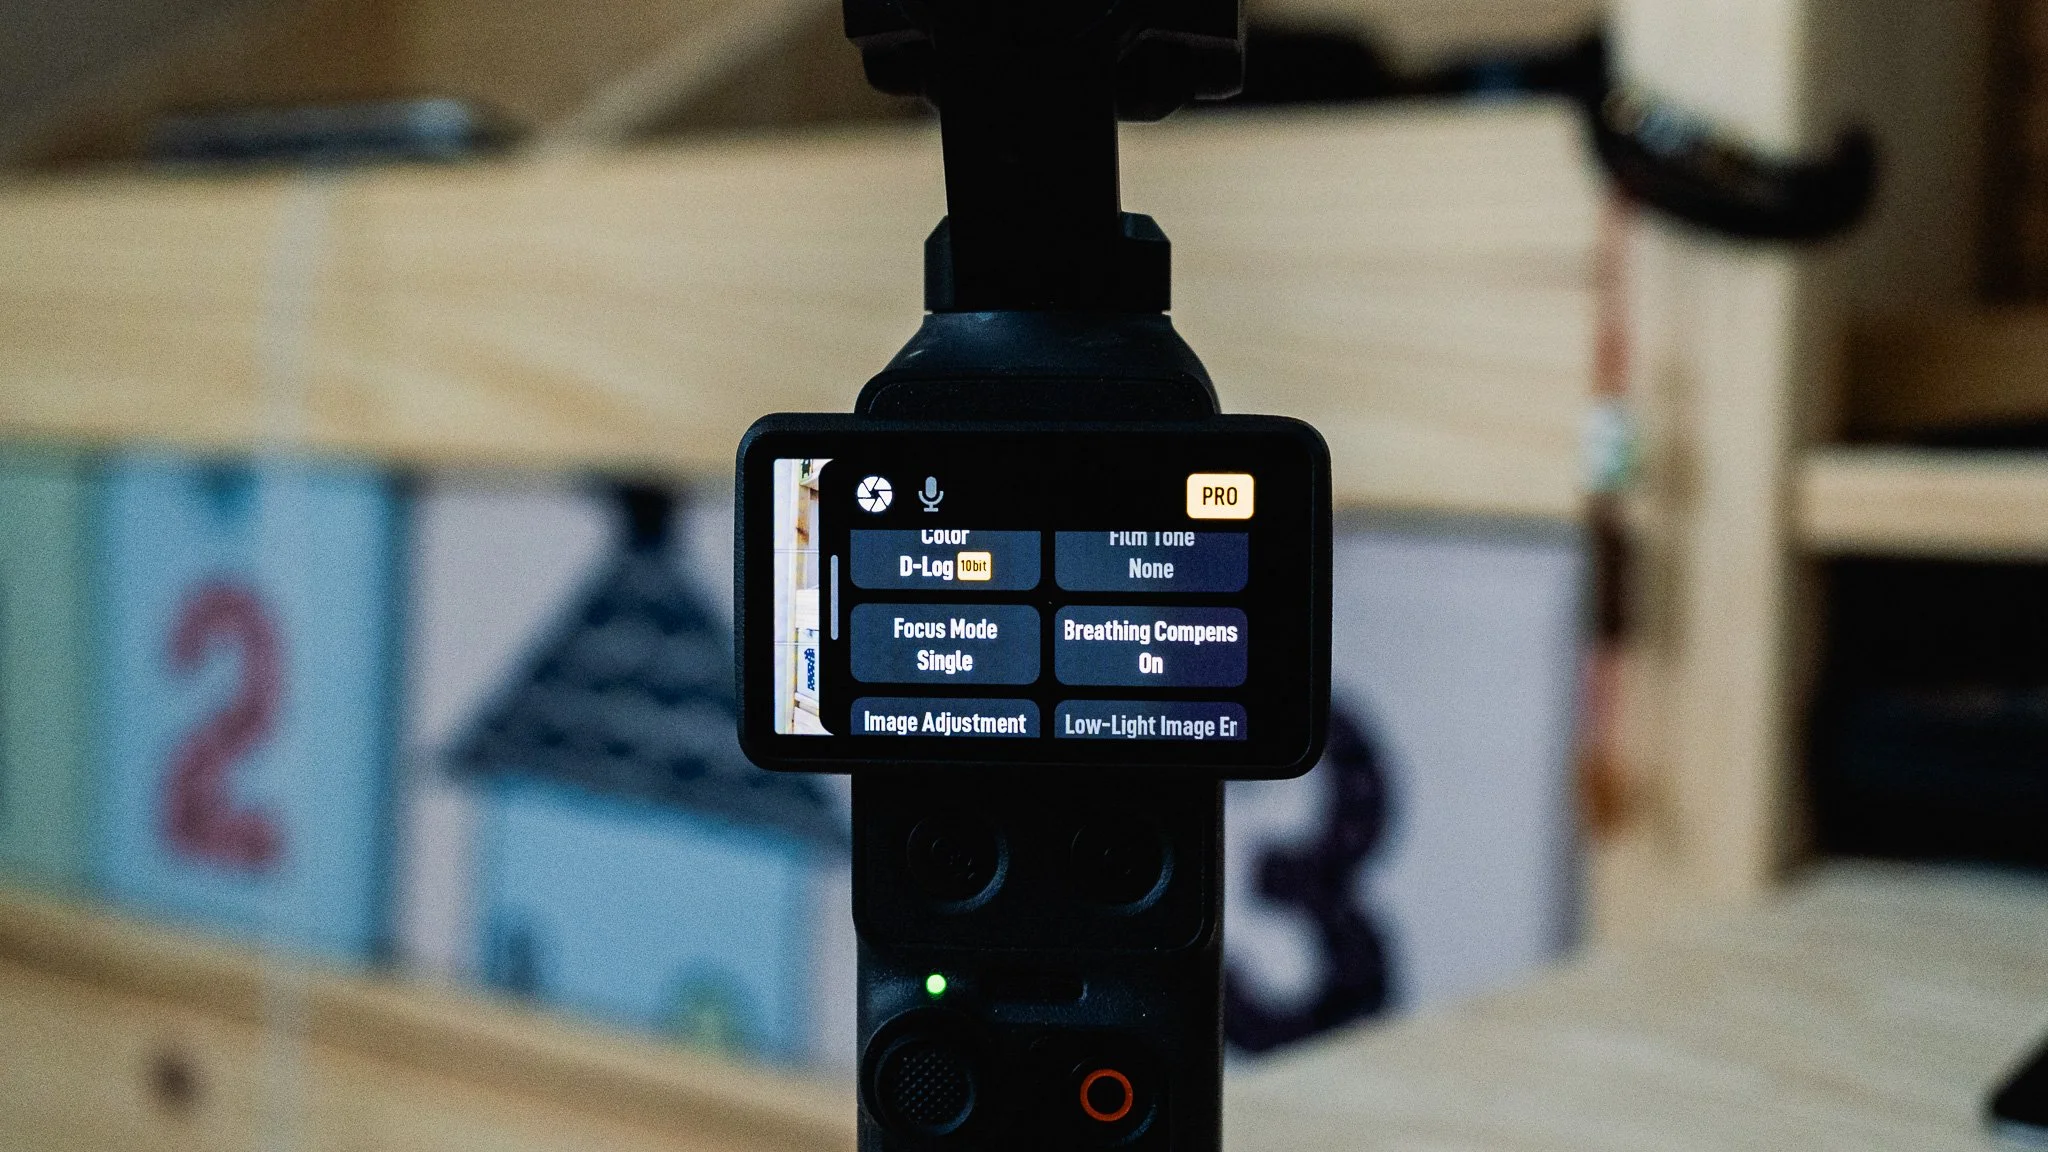
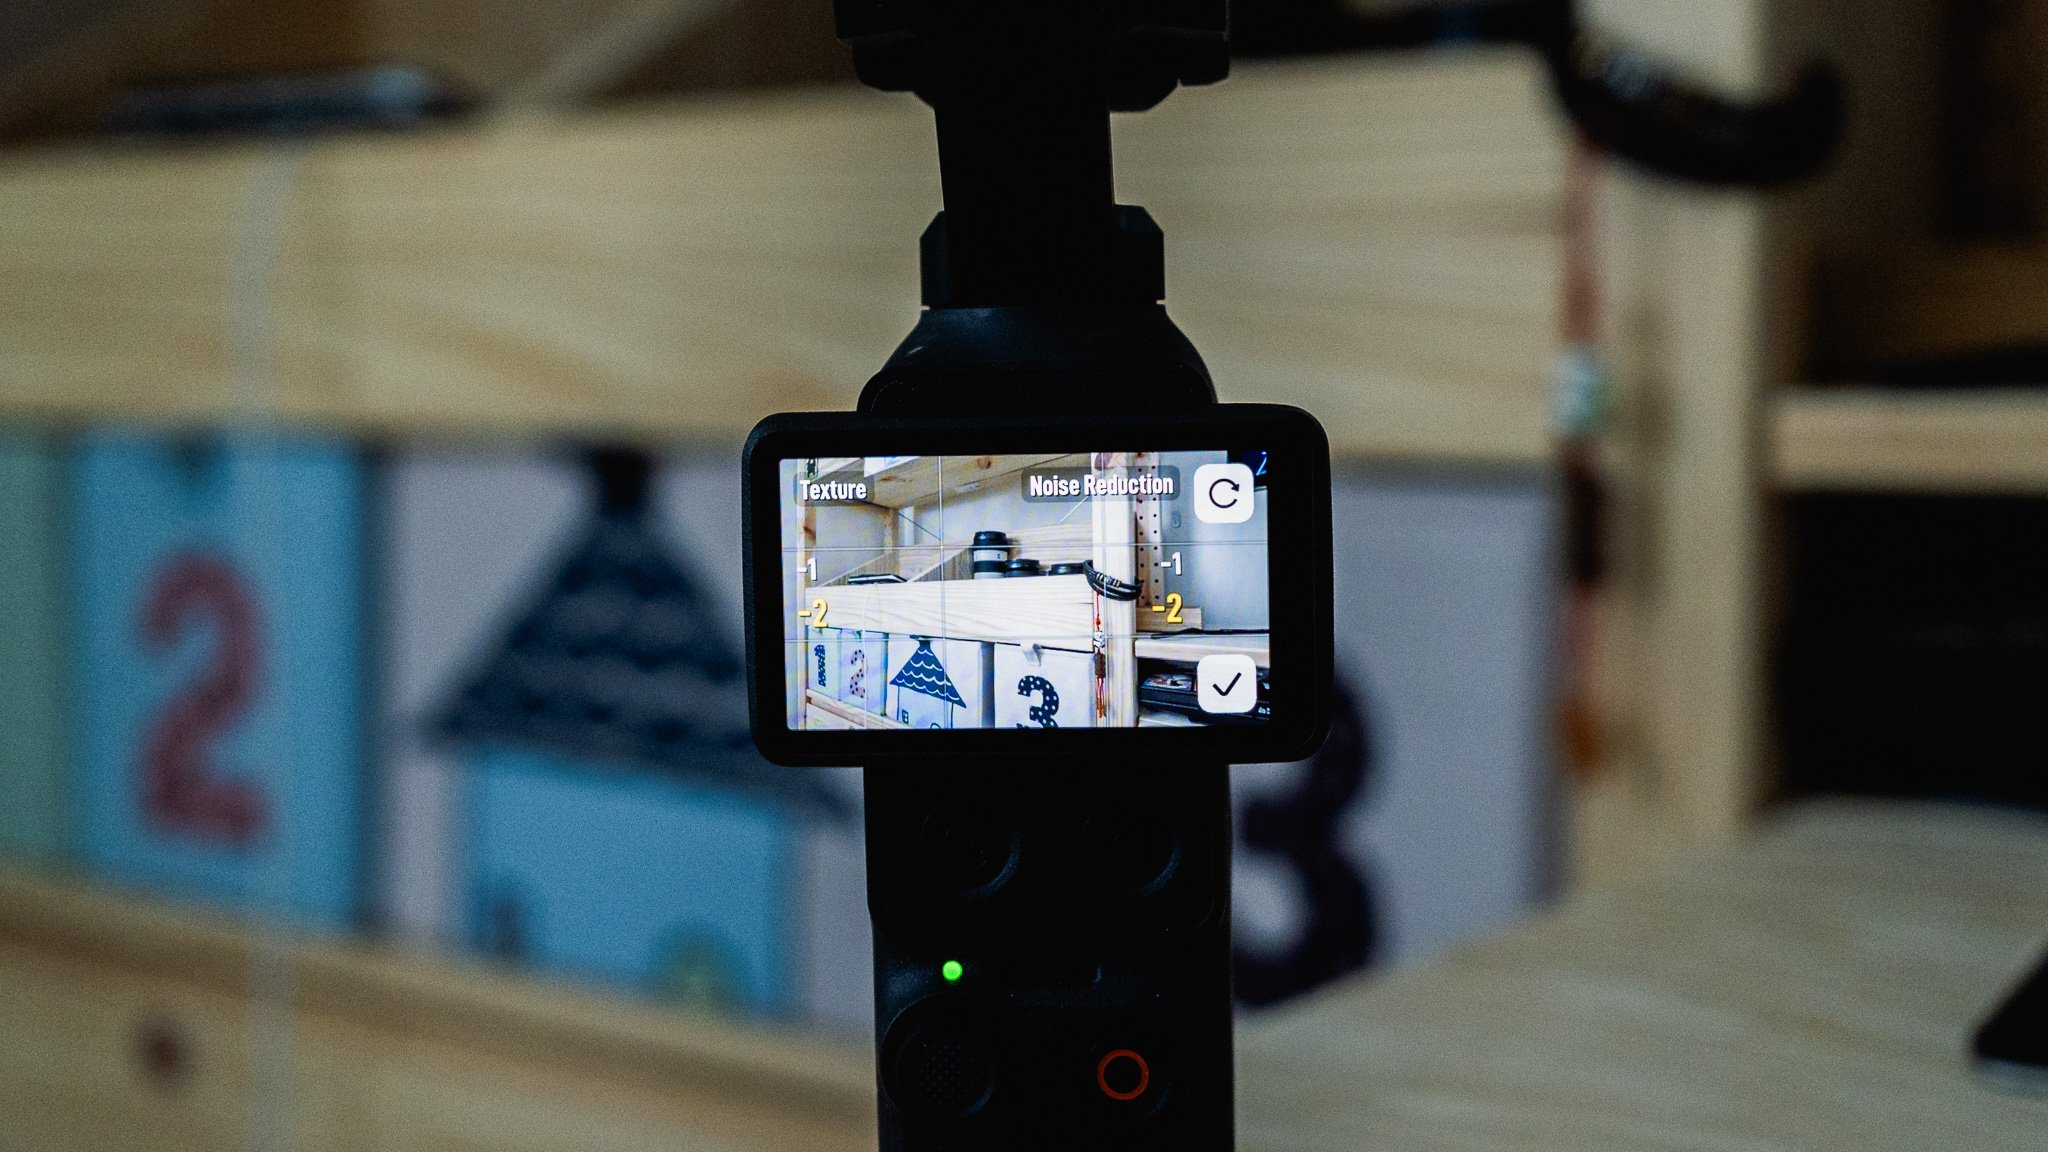
Under the Image Adjustment tab, I set both Texture and Noise Reduction to -2. I would rather adjust these in editing if necessary.
Exposure
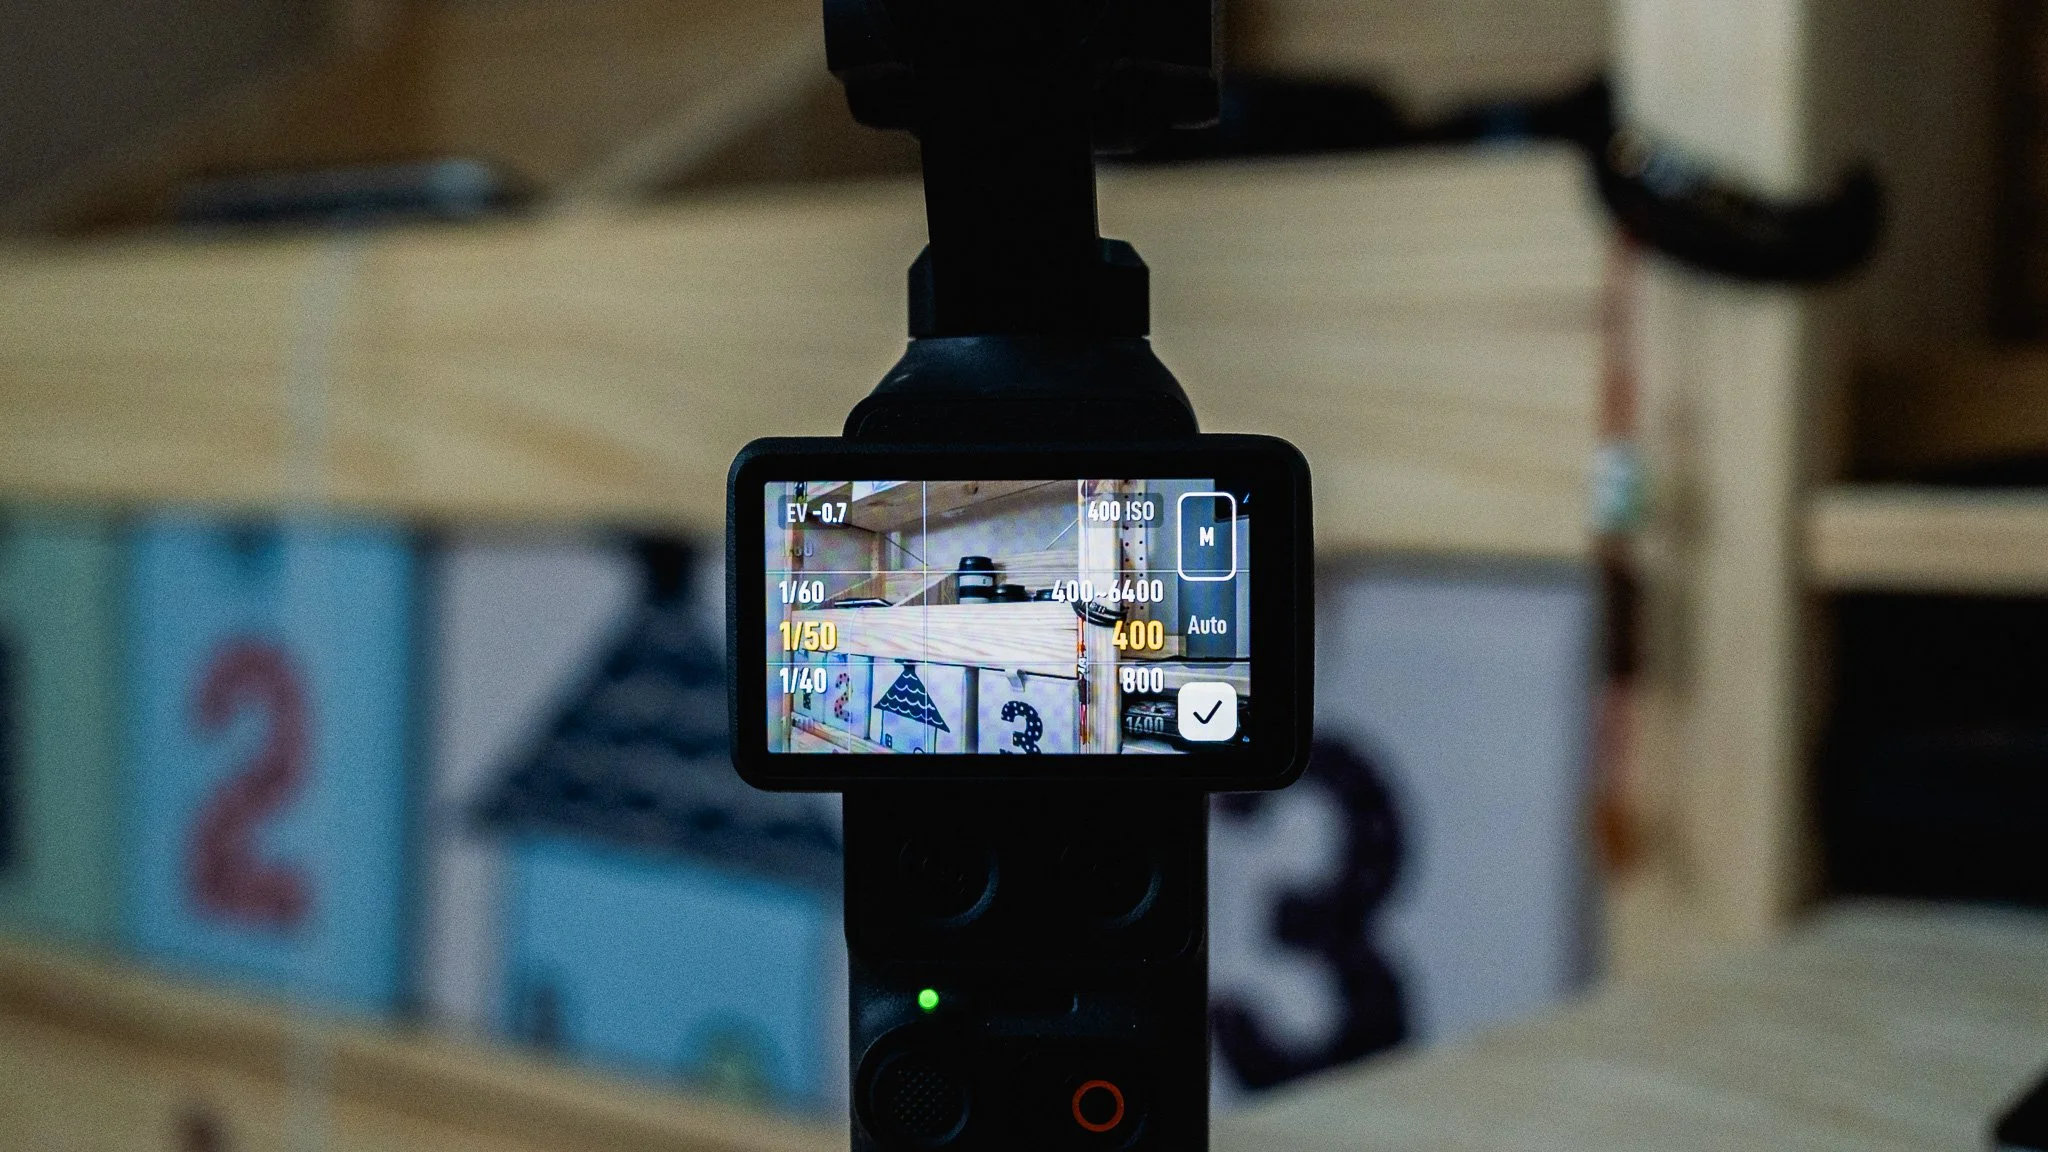
There are two ways to control exposure on the Pocket 4. The quick and easy approach, and the one I use for general vlogging, is to leave everything in Auto. While this is by far the easiest mode to use, it can also produce more amateur-looking footage due to the lack of natural motion blur.
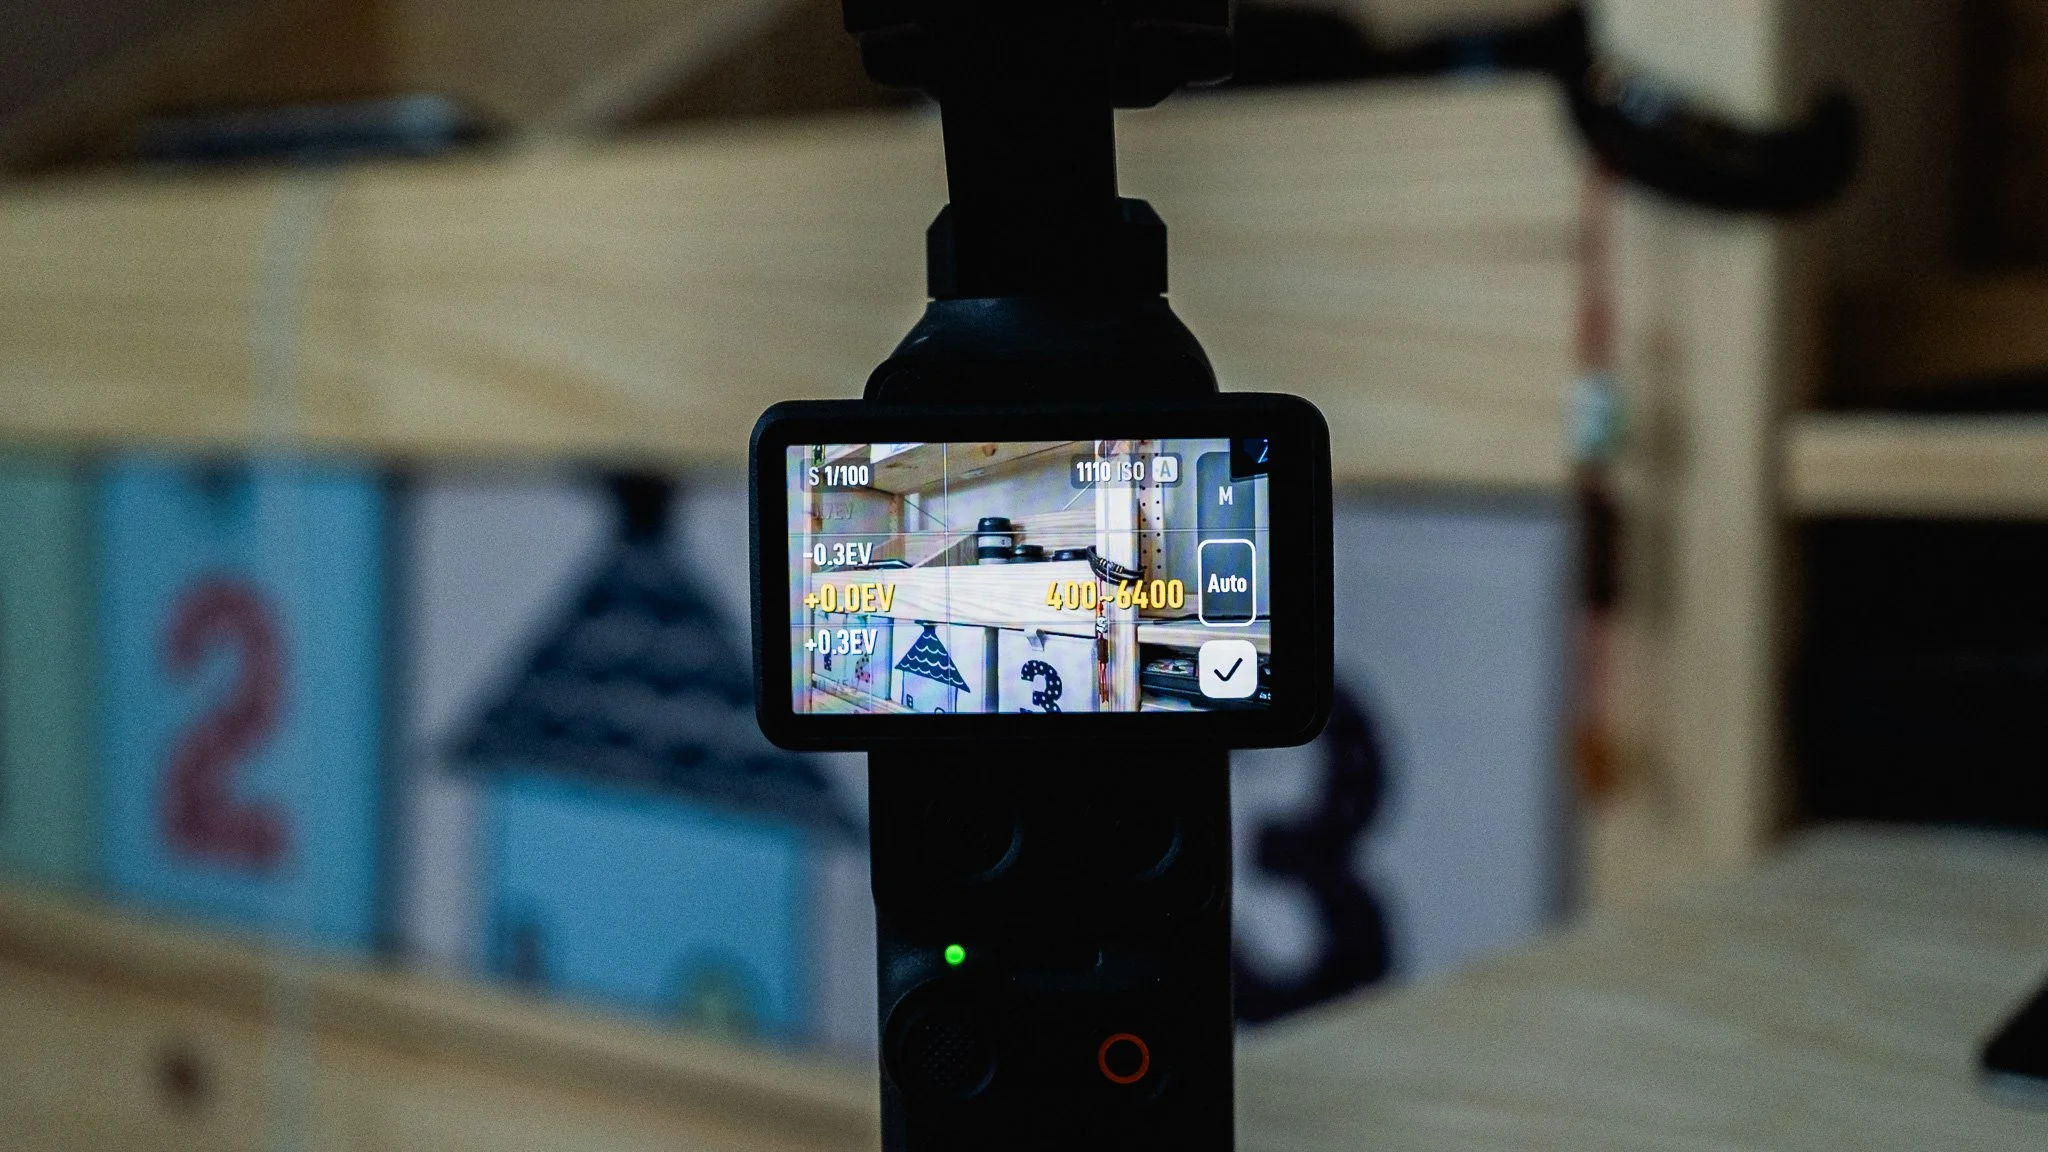
For more professional-looking footage, switch to manual exposure and set the shutter speed to double your frame rate. For example, if you’re shooting at 25fps, your shutter speed should be 1/50. I then set the ISO range to Auto, between 400 and 6400, so that there is one less thing to worry about. For this setup to work seamlessly during the day, you’ll also need an ND filter.
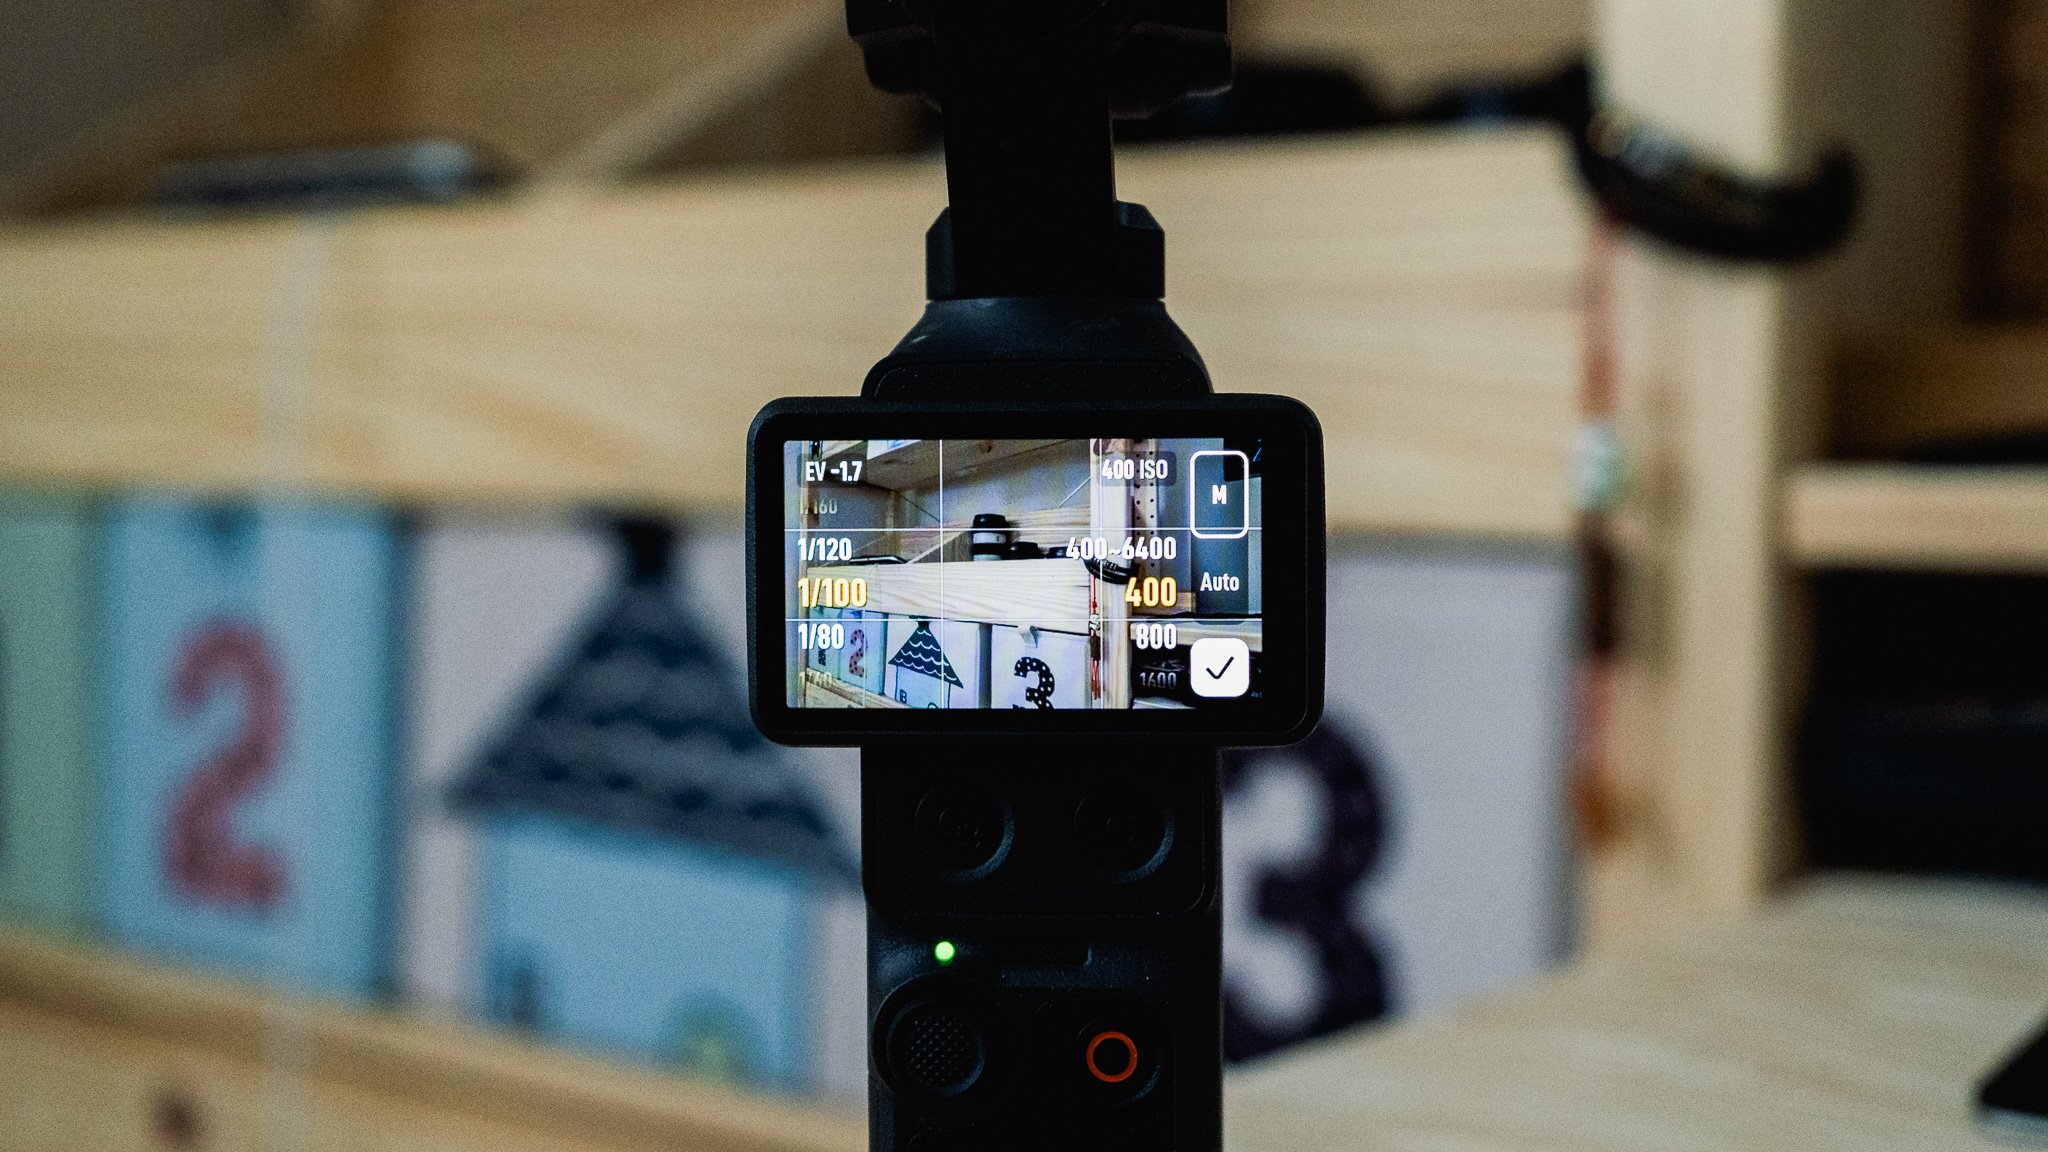
This approach will give you the most professional-looking footage the camera can produce. For general vlogs, I leave everything in Auto. When image quality matters more, I use manual exposure with a shutter speed of 1/50.
Focus
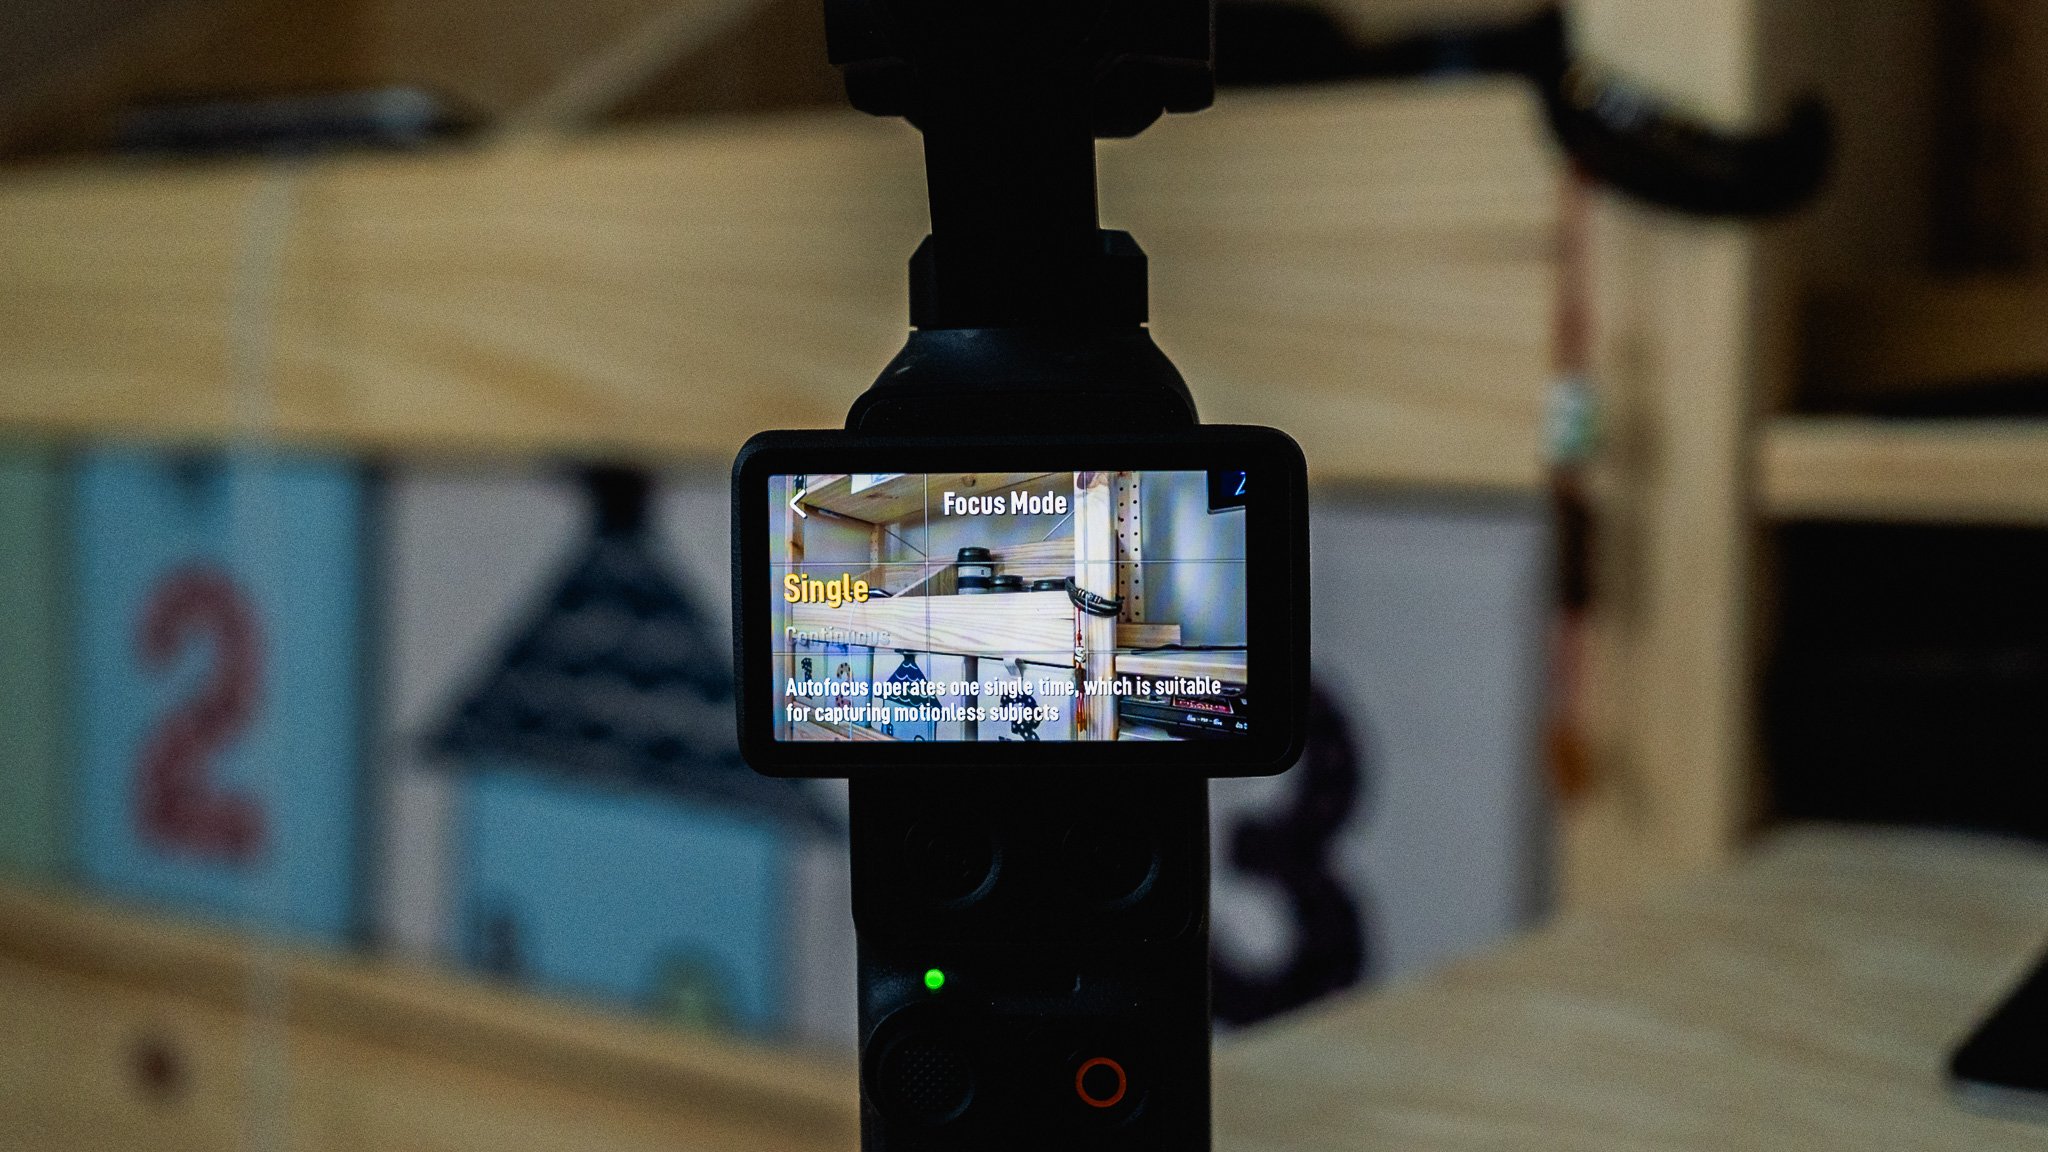
There are two main focus modes: single and continuous. Single autofocus acquires focus once and then locks it. This is useful for static shots or when you want the camera to focus on something in the distance without changing. Continuous autofocus is better when you’re regularly shifting focus and need the camera to keep up. For example, it’s useful if you frequently switch between filming yourself and the scene in front of you.
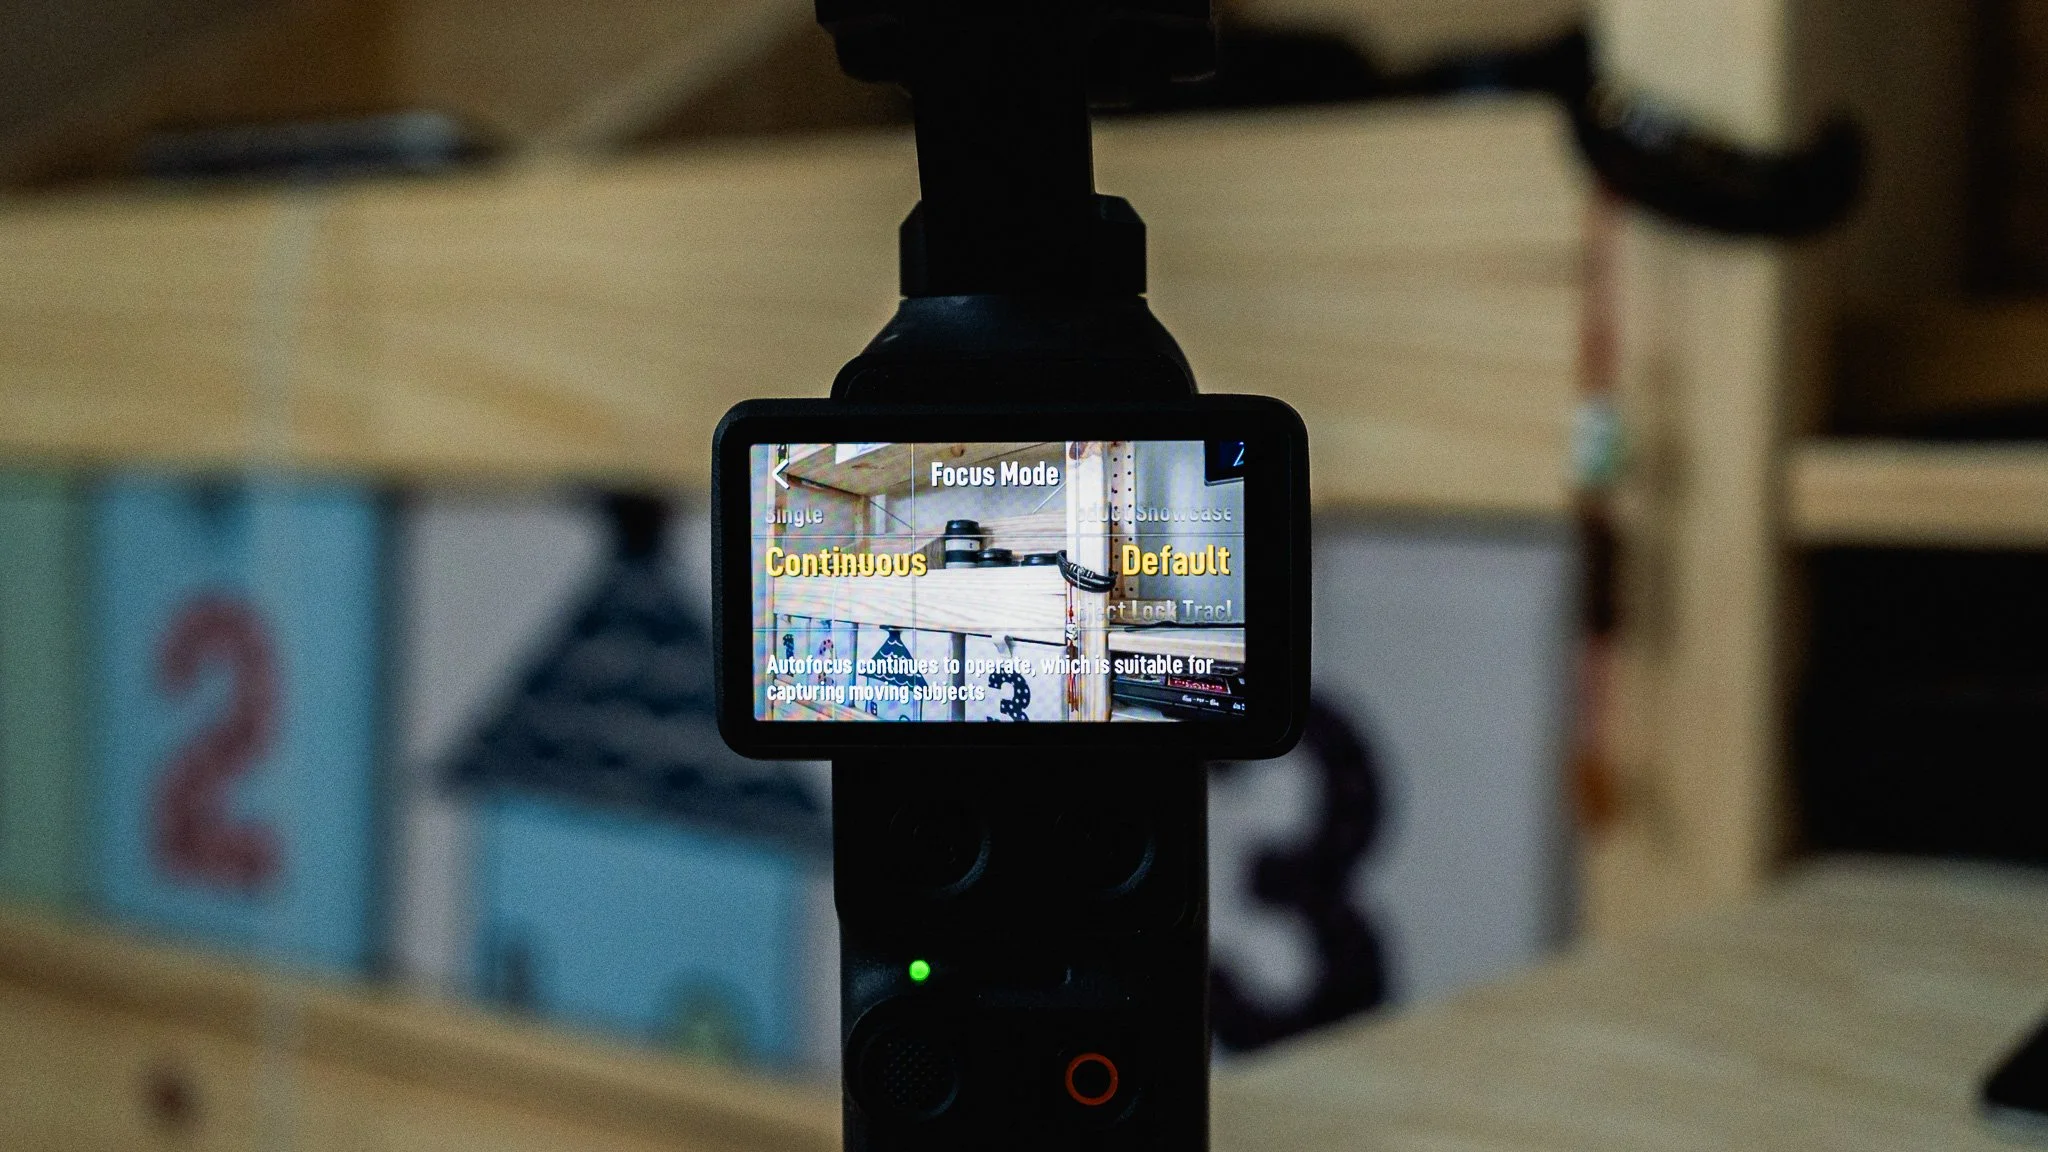
I use both modes by assigning them to custom configurations, but I’ll cover that later in the blog. When using continuous autofocus, you have a few additional options. I use Default around 90% of the time, along with Showcase mode when needed. Default is suitable for most everyday situations. Showcase mode is better for filming objects, such as food or products held close to the camera.
Audio
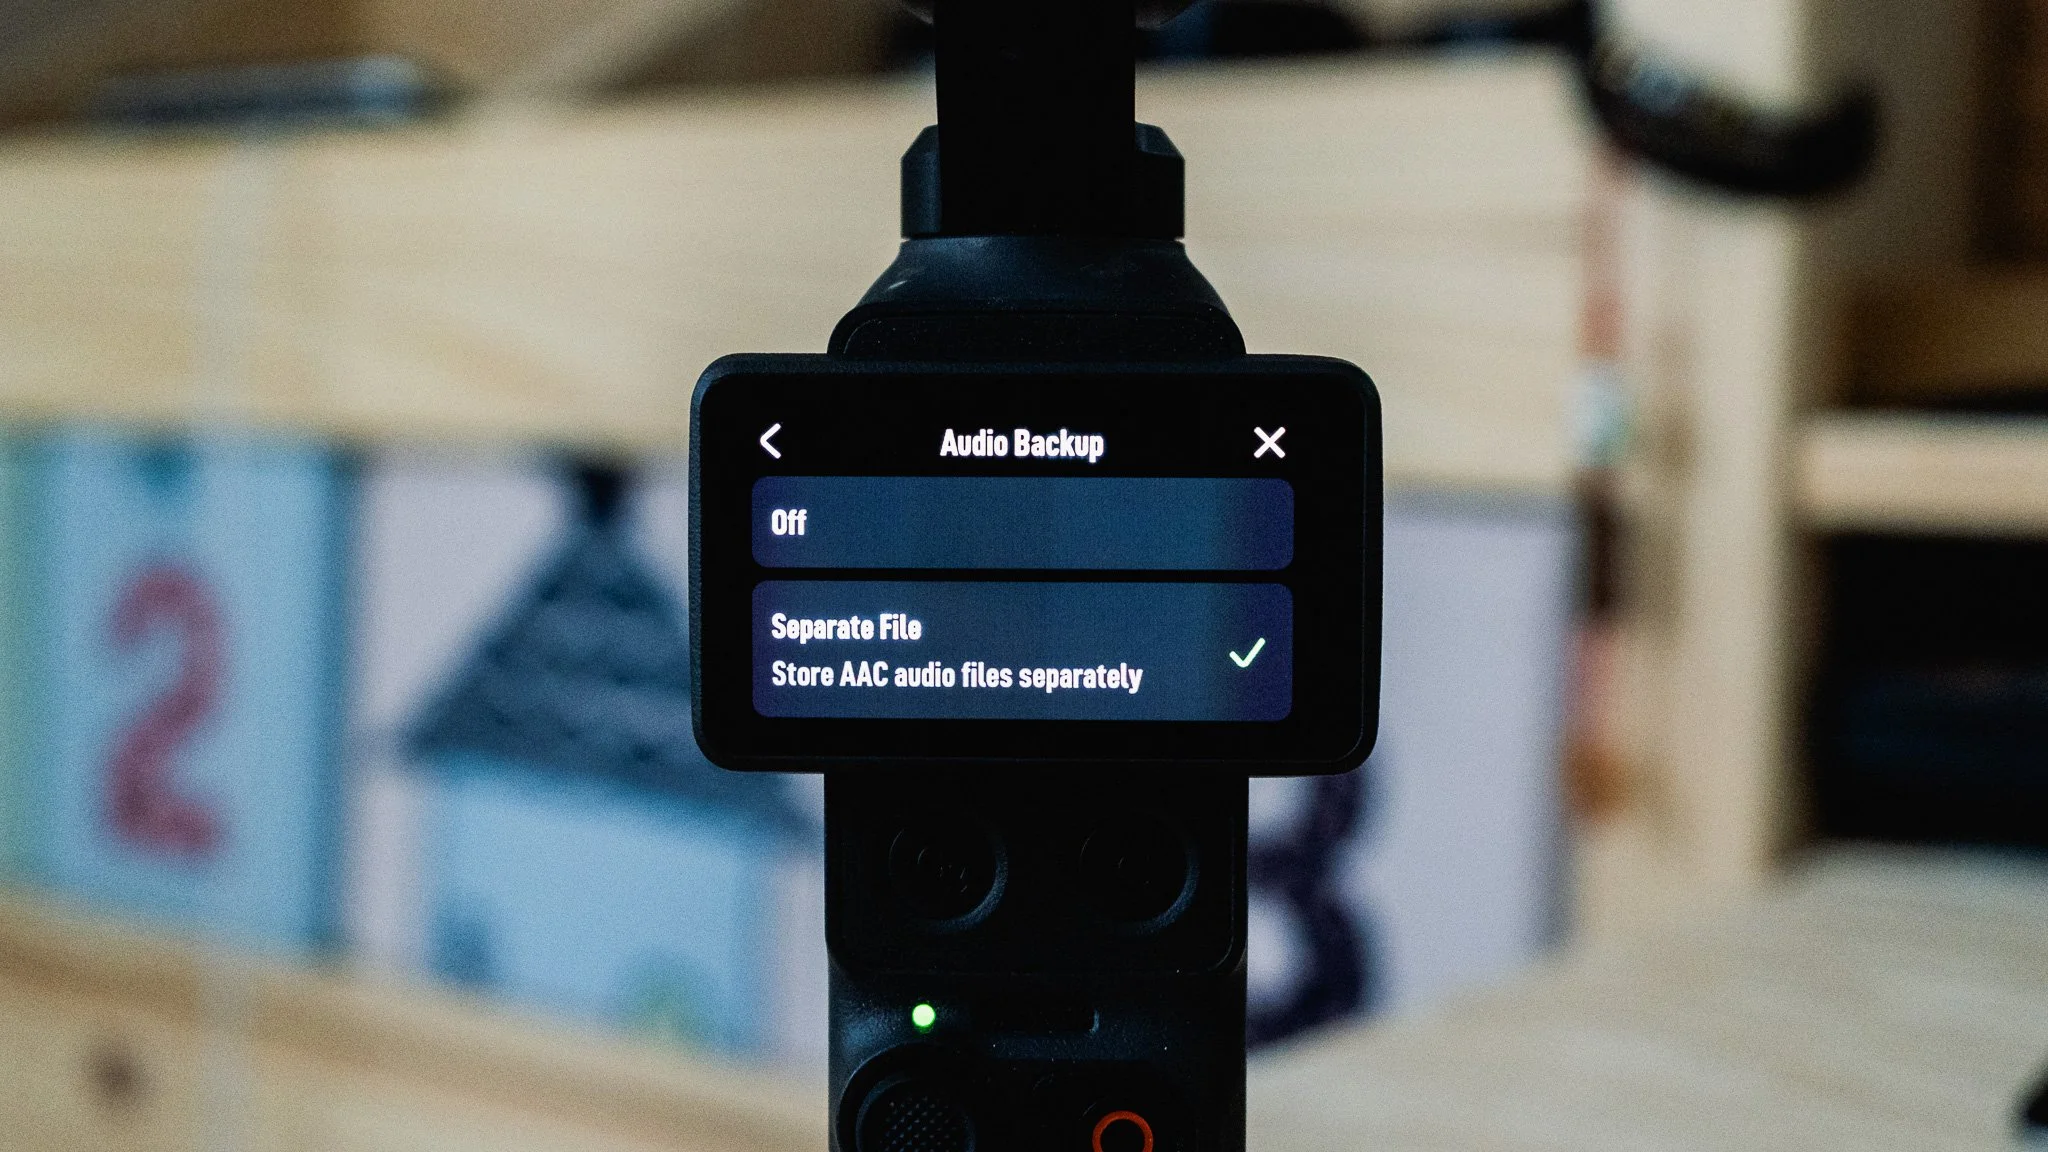
There are a few audio settings we need to adjust. First, open the main settings menu and select Audio Backup. Choose Separate File to save a copy of the camera’s internal audio as an individual file. This is essential if you plan on using external microphones. It’s also a useful way to capture ambient sound. You can record an audio track even if you don’t end up using the accompanying video.
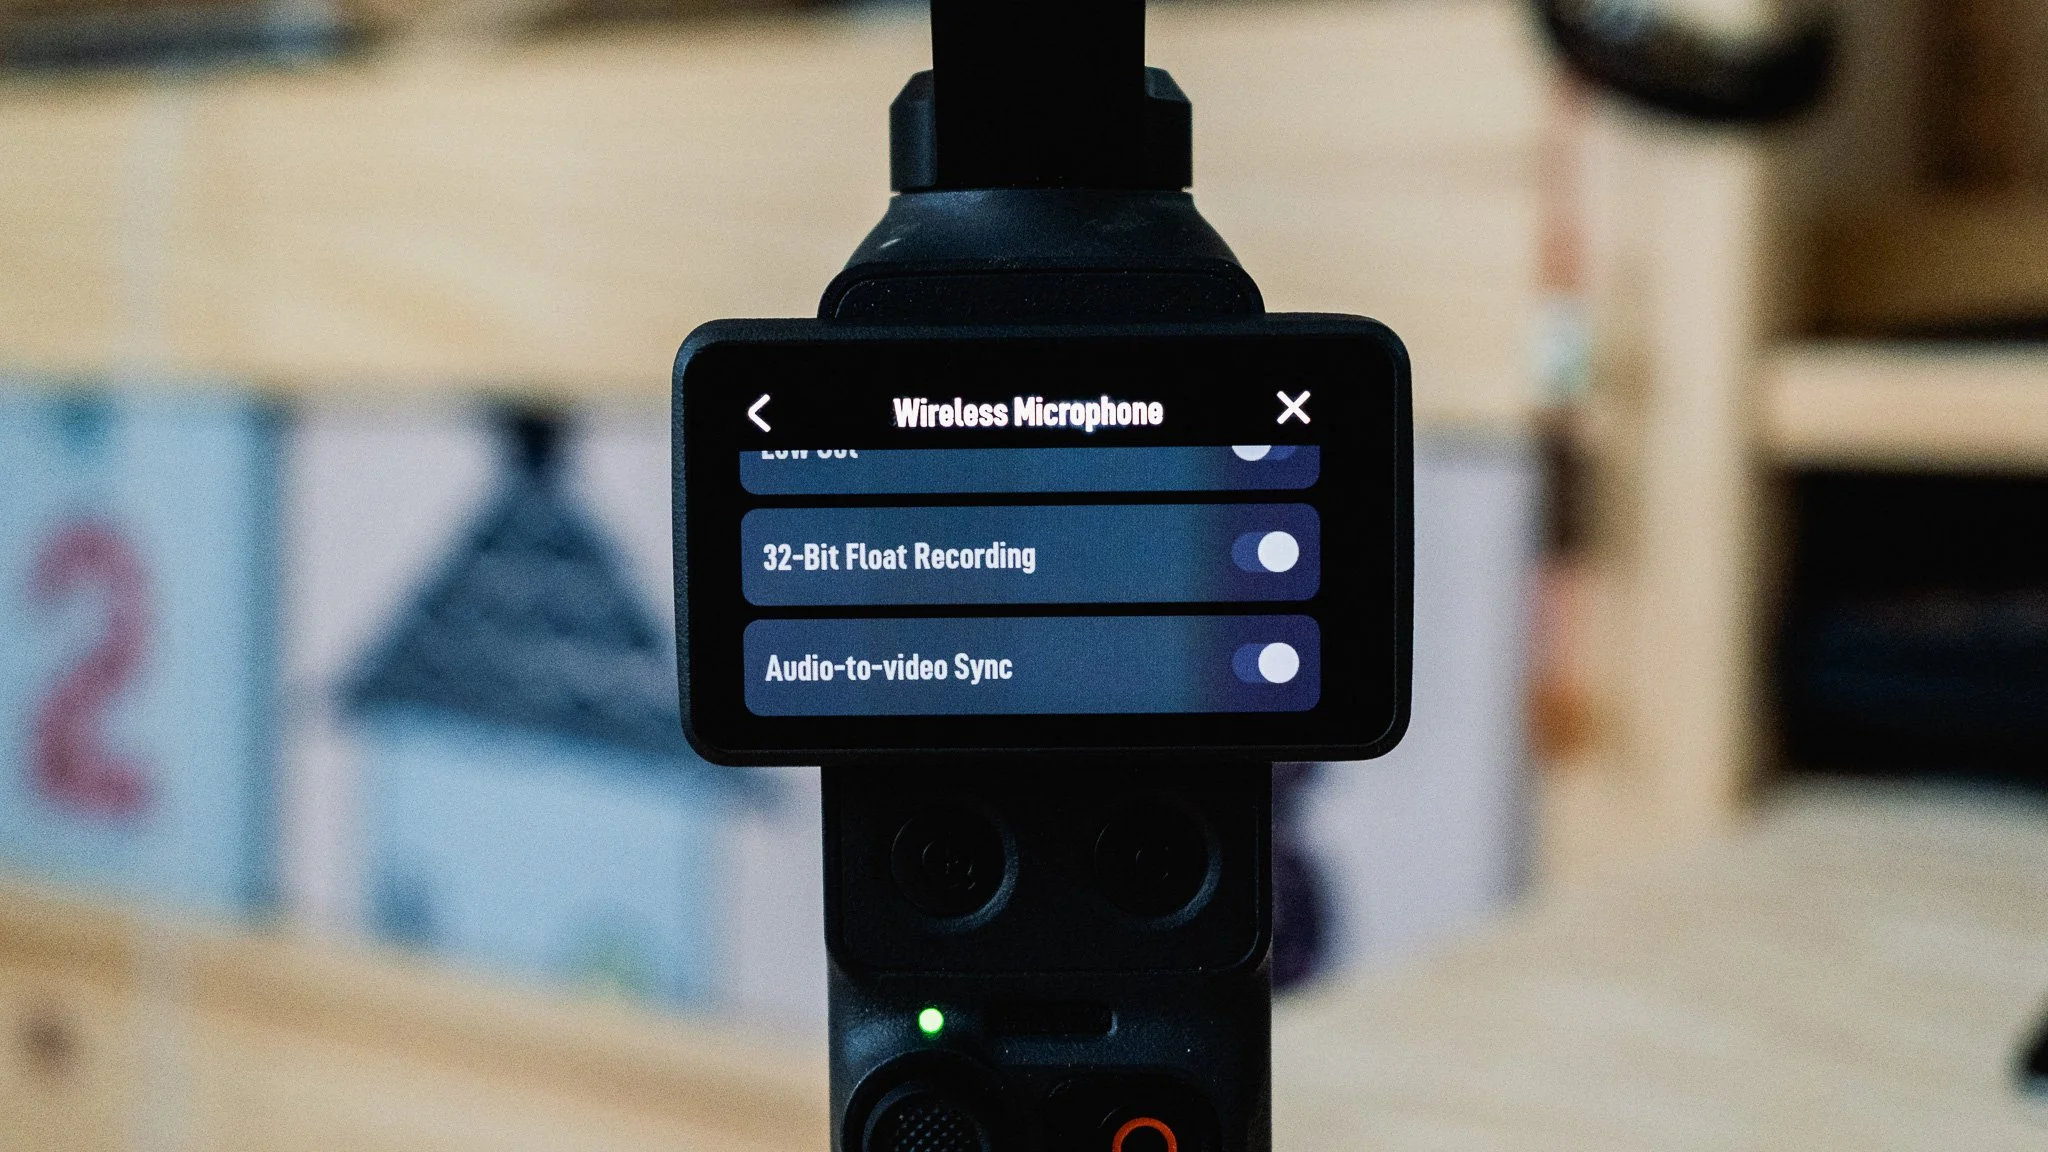
When using external microphones, I enable both 32-Bit Float recording and Audio-to-Video Sync. This provides the highest-quality audio possible while also creating a local backup file on the DJI Mic.
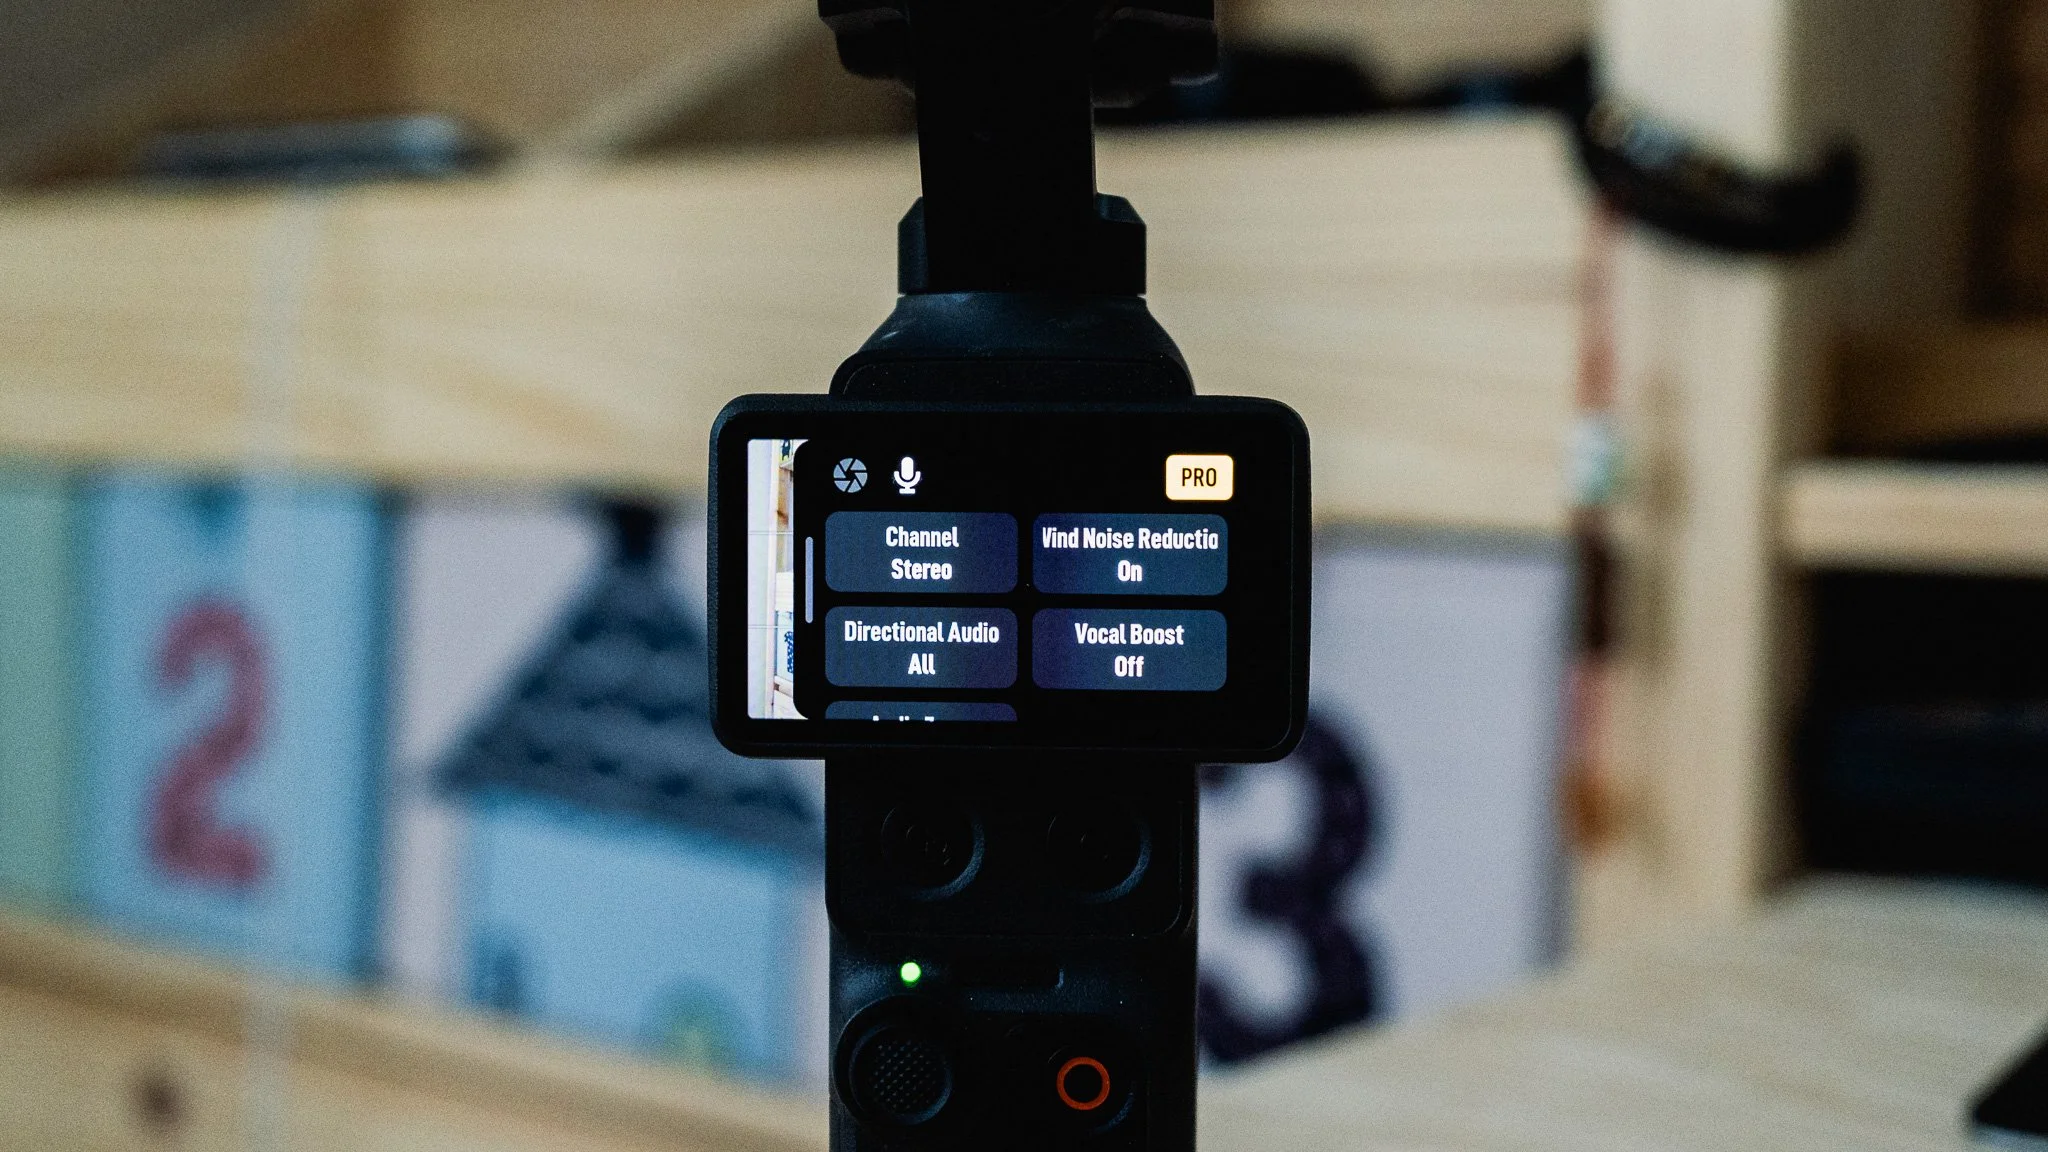
Next, return to the main screen and swipe in from the right, just as you did when adjusting the video settings. This time, select Audio and make sure Pro mode is enabled. I use the following settings:
Channel: Stereo
Wind Reduction: On
Directional Audio: All
Voice Boost: Off
Audio Zoom: Off
I use the All setting for Directional Audio, but you can select Front and Back if you want cleaner dialogue.
Custom Button
Last but not least, we have the new custom button. I’ve left this section until the end because you need to configure the rest of the camera before setting it up. The custom button supports three actions:
Single press: Gimbal Recenter
Double press: Switch C1/C2
Triple press: Lock/Unlock Gimbal
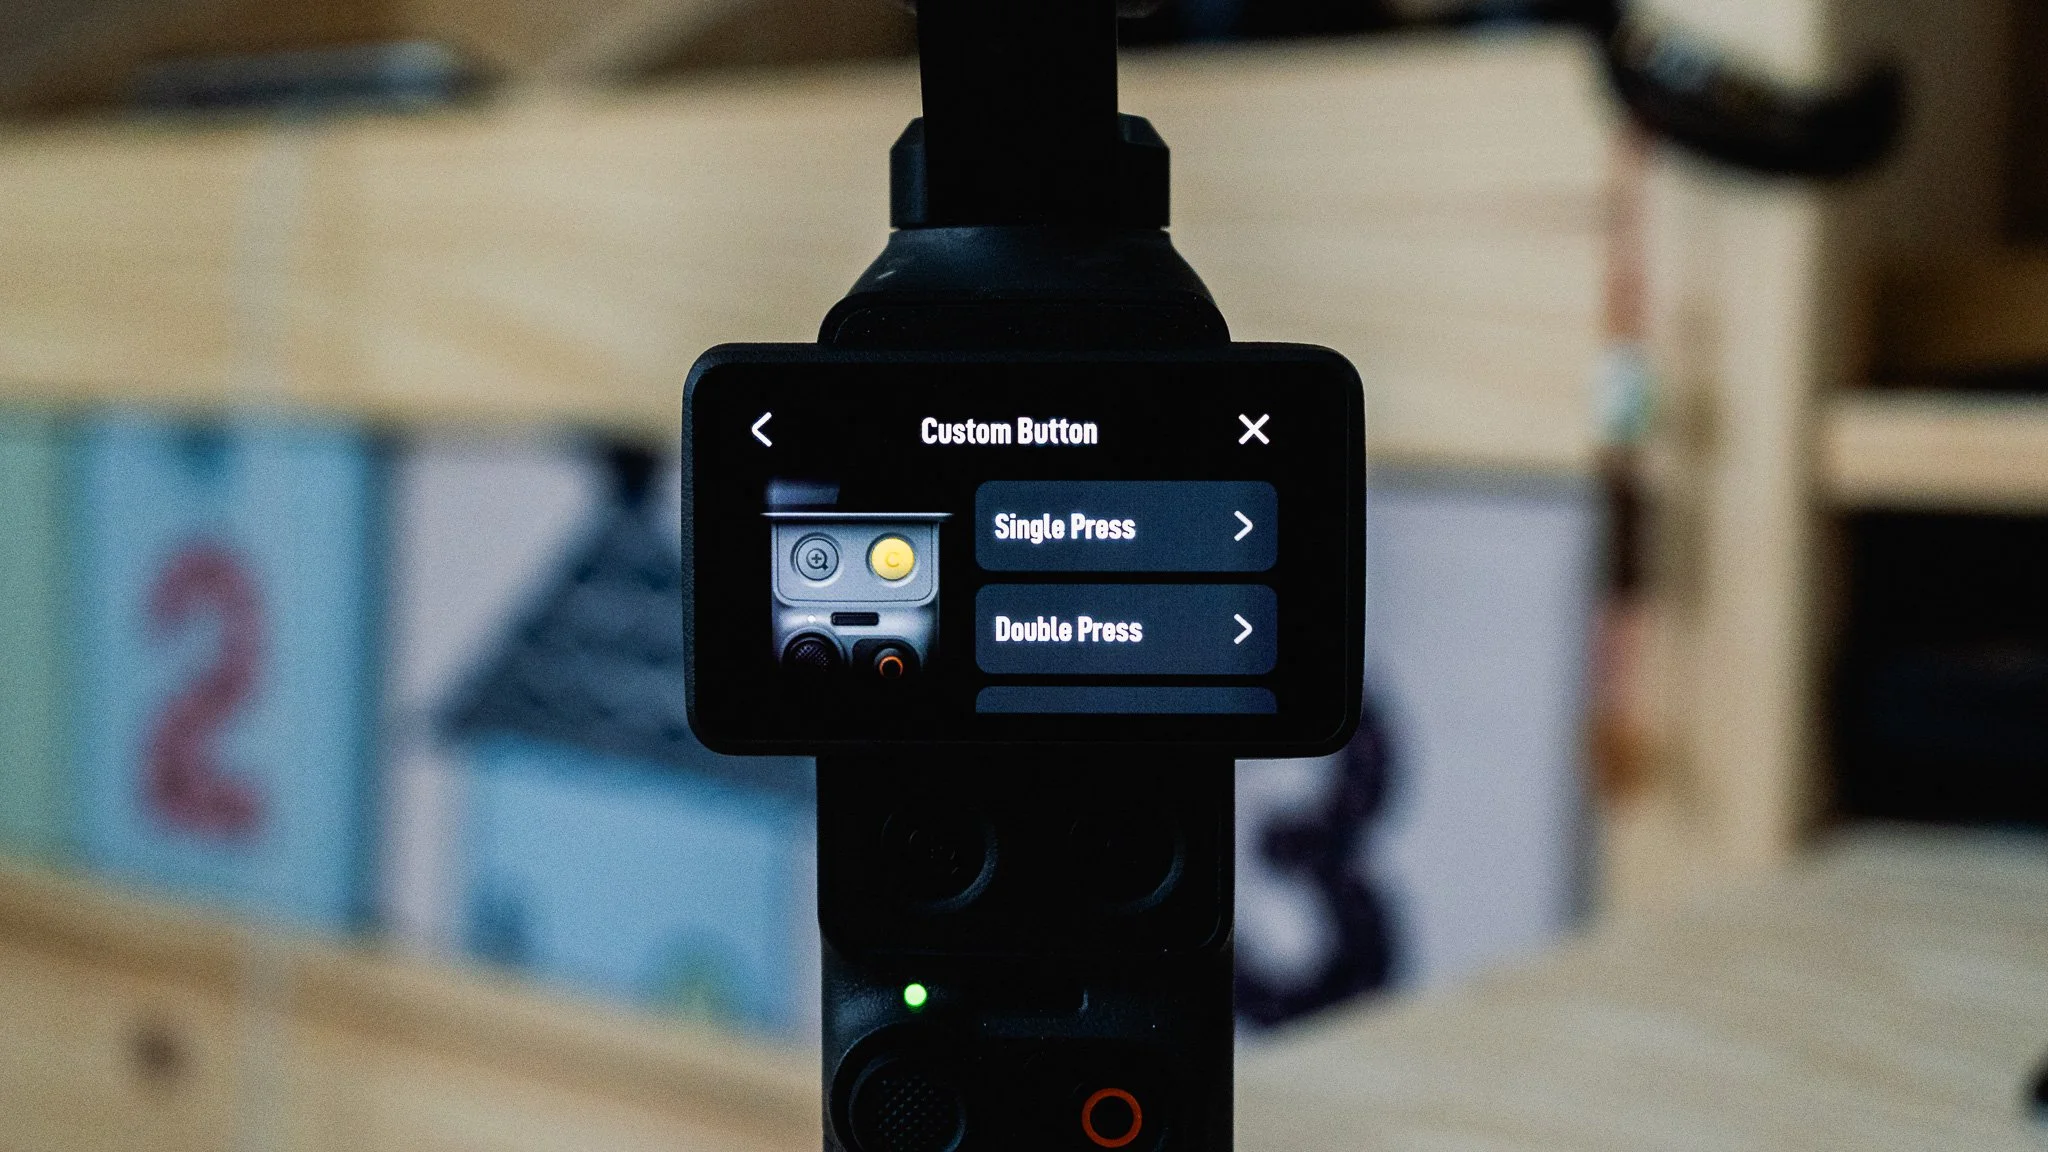
The single and triple press actions are self-explanatory, so let’s look at what I’ve done with the double press.
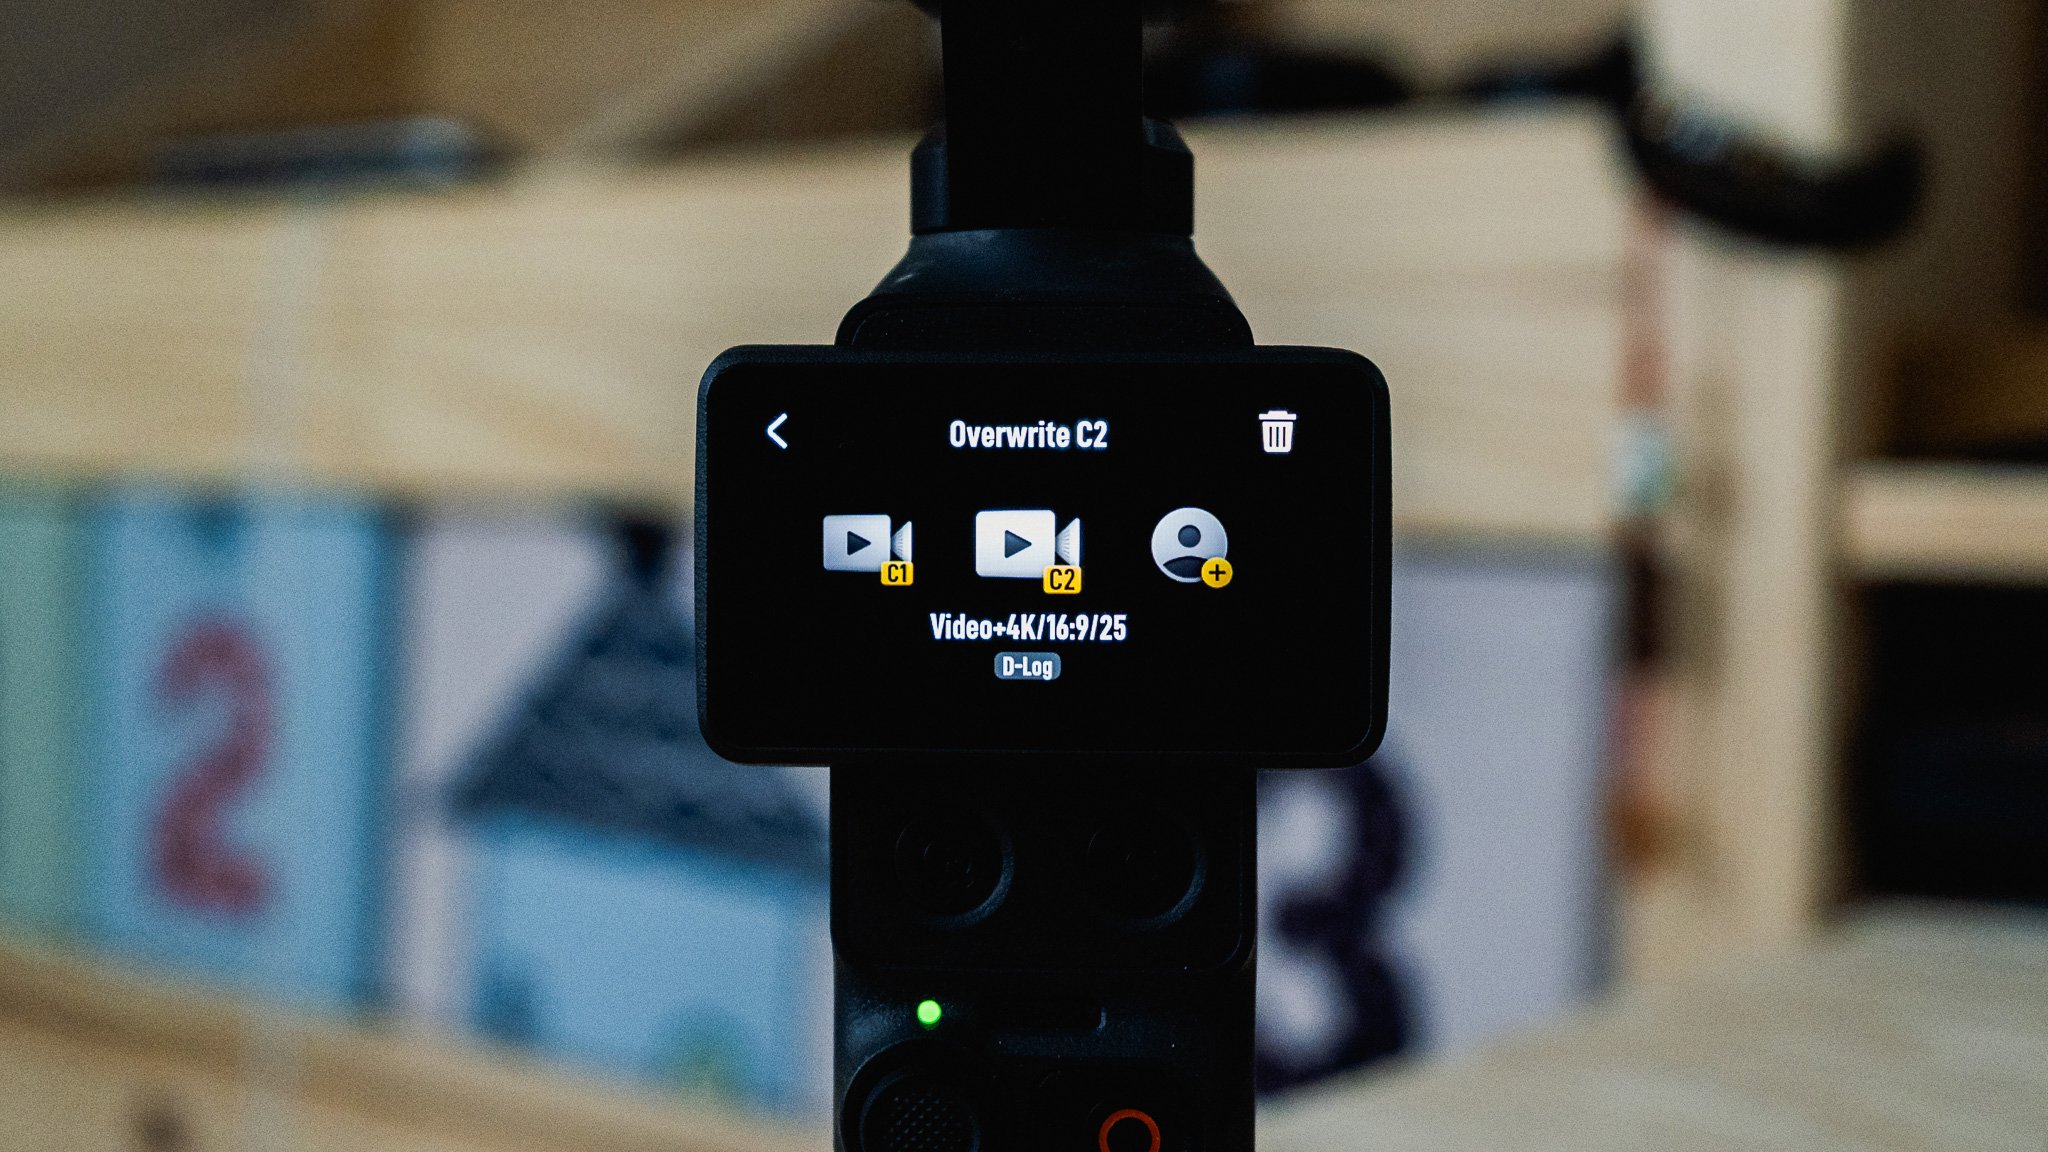
The Pocket 4 allows you to save custom camera configurations and quickly switch between them. Each configuration can use completely different exposure settings, focus modes, frame rates, and even picture profiles.
C1 and C2 are the first two configurations you save. By double pressing the custom button, you can switch between them instantly.
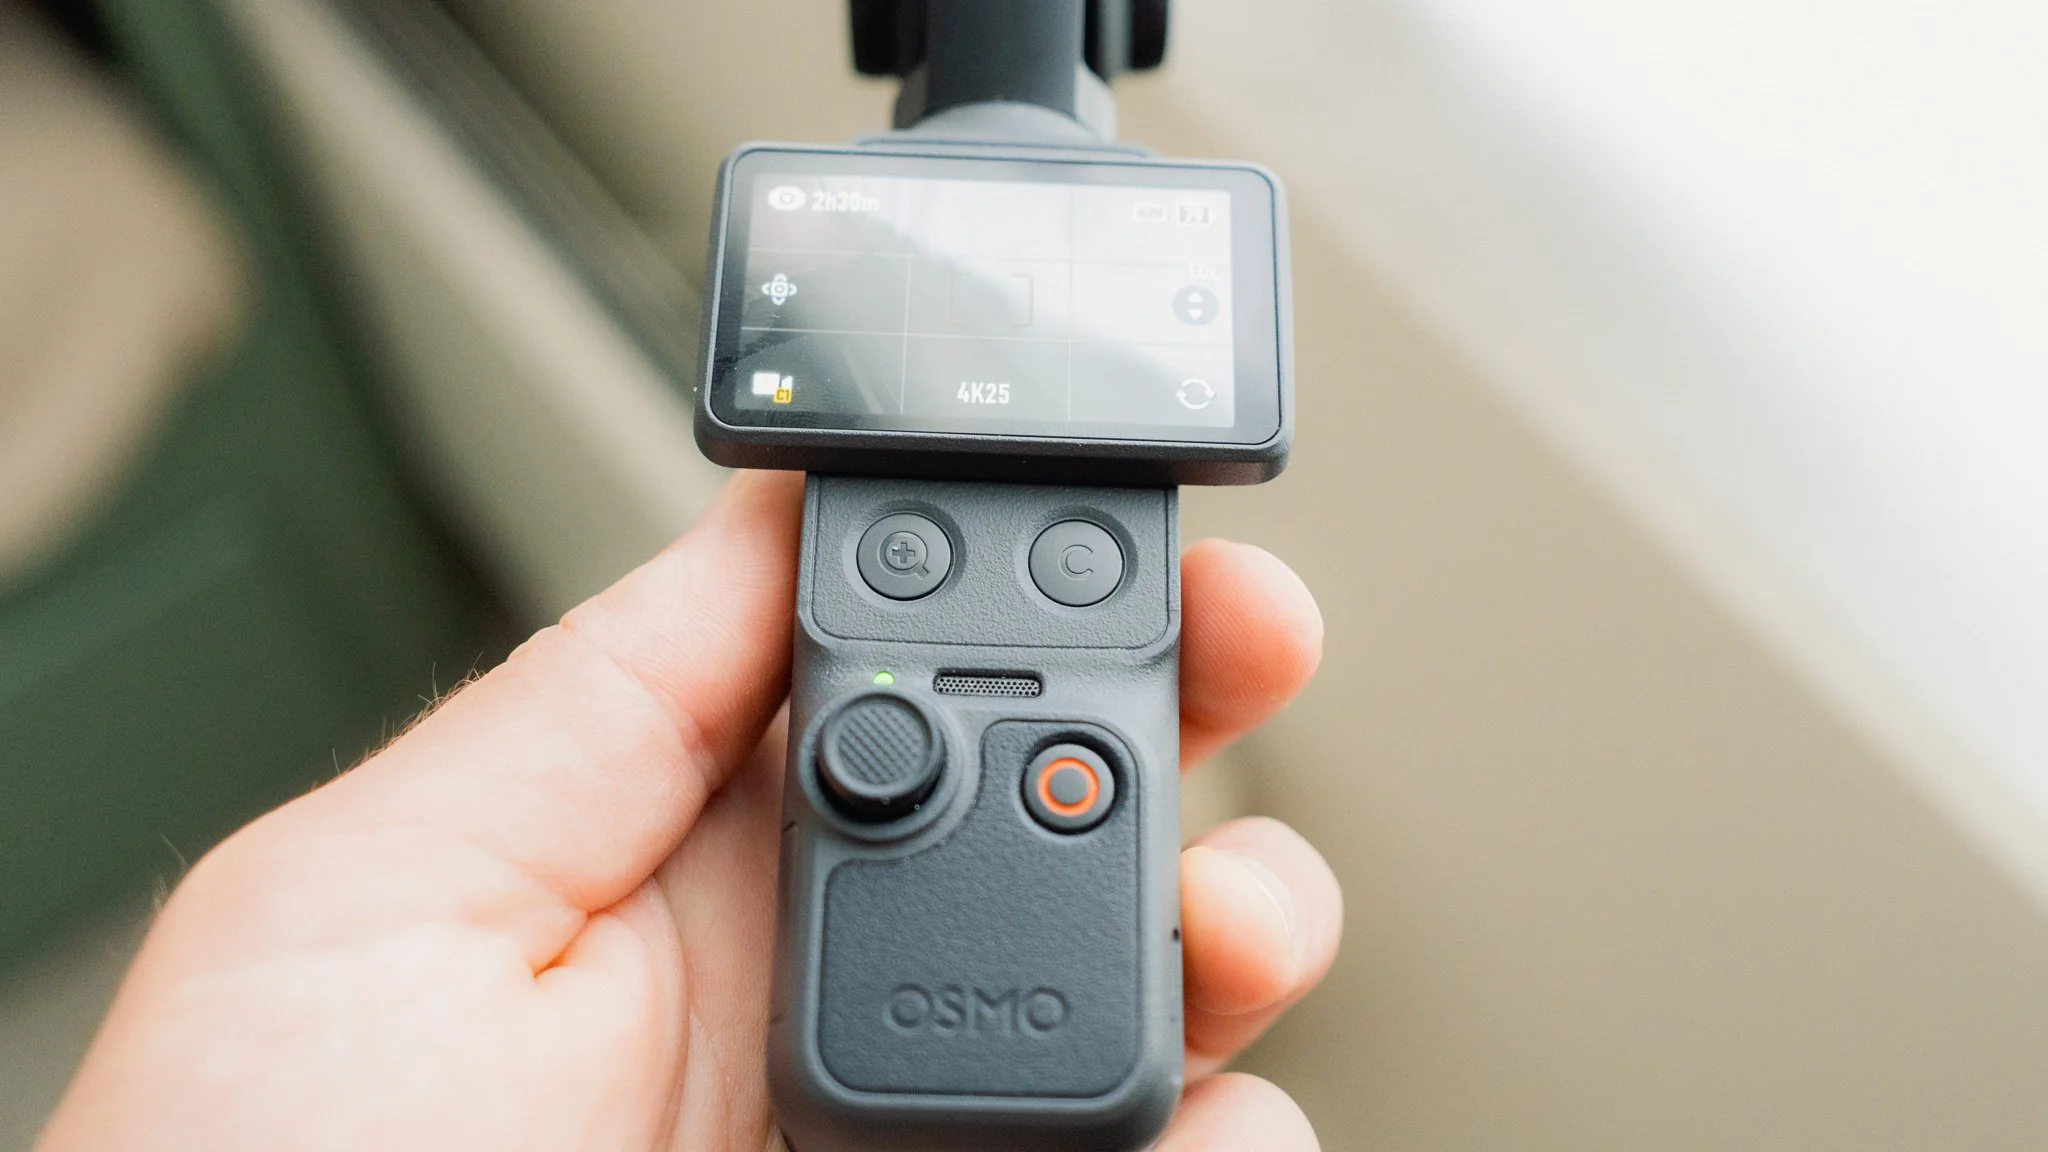
My C1 and C2 configurations are identical apart from one small difference: C1 uses single autofocus, while C2 uses continuous autofocus. This allows me to change focus modes quickly, helping me avoid focus hunting or missed focus when shooting in areas with lots of moving subjects. If I’m filming myself or using tracking, I select C2 for continuous autofocus. If I’m walking along the street or filming static subjects, I use C1 for single autofocus.
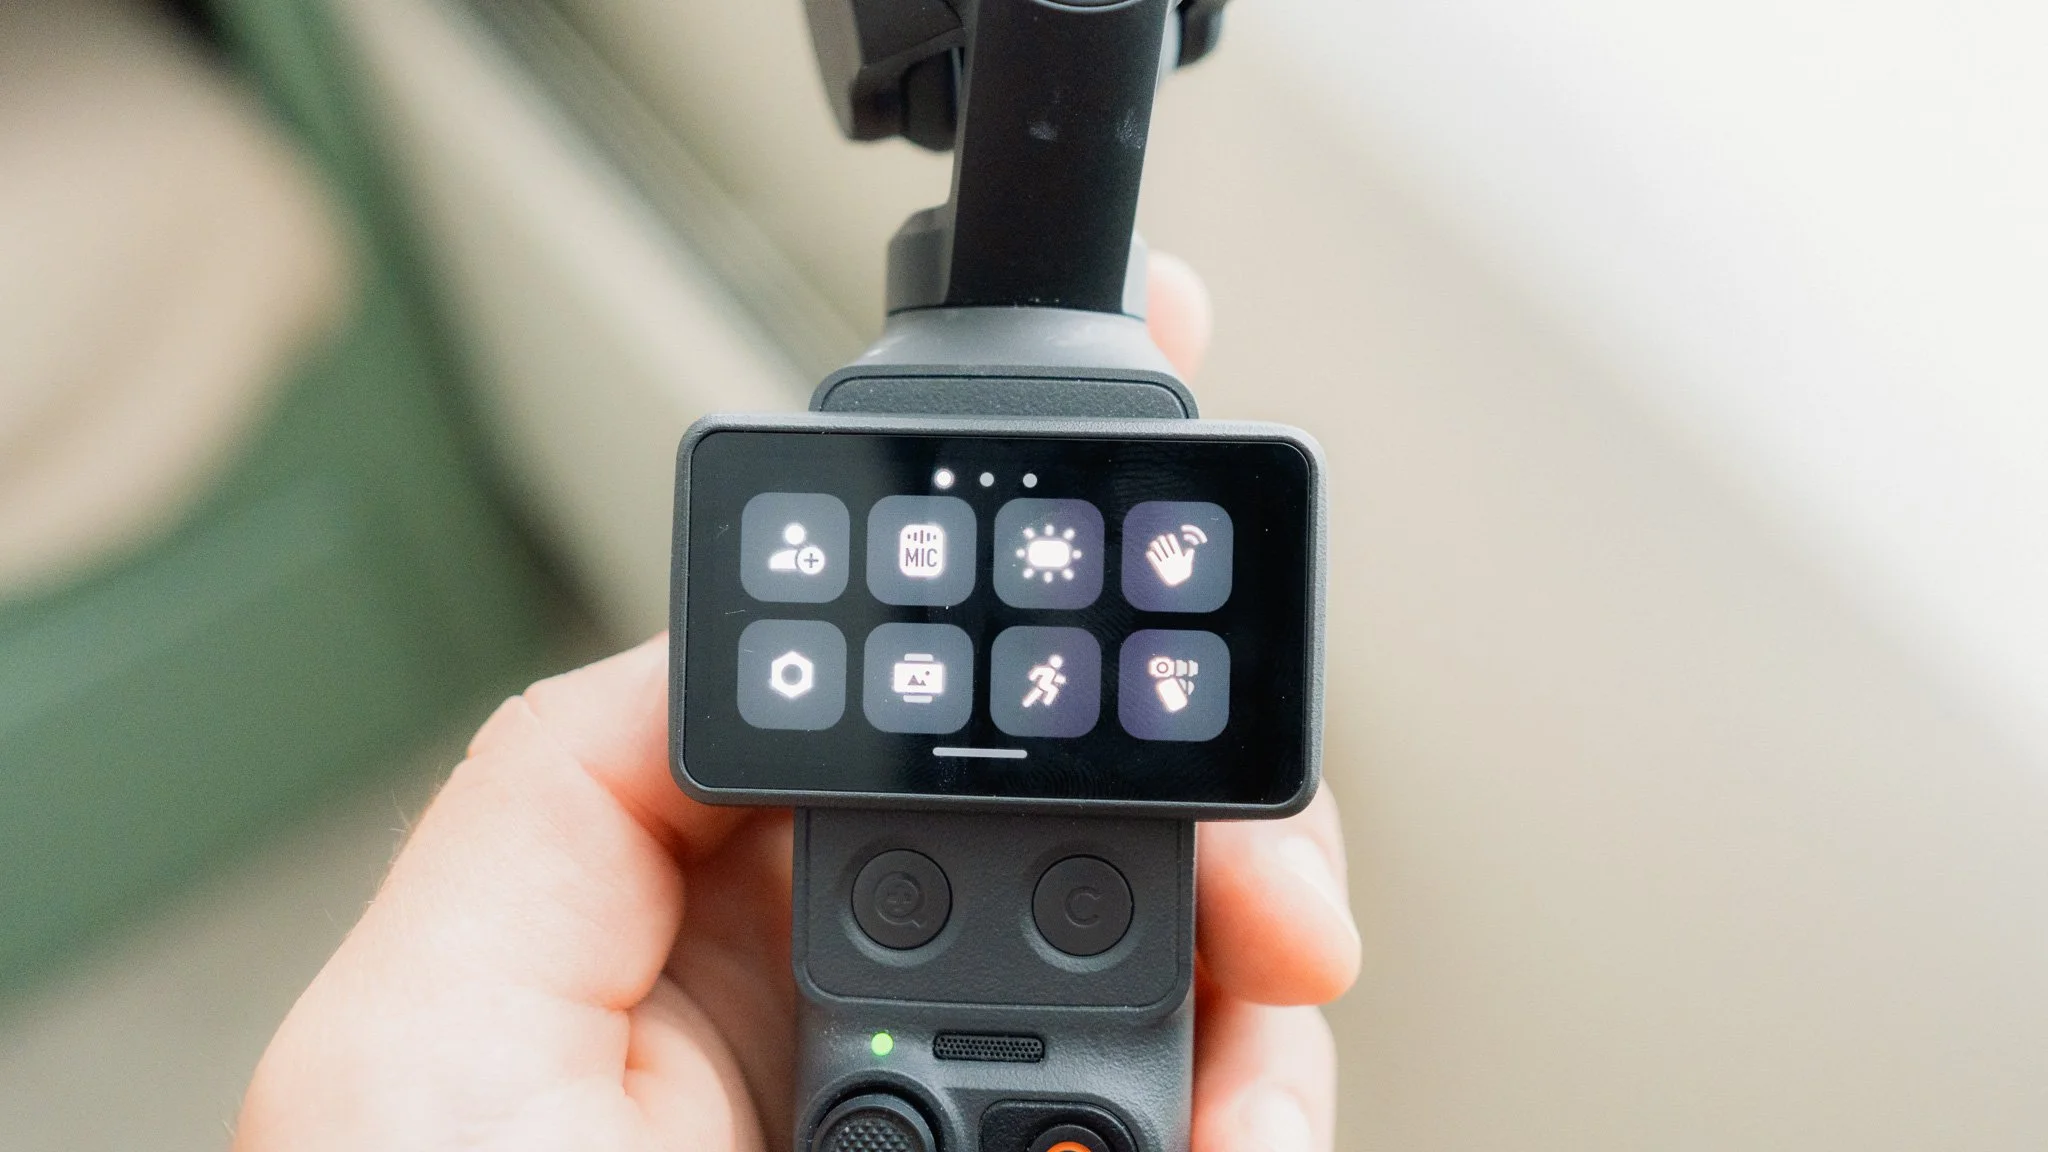
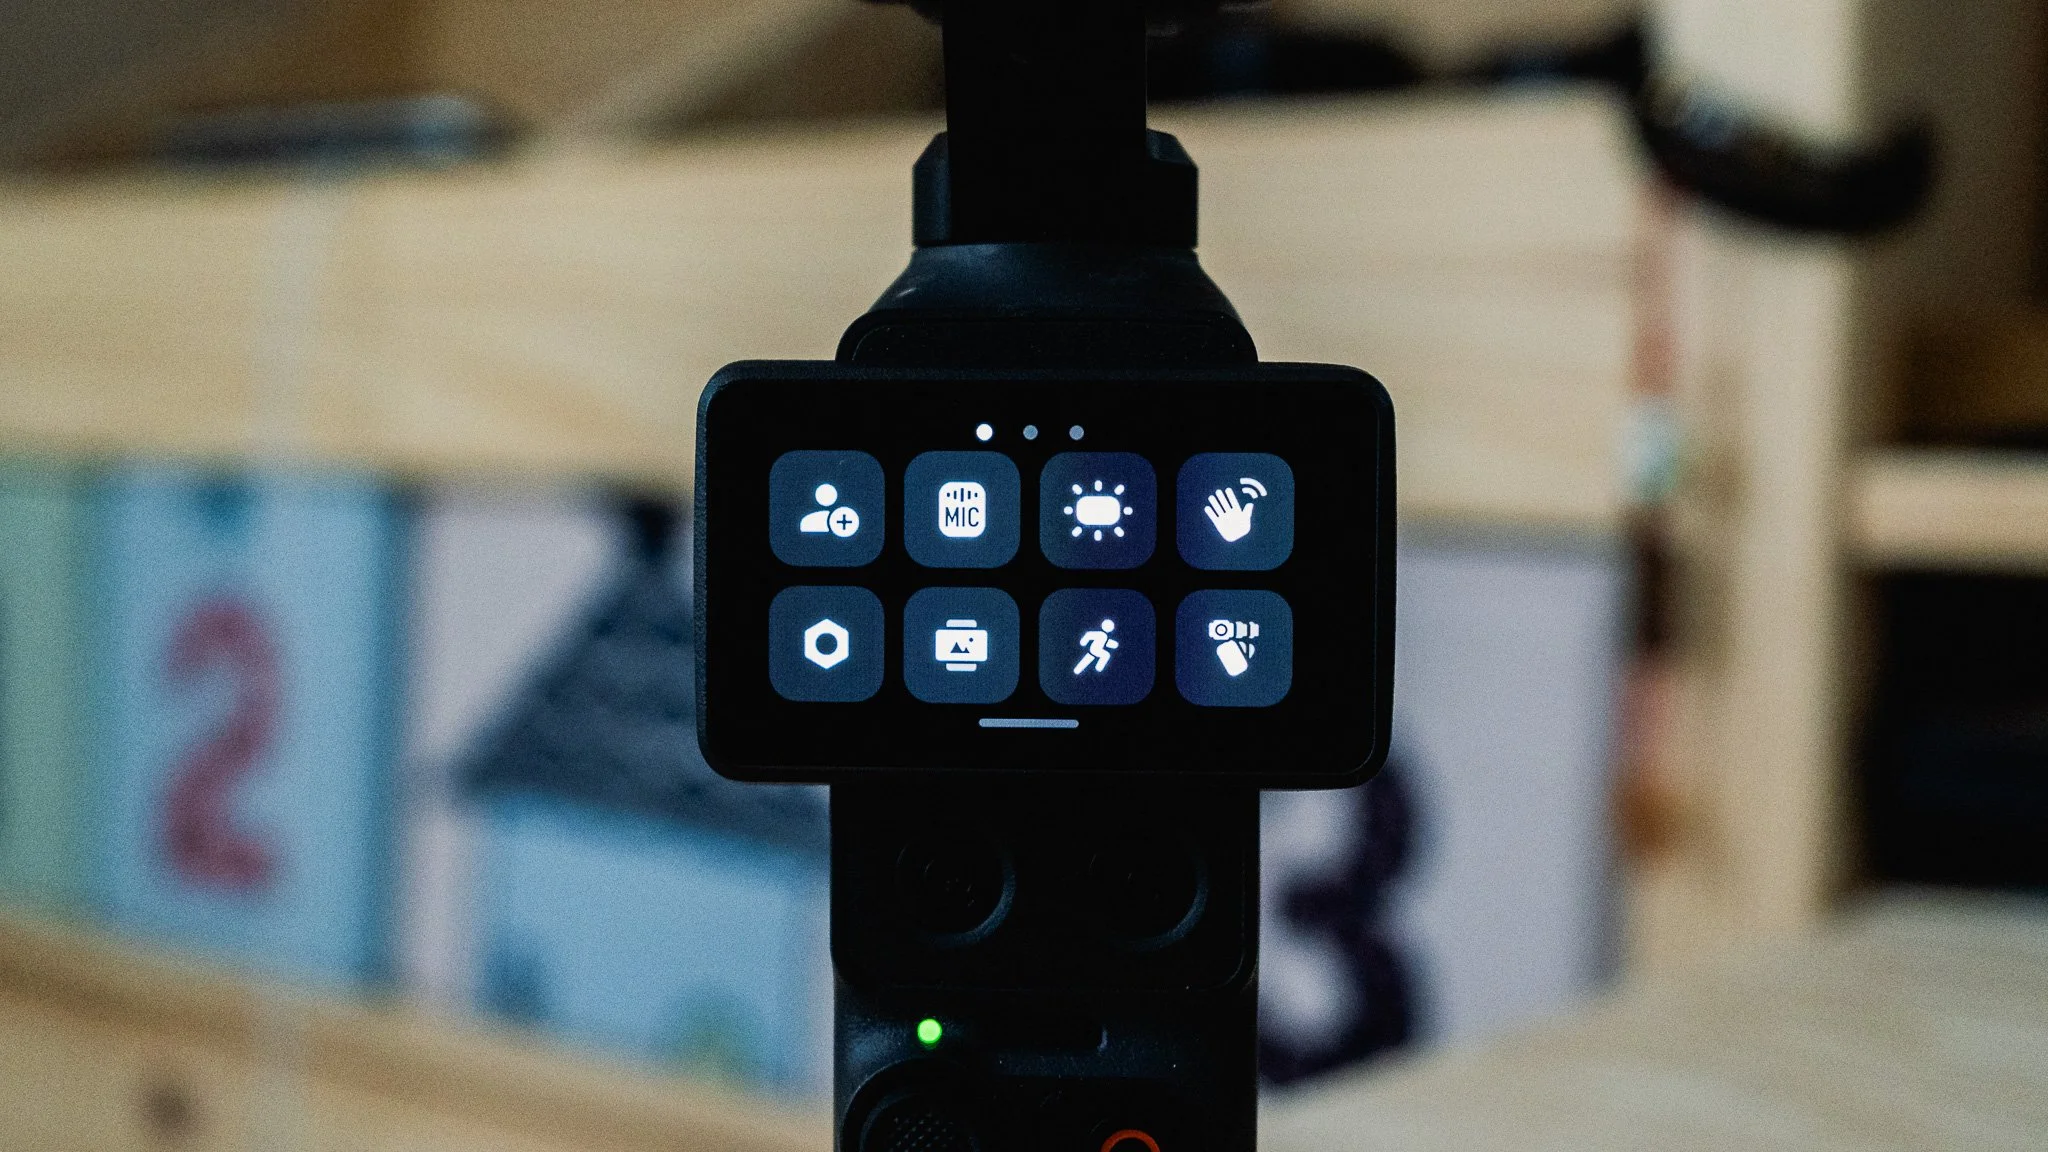
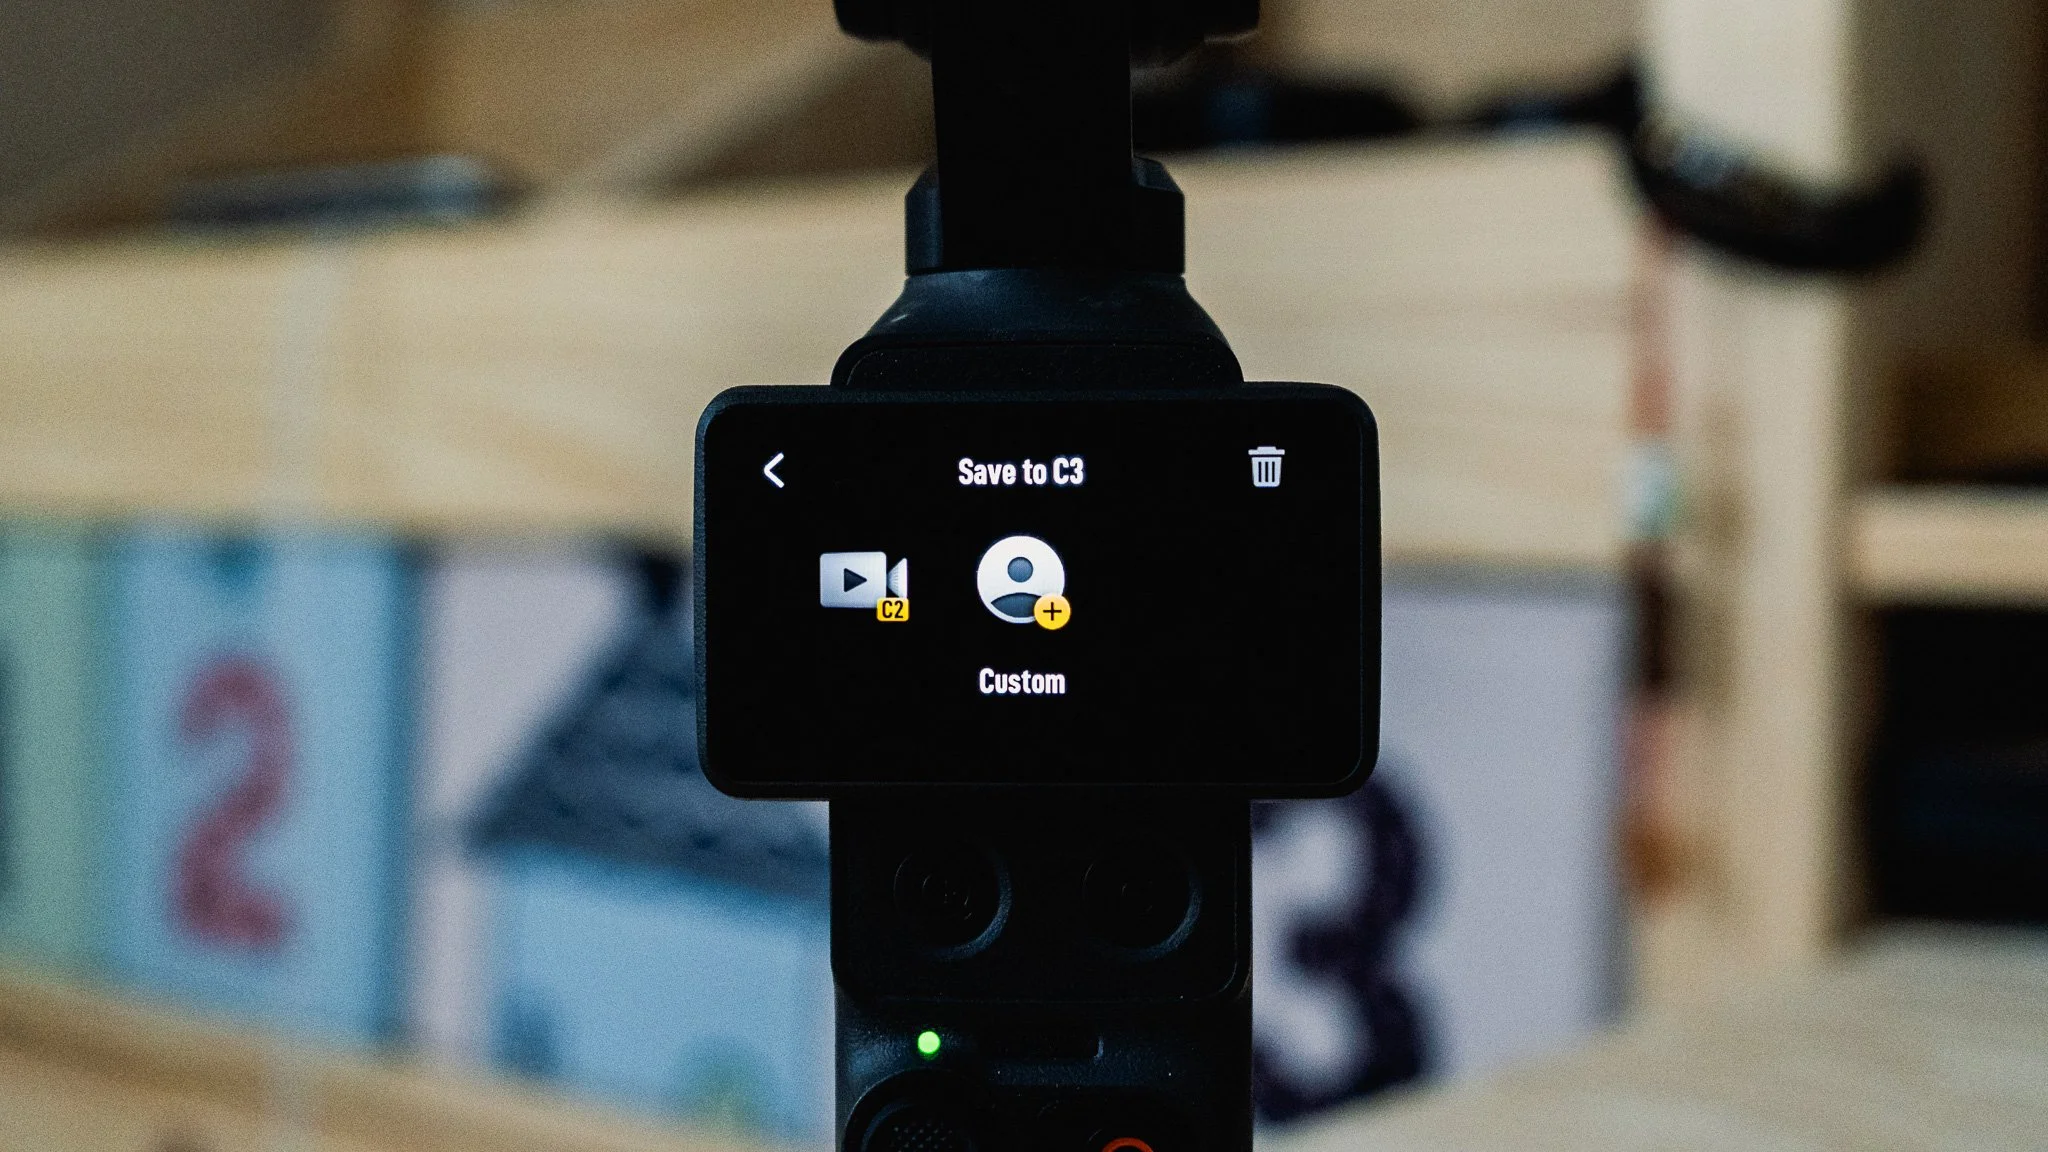
To save a configuration, first set up the camera as desired. Next, swipe down to open the menu and select the button in the top-left corner to view all configurations. From there, you can easily save a new one.














Instead of telling you how these will change your life, I would rather be practical and answer the most common questions that people tend to have when buying presets.
What are presets?
They are editing settings that are saved in a file and can be applied to any image.
Why do people buy presets?
Sometimes because they like the work of the photographer and want that style for their own photos. Mostly because they would like to see how other people edit and learn by reverse engineering the presets. Other times it’s just to support their favourite photographers, thank you!
What’s the overall style of these presets?
- Filmic
- Warm
- Soft
- Bright
What are these presets suitable for?
Street & Travel Photography
Some Nature (with further editing)
Some Portraits (with extensive editing)
Do I actually use these?
Yes. This is the same pack I use right now for all my editing. This isn’t a pack made just to sell.
Do these presets get updated?
Yes, as my style changes, these presets will also be updated. Any time a new update is available, you will get a free update via email. Of course you also keep all the old presets in case you prefer the older looks. Only presets purchased from 2025 onwards will receive the updates.
What file types are these presets for?
- All RAW files
- JPEGs & TIFFs (not recommended)
What camera brands are these presets for?
These were designed around Fujifilm, Sony, and Leica sensors. With that said, they will work with all camera brands. While there might be differences due to individual camera colour science, the overall feel of the preset will carry over.
Will these work with JPEG files?
Yes, but you will need to reduce the intensity and make further edits. I strongly recommend editing RAW files.
Are these one click edits?
95% No. You would need to do some basic adjustments as each image is different. These adjustments can include exposure, colour balance etc. In 5% of cases you can just apply and leave it alone.
Do I need to know how to edit?
You need to have a basic understanding of adjusting exposure, highlights, shadows, etc. A more comprehensive editing skillset will let you get the most out of them.
How many presets are included?
10 in the main pack and 24 in the extras pack
Why two packs?
The main pack is what I use for 99% of my edits and is kept small to reduce wasted time scrolling through presets. The extras pack is everything I don’t use often.
What software do I need?
These presets will work with any of the following:
- Photoshop (adobe camera raw)
- Lightroom Classic
- Lightroom Desktop
- Lightroom Mobile
Will these presets work with free versions of the above software?
You need to research and double check before buying. These presets were designed for the full paid versions.
Will these presets work with very old versions of the above software?
You need to research and double check before buying. These presets were designed on and for the latest software.
What file type do I get?
XMP
What else do I get?
- Comprehensive PDF guide
Can I modify these and turn them into my own?
Yes! In fact I encourage you to modify them and play around. Use these to help you get your own style.
I have more questions…. What do I do?
Make a cup of tea and drop me an email on hello@snapsbyfox.com
Please note that due to the nature of digital products, refunds are generally not accepted. However, if you experience any issues, feel free to contact me and I’ll review your situation individually. You are welcome to use this product for personal or commercial projects, but you may not copy, distribute, or resell the files in their original or modified form.
Finally I want to say a massive thank you for supporting me. Buying these presets is the most direct way you can support my work.
Thank you!