Ricoh GRIII / GRIIIX - How To Set Up U1, U2, U3 Mode Dial
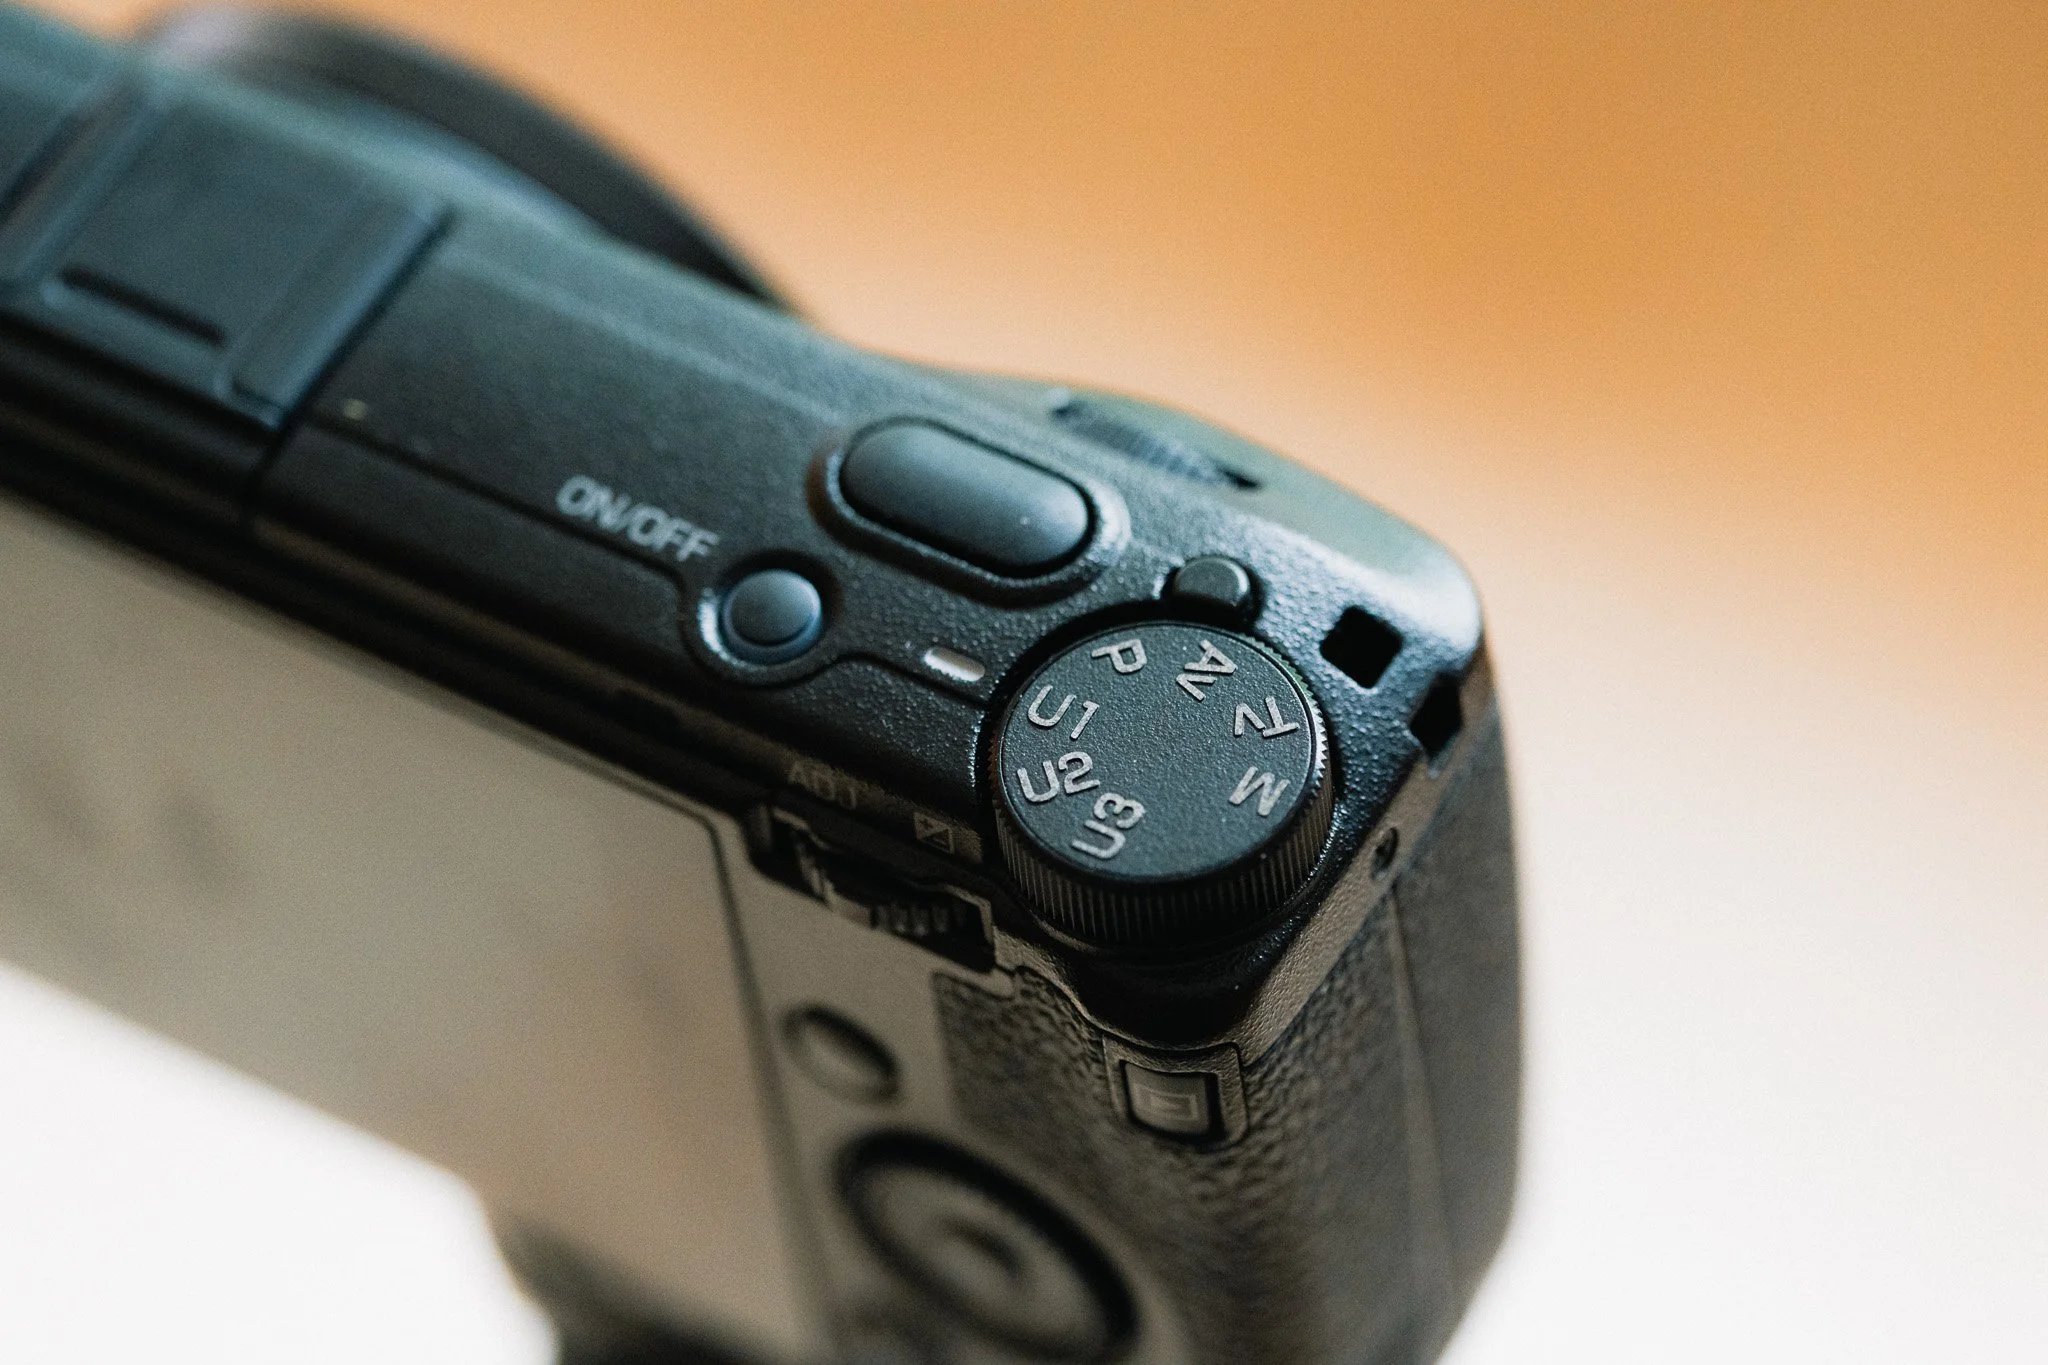
The Ricoh GRIII and GRIIIx come with a Mode Dial. This dial is one of the primary ways in which you can change how the camera operates. You have all the usual modes there such as Av for aperture priority, Tv for shutter priority, P for program, and M for full manual exposure. You will also find three custom modes labelled as U1, U2, and U3. In this blog I will share with you how to set these up so you can get the most out of them.
Important Information:
It’s worth keeping in mind that the these custom U settings remember almost everything. From your aperture value, down to what custom button you set. Any changes you make to the camera while in one of these modes, will be reset back to defaults you saved when you change to another mode. I highly suggest setting up the entire camera first before assigning these custom modes in order to save yourself a lot of time and hassle updating everything again later.
Ricoh GRIII Guide
If you’re finding this blog useful, and wish to learn more about setting up your GRIII / GRIIIx, then please check out my in-depth guide. Learn how I set up the camera, and how to squeeze the most out of it. By purchasing this guide, you’re directly supporting my work and helping keep this blog ad-free. Thank you.

This Ricoh GRIII/GRIIIX set-up guide is designed to save you time and get your camera set up and working just like I do. This guide covers all GRIII variants.
You will learn what the major features do and why I chose to set them in a certain way. I will show you how to assign the buttons and custom menus in order to have the most important features at your fingertips. Finally, I will walk you through how I expose and focus.
This guide is not a replacement for your user manual and does not cover 100% of the features. It covers the features that, in my experience, 90% of the people use 90% of the time. This is based on years of photography and video experience.
This guide is best suited for those who want to be up and running quickly with a tried-and-tested set-up.
This is a digital download and not a physical product. The download is around 23mb.
Please note that due to the nature of digital products, refunds are generally not accepted. However, if you experience any issues, feel free to contact me and I’ll review your situation individually. You are welcome to use this product for personal or commercial projects, but you may not copy, distribute, or resell the files in their original or modified form.
Finally, I want to say a massive thank you for supporting me. Buying this guide is the most direct way you can support my work, thus allowing me to make more videos, photos, and tutorials for you.
Thank you for your support!
Memory Boxes:
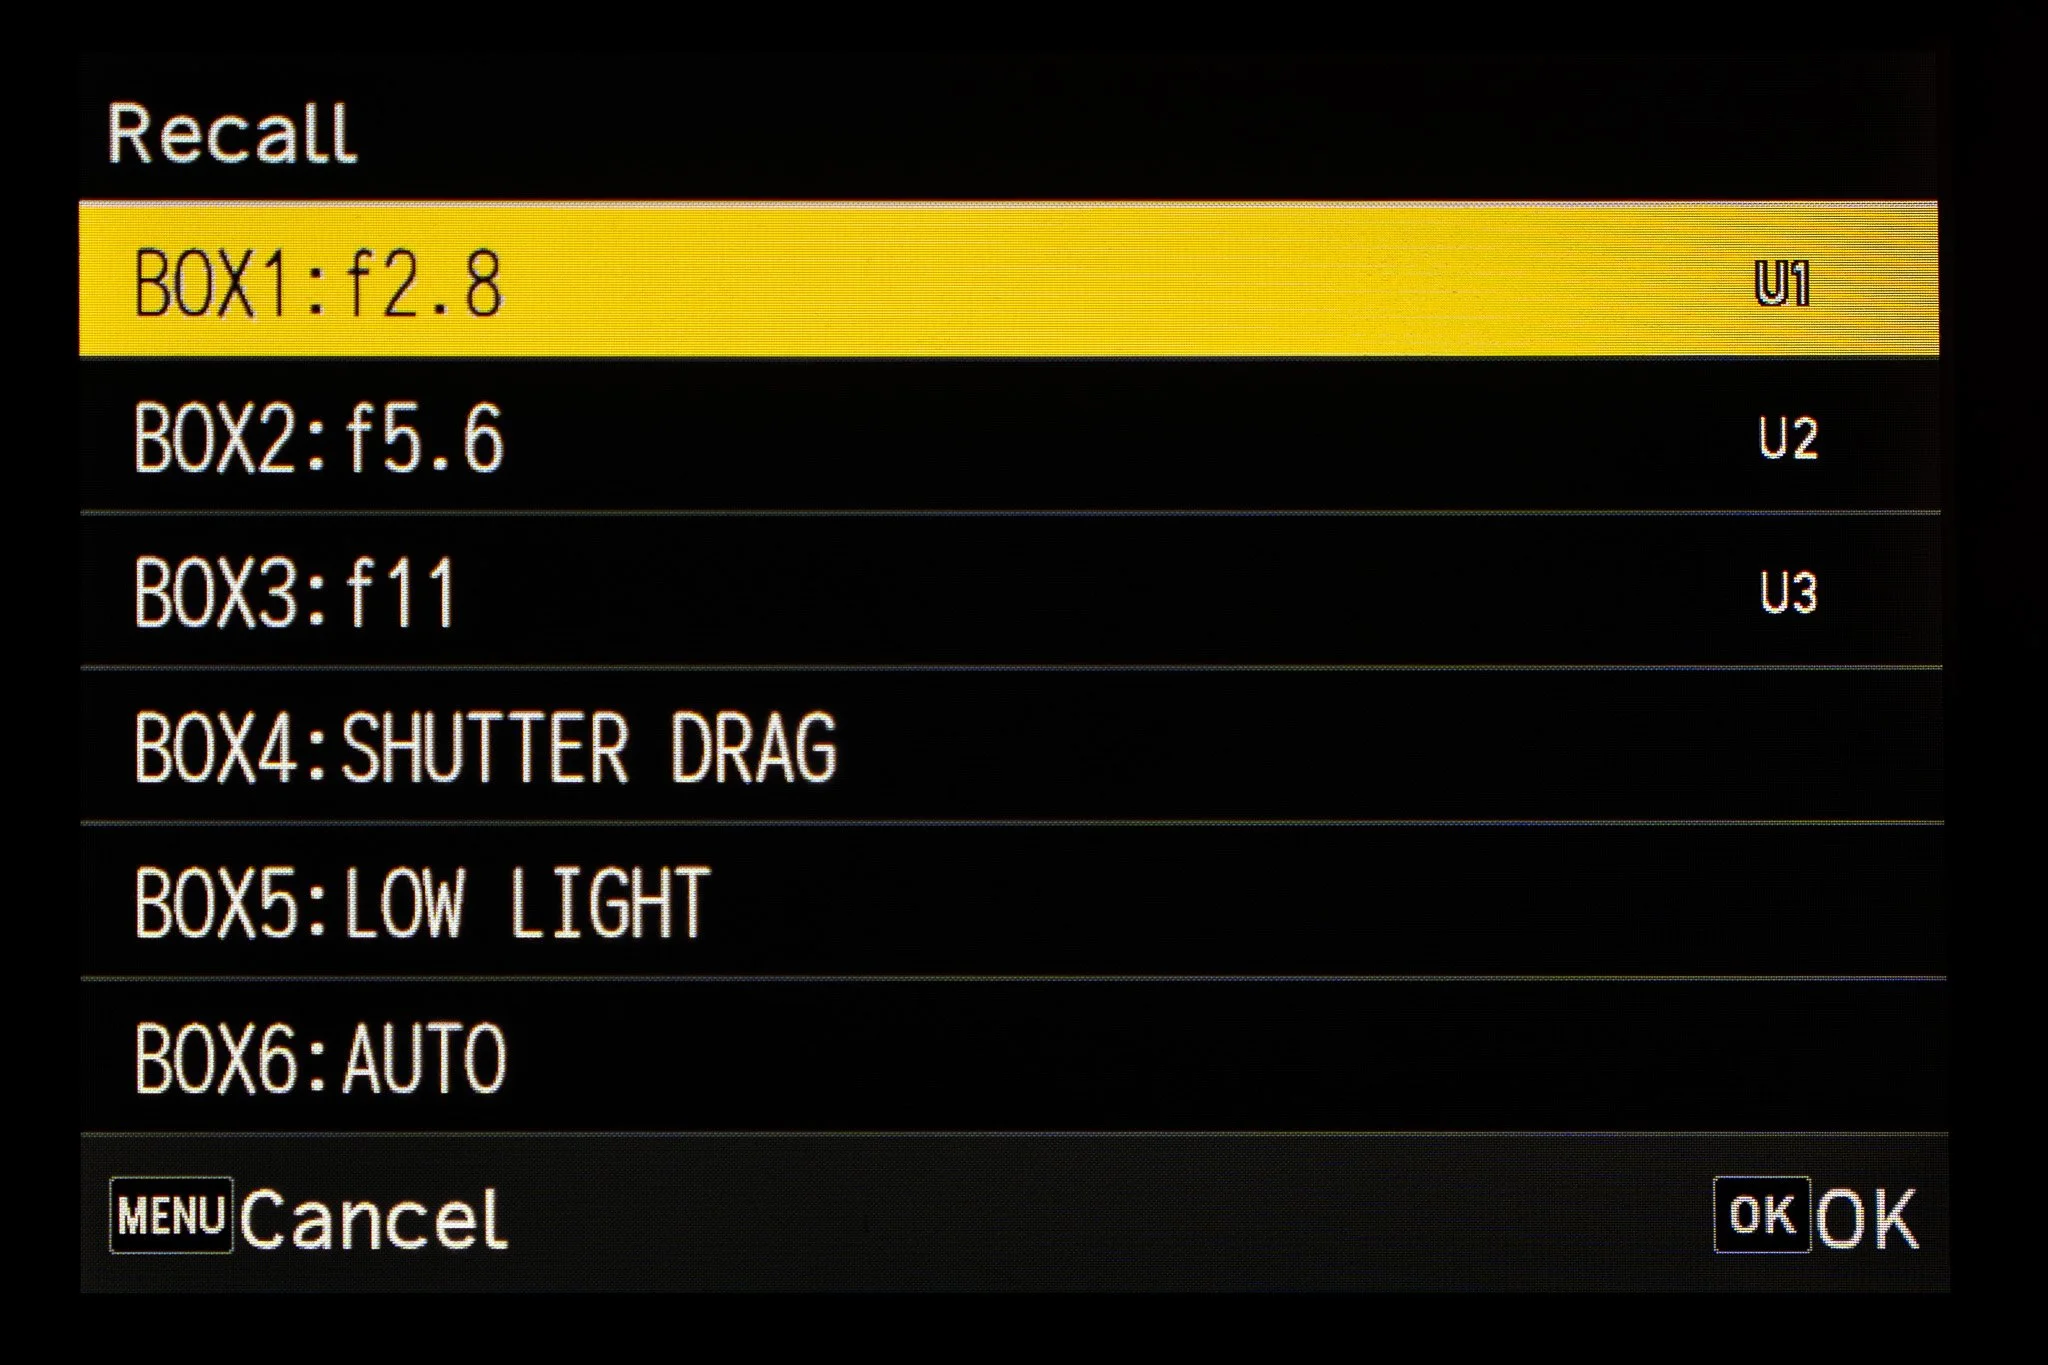
While you only have three custom U modes on the Mode Dial, you actually get 6 memory boxes that can hold different set ups. The theory behind it, is you save 6 different configurations, and then can assign them to one of the U modes as and when you need.
What I use them for:
This is very subjective and will differ depending on what you shoot, and how you like to use cameras. This is what works for me. Box 1, 2, and 3 are for different aperture values. The camera is in aperture priority with each box having a different value assigned. Box 1 is f2.8, box 2 is f5.6, and box 3 is f11. The idea behind it is it allows me to quickly change the aperture value without needing to look at the camera or take time with the index wheel. The other three boxes are set up for night photography, slow shutter drag, and a full auto mode for point and shoot.
Saving & Assigning:
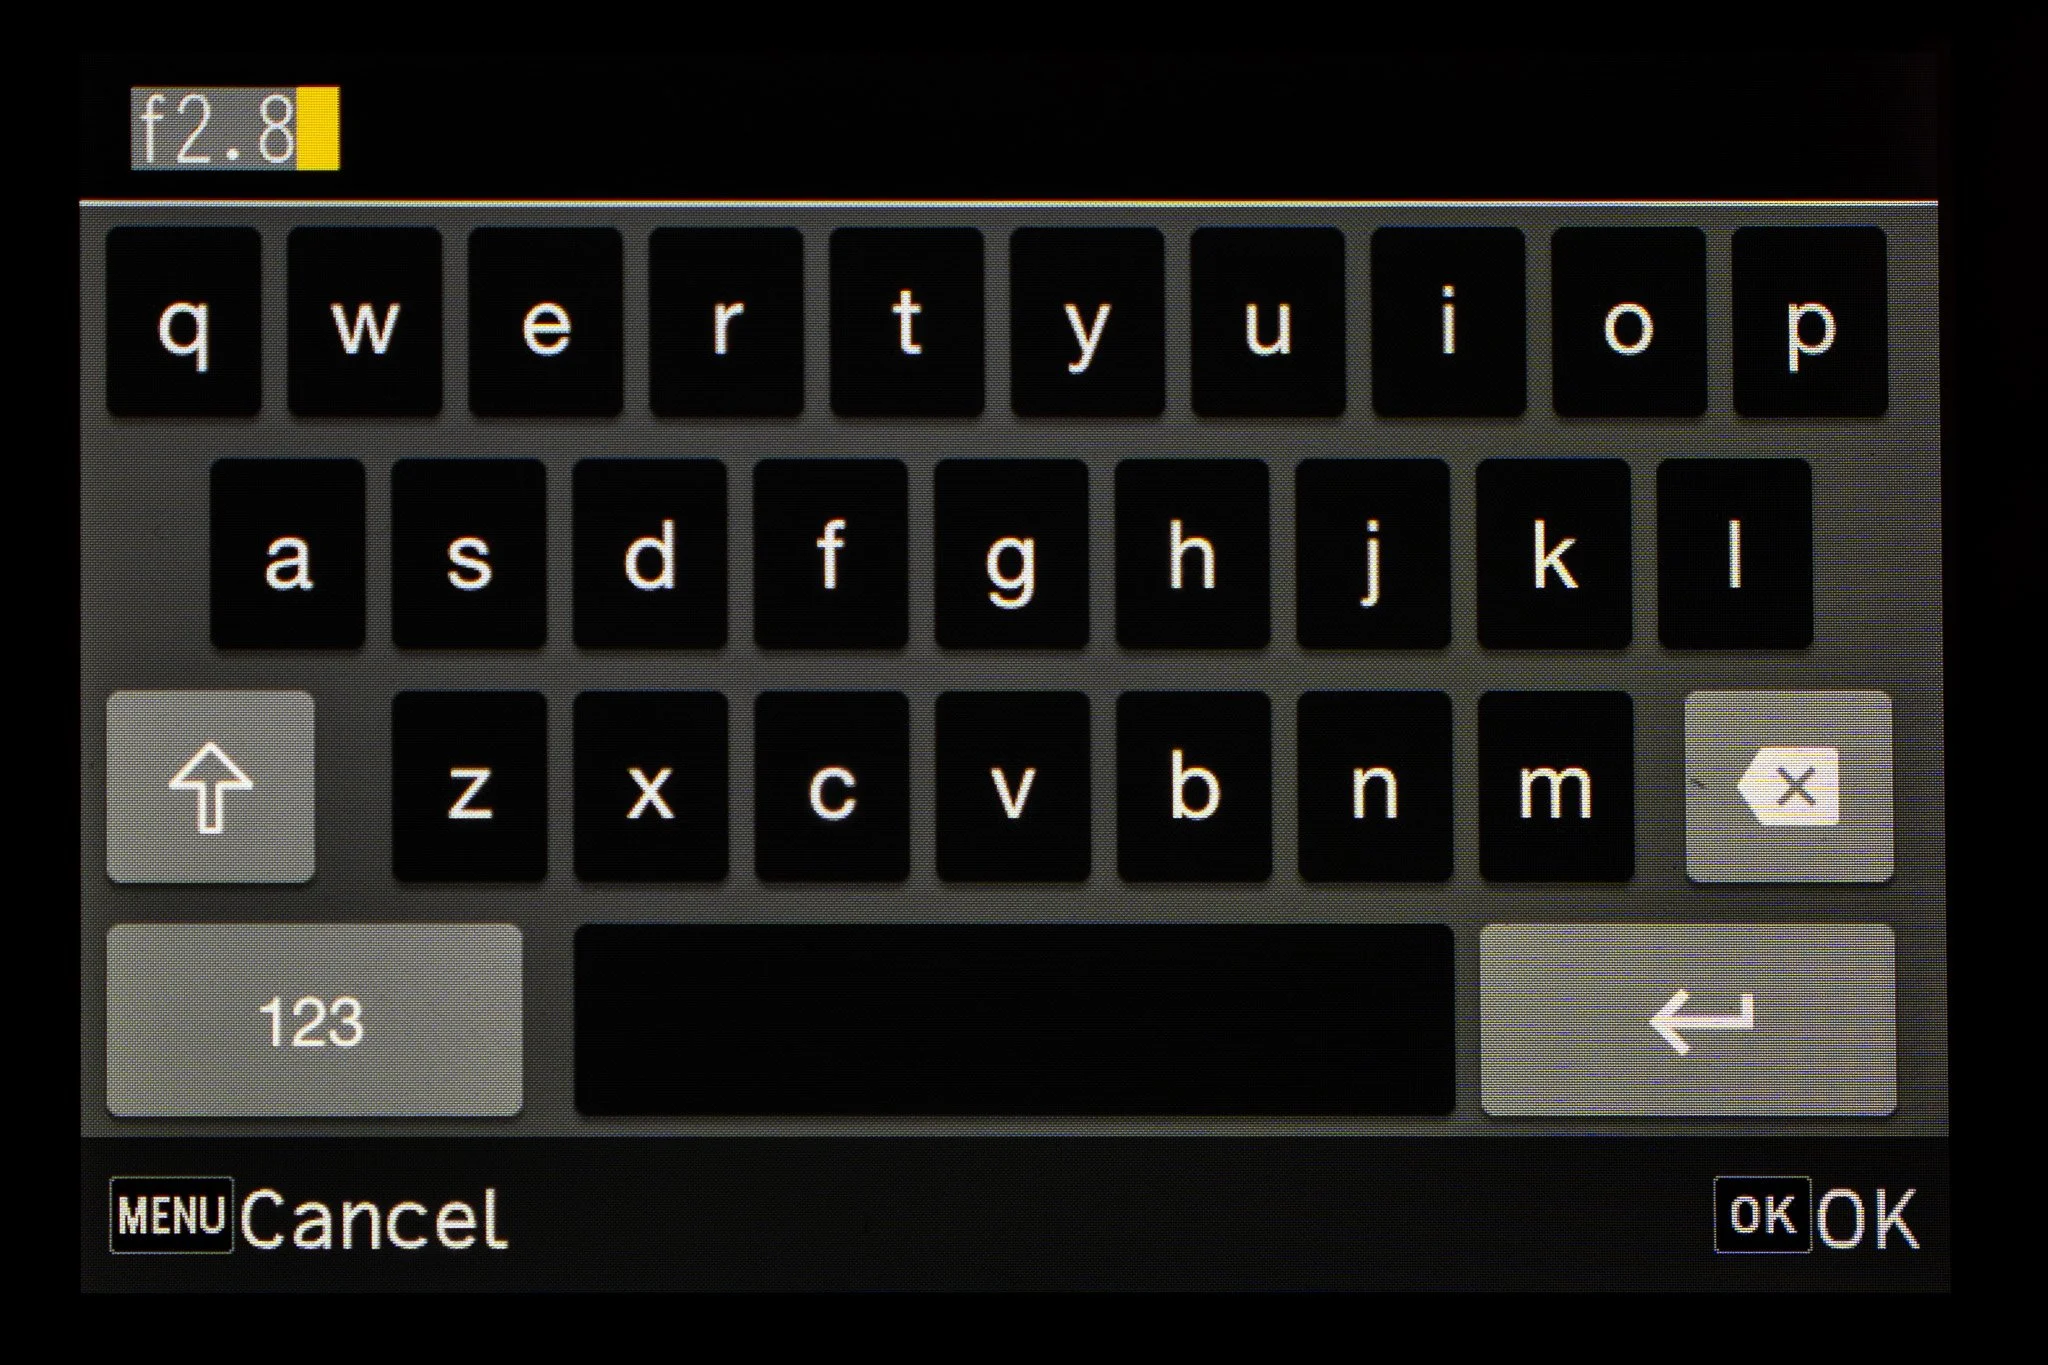
Before you assign a custom mode, you first need to place the camera in the desired exposure mode. Av, Tv, P, and M can all be used. For this example let’s set up U1 as aperture priority using f2.8. Once you’ve set up the camera as you wish, make sure the Mode Dial is set to Av, and set the aperture to f2.8 (or whatever value you want to be default).
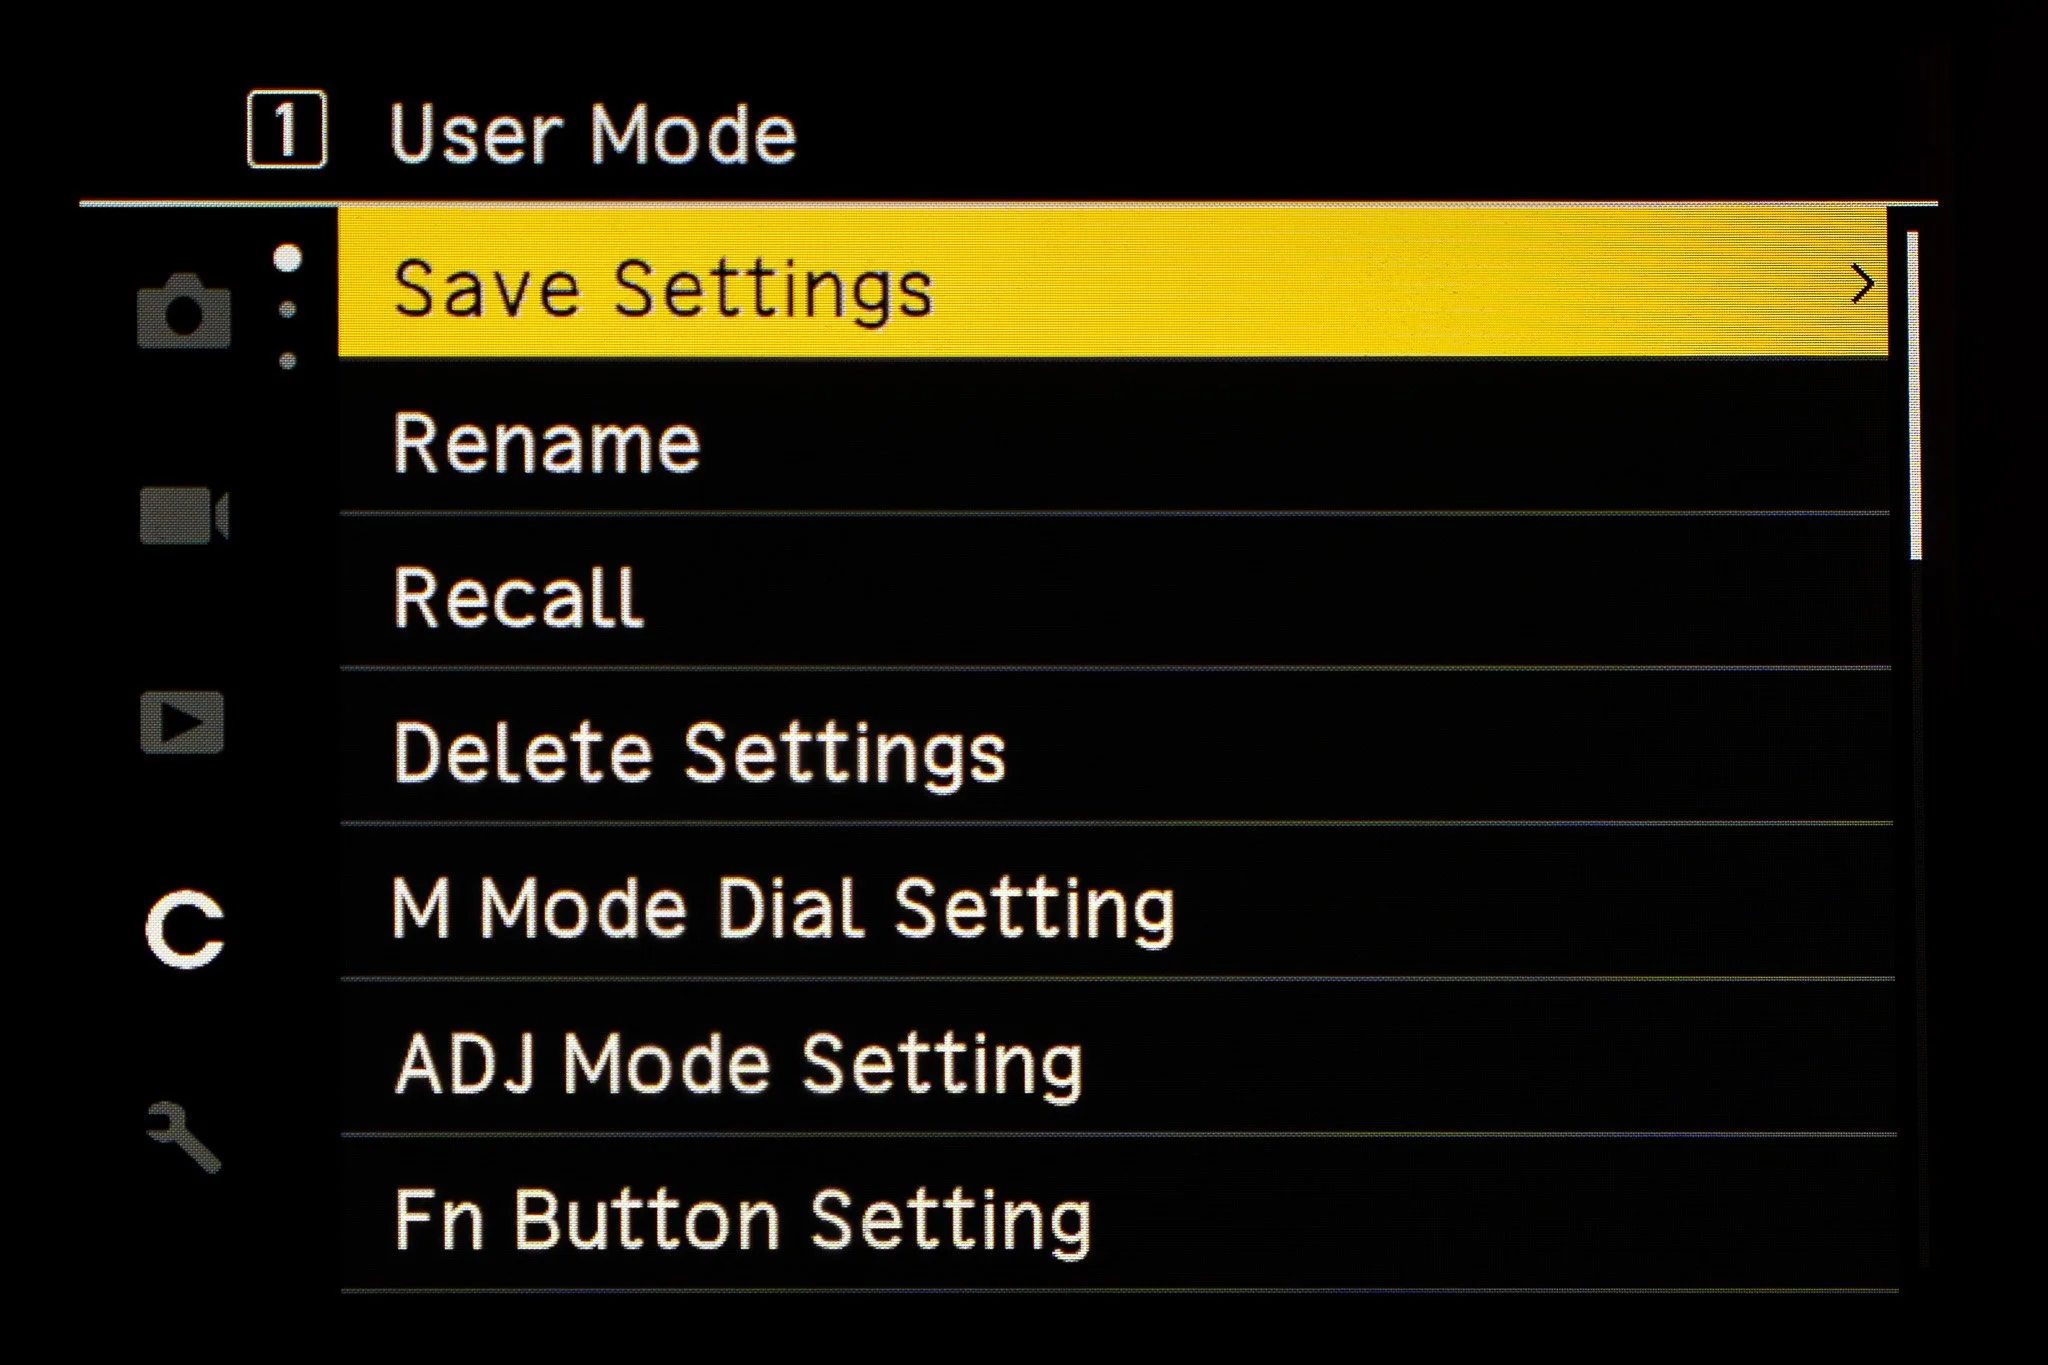
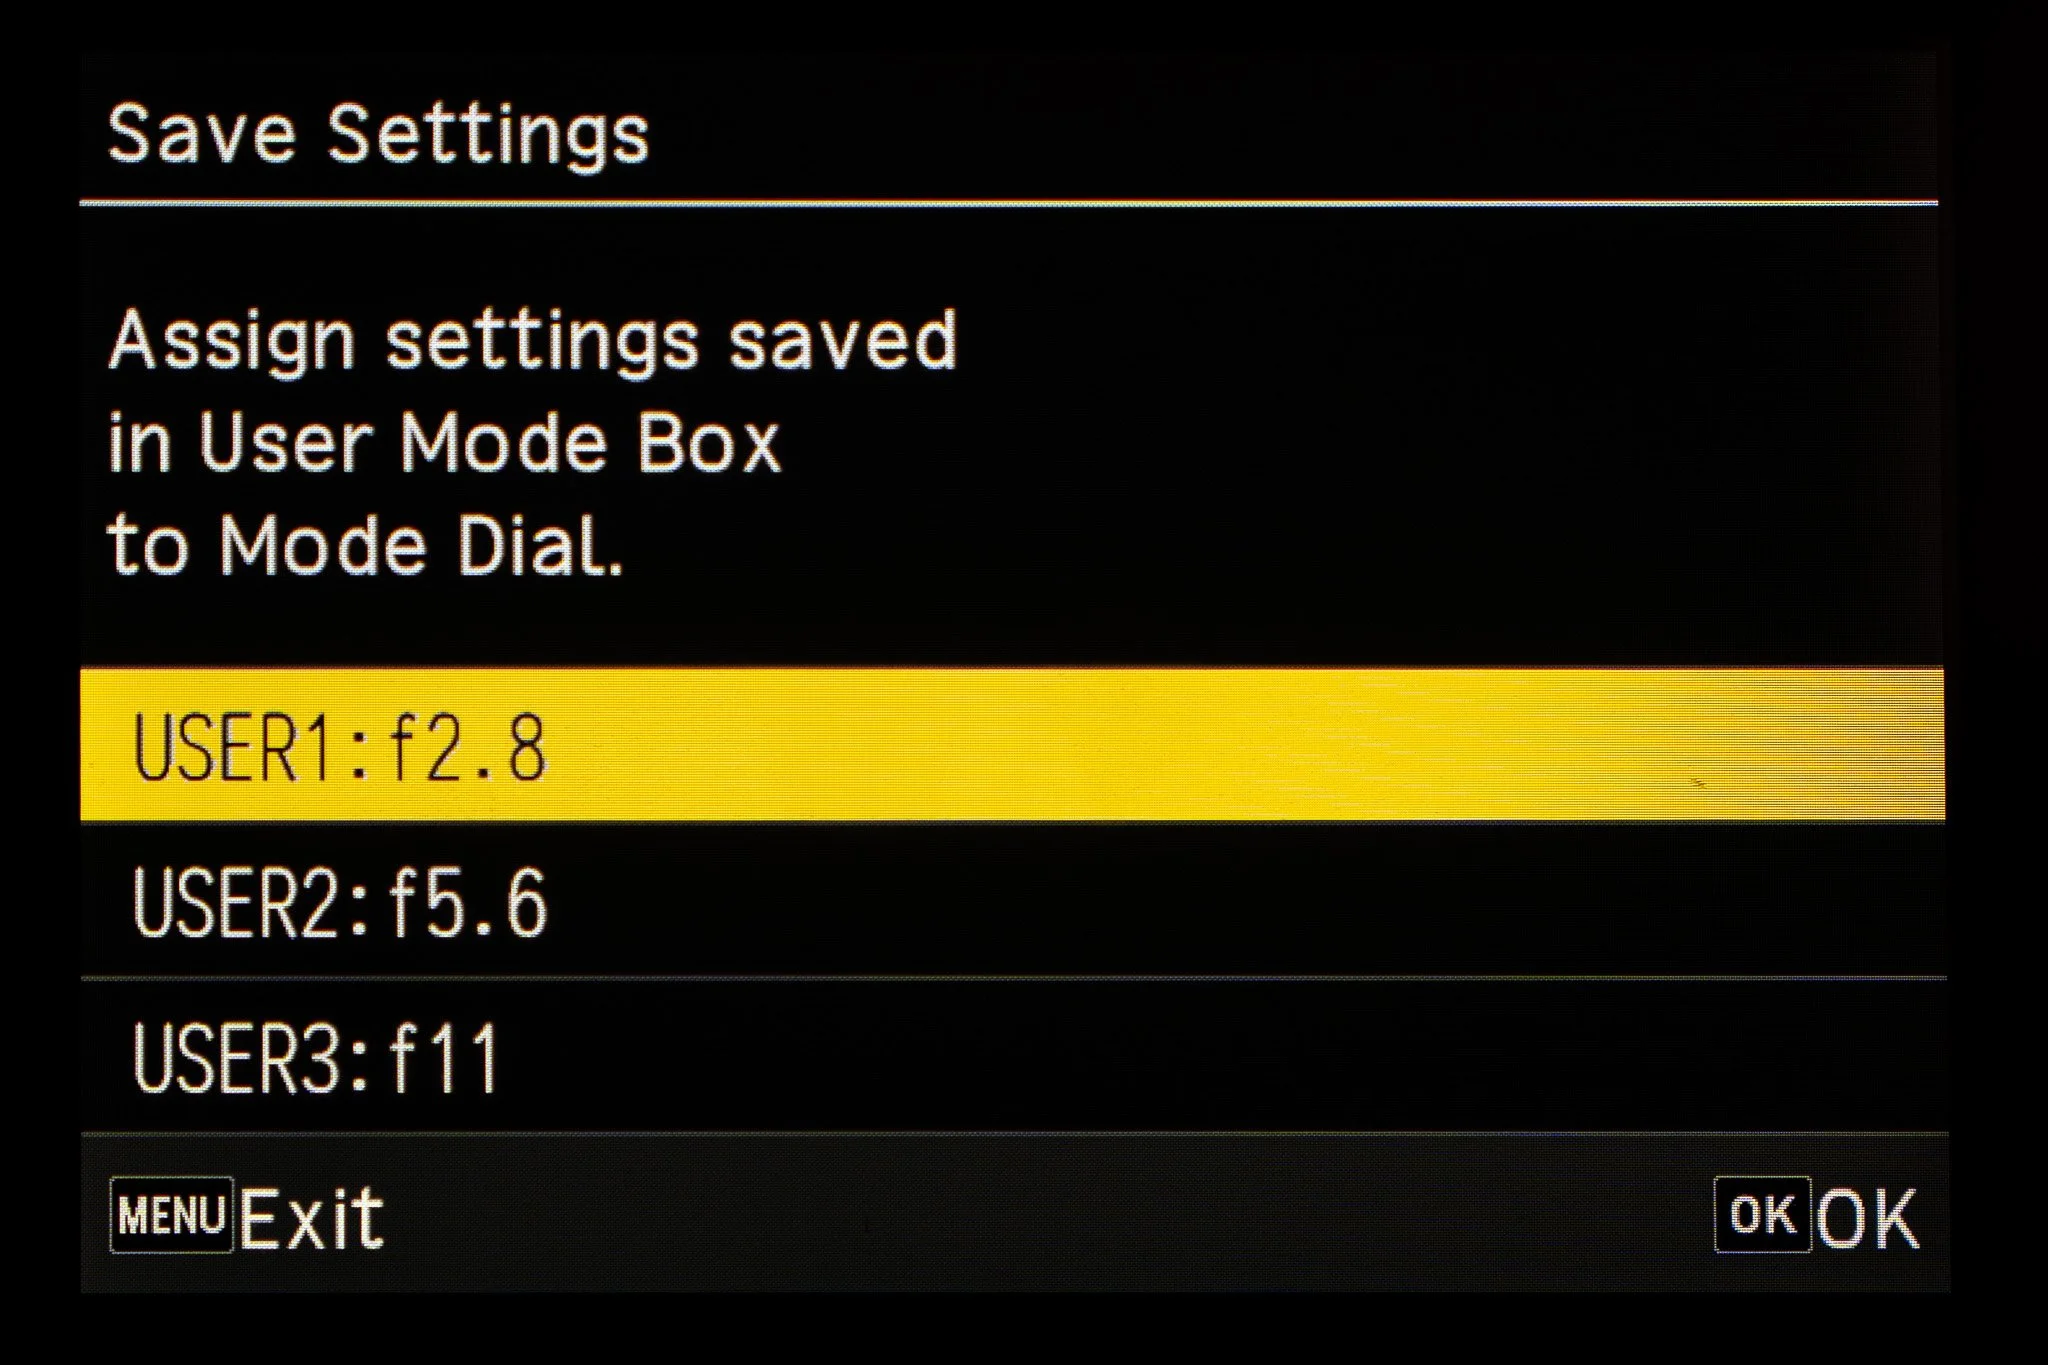
Next you need to go to Menu > Customise Settings > Save Settings. Select the box you would like to save this set up to. For now you can use Box 1. Create a custom name and finally assign it to either U1, U2, or U3. Repeat this process for any other custom modes you want and you’re good to go. If you want to change which box is assigned to which U mode, you can use the Recall option in the Customise Settings menu.