
Work With Your Photos, Not Against Them
In this blog, I will share two editing scenarios where, if we're not careful, we can actually make things worse. Specifically, we will focus on the concept of working *with* our photos rather than *against* them. There are two aspects of editing where this is particularly relevant: contrast and geometry.
Contrast
Whenever we are shooting in any kind of lighting scenario, we are dealing with contrast. Some scenes, such as a harshly lit open area, will have low natural contrast. However, shooting into the sun at 10 am will produce a high-contrast scene.


When it comes to editing, it’s easy to try and force a specific look onto an image. For example, let’s take this photo of a man sitting in a boat. This was taken in Venice last year, and we can clearly see a high-contrast image.

However, perhaps when I was there, I remember the scene appearing more washed out and low contrast. So, I might try to recreate that by lifting the shadows and lowering the highlights. The problem is that most of us can agree the resulting image is not very pleasant and looks a little HDR-ish.

Instead of forcing a high-contrast scene to appear low contrast, perhaps we should work with the file in front of us and even exaggerate the contrast. Now, as you can see, the image looks more dynamic, vibrant, and generally more pleasing.


Another example is this cityscape of Madrid. It was a hazy, sunny morning, and the overall scene was low contrast and flat. However, if I boost the contrast, the photo looks awful and unrealistic.

No matter how I try to edit it, the high-contrast look doesn’t work here. Instead, by embracing the low-contrast, soft look, I achieve a much better result.

To summarise, when it comes to contrast, don’t try to force a low-contrast scene to appear high contrast, and vice versa. In some cases, it might work, but most of the time it simply won’t look right.


Geometry
I follow a specific process for editing, and one of my first steps is to correct the geometry. By geometry, I mean ensuring that horizontal and vertical lines appear as they should. In many cases, vertical lines might not be entirely straight, and horizontal lines might be slightly off too.


This misalignment is caused by the lens not being at a perfect 90-degree angle to the vertical lines, or by standing slightly off-centre and shooting a building from a slight angle rather than head-on. In many cases, using the geometry tool in Lightroom, we can improve the photo by straightening everything and making it look neat. However, there are situations where perfectly straight lines can actually look a bit odd. I can recall many times when, after applying a geometry correction, something still felt off. No matter how much I adjusted the geometry, nothing seemed to work.
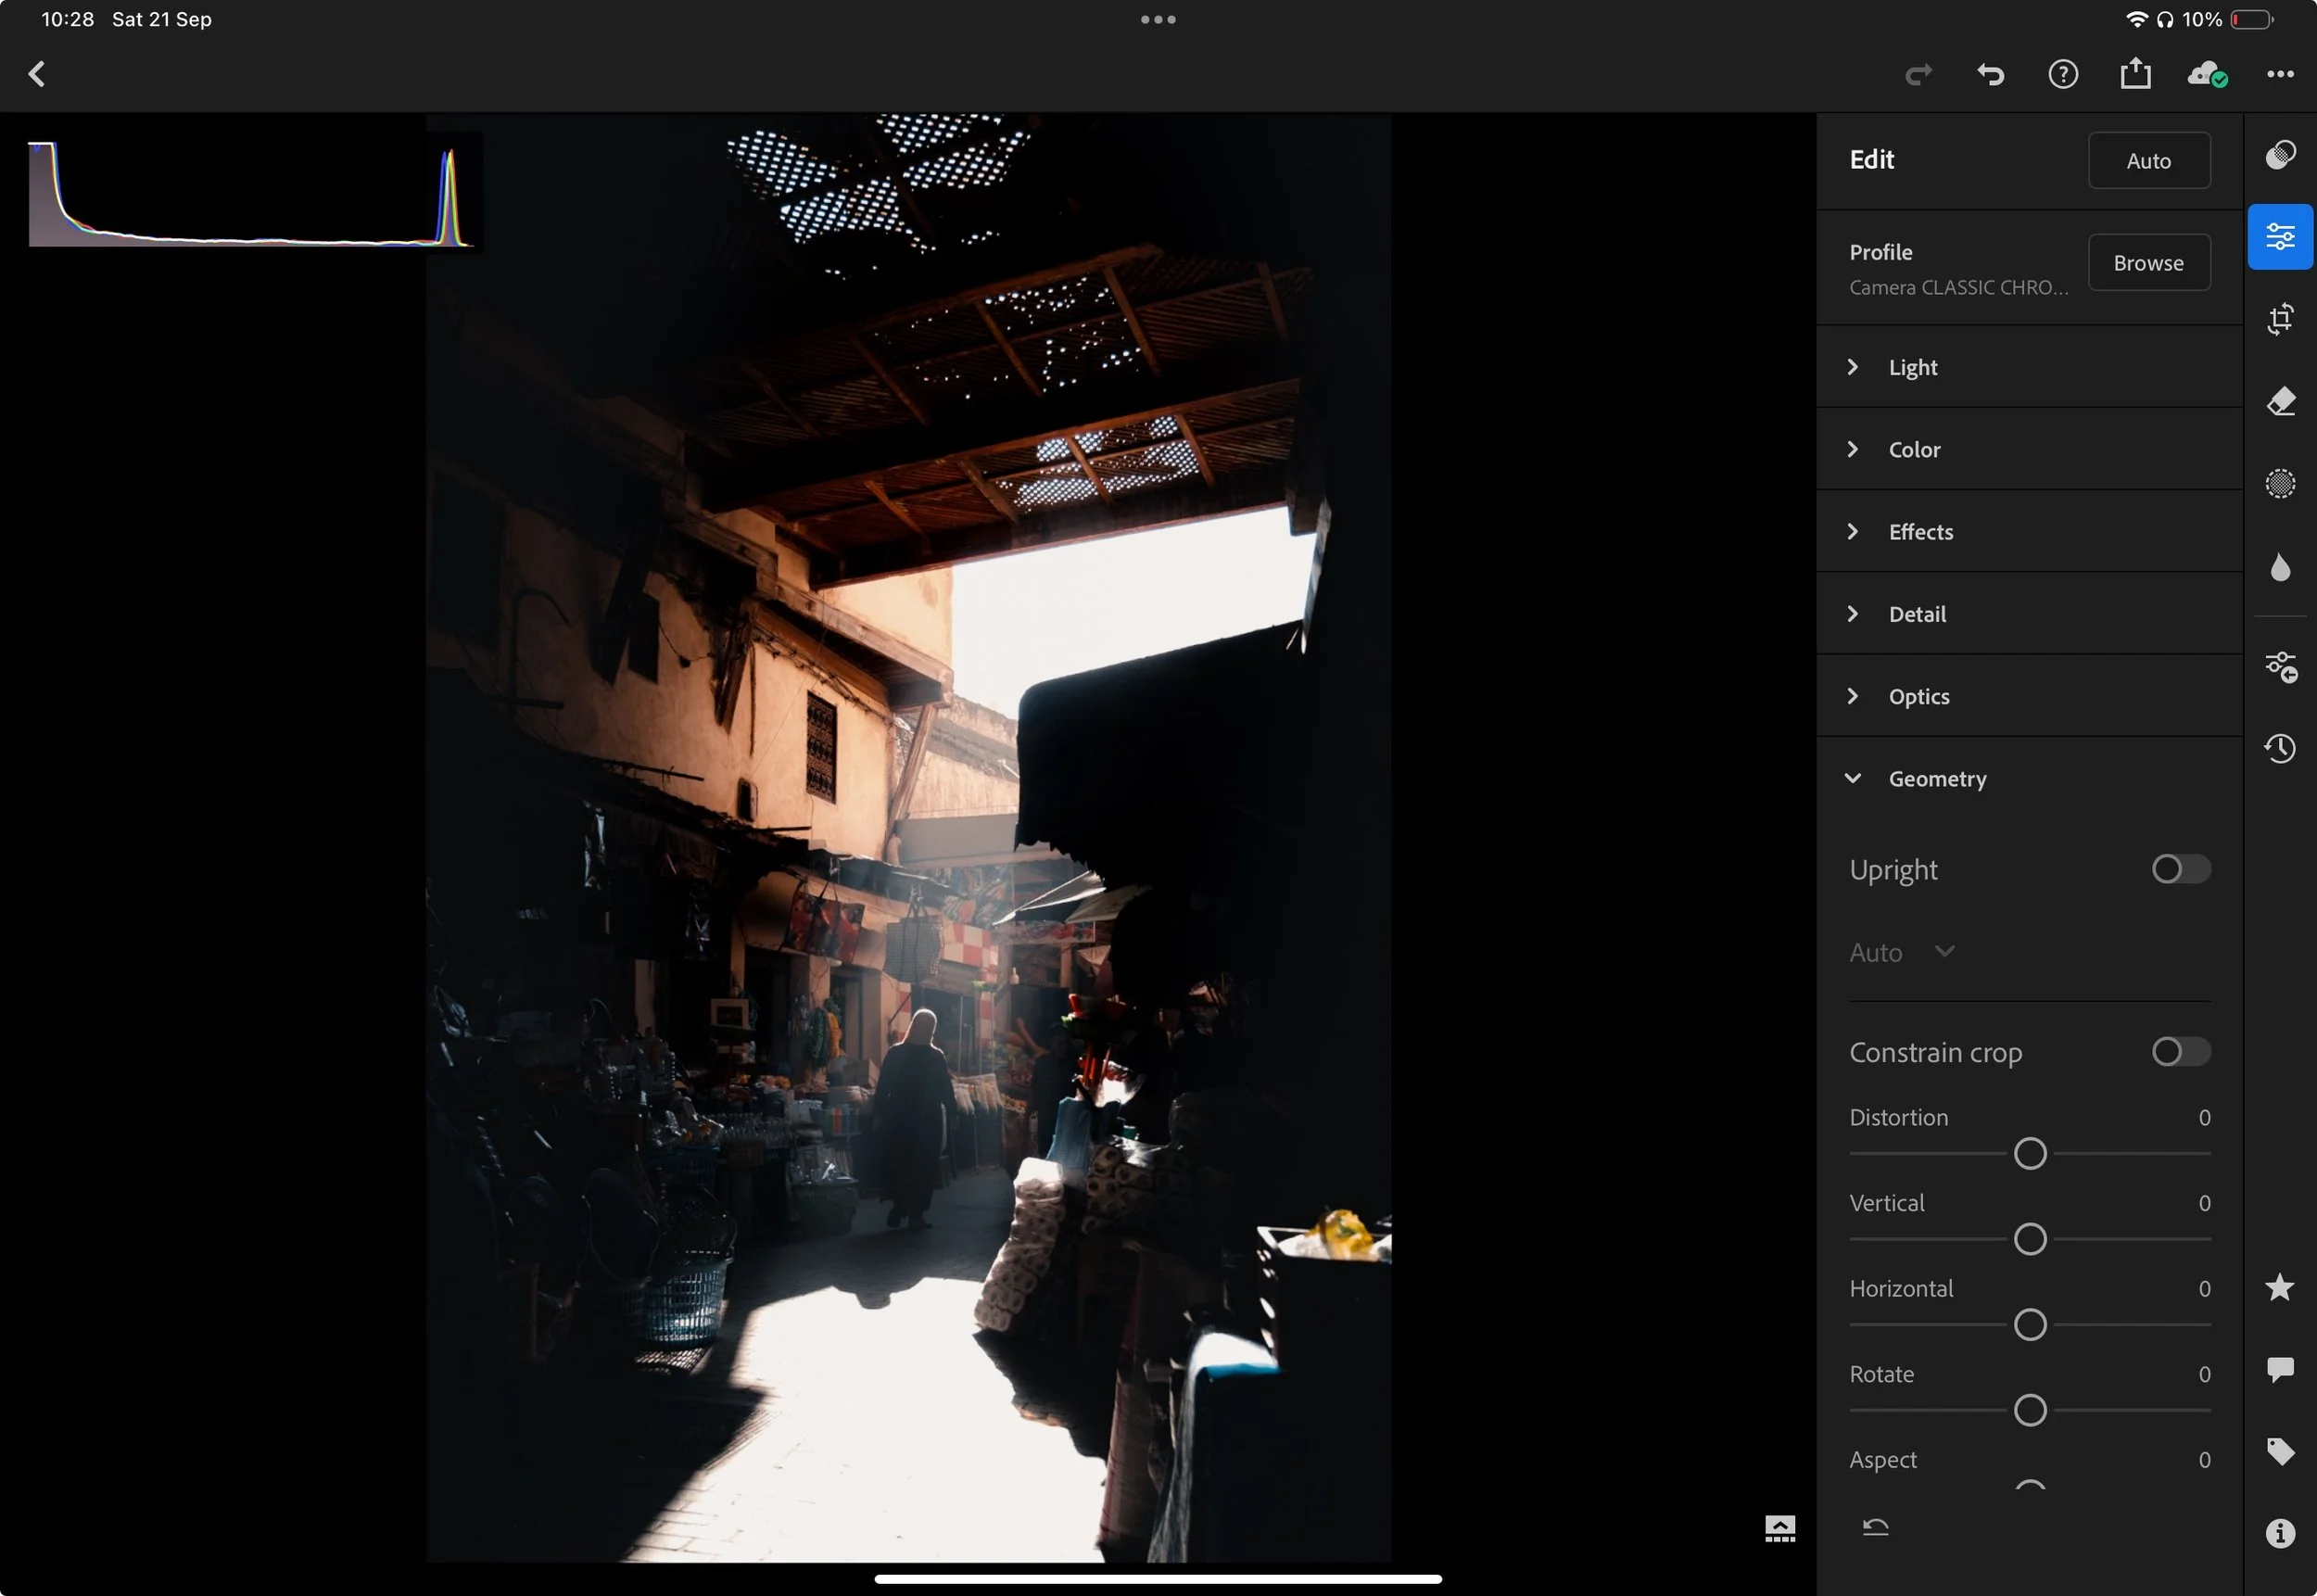

In the end, simply turning off the geometry correction resulted in a more natural-looking image. The point here is that you don’t always need to fix the geometry. Sometimes, leaving it as it is and only adjusting the horizon is enough to make the image look just right.














Instead of telling you how these will change your life, I would rather be practical and answer the most common questions that people tend to have when buying presets.
What are presets?
They are editing settings that are saved in a file and can be applied to any image.
Why do people buy presets?
Sometimes because they like the work of the photographer and want that style for their own photos. Mostly because they would like to see how other people edit and learn by reverse engineering the presets. Other times it’s just to support their favourite photographers, thank you!
What’s the overall style of these presets?
- Filmic
- Warm
- Soft
- Bright
What are these presets suitable for?
Street & Travel Photography
Some Nature (with further editing)
Some Portraits (with extensive editing)
Do I actually use these?
Yes. This is the same pack I use right now for all my editing. This isn’t a pack made just to sell.
Do these presets get updated?
Yes, as my style changes, these presets will also be updated. Any time a new update is available, you will get a free update via email. Of course you also keep all the old presets in case you prefer the older looks. Only presets purchased from 2025 onwards will receive the updates.
What file types are these presets for?
- All RAW files
- JPEGs & TIFFs (not recommended)
What camera brands are these presets for?
These were designed around Fujifilm, Sony, and Leica sensors. With that said, they will work with all camera brands. While there might be differences due to individual camera colour science, the overall feel of the preset will carry over.
Will these work with JPEG files?
Yes, but you will need to reduce the intensity and make further edits. I strongly recommend editing RAW files.
Are these one click edits?
95% No. You would need to do some basic adjustments as each image is different. These adjustments can include exposure, colour balance etc. In 5% of cases you can just apply and leave it alone.
Do I need to know how to edit?
You need to have a basic understanding of adjusting exposure, highlights, shadows, etc. A more comprehensive editing skillset will let you get the most out of them.
How many presets are included?
10 in the main pack and 24 in the extras pack
Why two packs?
The main pack is what I use for 99% of my edits and is kept small to reduce wasted time scrolling through presets. The extras pack is everything I don’t use often.
What software do I need?
These presets will work with any of the following:
- Photoshop (adobe camera raw)
- Lightroom Classic
- Lightroom Desktop
- Lightroom Mobile
Will these presets work with free versions of the above software?
You need to research and double check before buying. These presets were designed for the full paid versions.
Will these presets work with very old versions of the above software?
You need to research and double check before buying. These presets were designed on and for the latest software.
What file type do I get?
XMP
What else do I get?
- Comprehensive PDF guide
Can I modify these and turn them into my own?
Yes! In fact I encourage you to modify them and play around. Use these to help you get your own style.
I have more questions…. What do I do?
Make a cup of tea and drop me an email on hello@snapsbyfox.com
Please note that due to the nature of digital products, refunds are generally not accepted. However, if you experience any issues, feel free to contact me and I’ll review your situation individually. You are welcome to use this product for personal or commercial projects, but you may not copy, distribute, or resell the files in their original or modified form.
Finally I want to say a massive thank you for supporting me. Buying these presets is the most direct way you can support my work.
Thank you!