Why I Don’t Love Golden Hour (And How To Get Around it)
Golden hour can ruin your photography. Yes, it’s a bold statement and now I will explain why. I will also share some tips on how to shoot around it and not end up in a pair of golden handcuffs.
When I first started taking an interest in photography, I did what you’re probably doing right now, watching YouTube videos, reading blogs, and trying to learn something new.
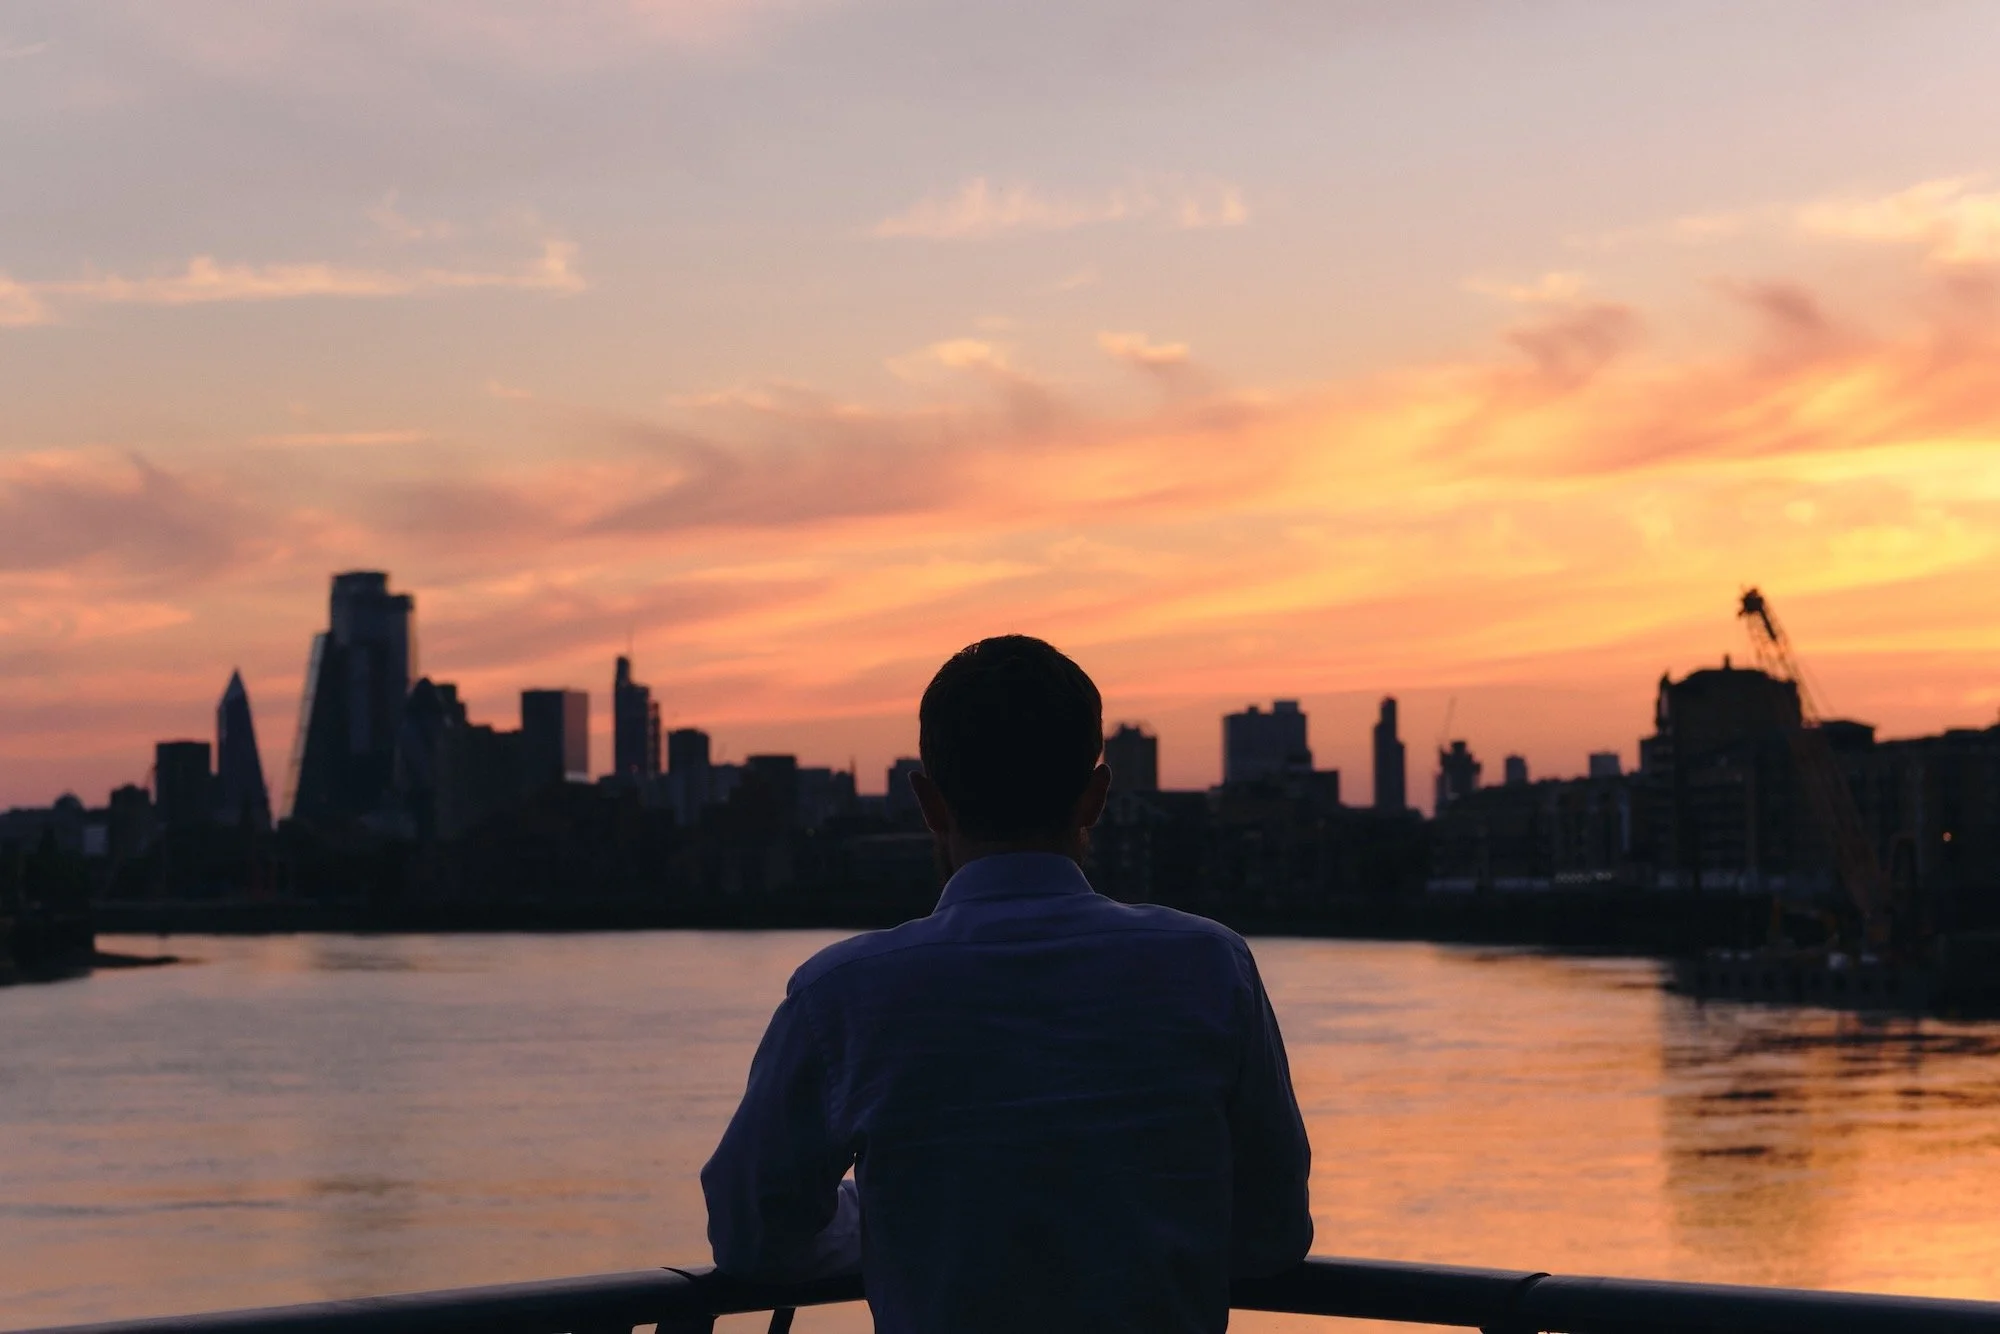
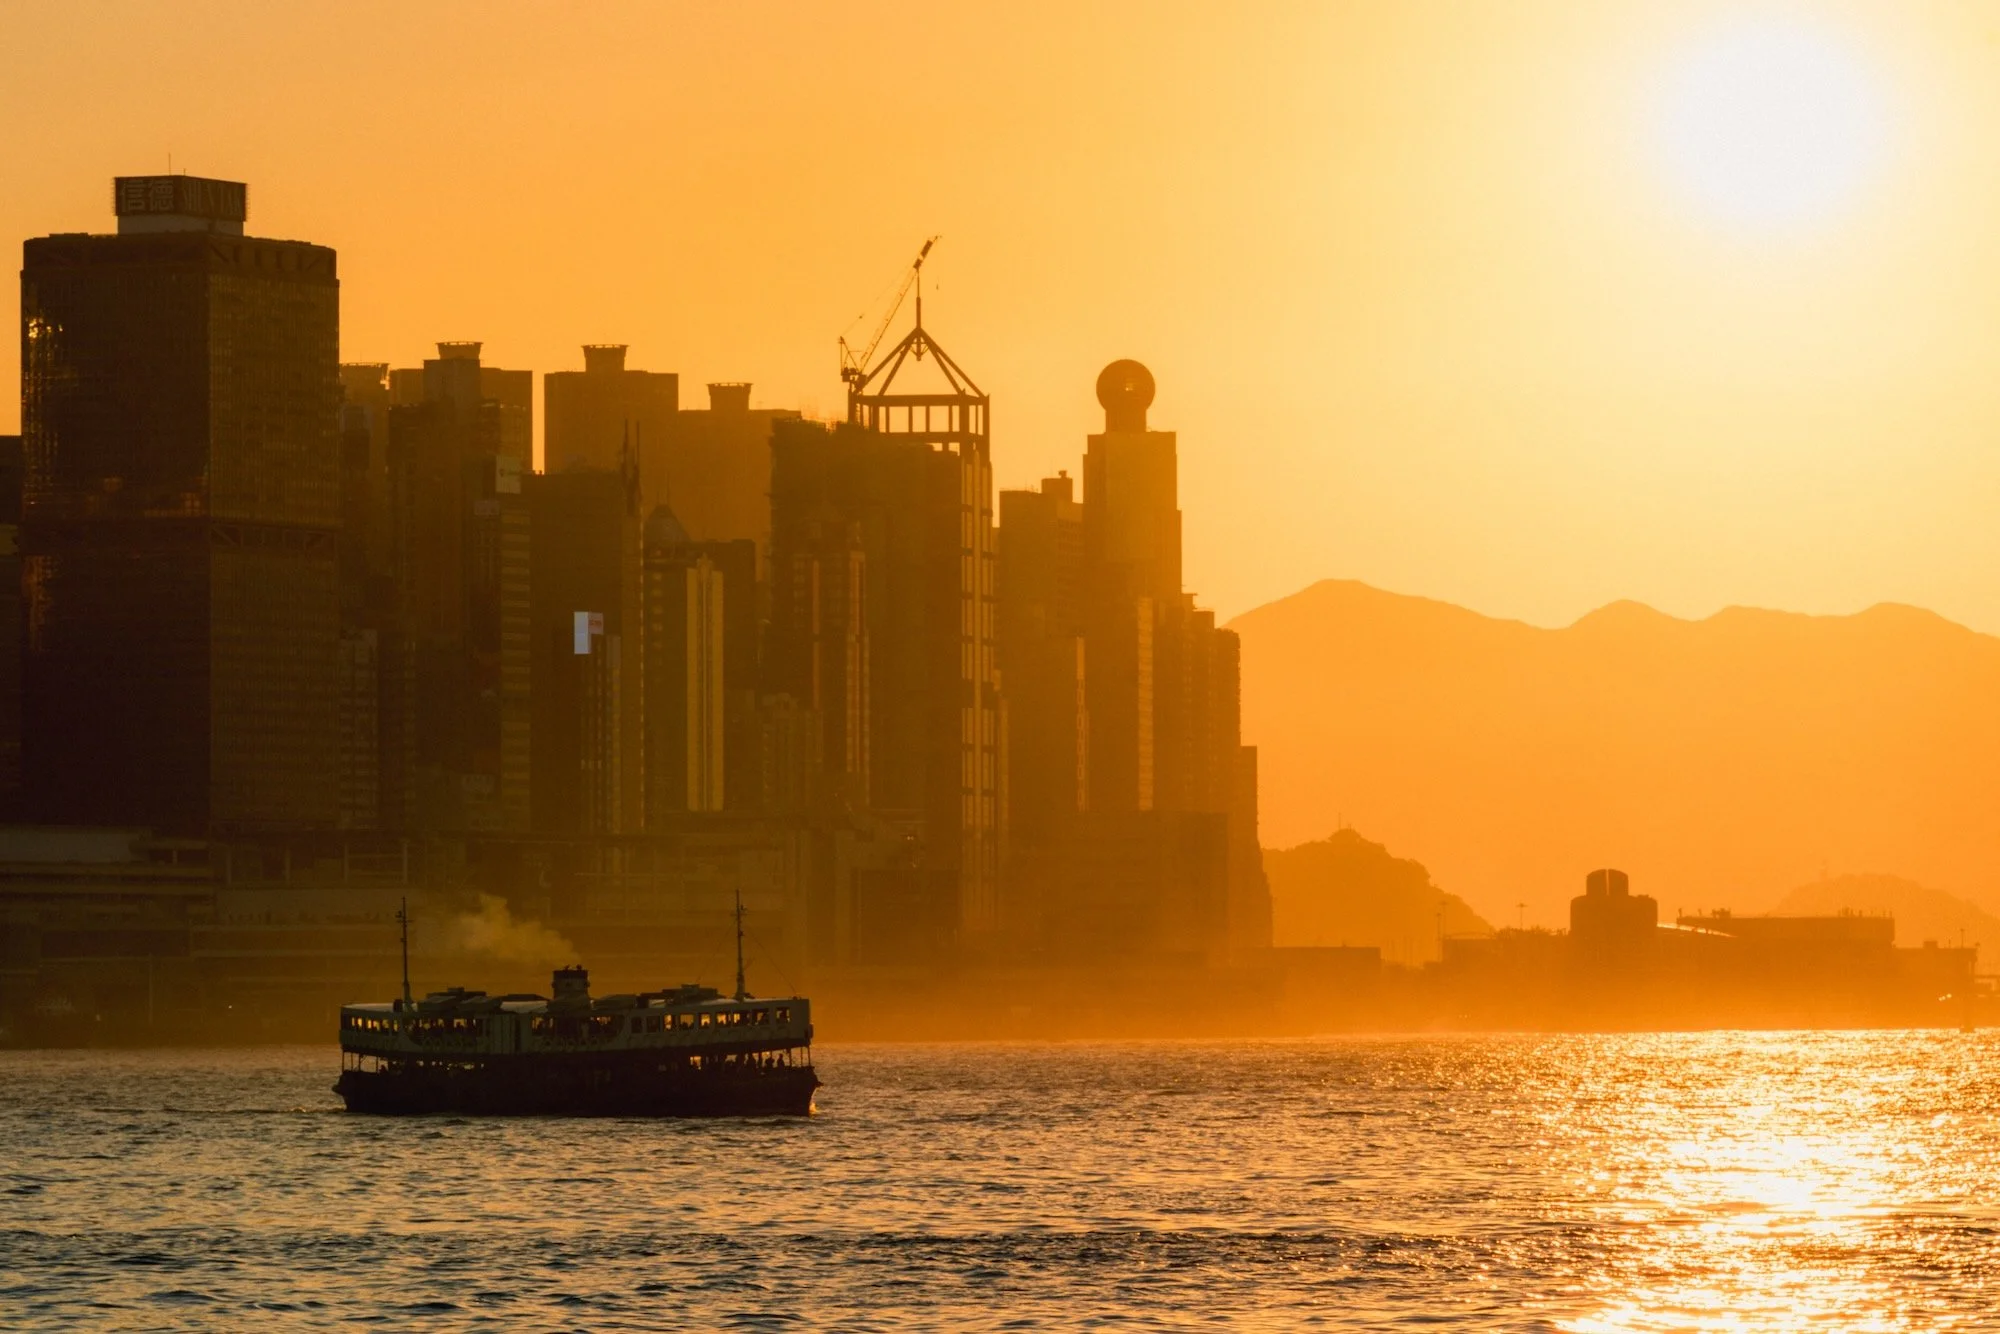
Soon enough I came across a bunch of photographers that swore by the golden hour. For the handful of you who don’t know what this means, it’s that hour or so before sunset and after sunrise, when the light is golden, hence the name.

It’s no secret that most of us love golden hour. However, there are photographers that will base their entire day around this tiny slither of time, and some will even make the point that any other form of light is too harsh, or too dull, and will ruin the shot. After enough time listening to this advice, I was convinced that shooting in golden hour was essential to getting good photos.
Back then photography was a hobby, and because I had a normal job, 90% of sunrises were written off, with sunsets only being viable in the summer months. As you can imagine, this meant very little opportunity to shoot. Matter of fact, most of my time was spent frustrated that I couldn’t be out there in this amazing light. Or worse still, not going out when I had the time, because it wasn’t golden hour.
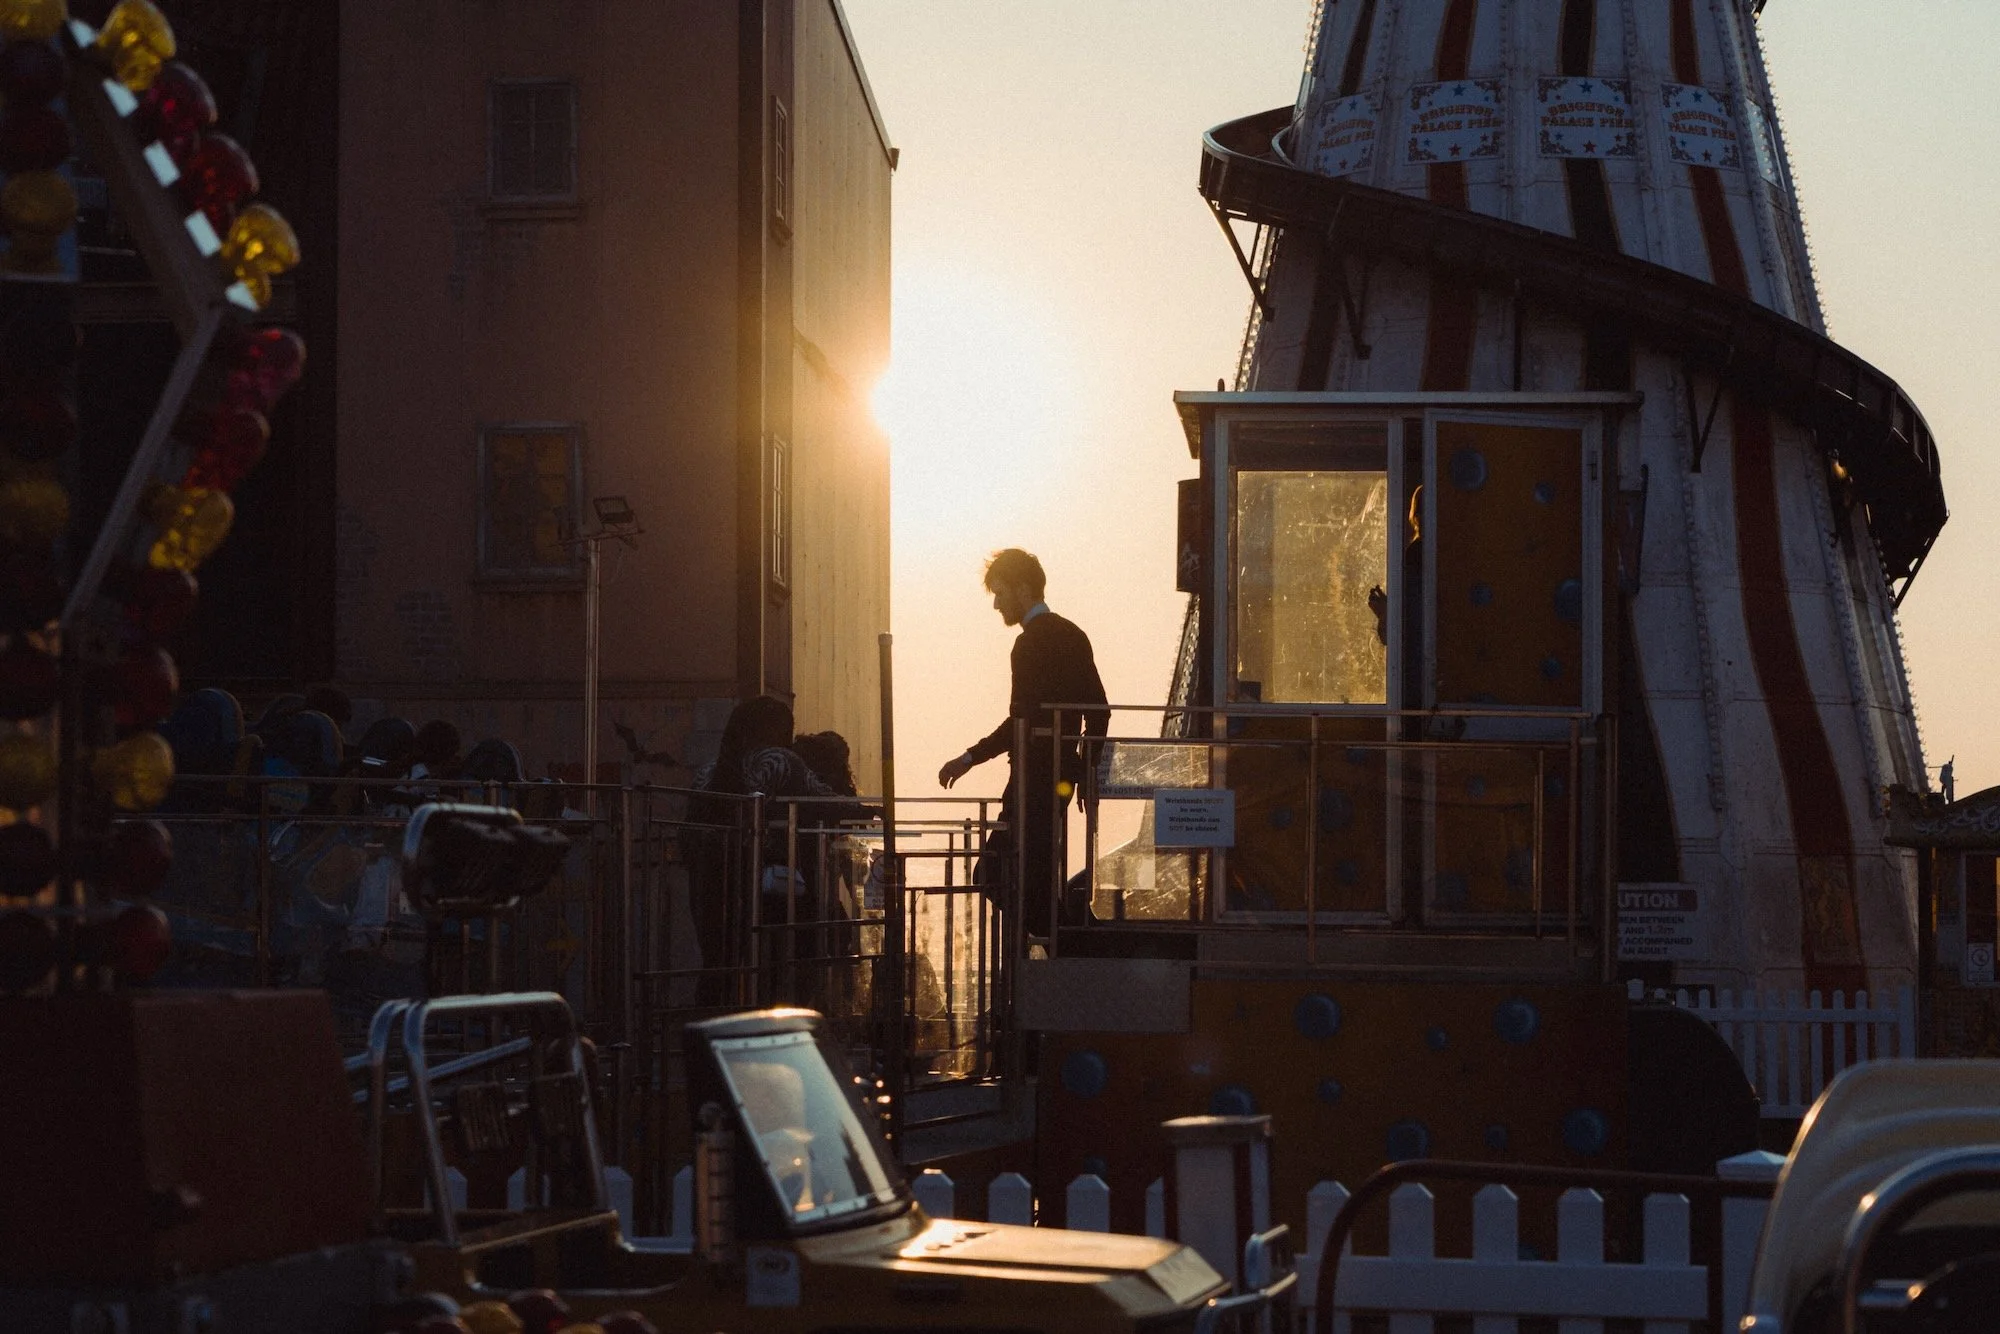
When I did make it out for golden hour, I often found myself in a hurry. Having that clock ticking in my head and losing the light with every minute that passed meant poor decisions and a distinct lack of enjoyment. Many of my images were rushed, many more were not thought through, and I found myself shooting the light and assuming that if it’s golden, it must be good.
When I got home, I quickly realised that only having this light was definitely not the answer. Even in objectively decent images, I found that often the subject was the light. Even if I got a selection of different shots, they all looked the same, because they all had the same overpowering golden light.
It even got to the point where I briefly fell out of love with photography. I hate early mornings, and all I want to do is grab a camera and go for a walk. Shooting golden hour meant more time planning, shooting while half asleep, or, as it applies to 95% of people reading this blog, not shooting at all because of real life responsibilities like having a job.
Golden hour turned into golden handcuffs and I realised that the only way for me to progress and actually enjoy photography was to learn how to shoot in all lighting conditions. In this blog I will explain how I shoot harsh light, dull light, and low light.
To be clear, this blog isn’t bashing golden hour or those who enjoy shooting in it, I love shooting golden hour and do it often. It’s here to showcase that all light is good light with the right approach, and that you don’t have to severely limit yourself.
Harsh light
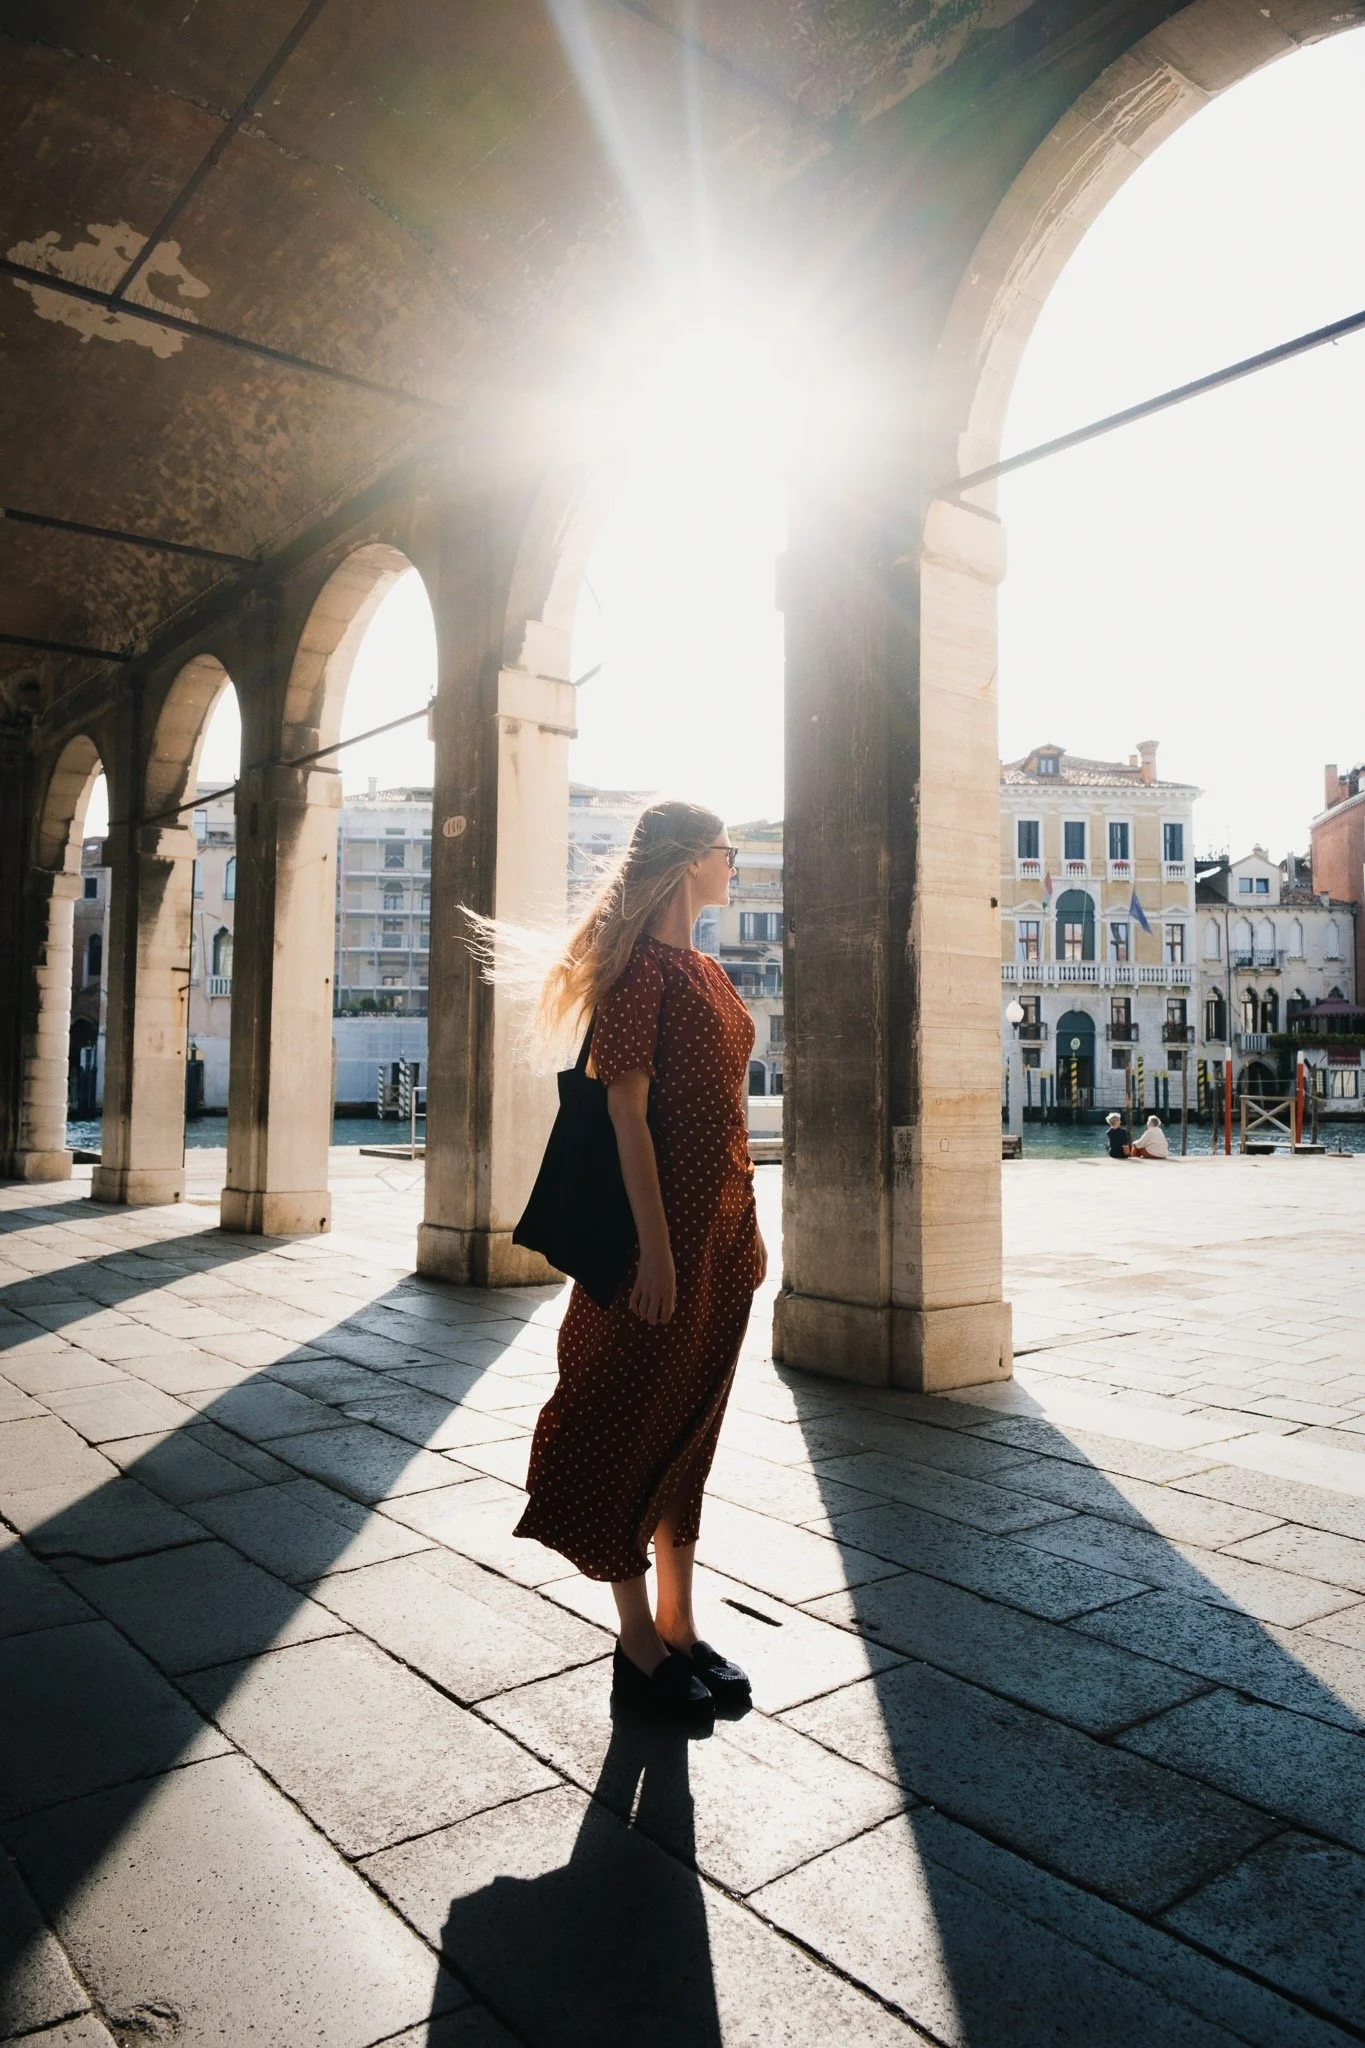
Shoot 180 degrees in front
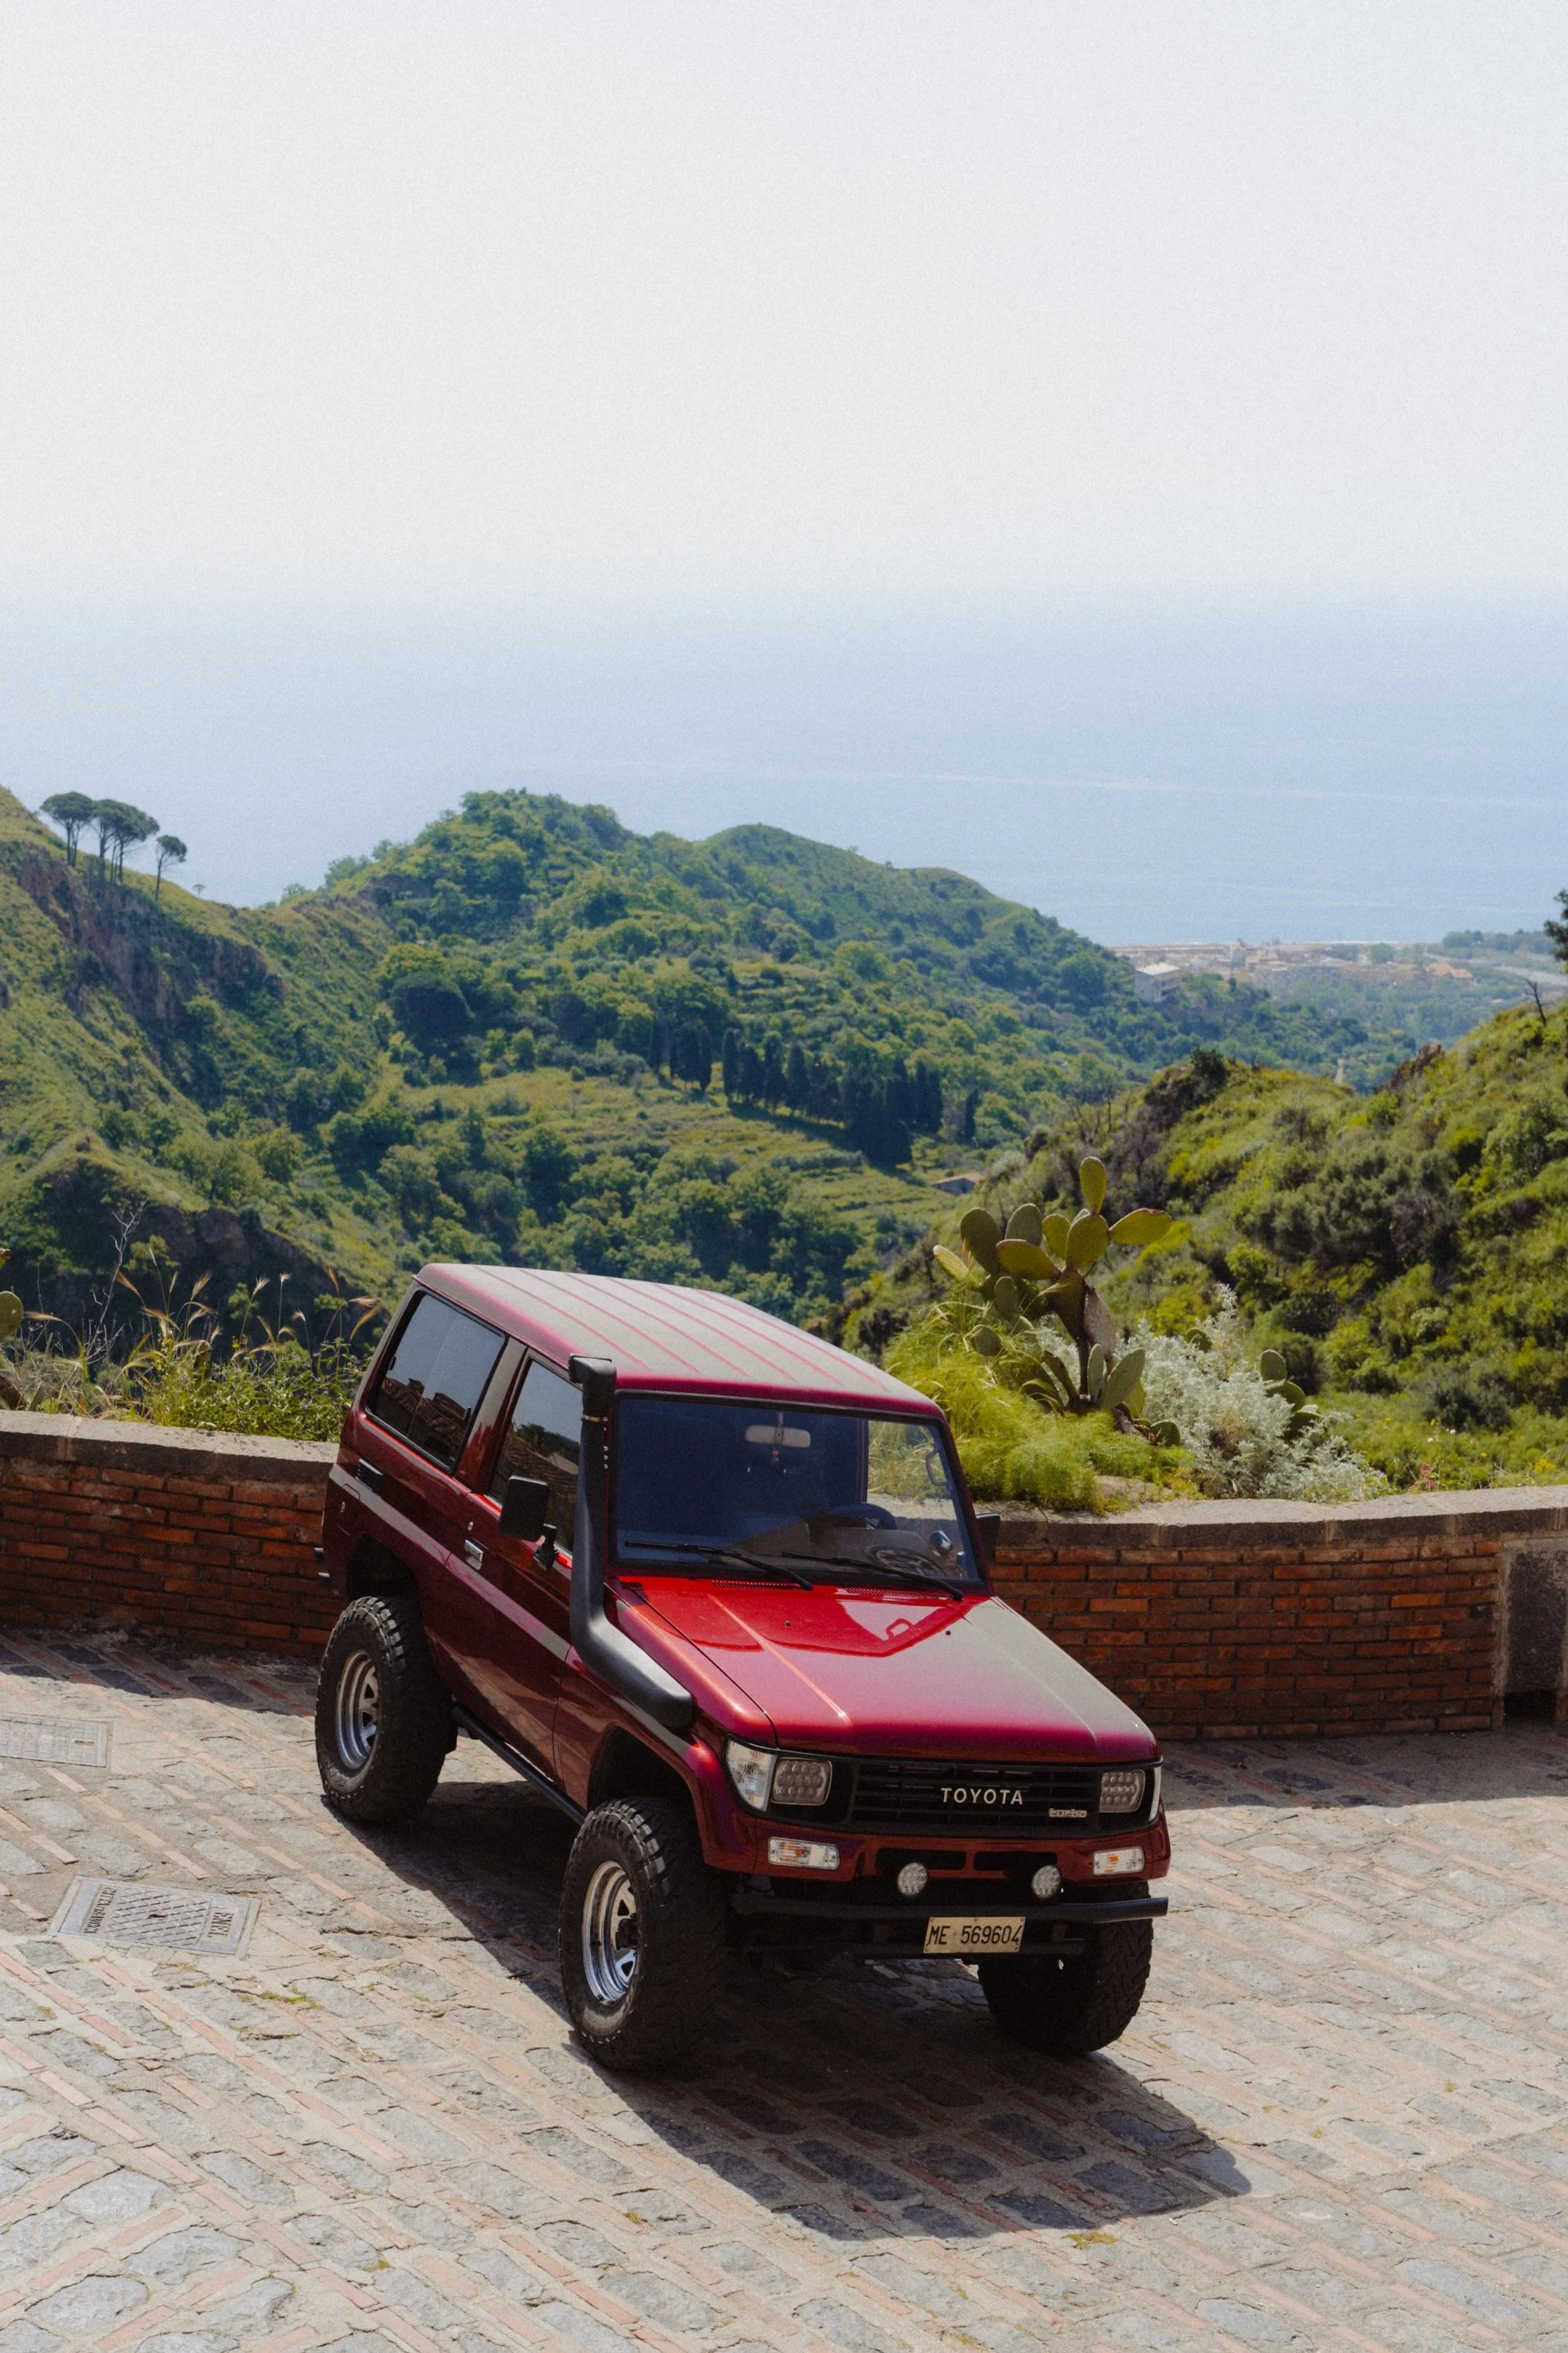
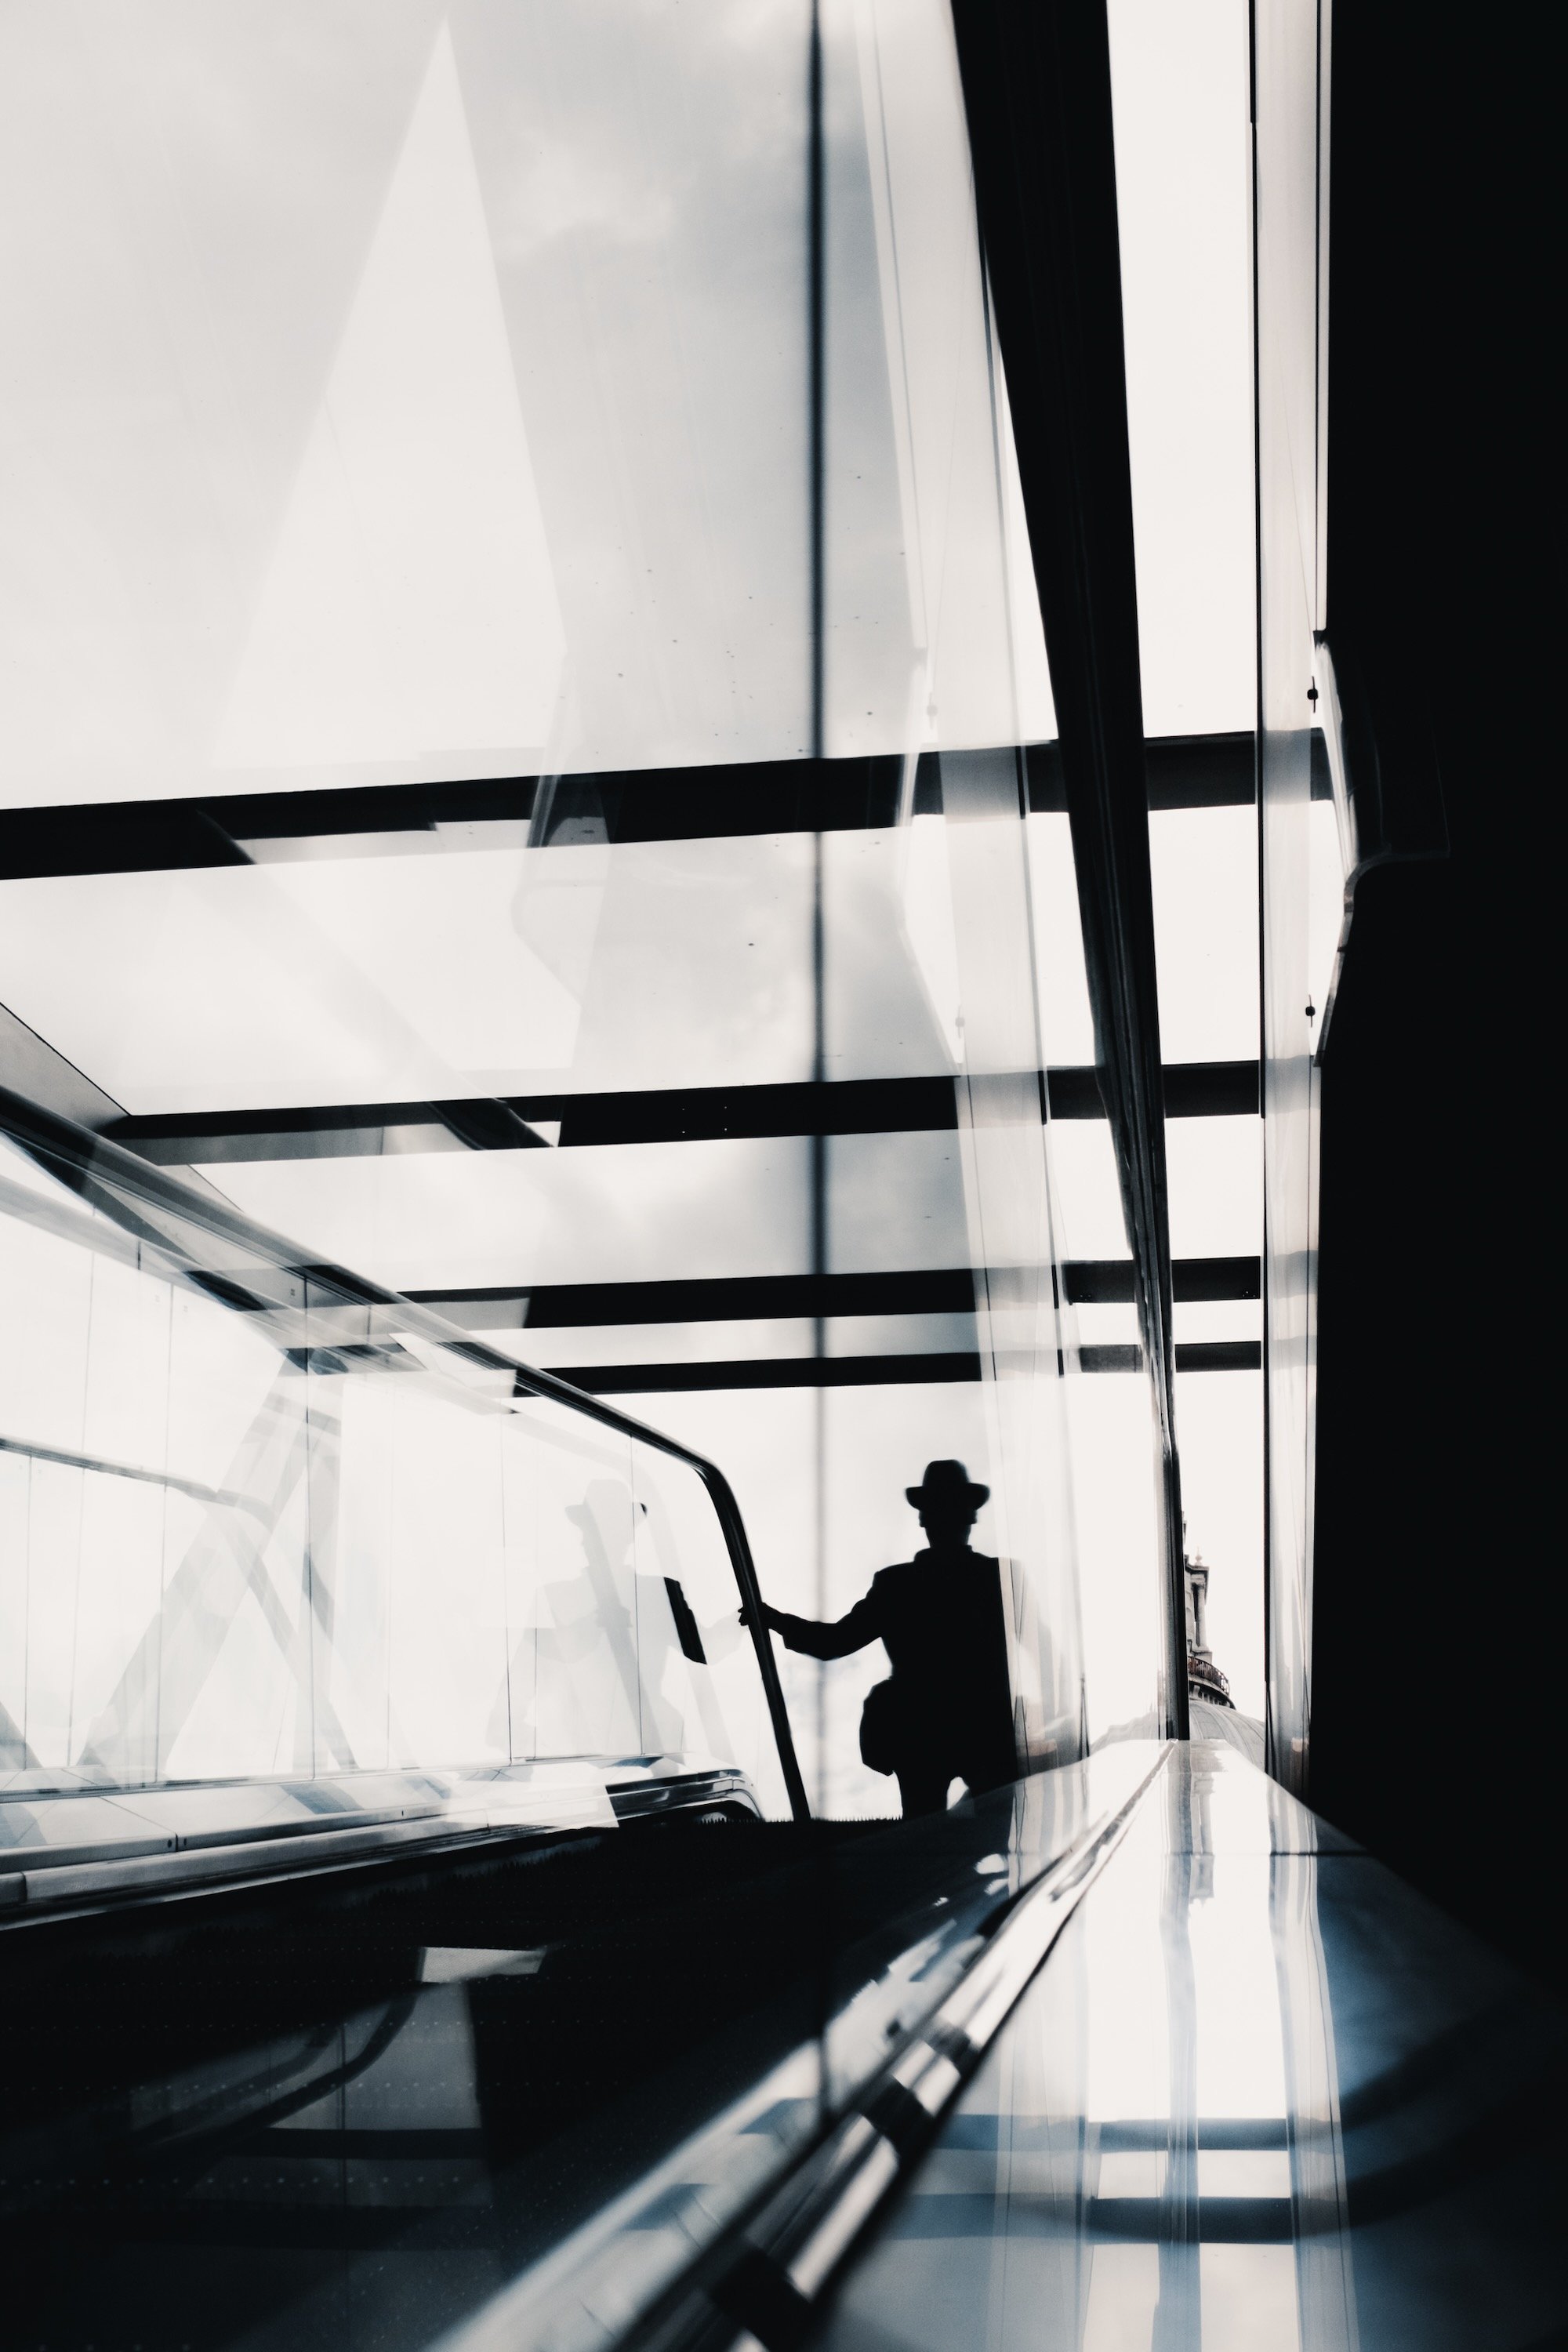
When shooting in harsh light, shoot into the shadow. In other words, make sure that the direction of the sun is within a 180 degree radius in front of you, thus casting shadows towards you. This will ensure there is still some depth to the image and it will look more pleasing.
Don’t fight contrast
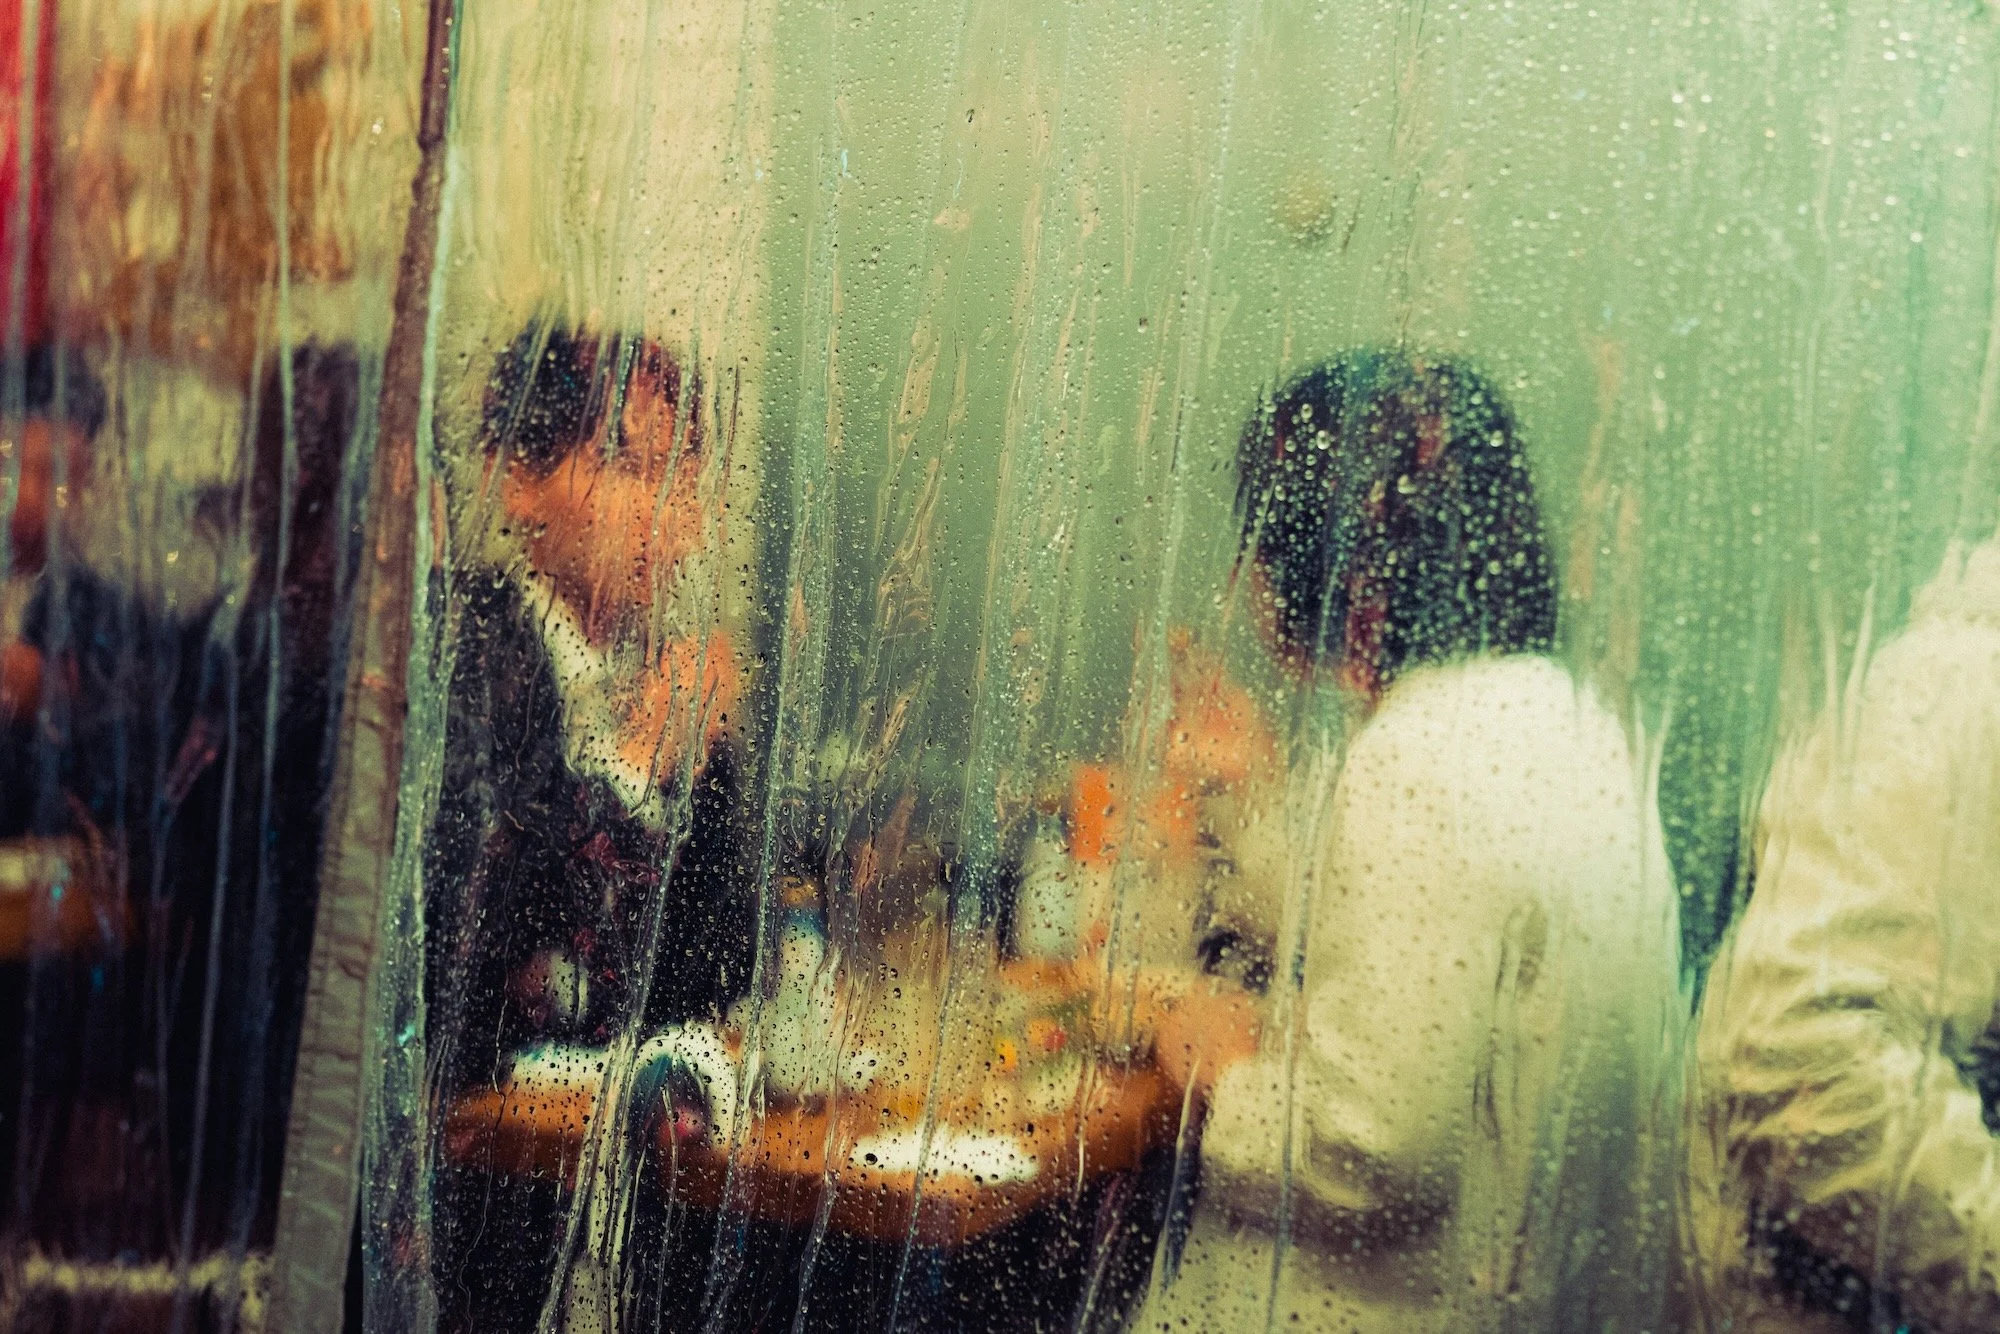
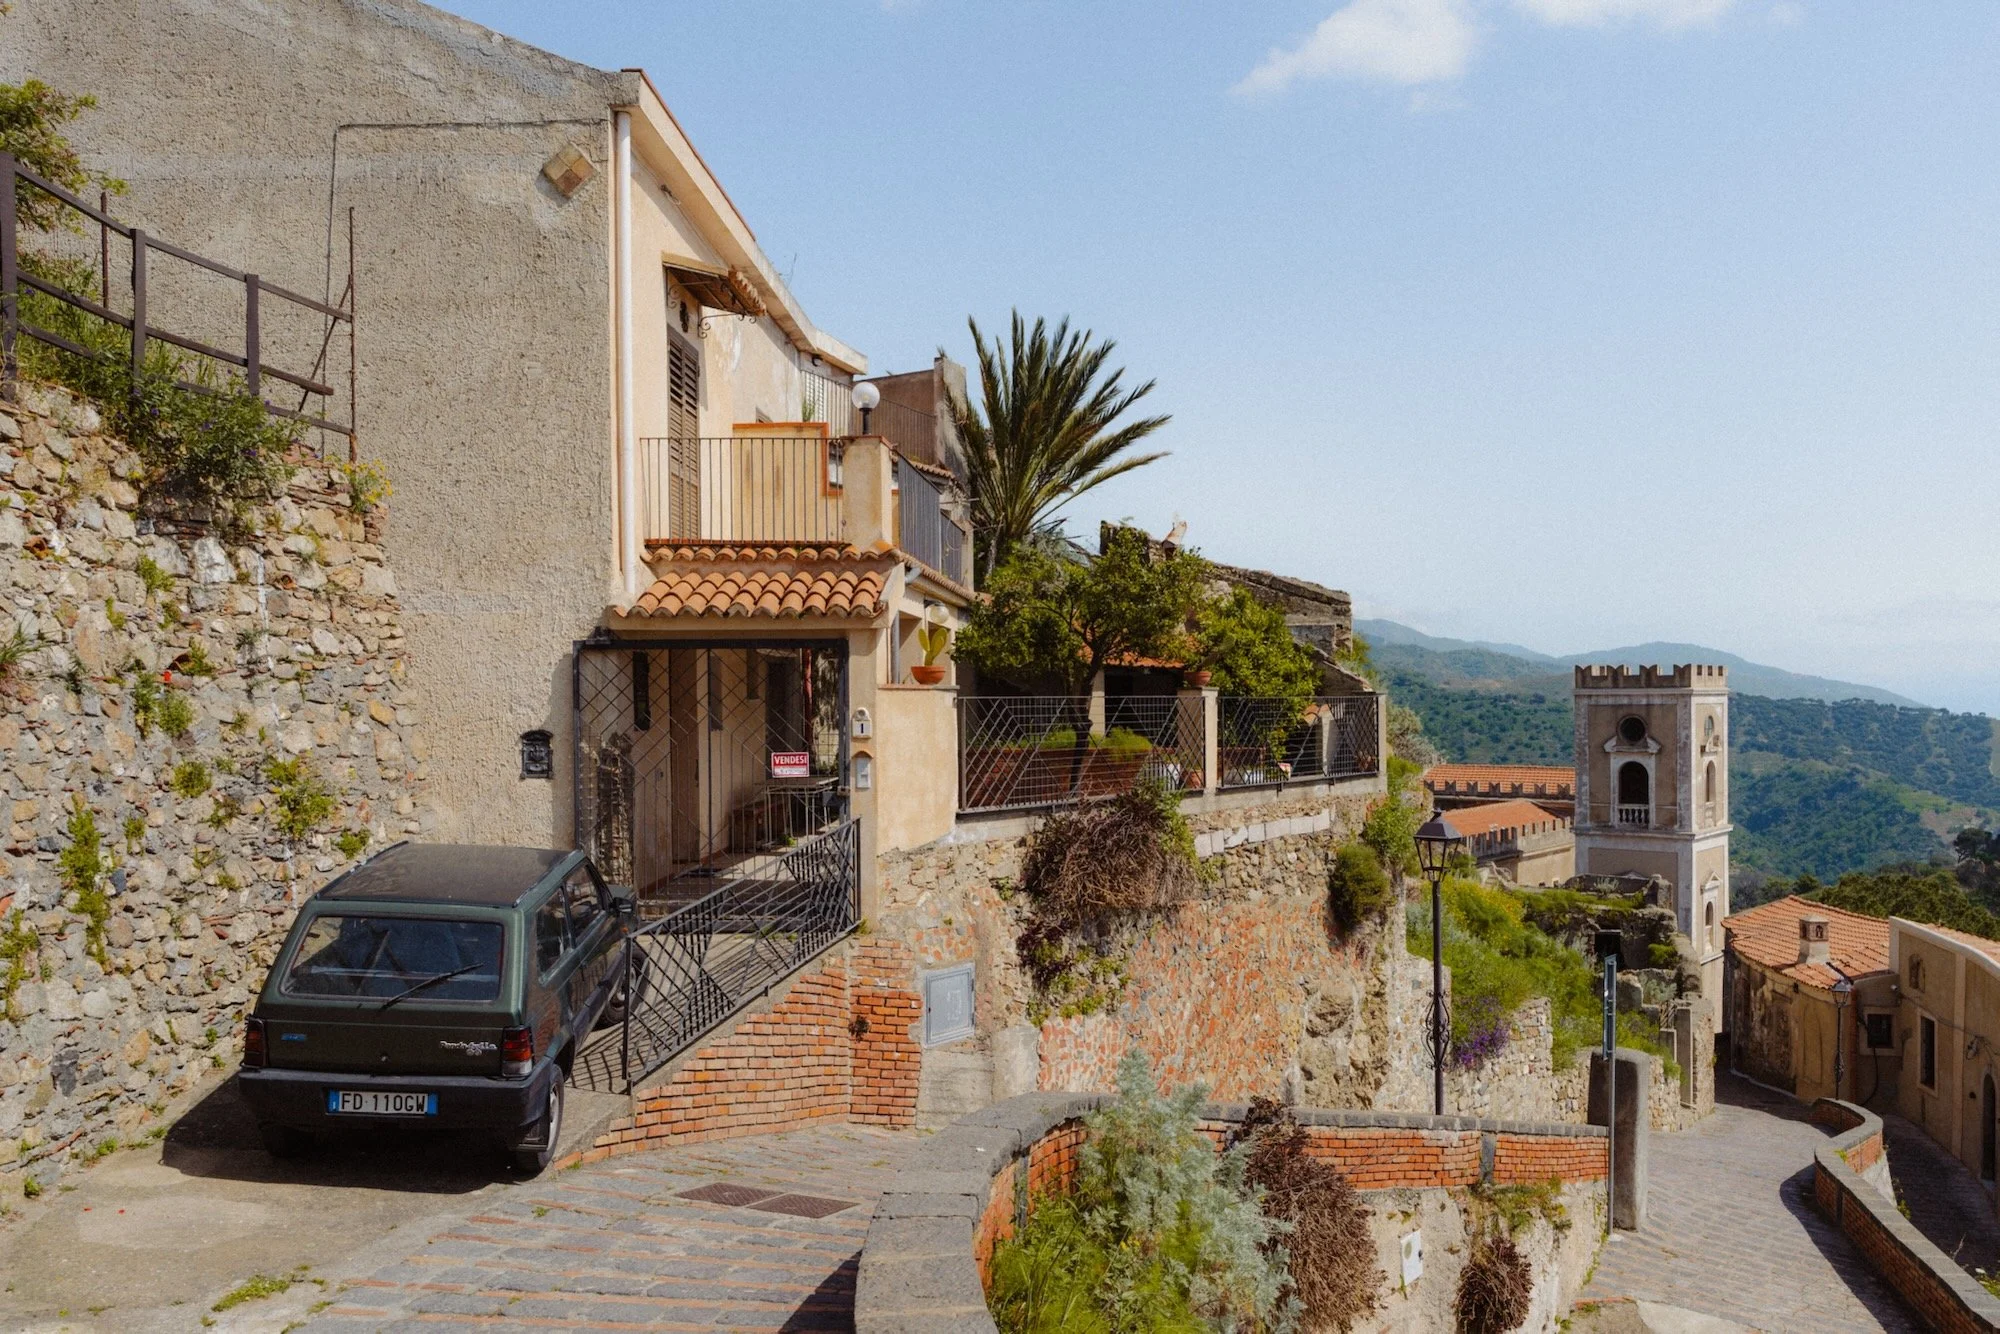
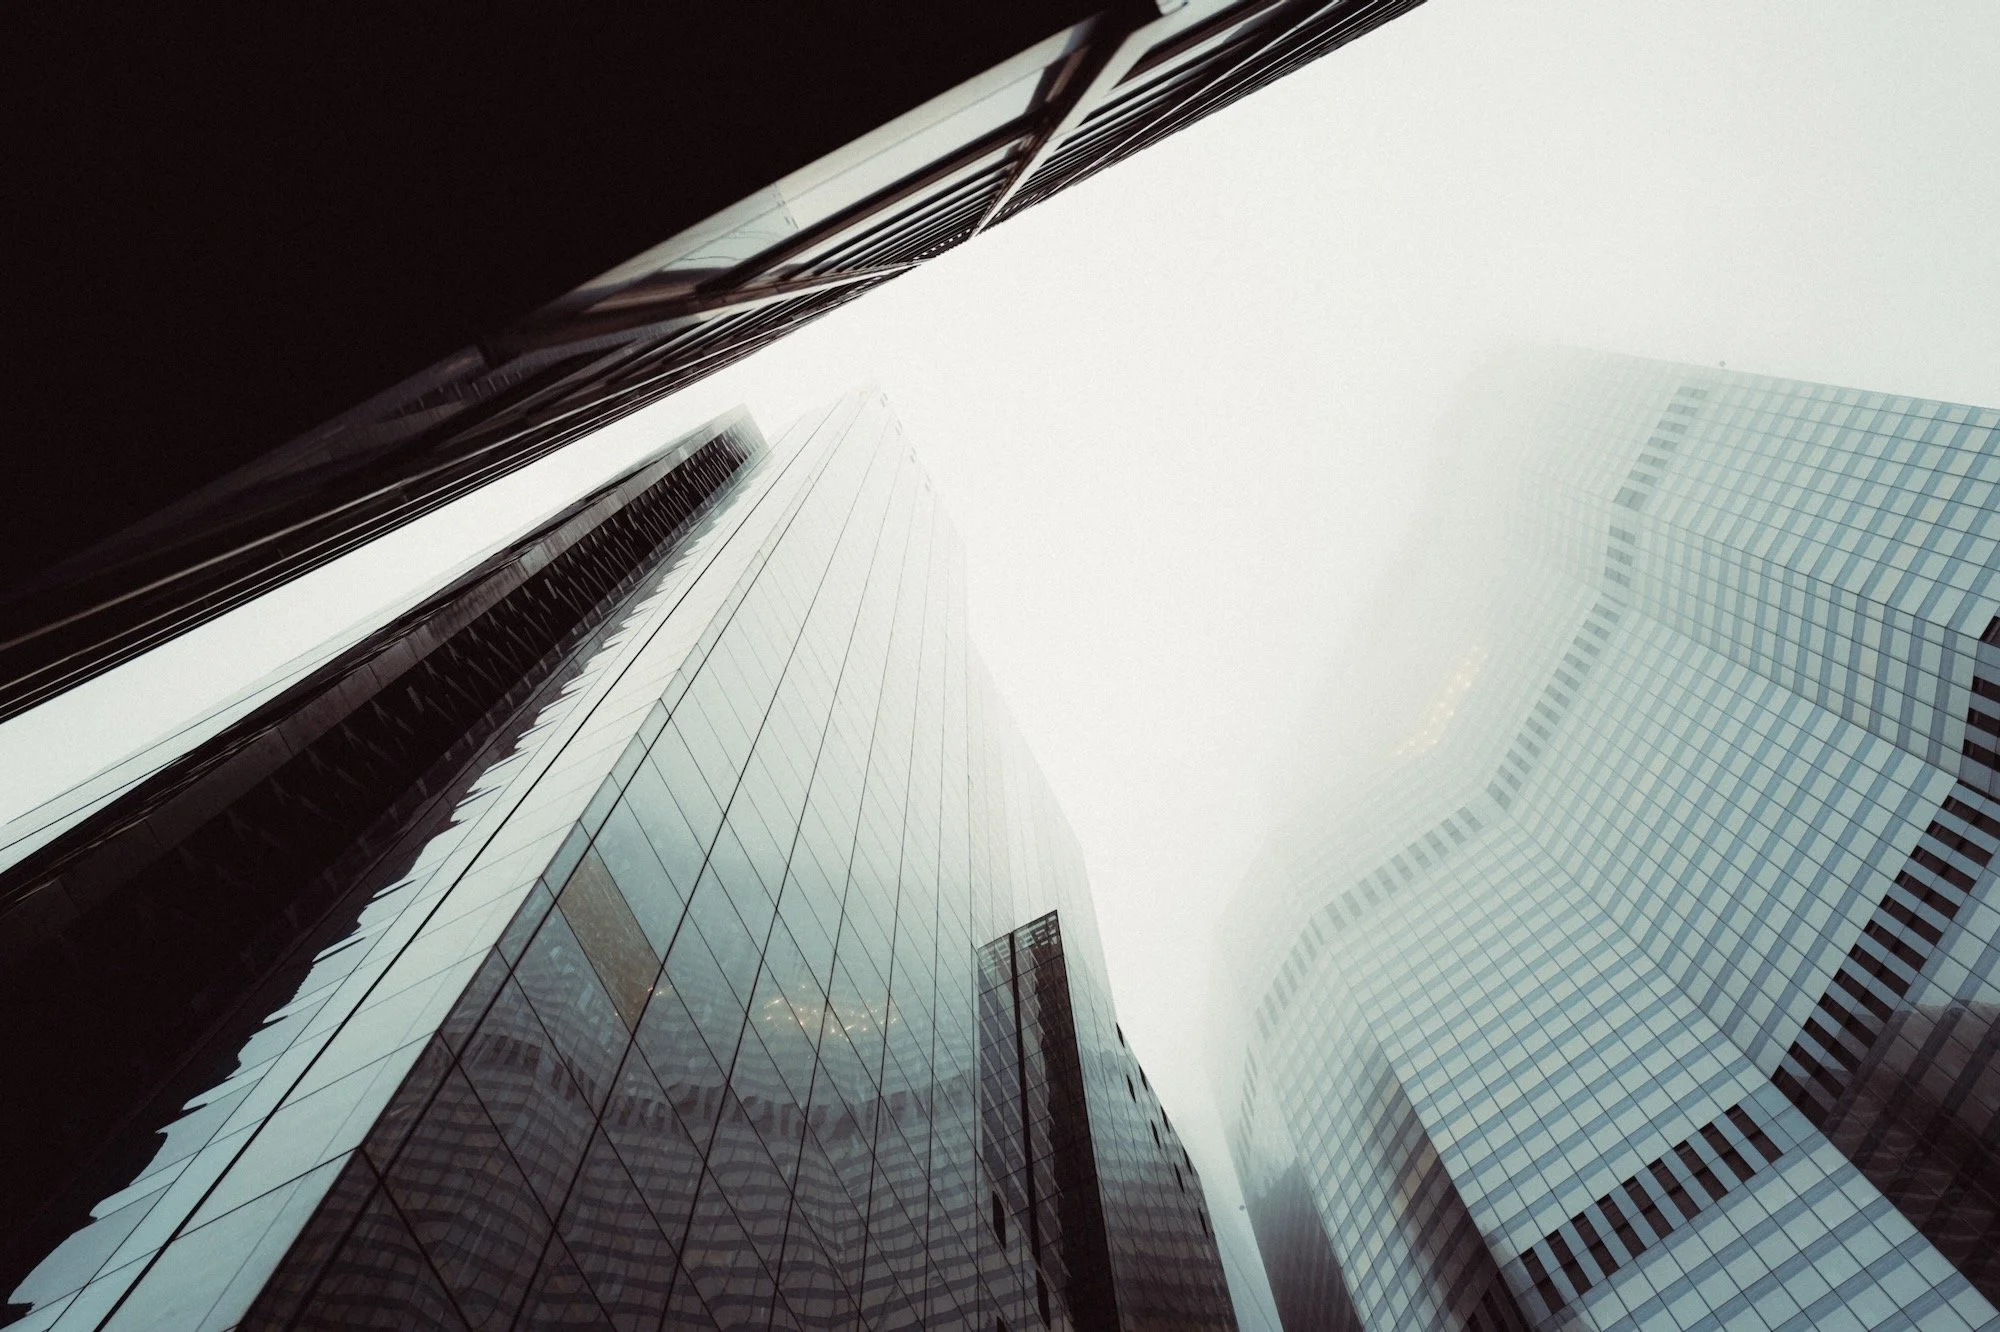
On a sunny day you will encounter two types of scenes, high contrast and low contrast. A high contrast scene will typically occur when you’re in a dark place shooting into a brighter one, such as between buildings, in a market, or in a tunnel. These scenes will be punchy and naturally high contrast. You will encounter washed out and low contrast scenes typically reserved for open areas and nature.
High contrast

Low contrast
It might be tempting to showcase all the detail in a high contrast shot by making it low contrast, however this will only make it muddy and overly processed.
This looks natural
This doesn’t
Equally, it might be tempting to add contrast to a washed out scene in order to make it more punchy or vibrant, however all this will do is make it look crunchy and unnatural. Don’t fight the natural contrast of the photo, instead work with it.
This looks natural
This doesn’t
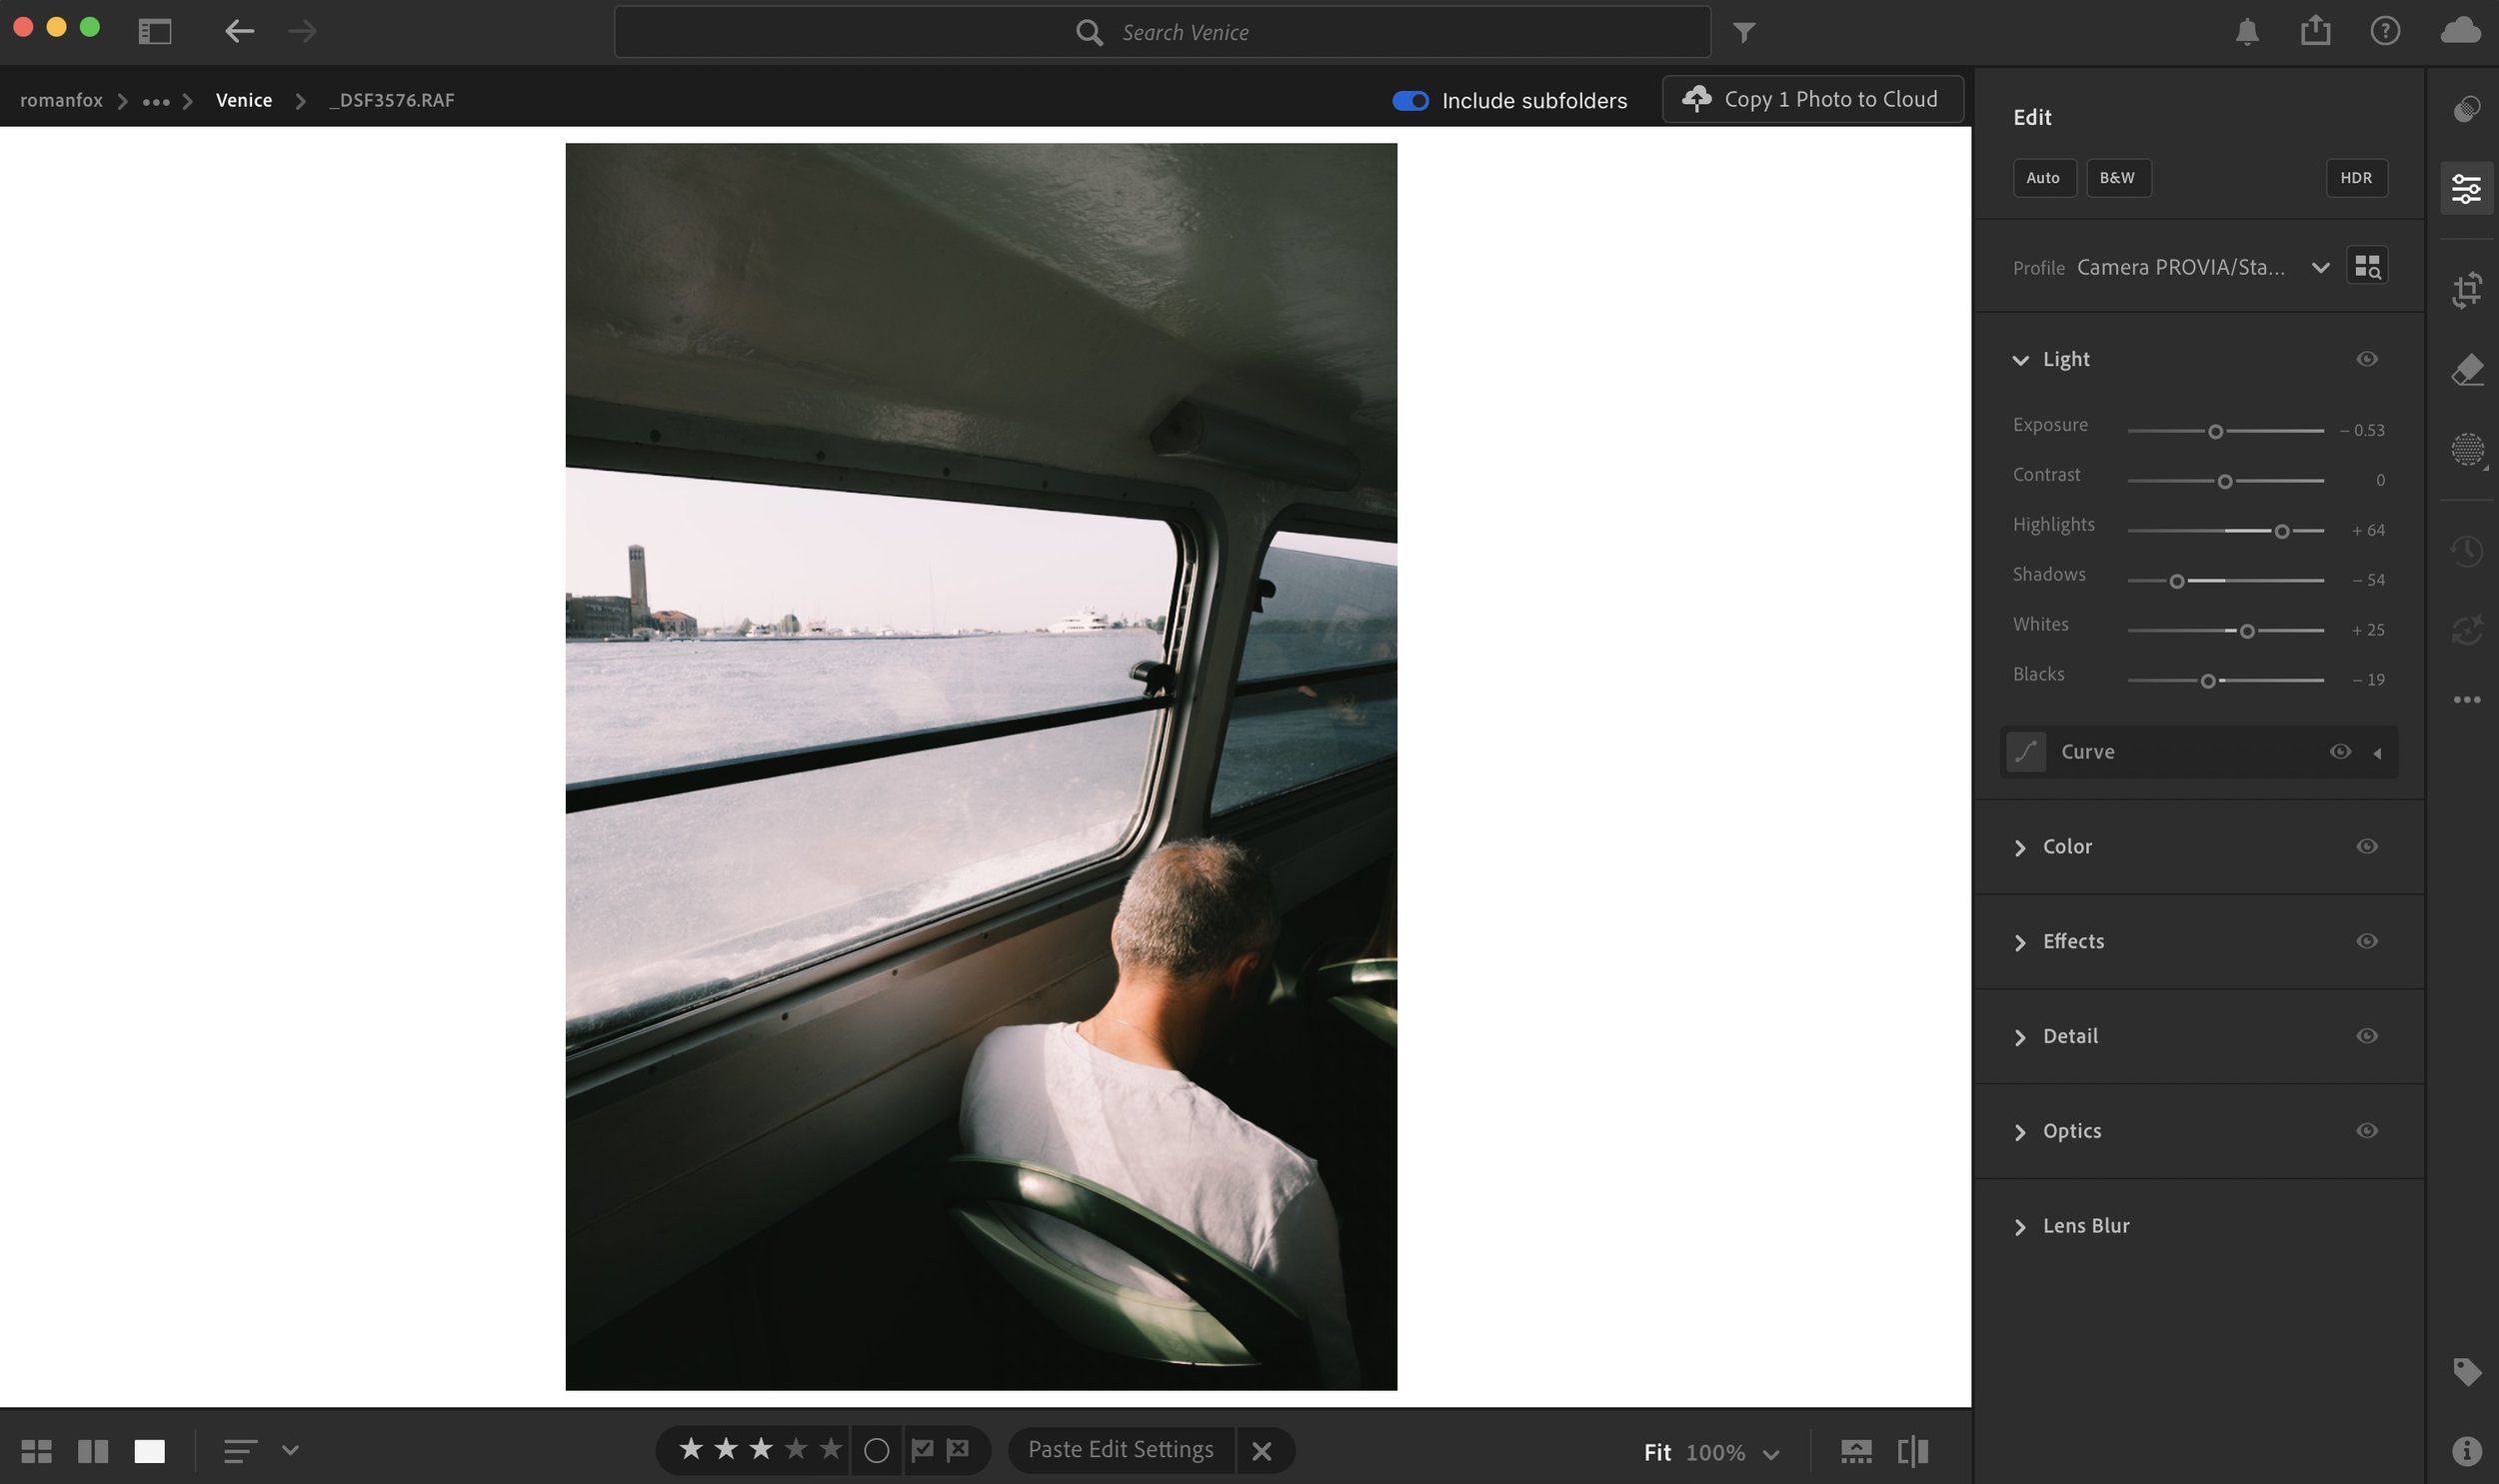
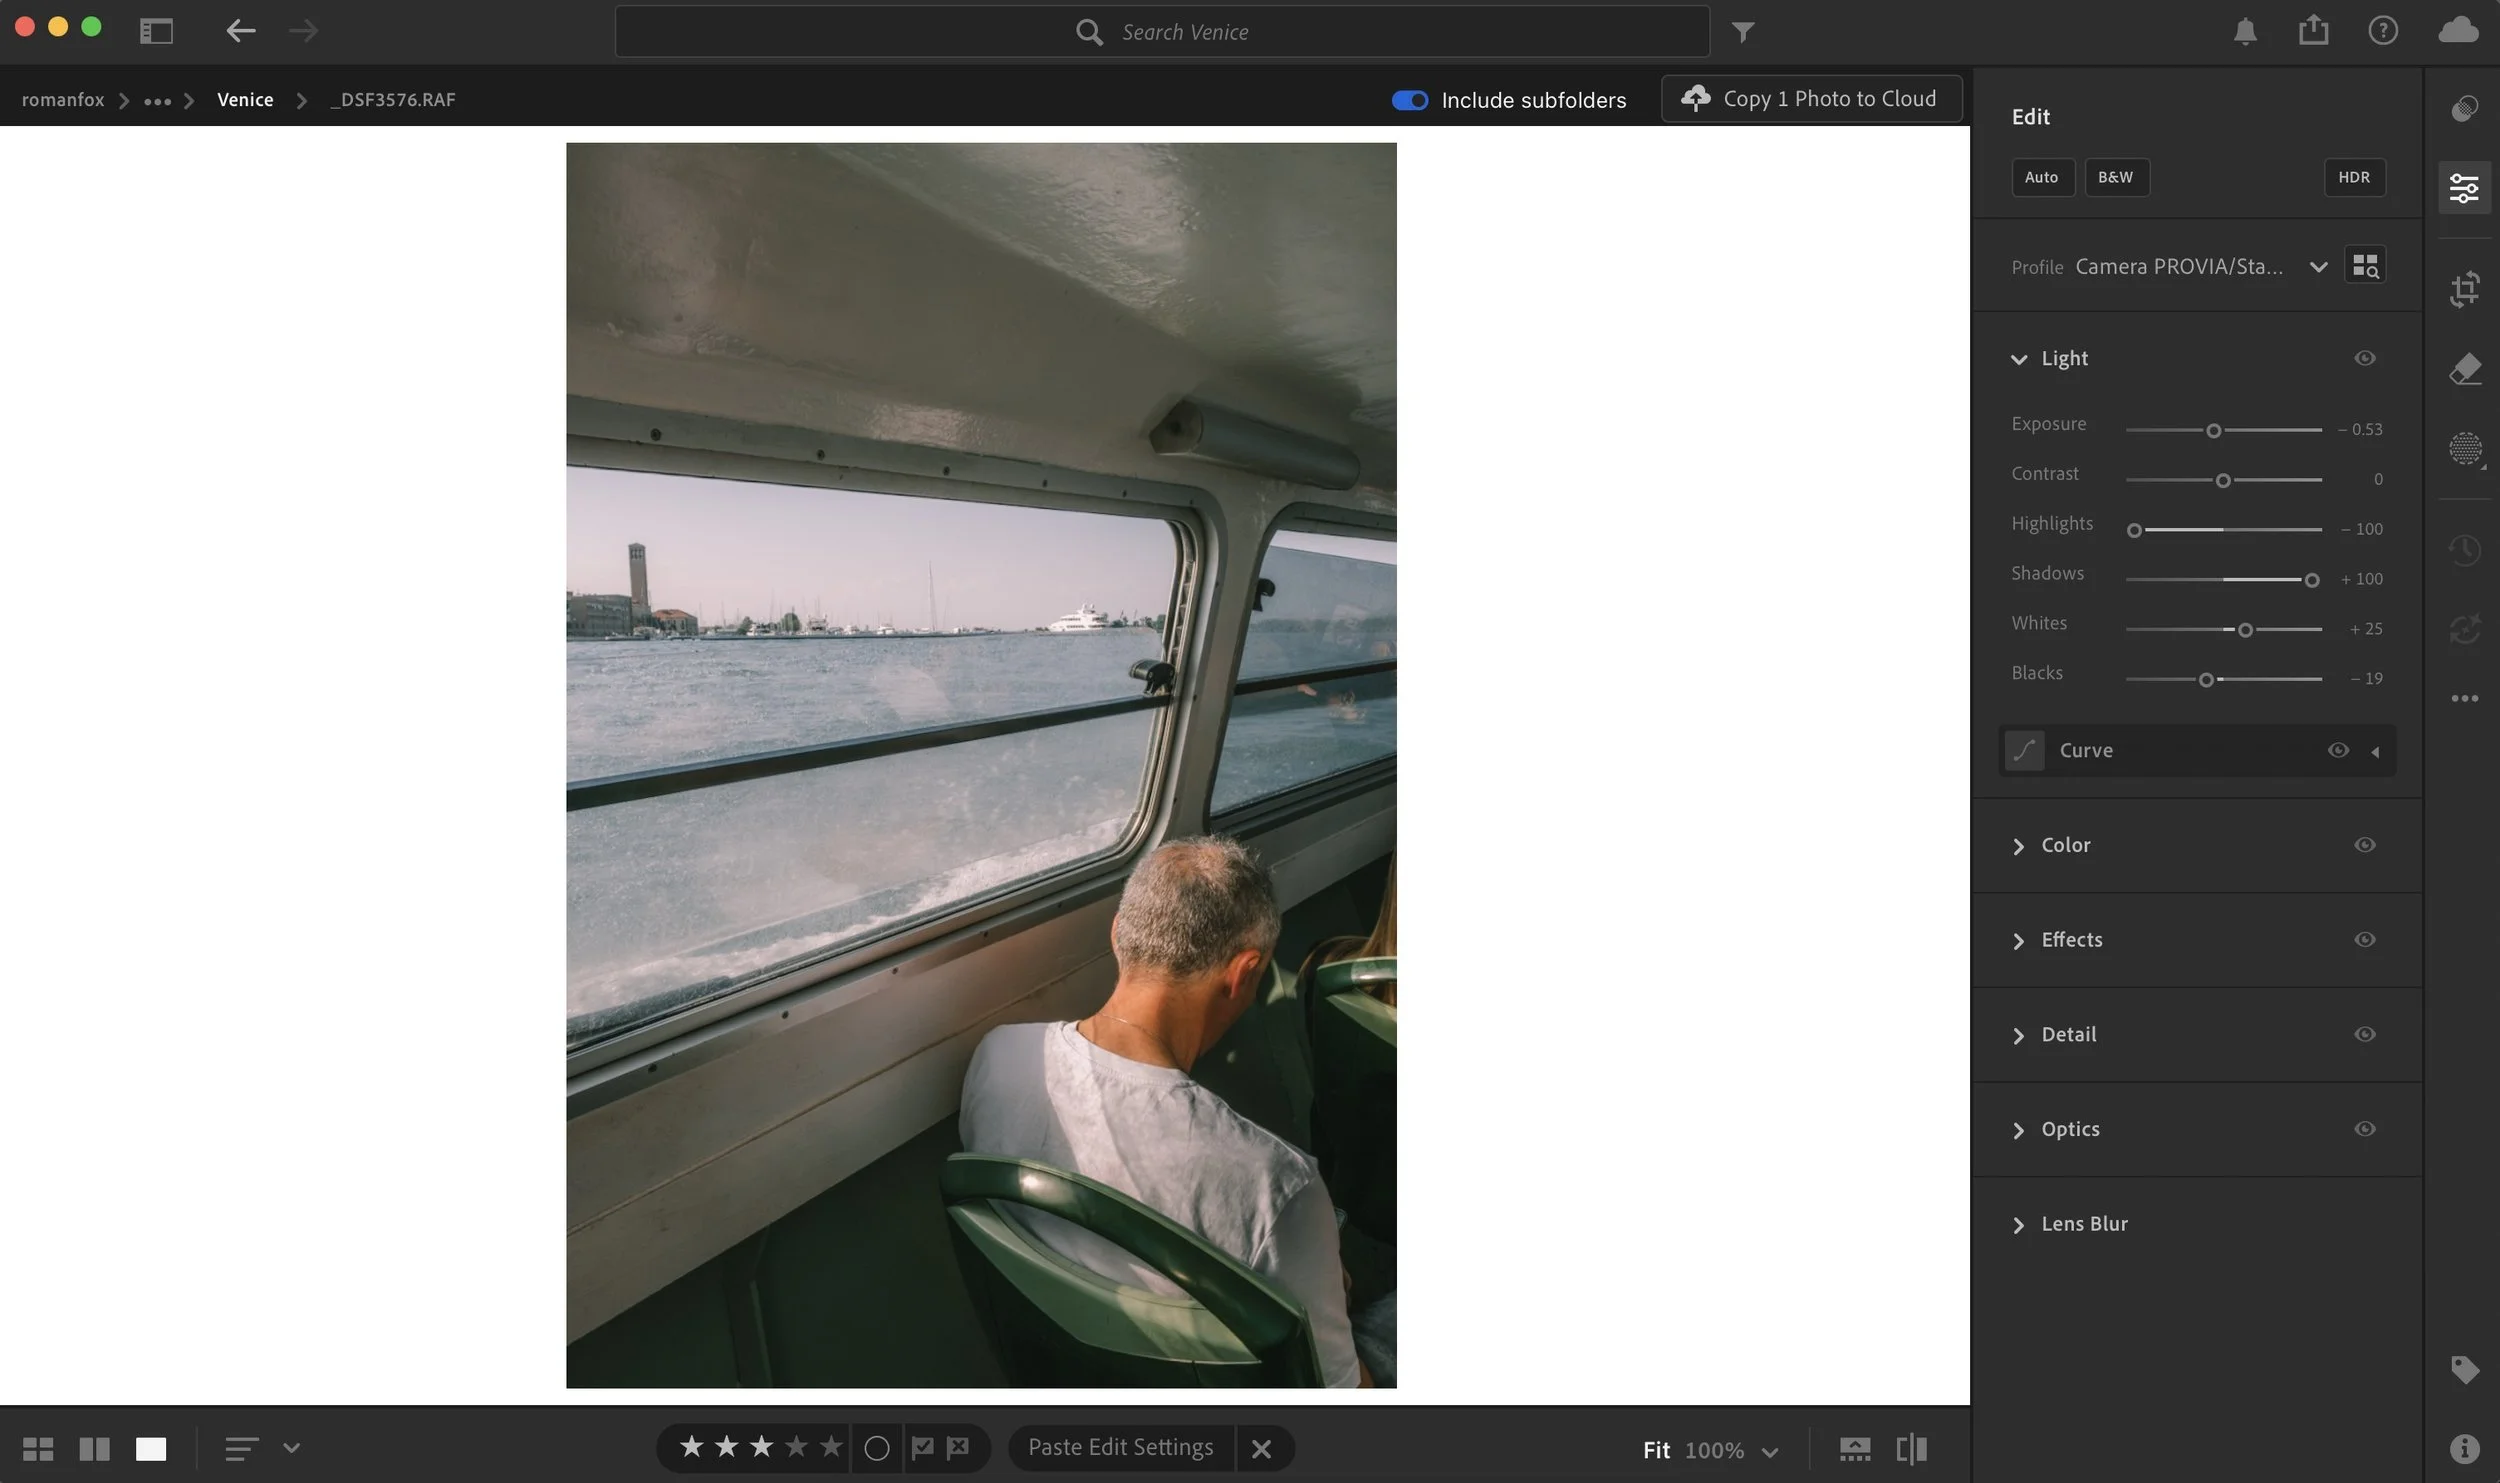
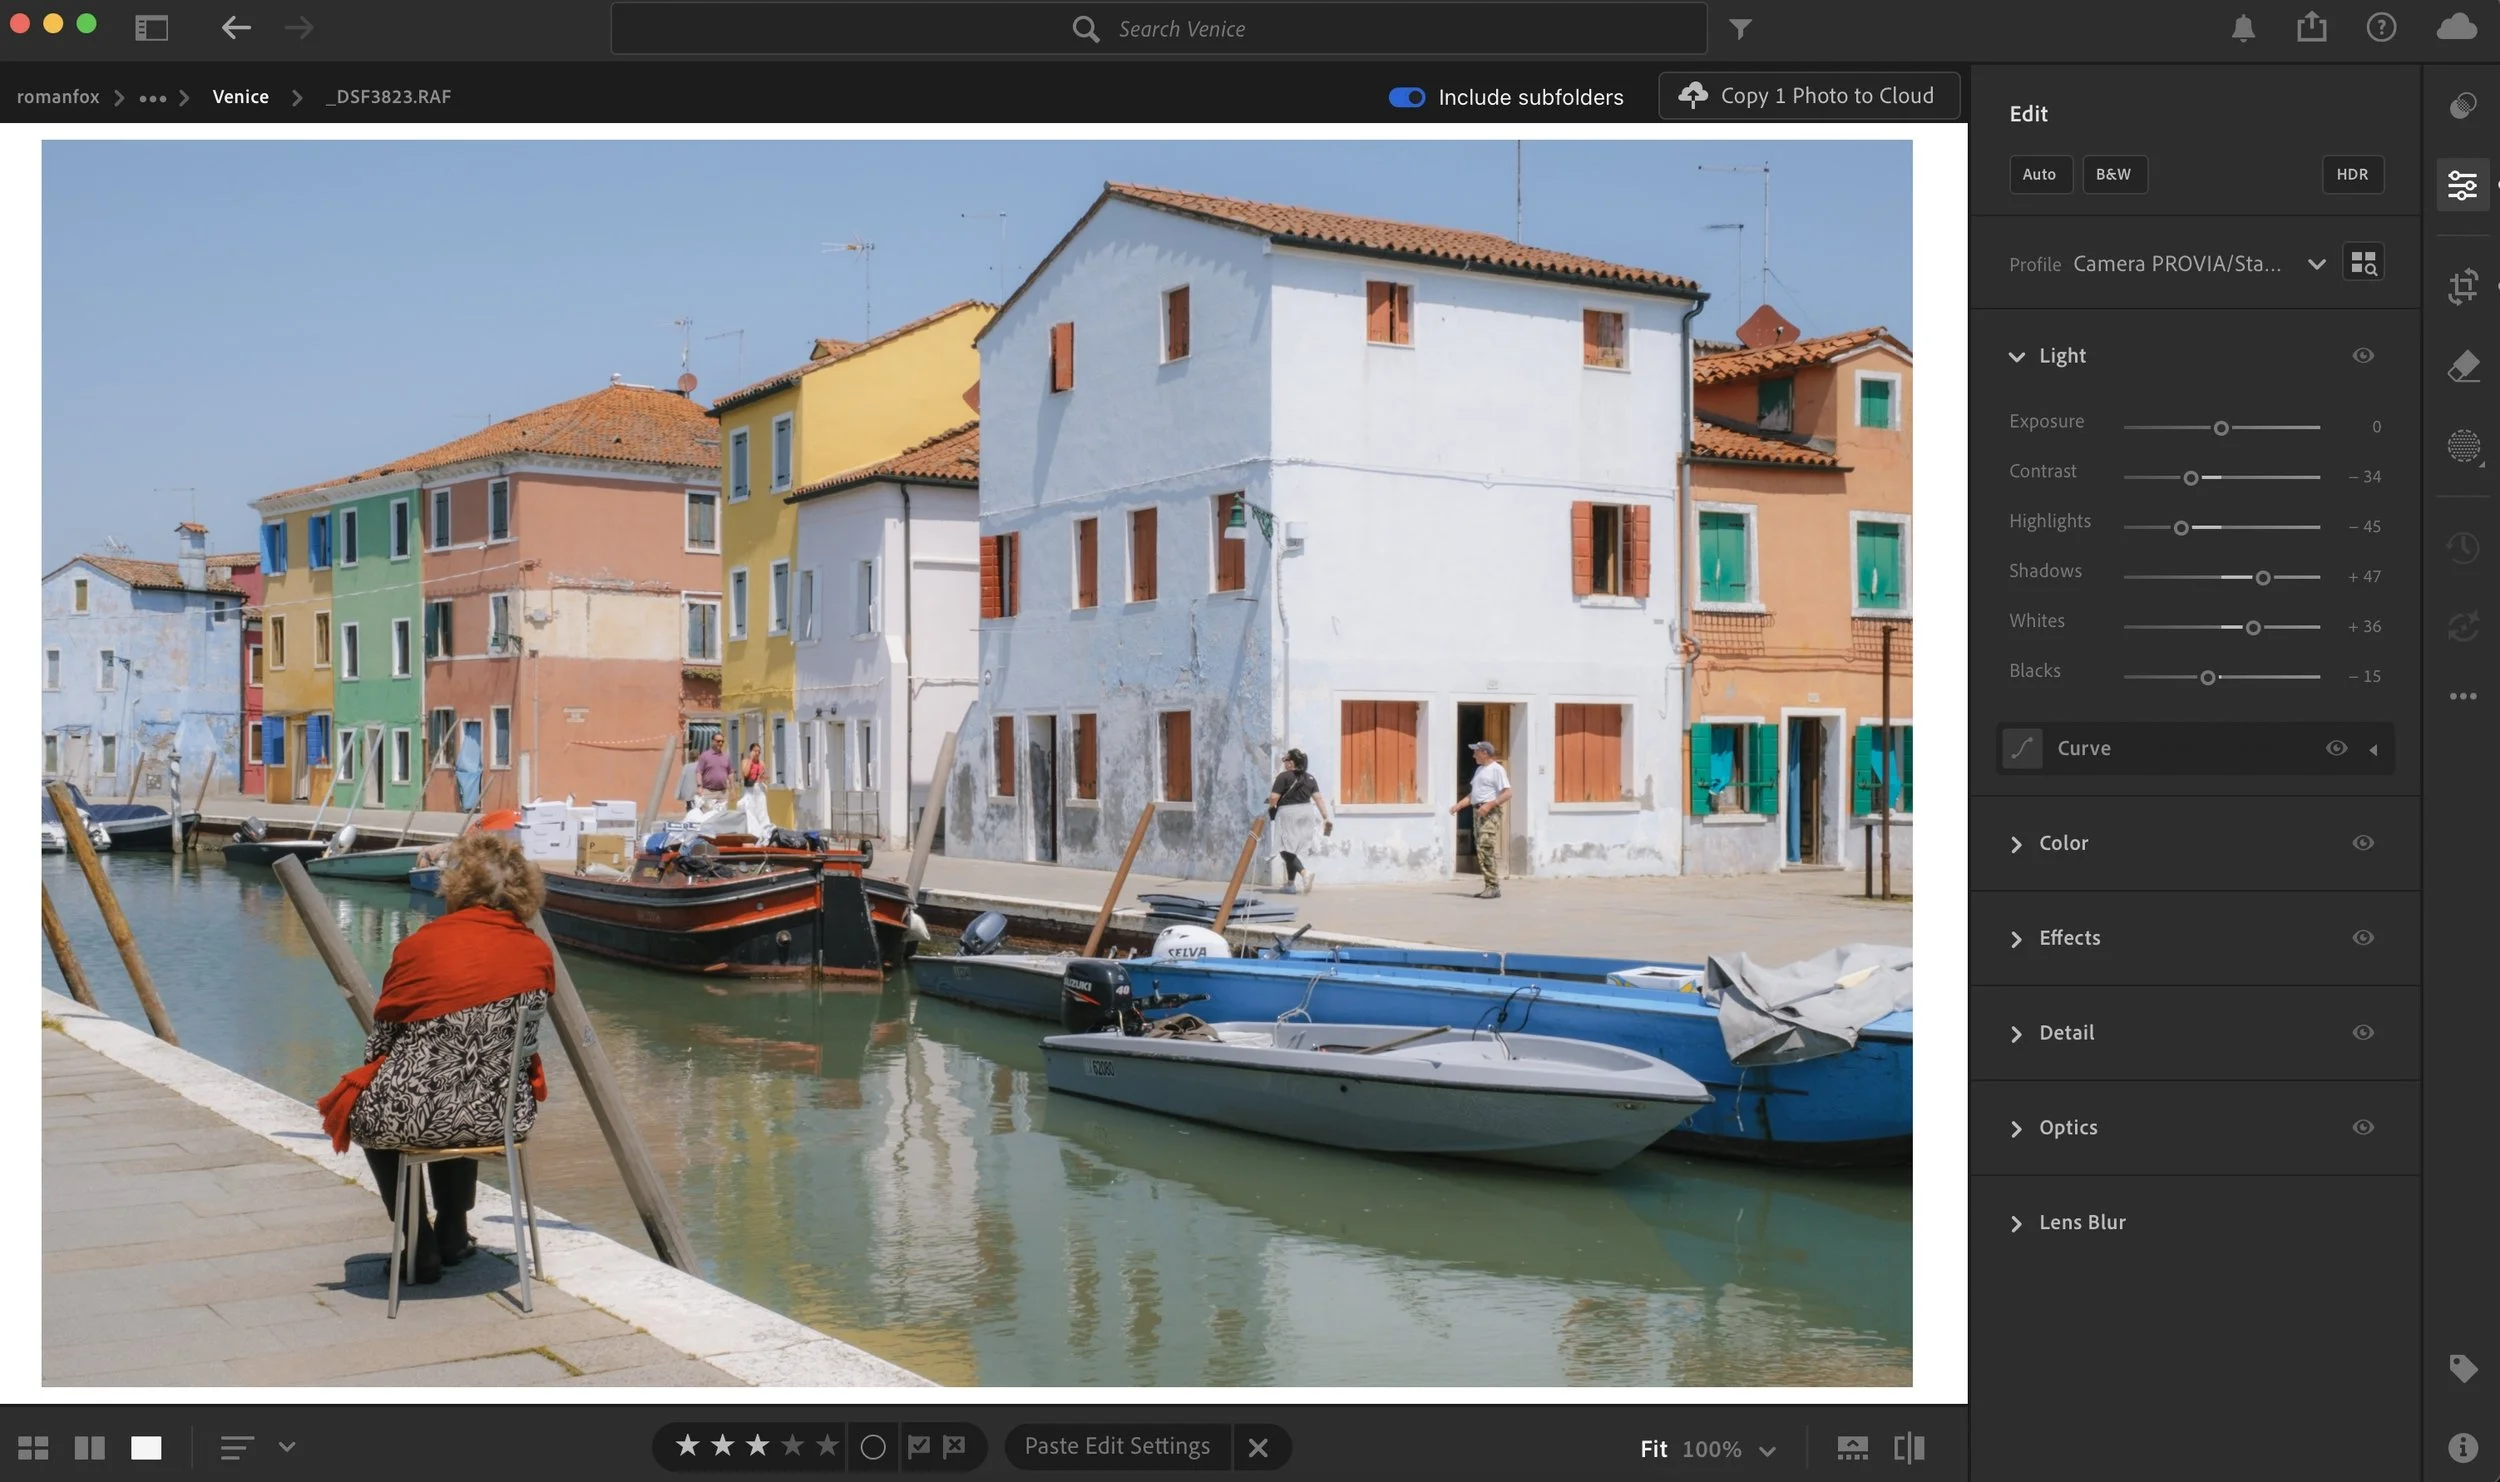
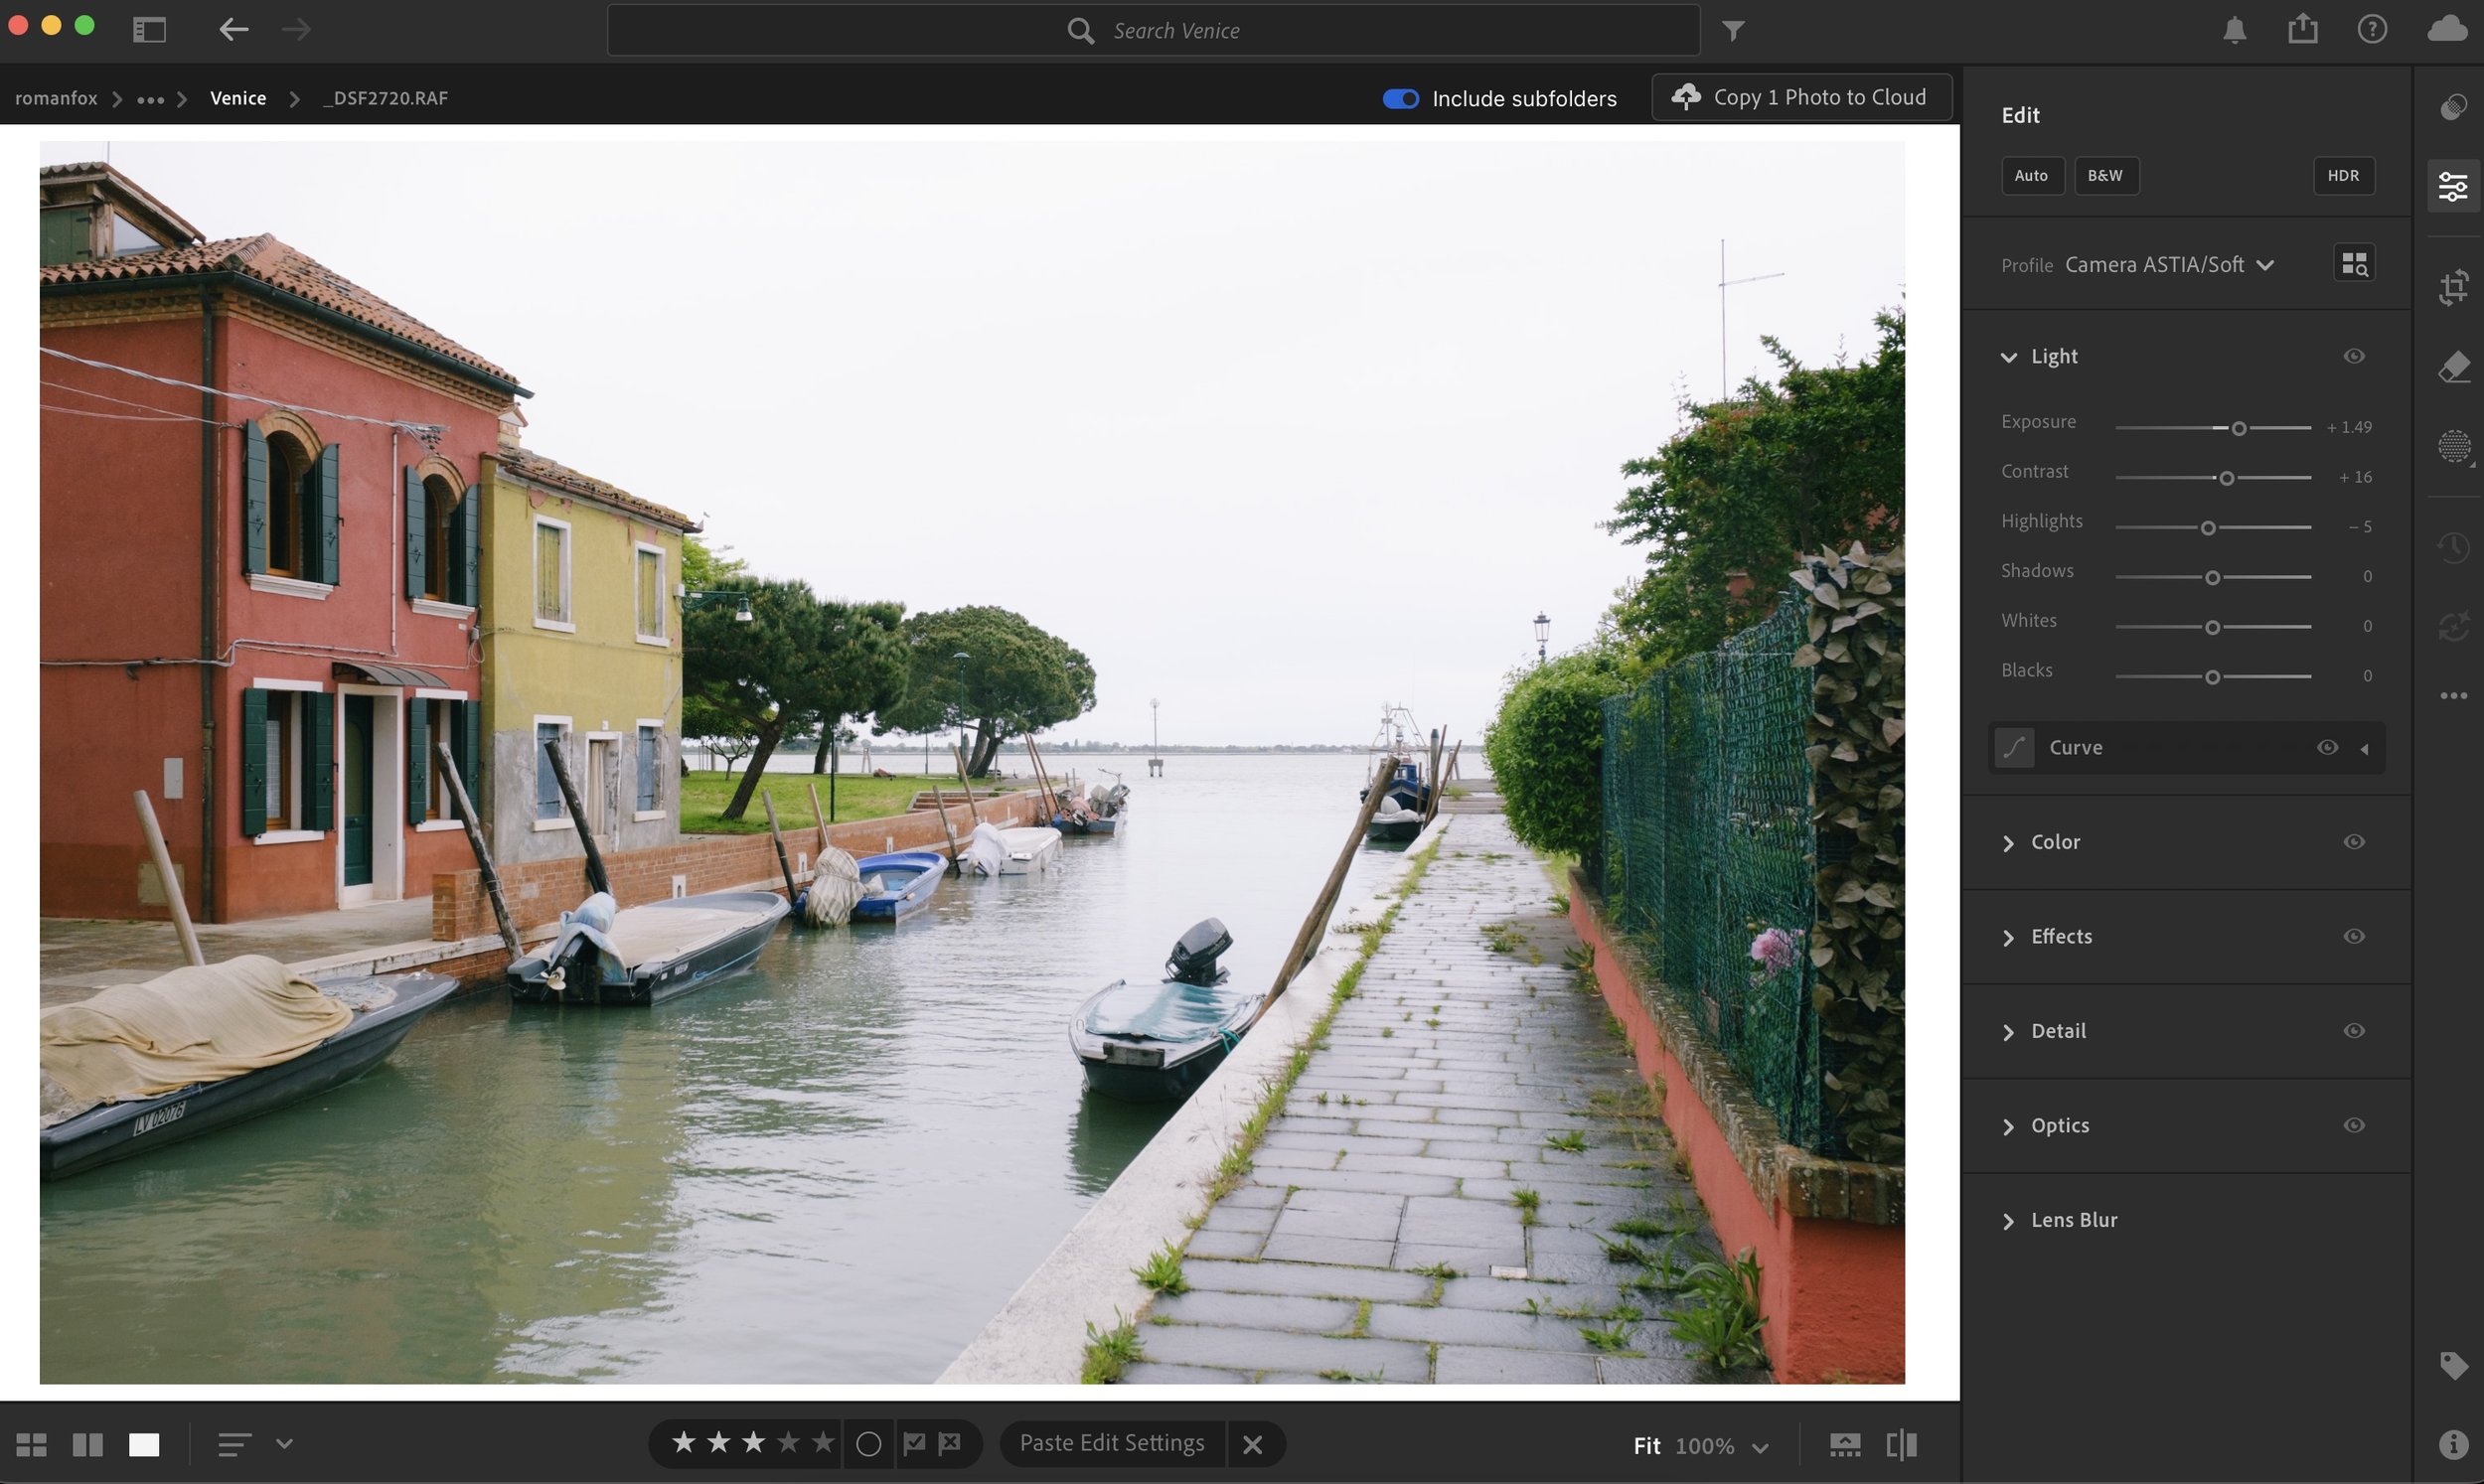
Exposure and white balance matter
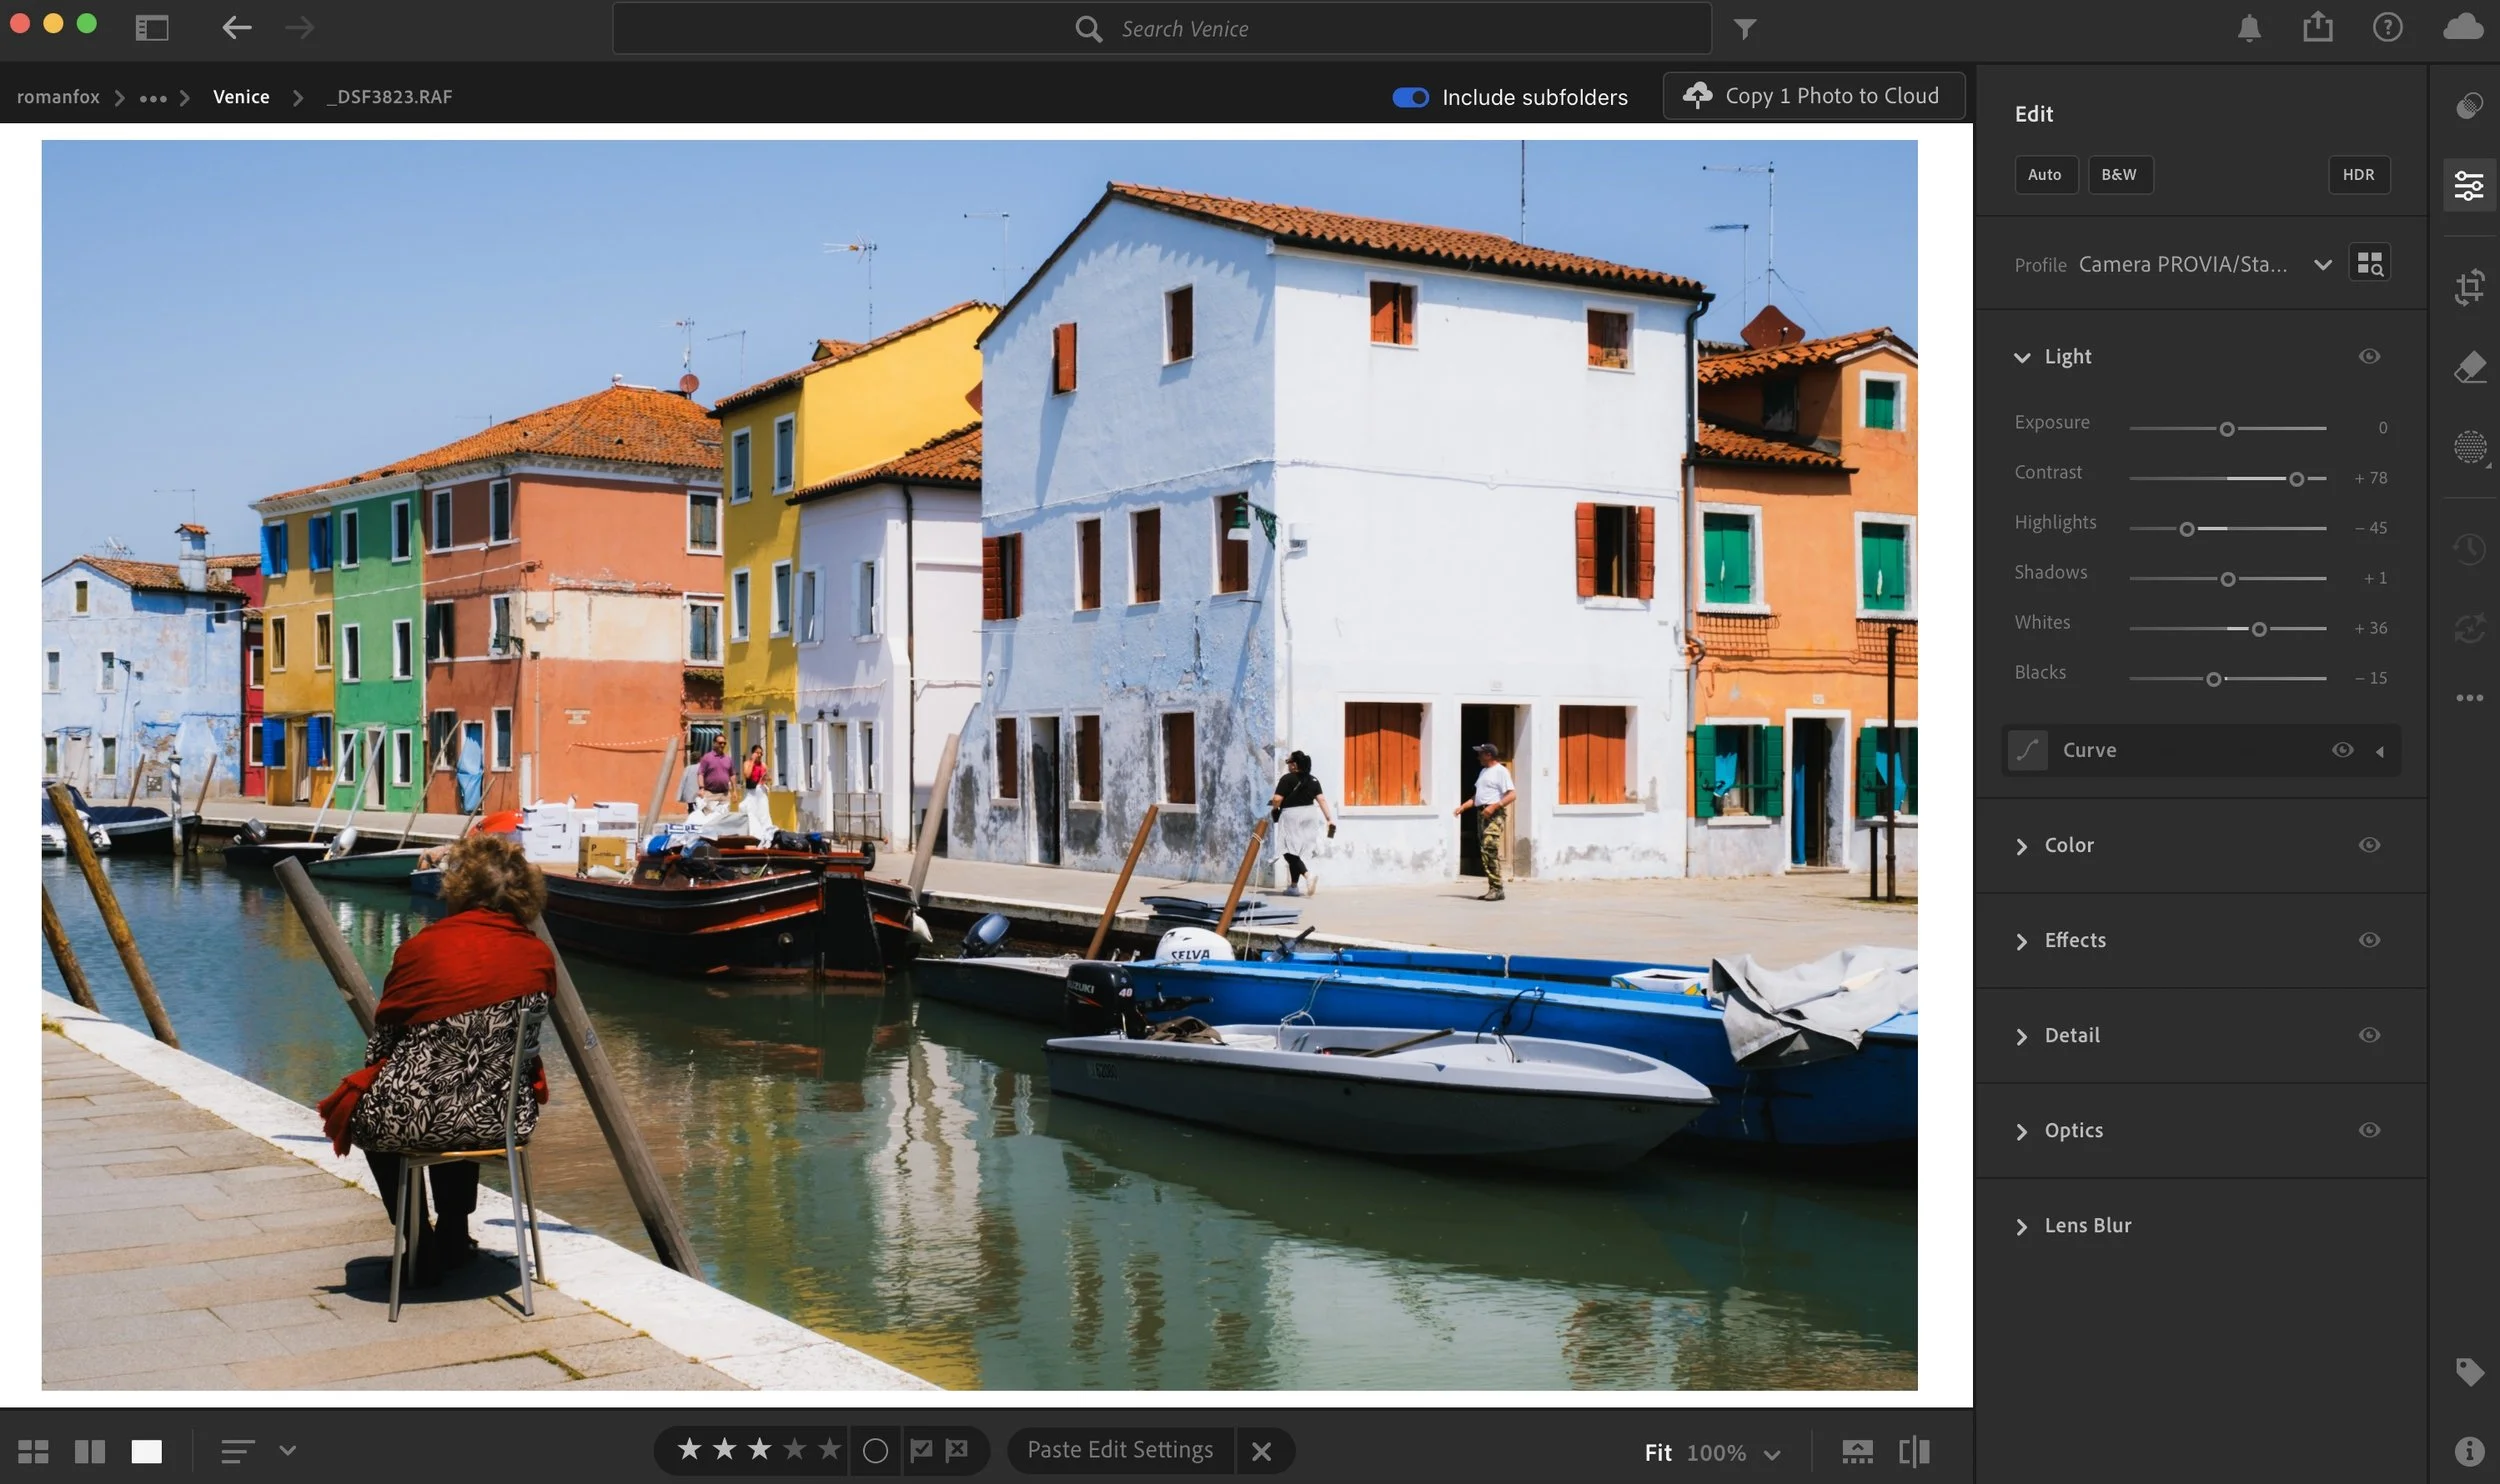
Exposure and white balance are the two biggest levers you have in terms of impact on the image, whether in camera or in editing. In many cases, cameras will tend to underexpose bright sunny days while also making the image seem a little cool. Is this wrong? No. The settings are technically correct, they just don’t match what your eyes saw or what we might perceive as a bright warm day. I often find increasing the exposure and warming up the image in editing makes a world of difference.
Straight out of camera - underexposed and cold
Boosted exposure and warmth make it feel more how it did when I was there
Fix locally
When shooting in harsh light, we often come across scenes with varying levels of exposure. A good example is a beach where the sand might be disproportionately brighter than the rest of the image. Equally, this can happen with an overpowering blue sky. Rather than wrestling with the whole image, try to fix issues locally. For example, with the beach photo, you can use a gradient mask in Lightroom to lower the exposure only in that part of the shot.
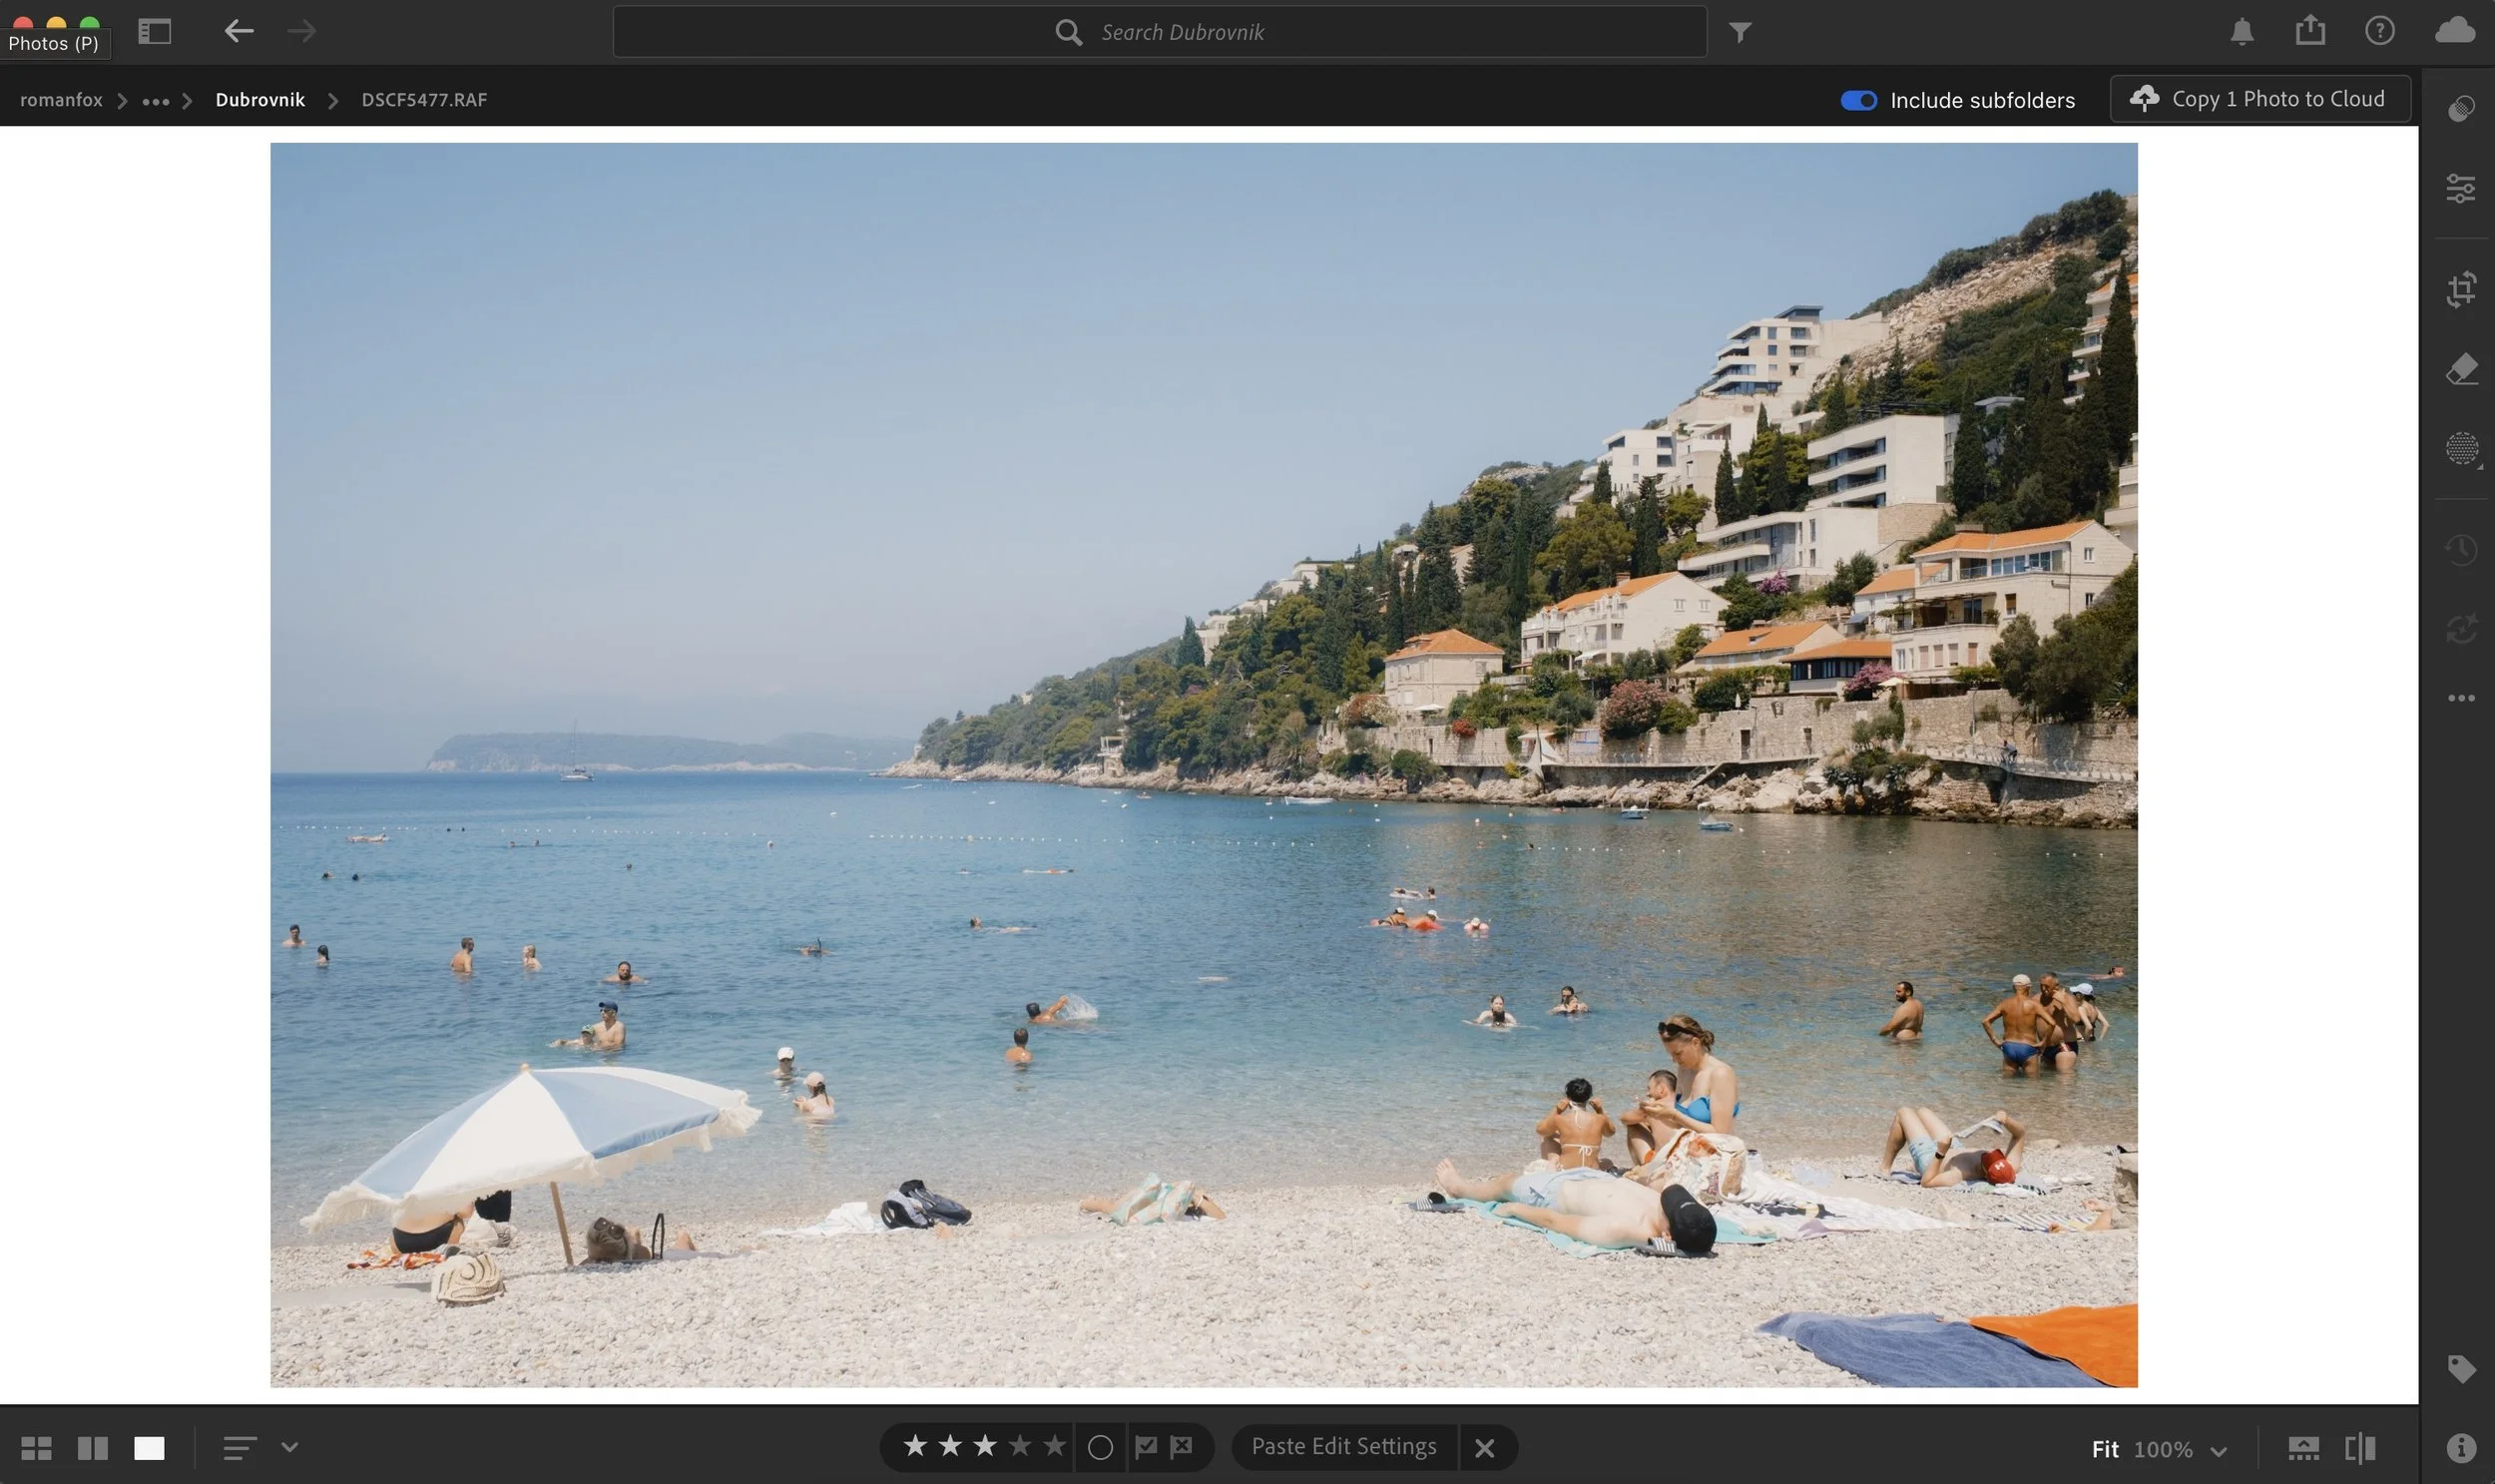
The scene is correctly exposed but the beach is too bright
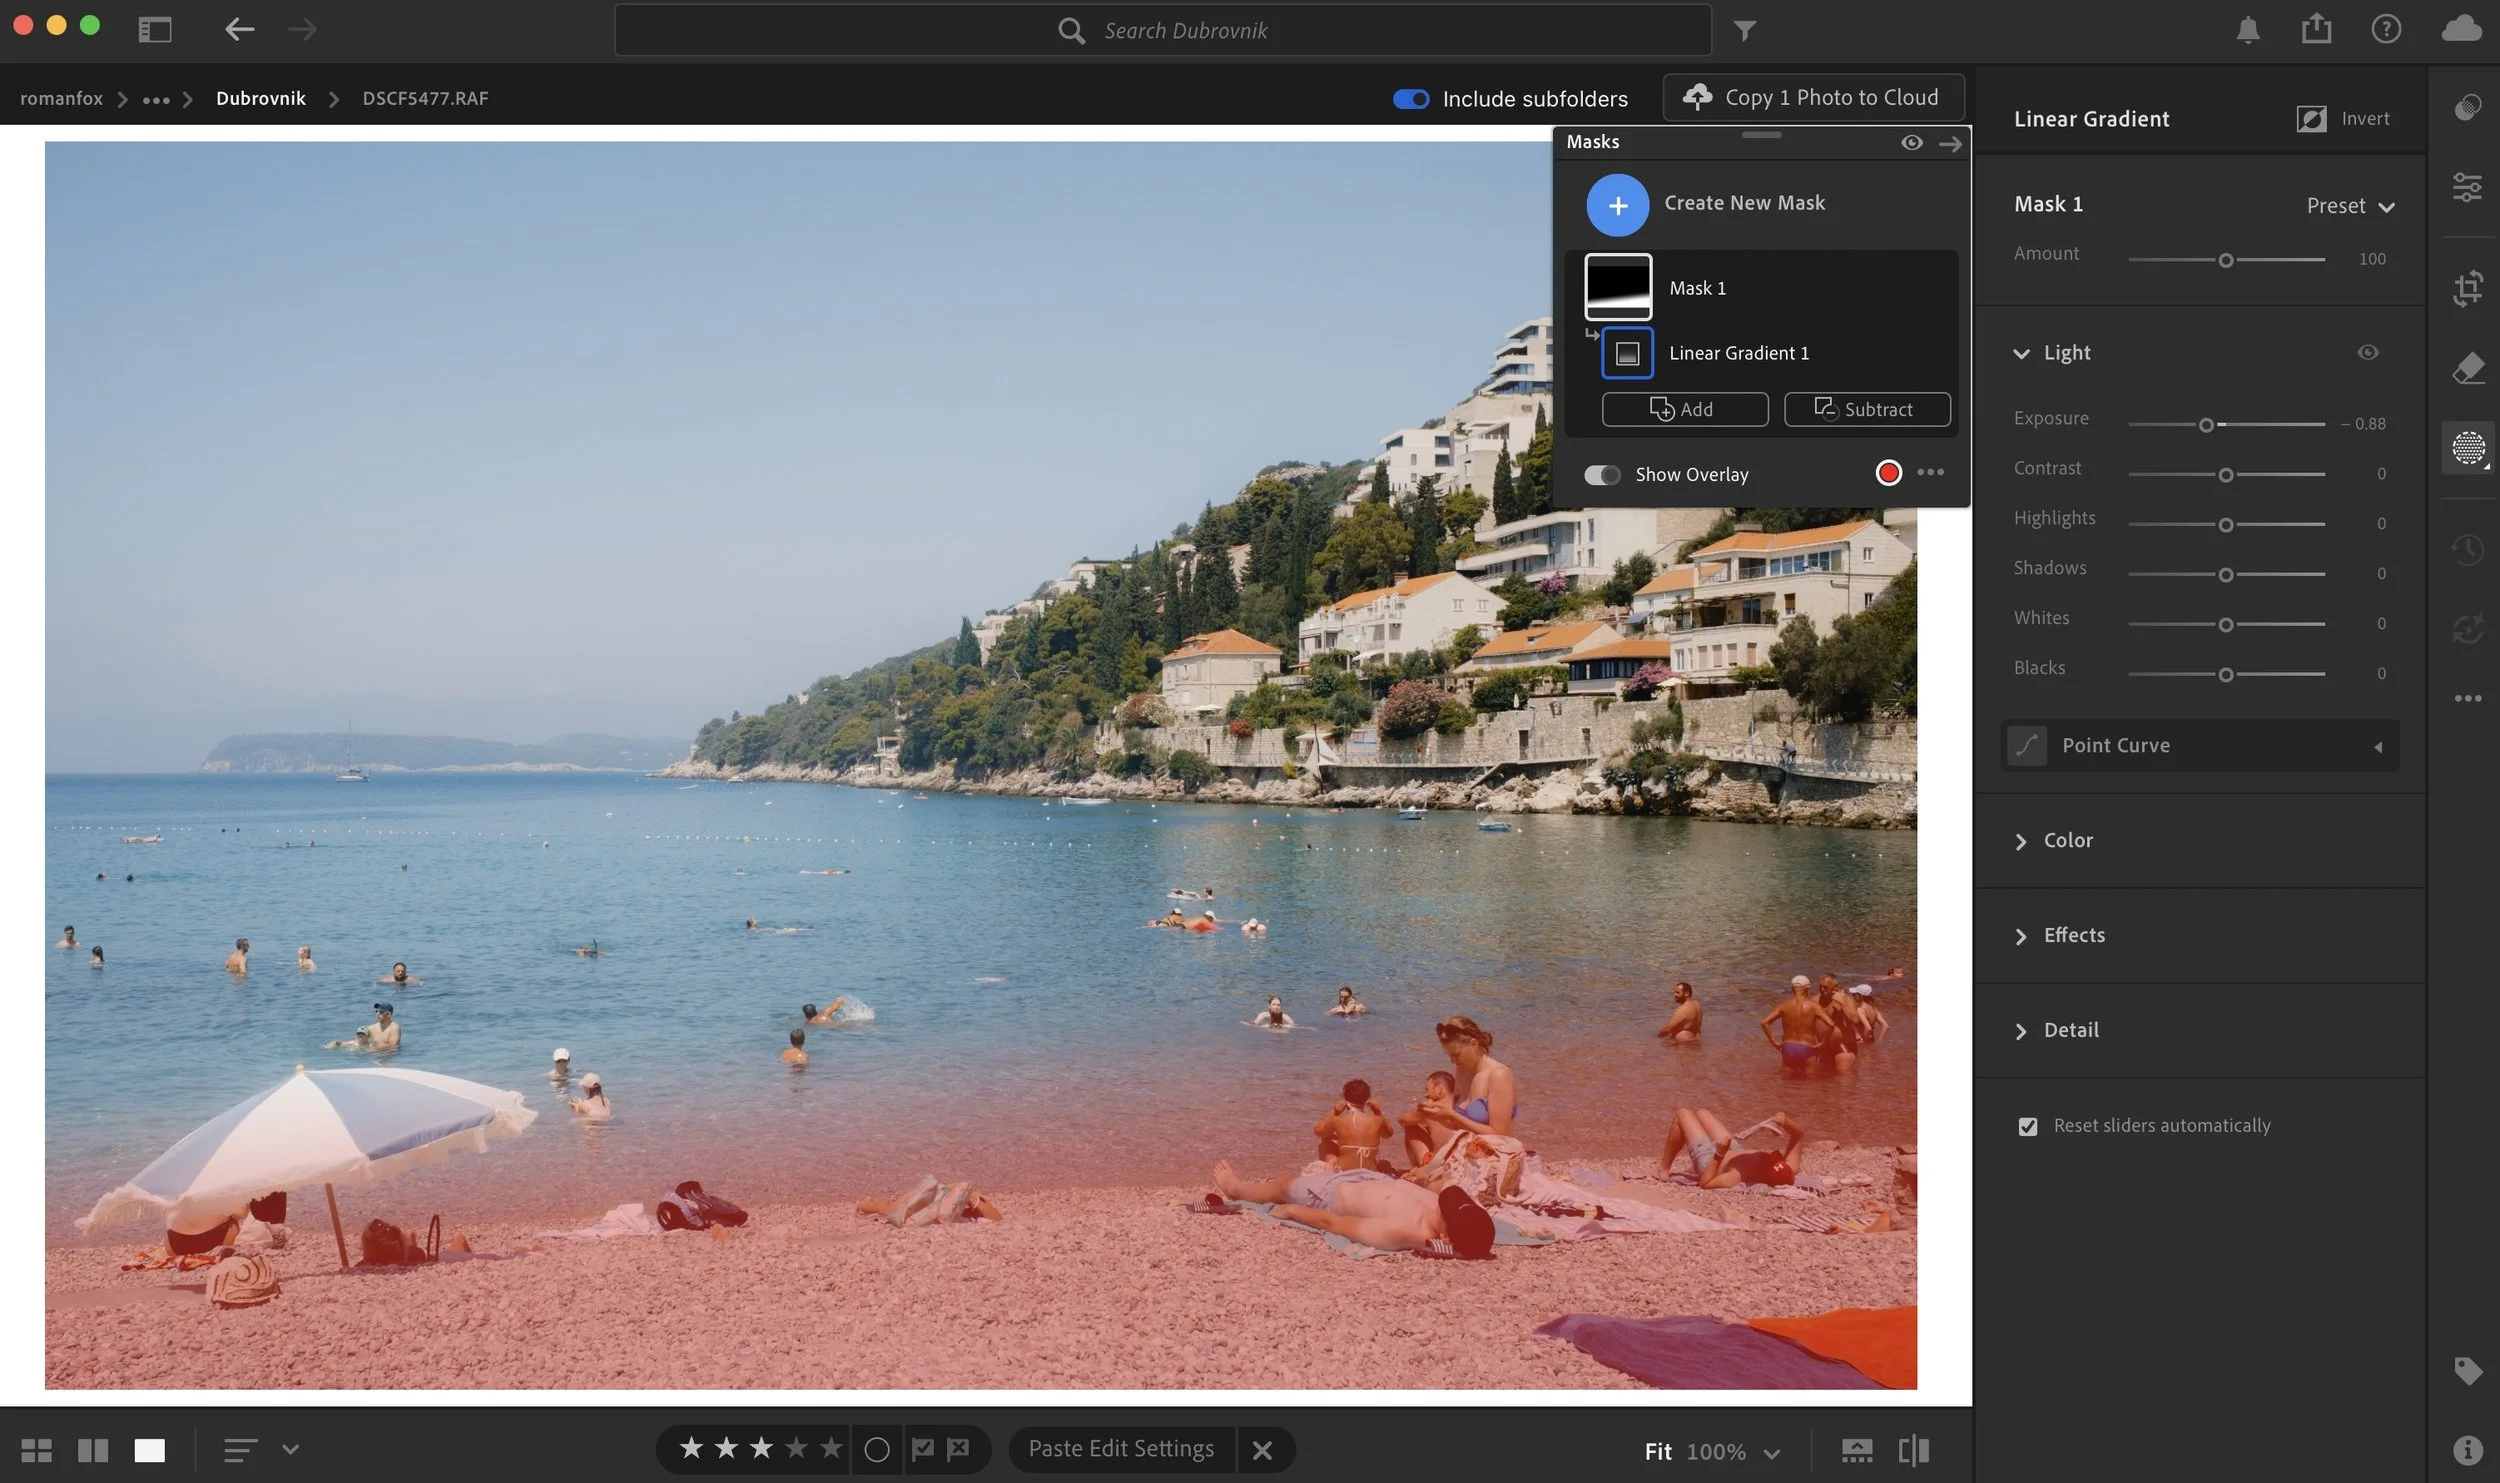
Add a gradient mask and reduce exposure
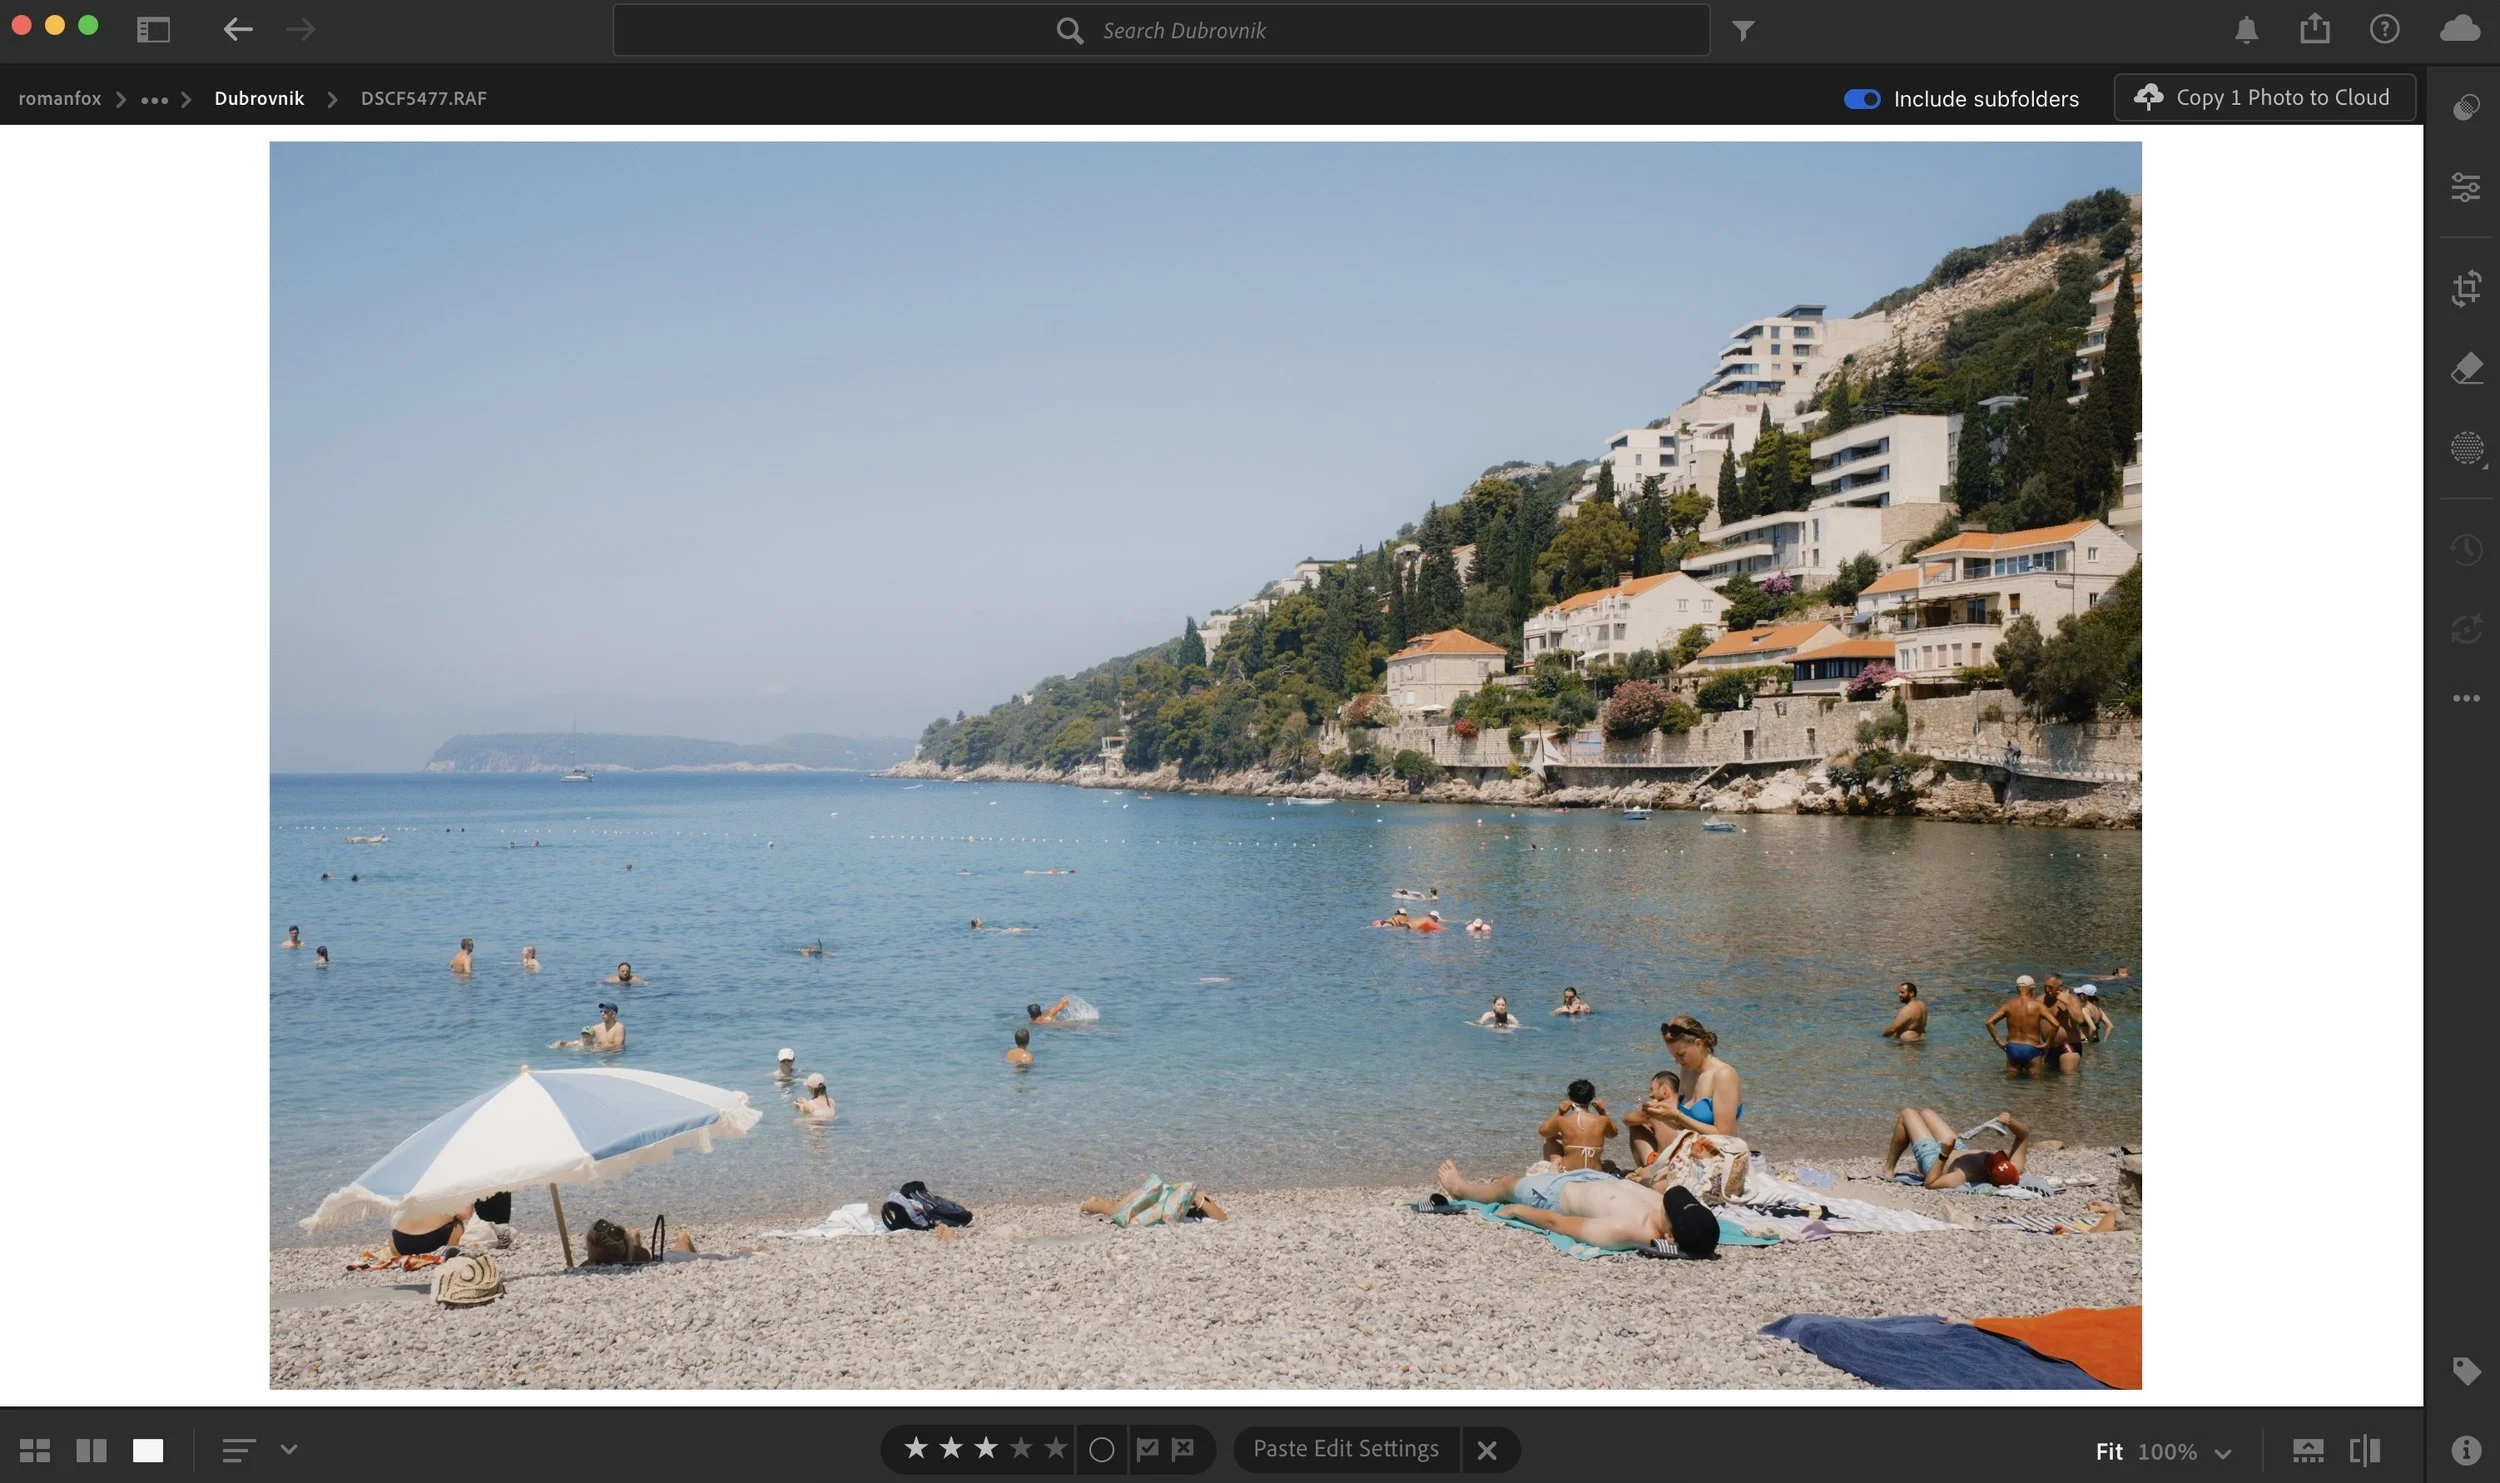
This looks more natural
Dull light
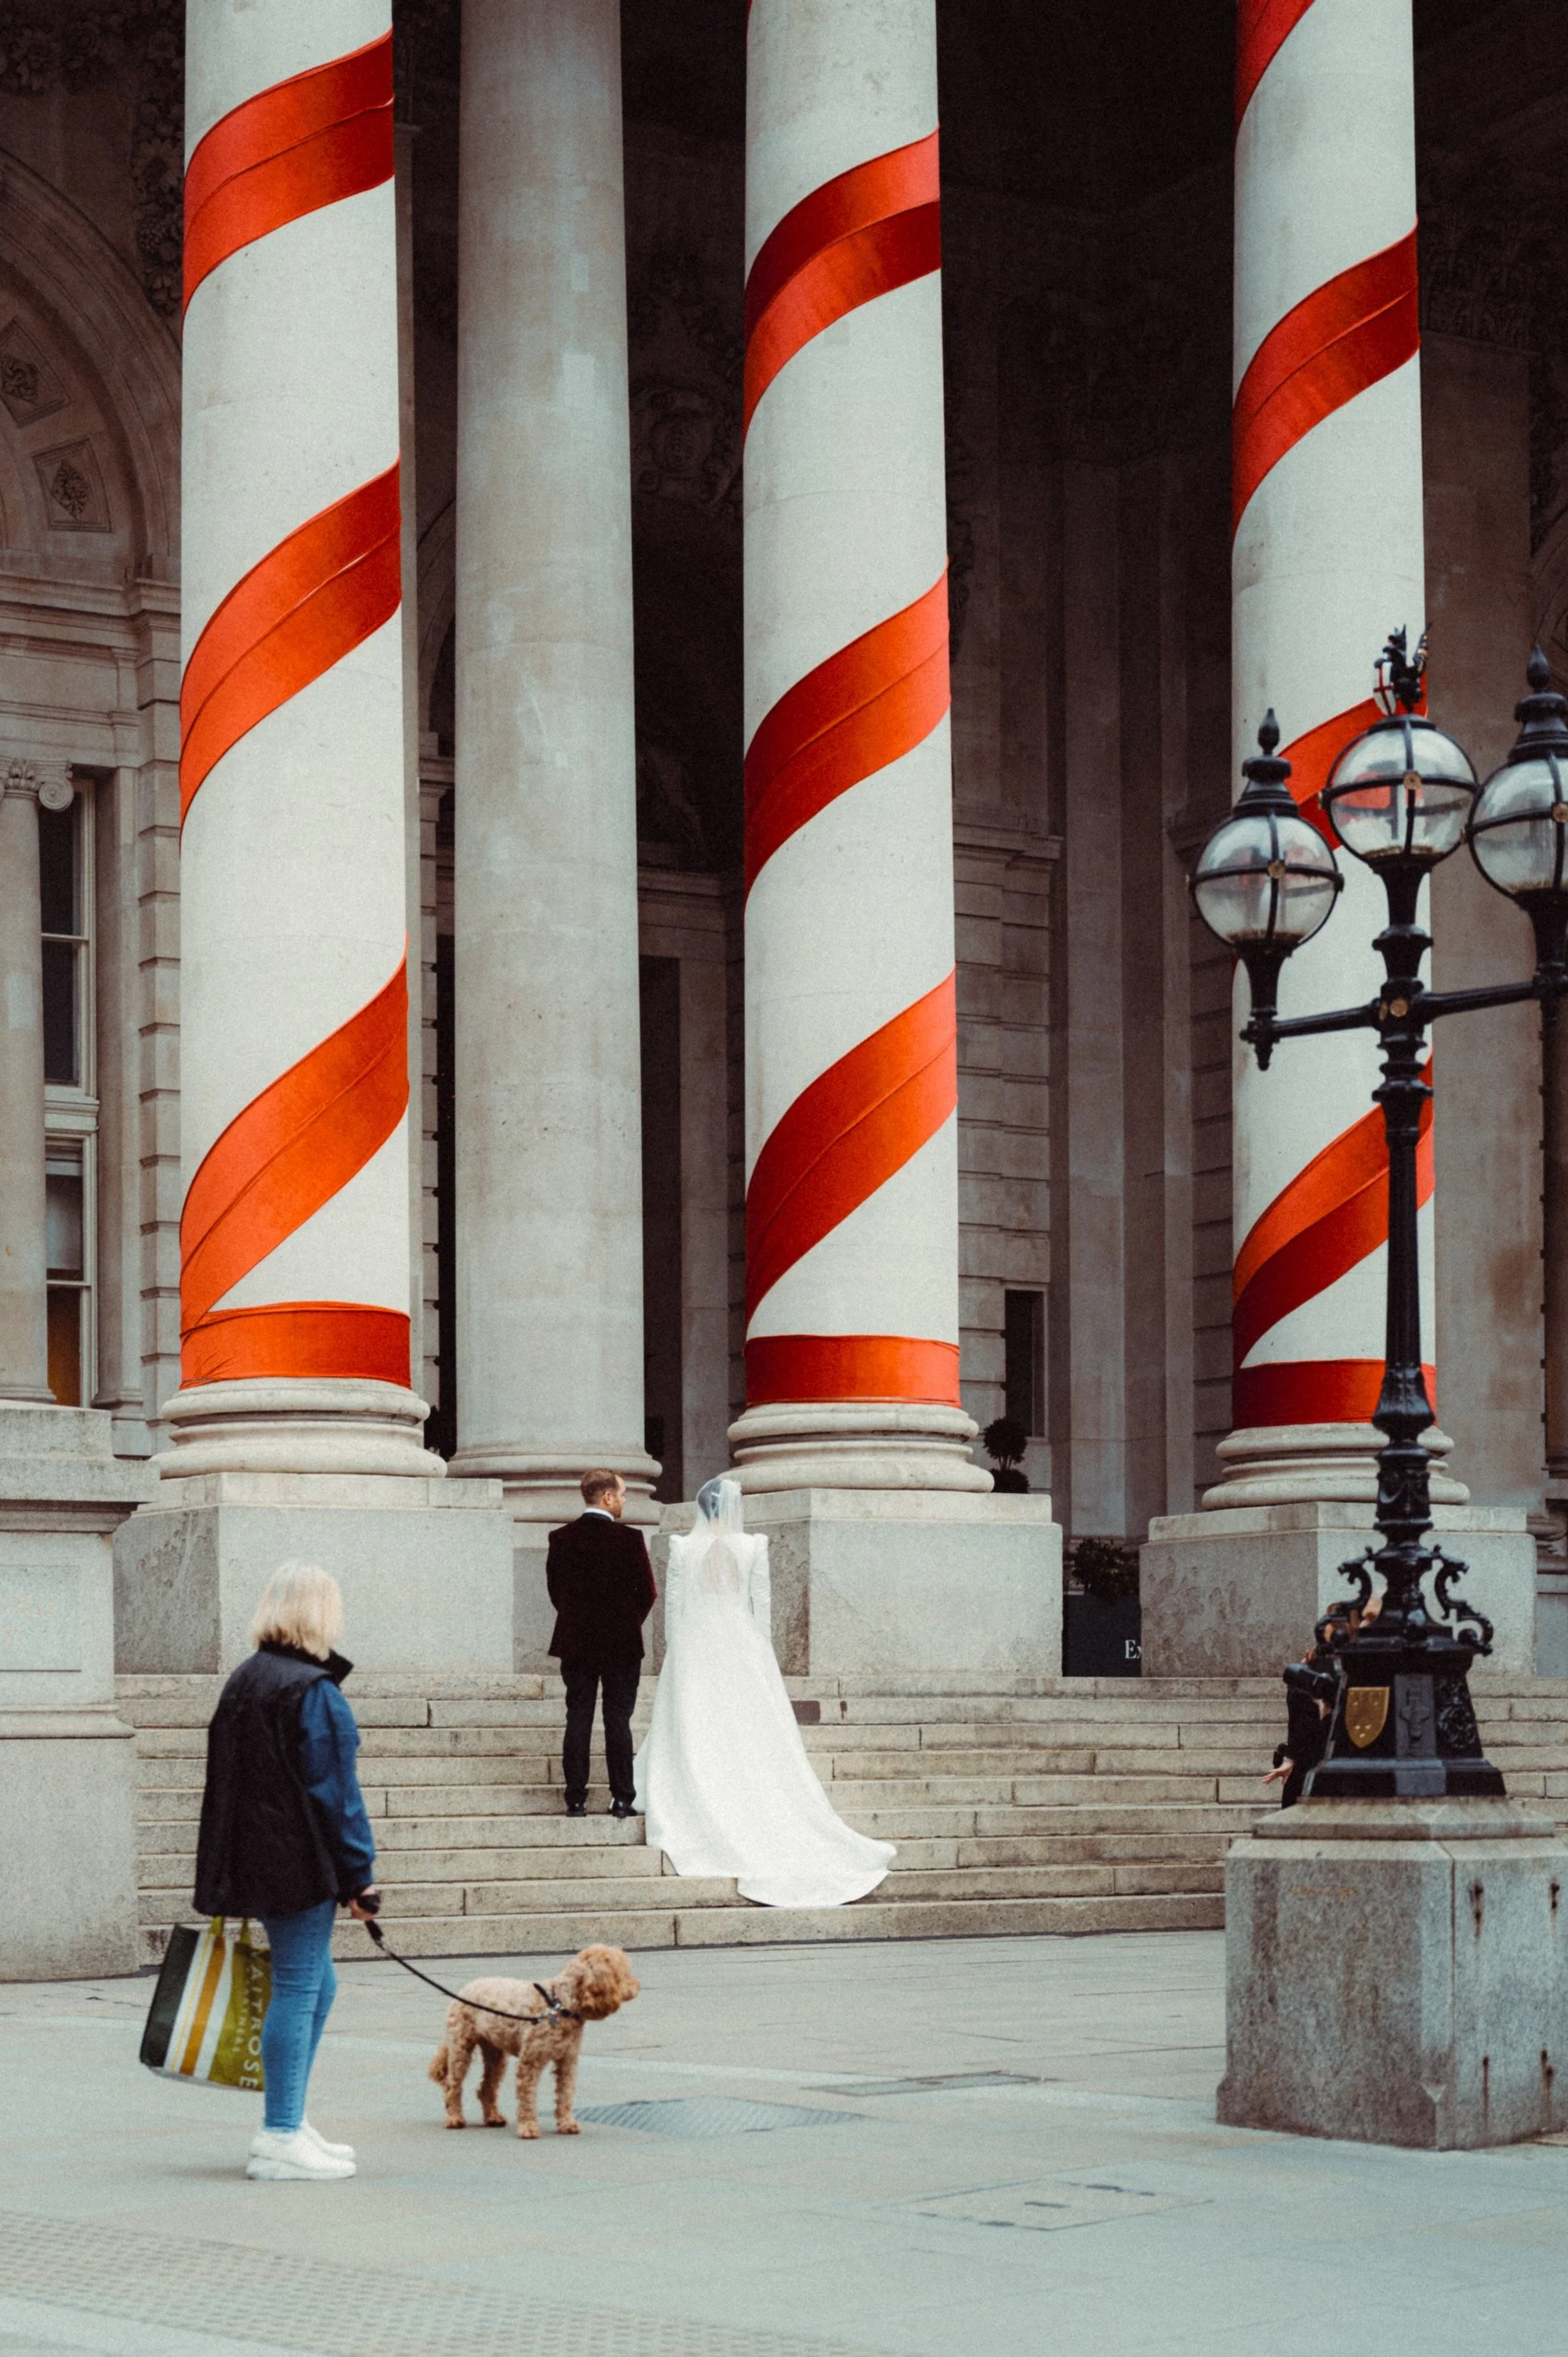
Seek contrast
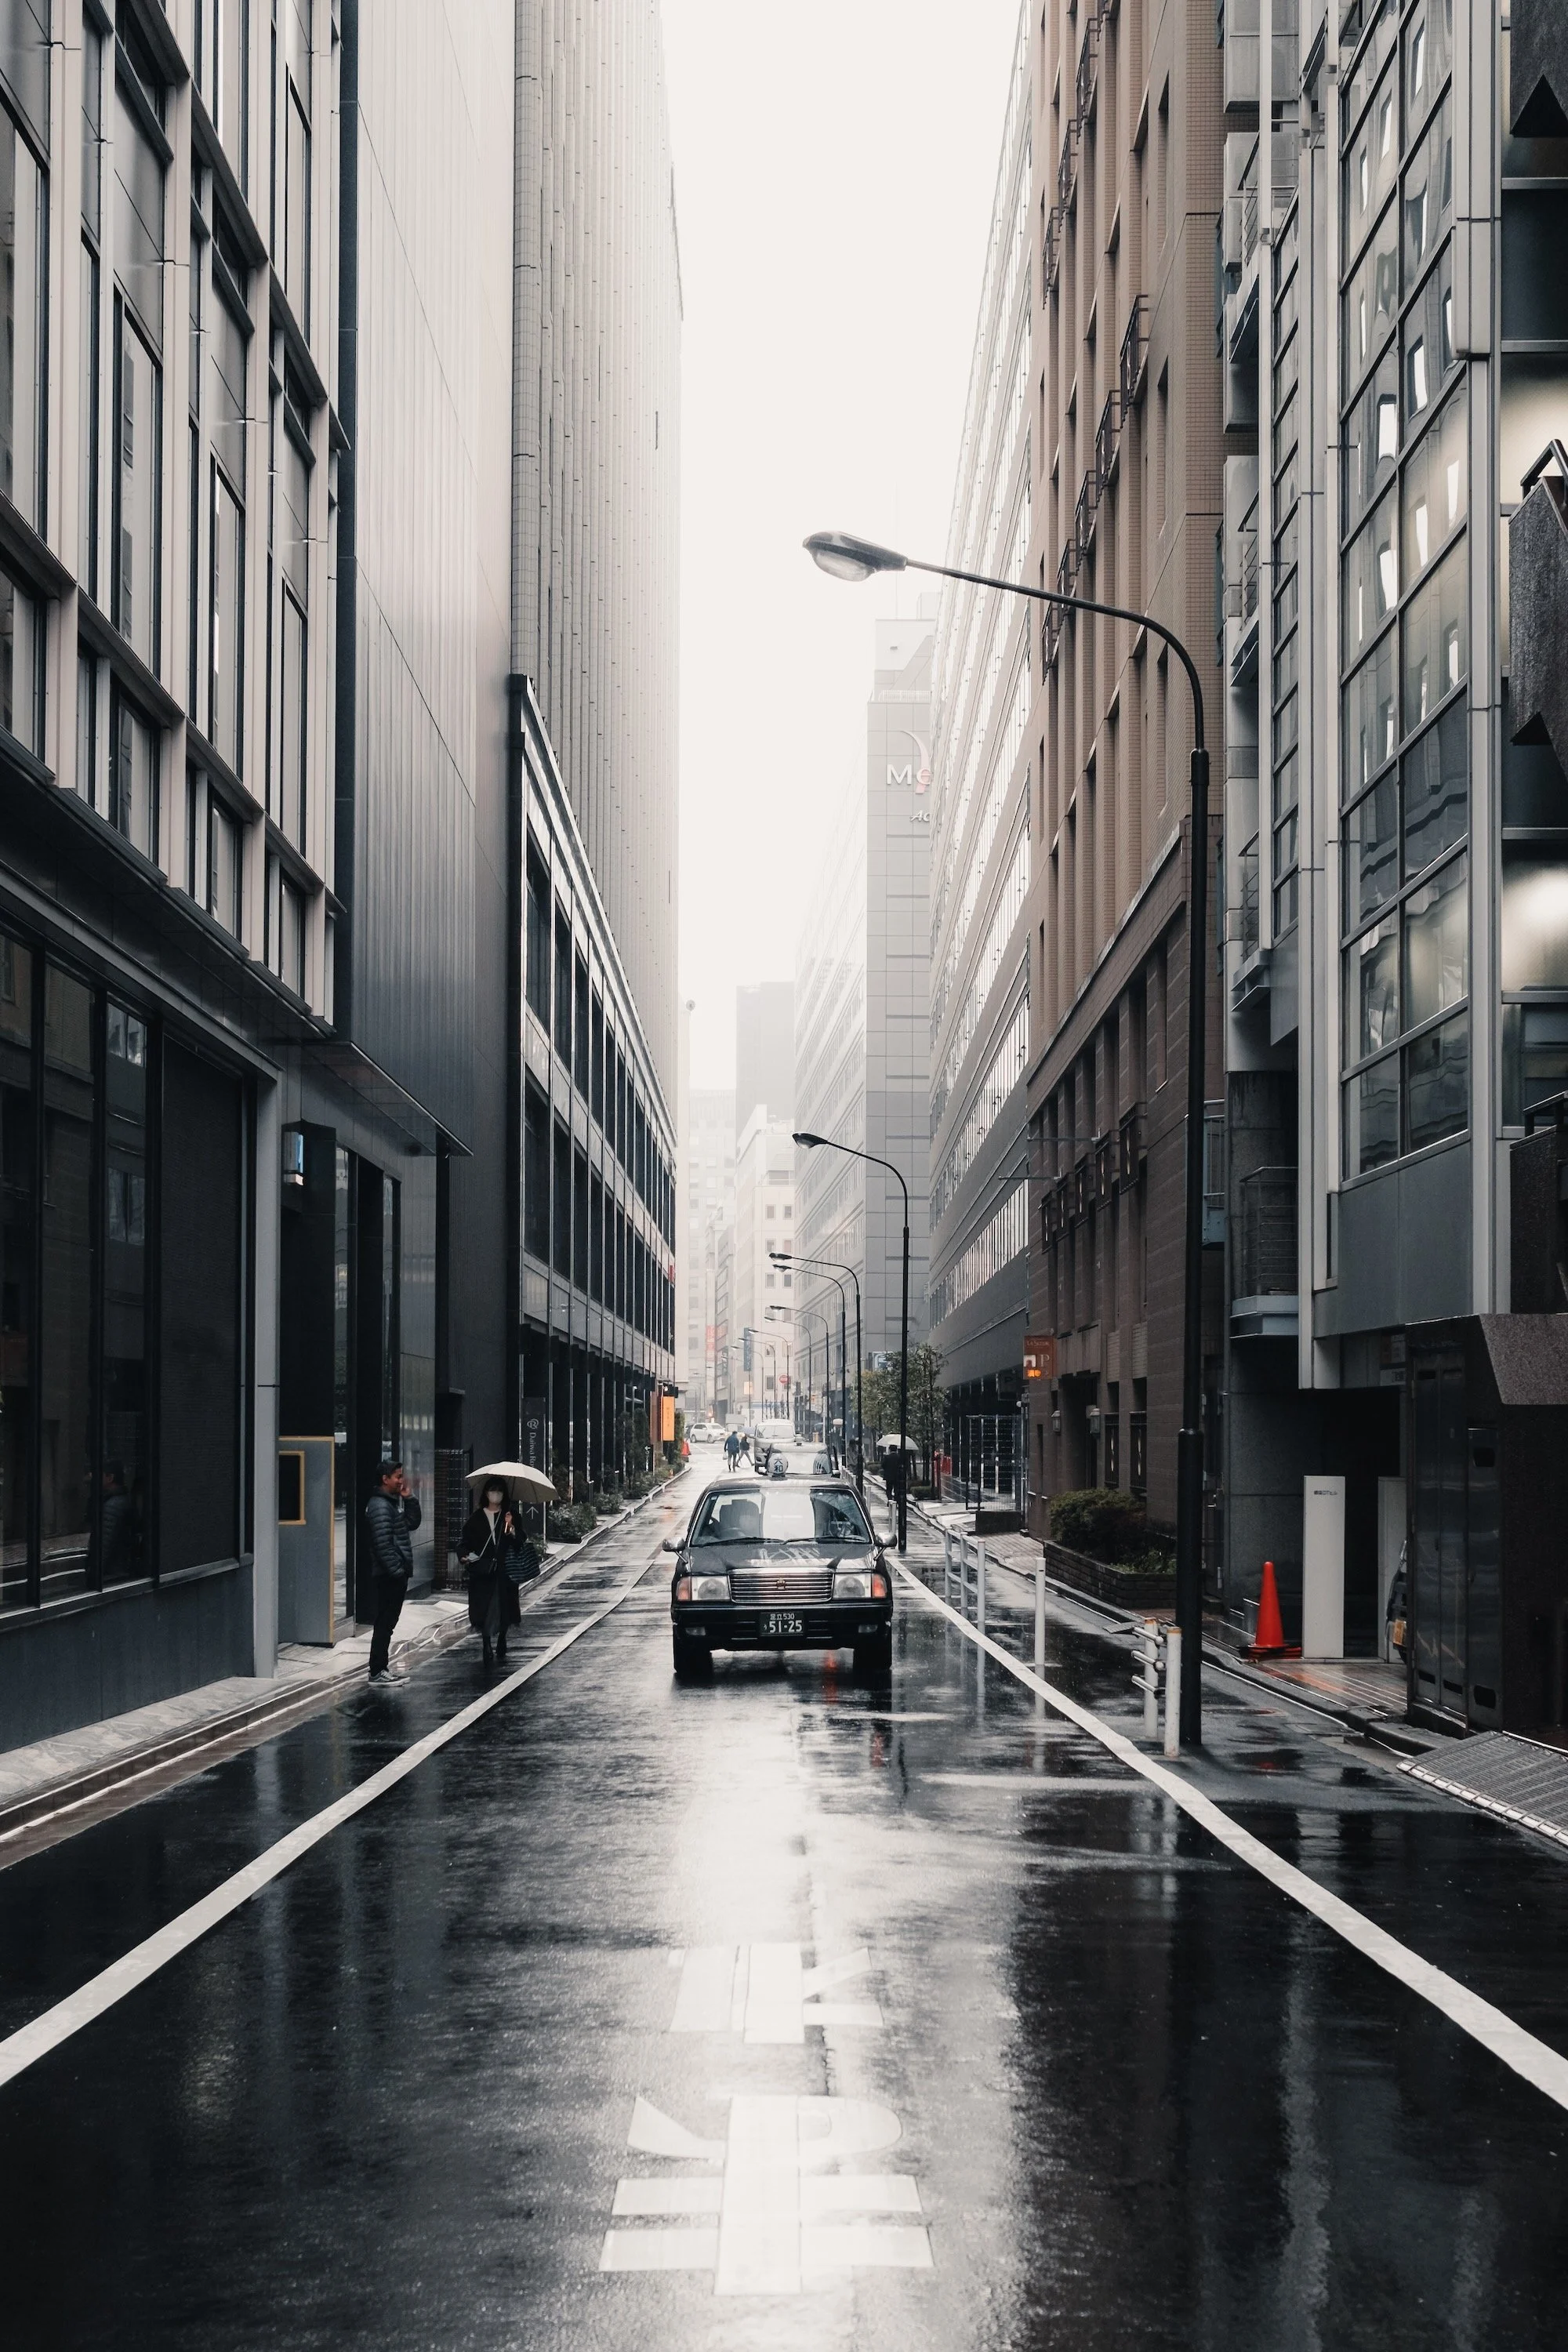
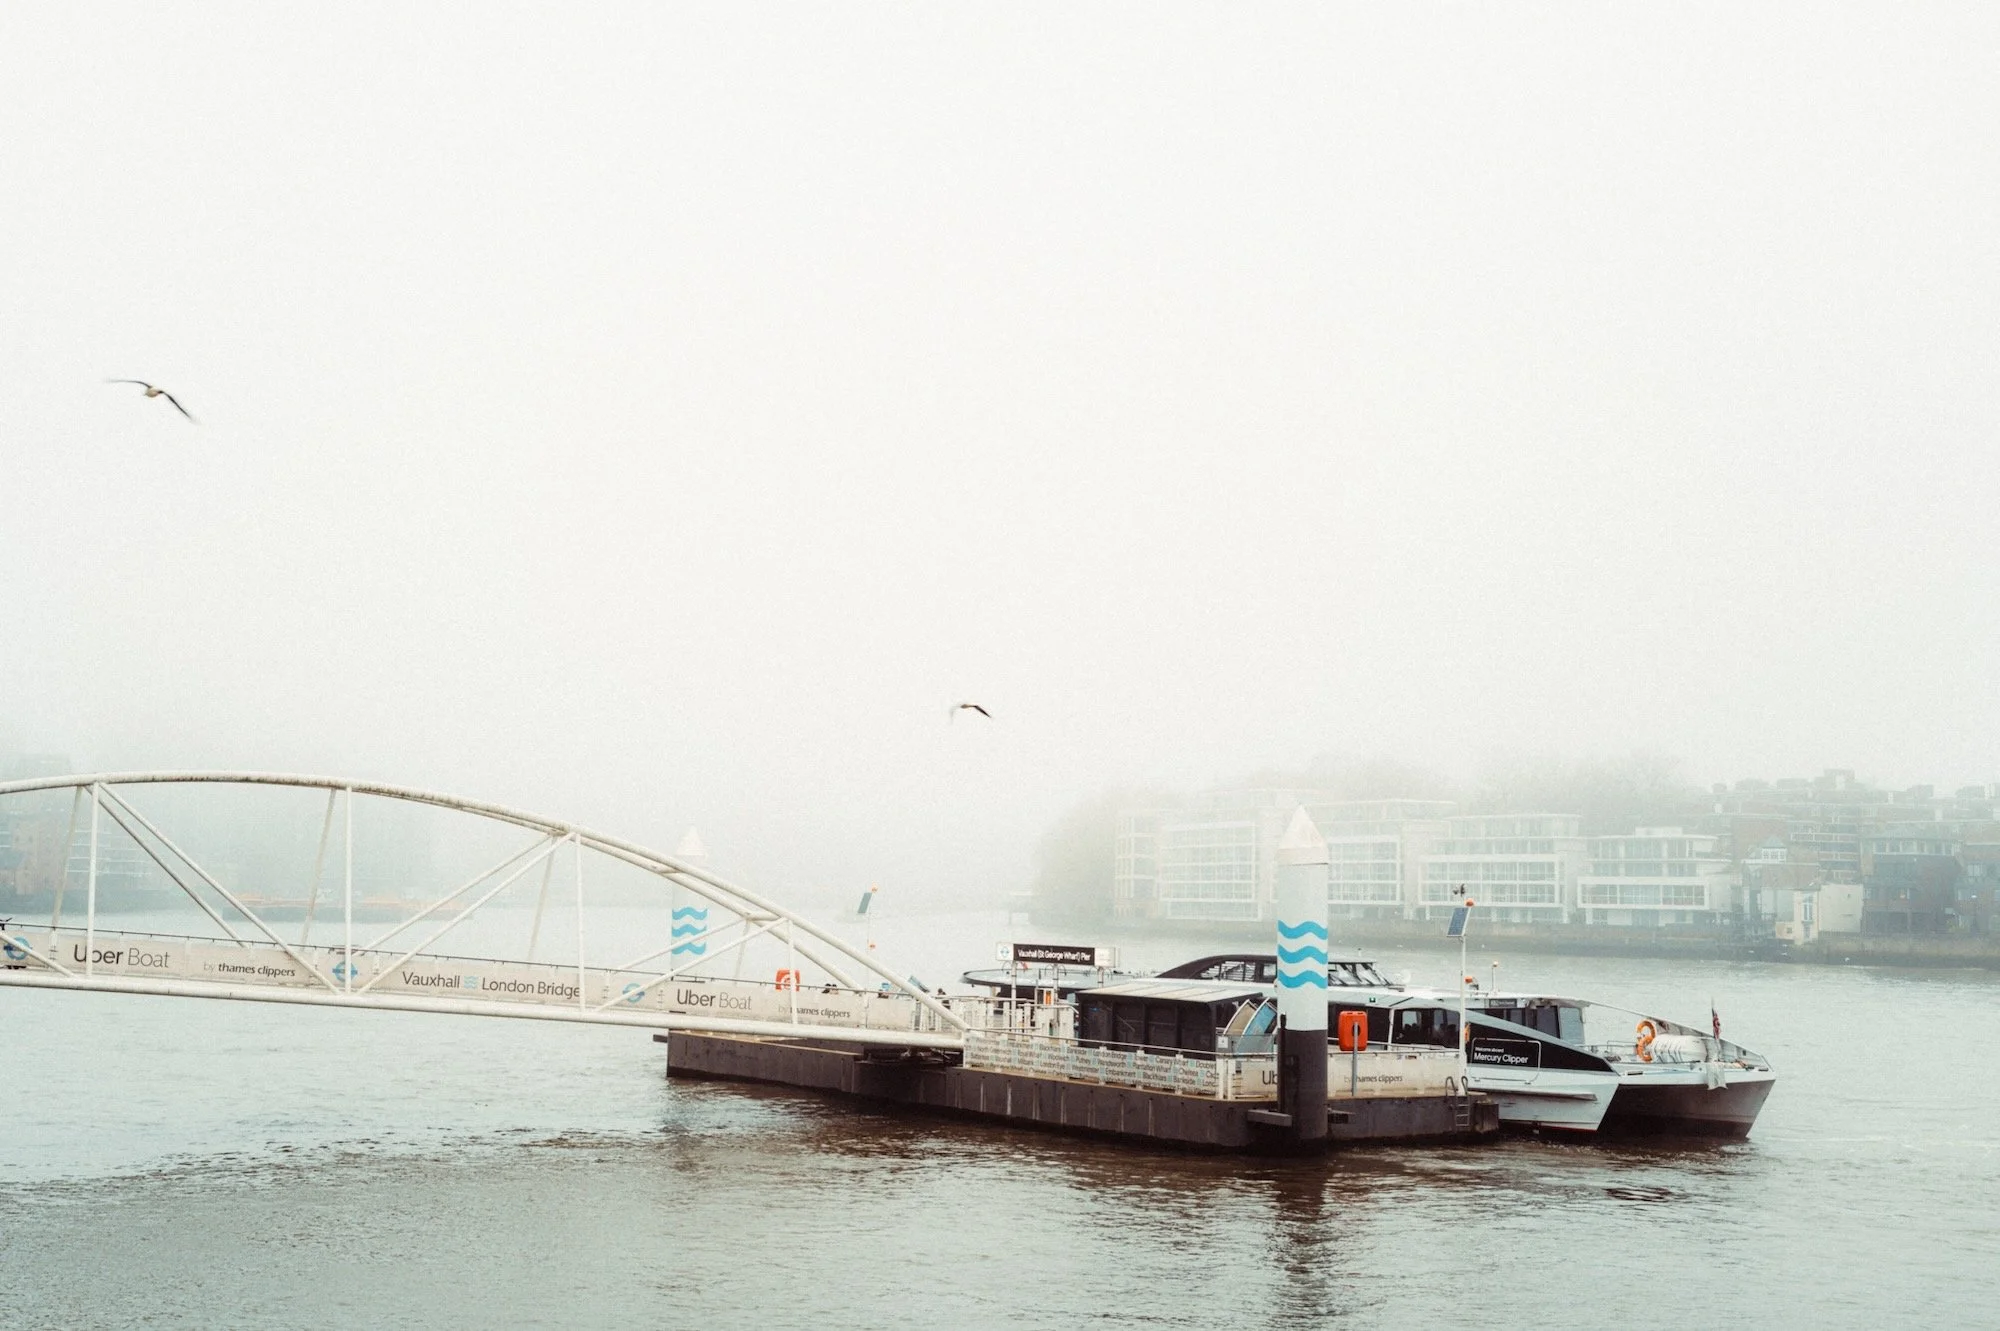
One of the biggest challenges of shooting on a dull, cloudy day is the distinct lack of contrast. The cloud acts as a giant softbox and, unless it’s a very thin layer, will remove most of the contrast from the scene. For many photographers, especially those into portraiture, this is a positive. However, for my style of work, it’s the opposite. The first thing I do when I encounter this kind of light is look for areas with higher contrast. This could be shooting through a walkway, between buildings, or anywhere you’re moving from dark to light.
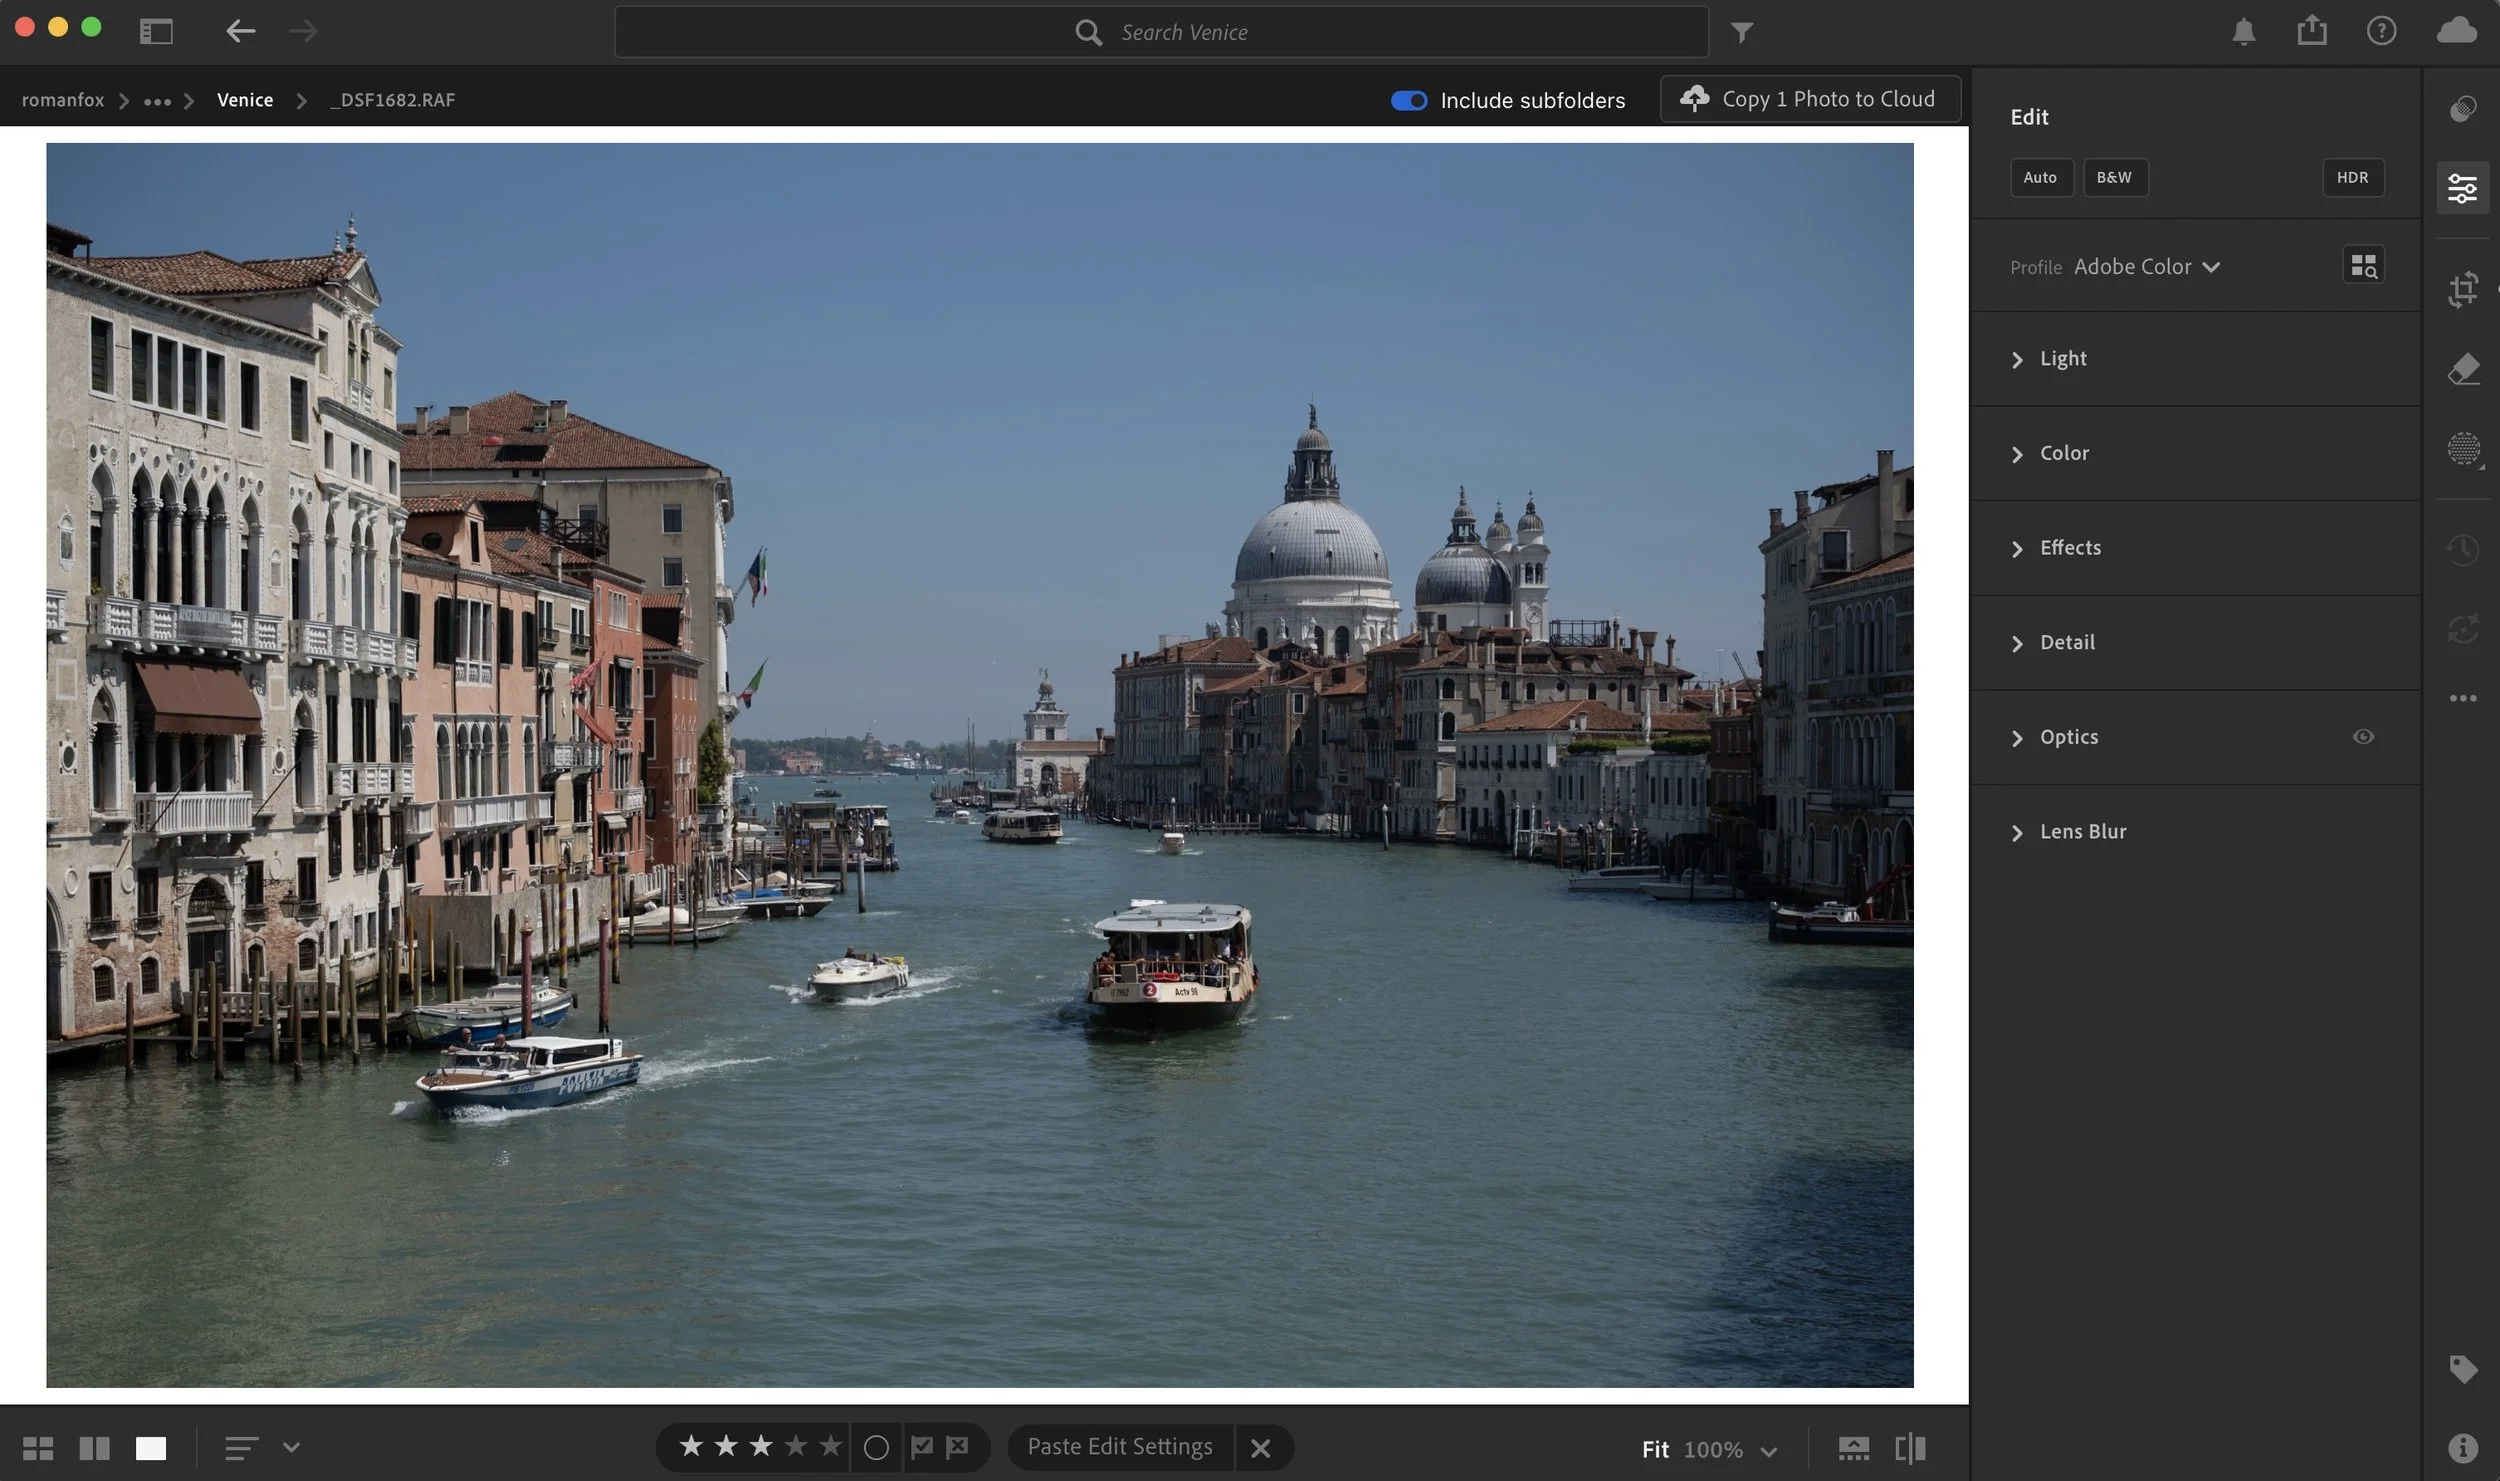
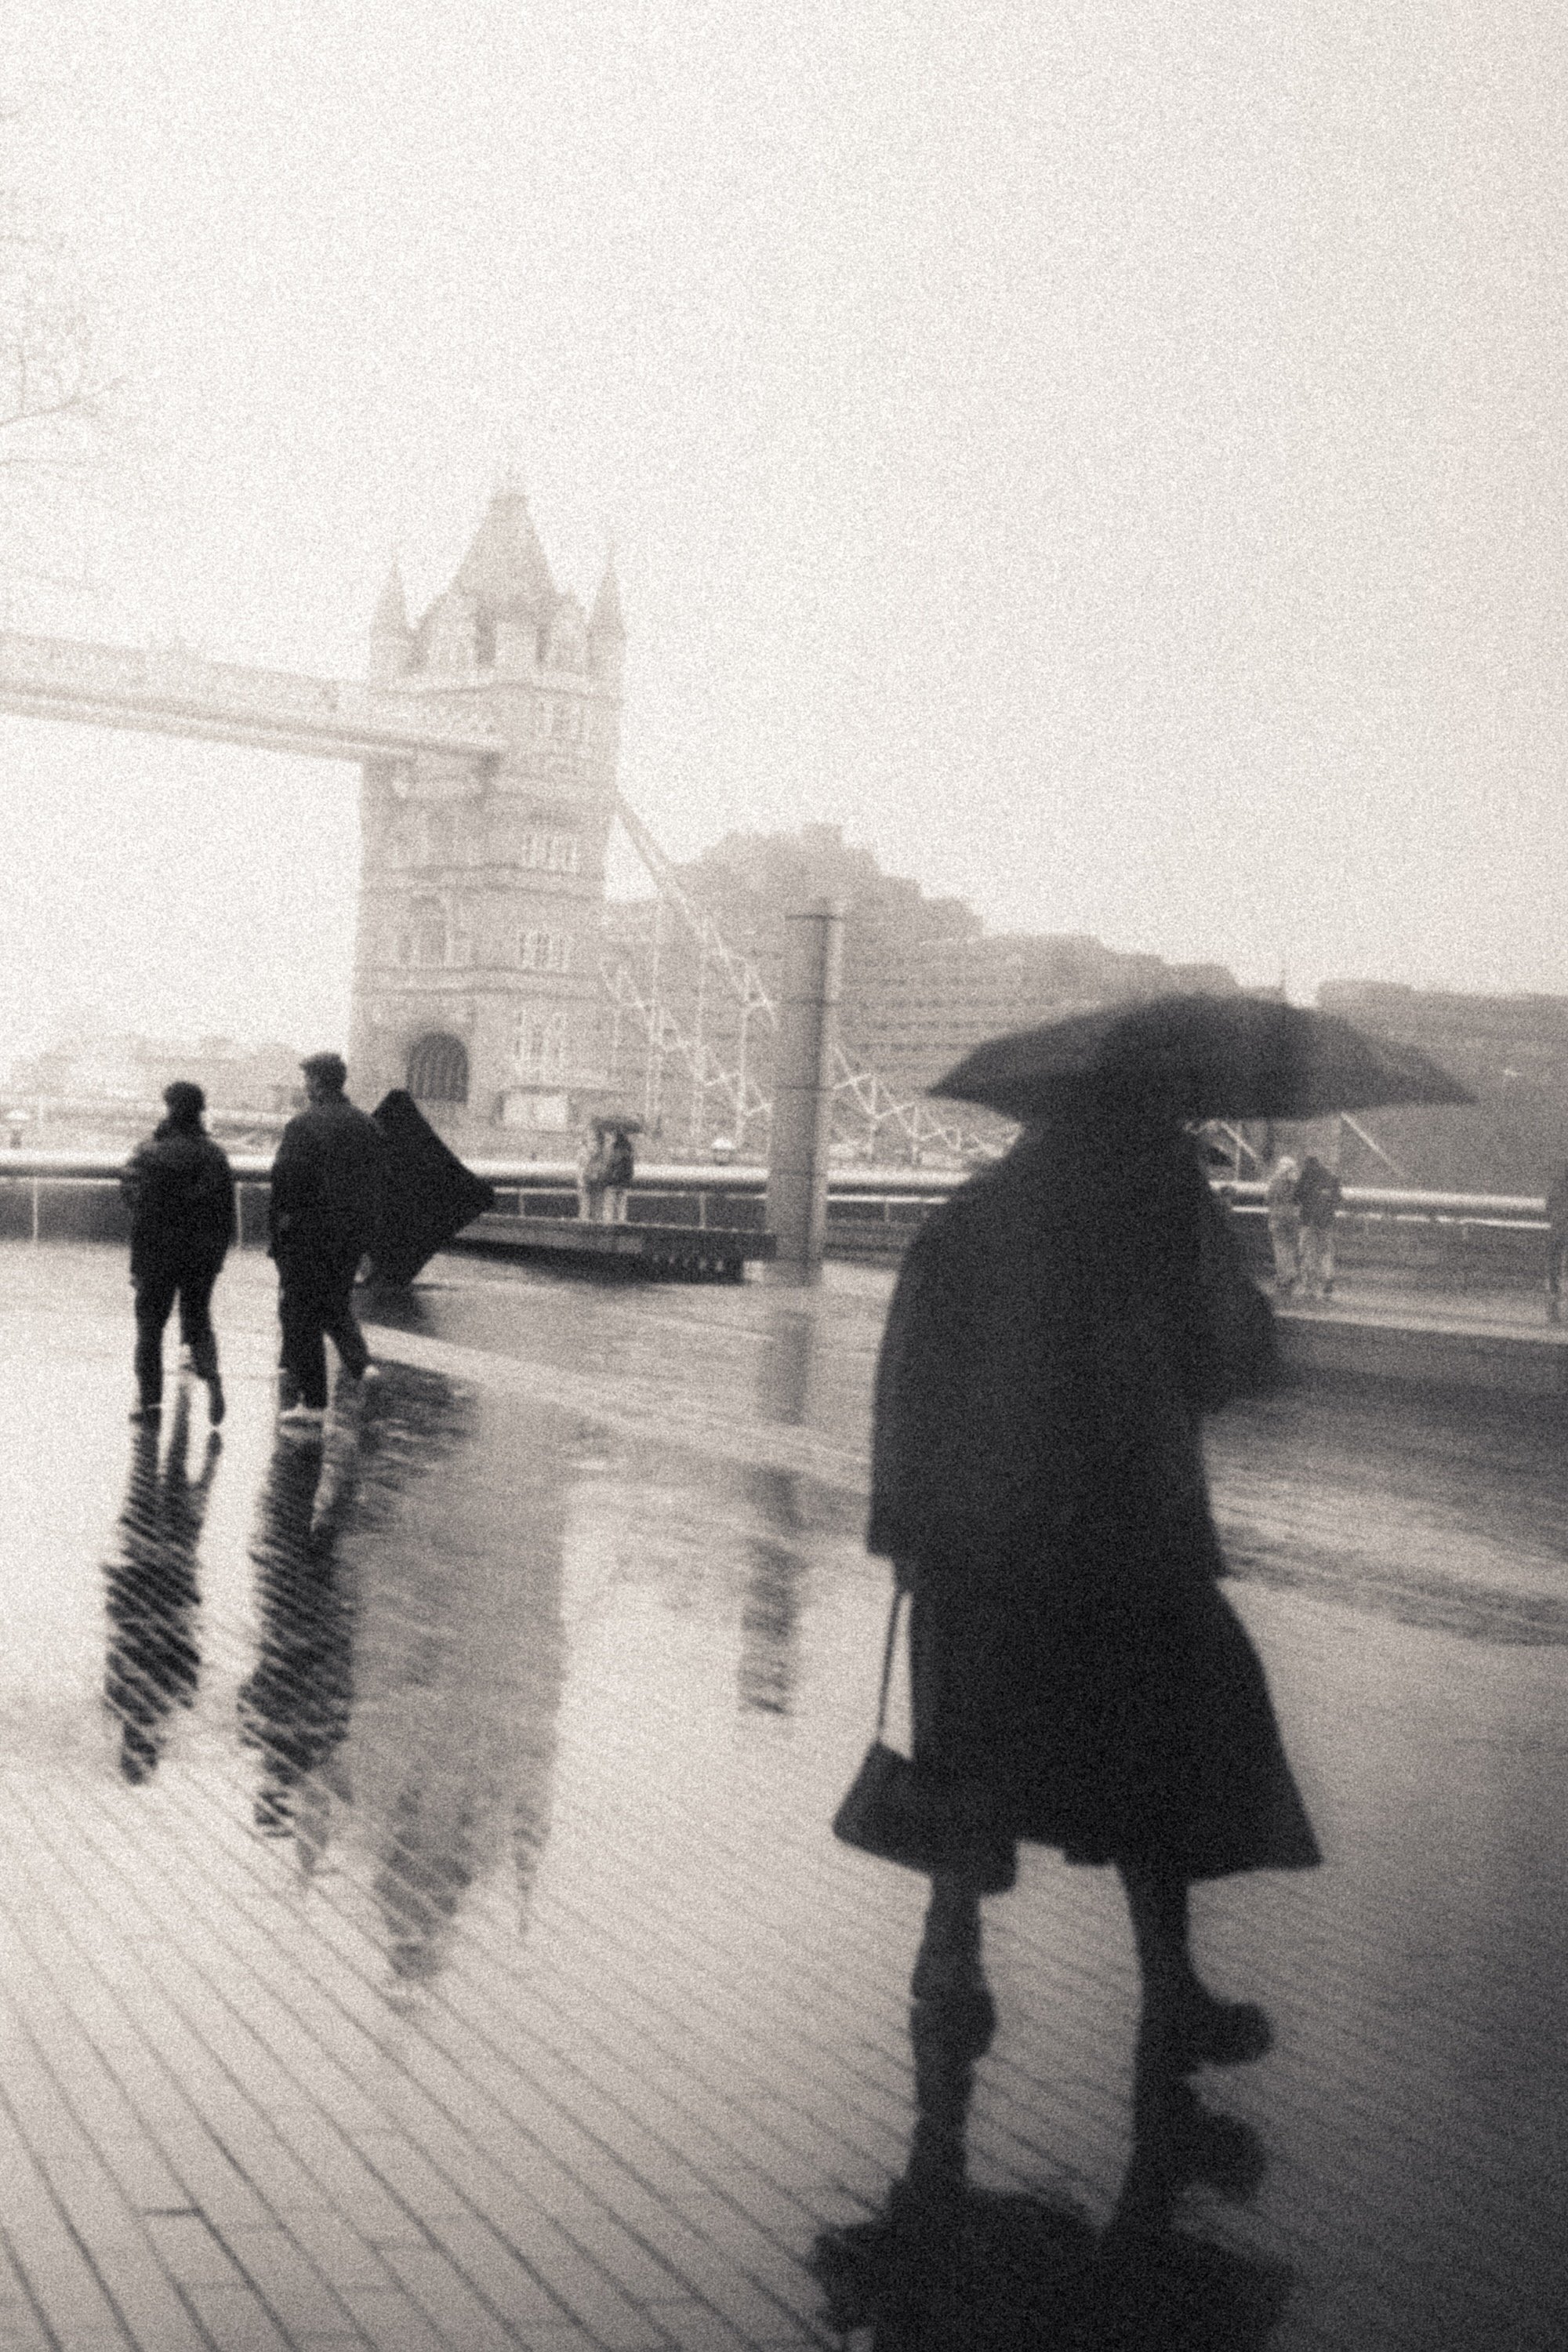
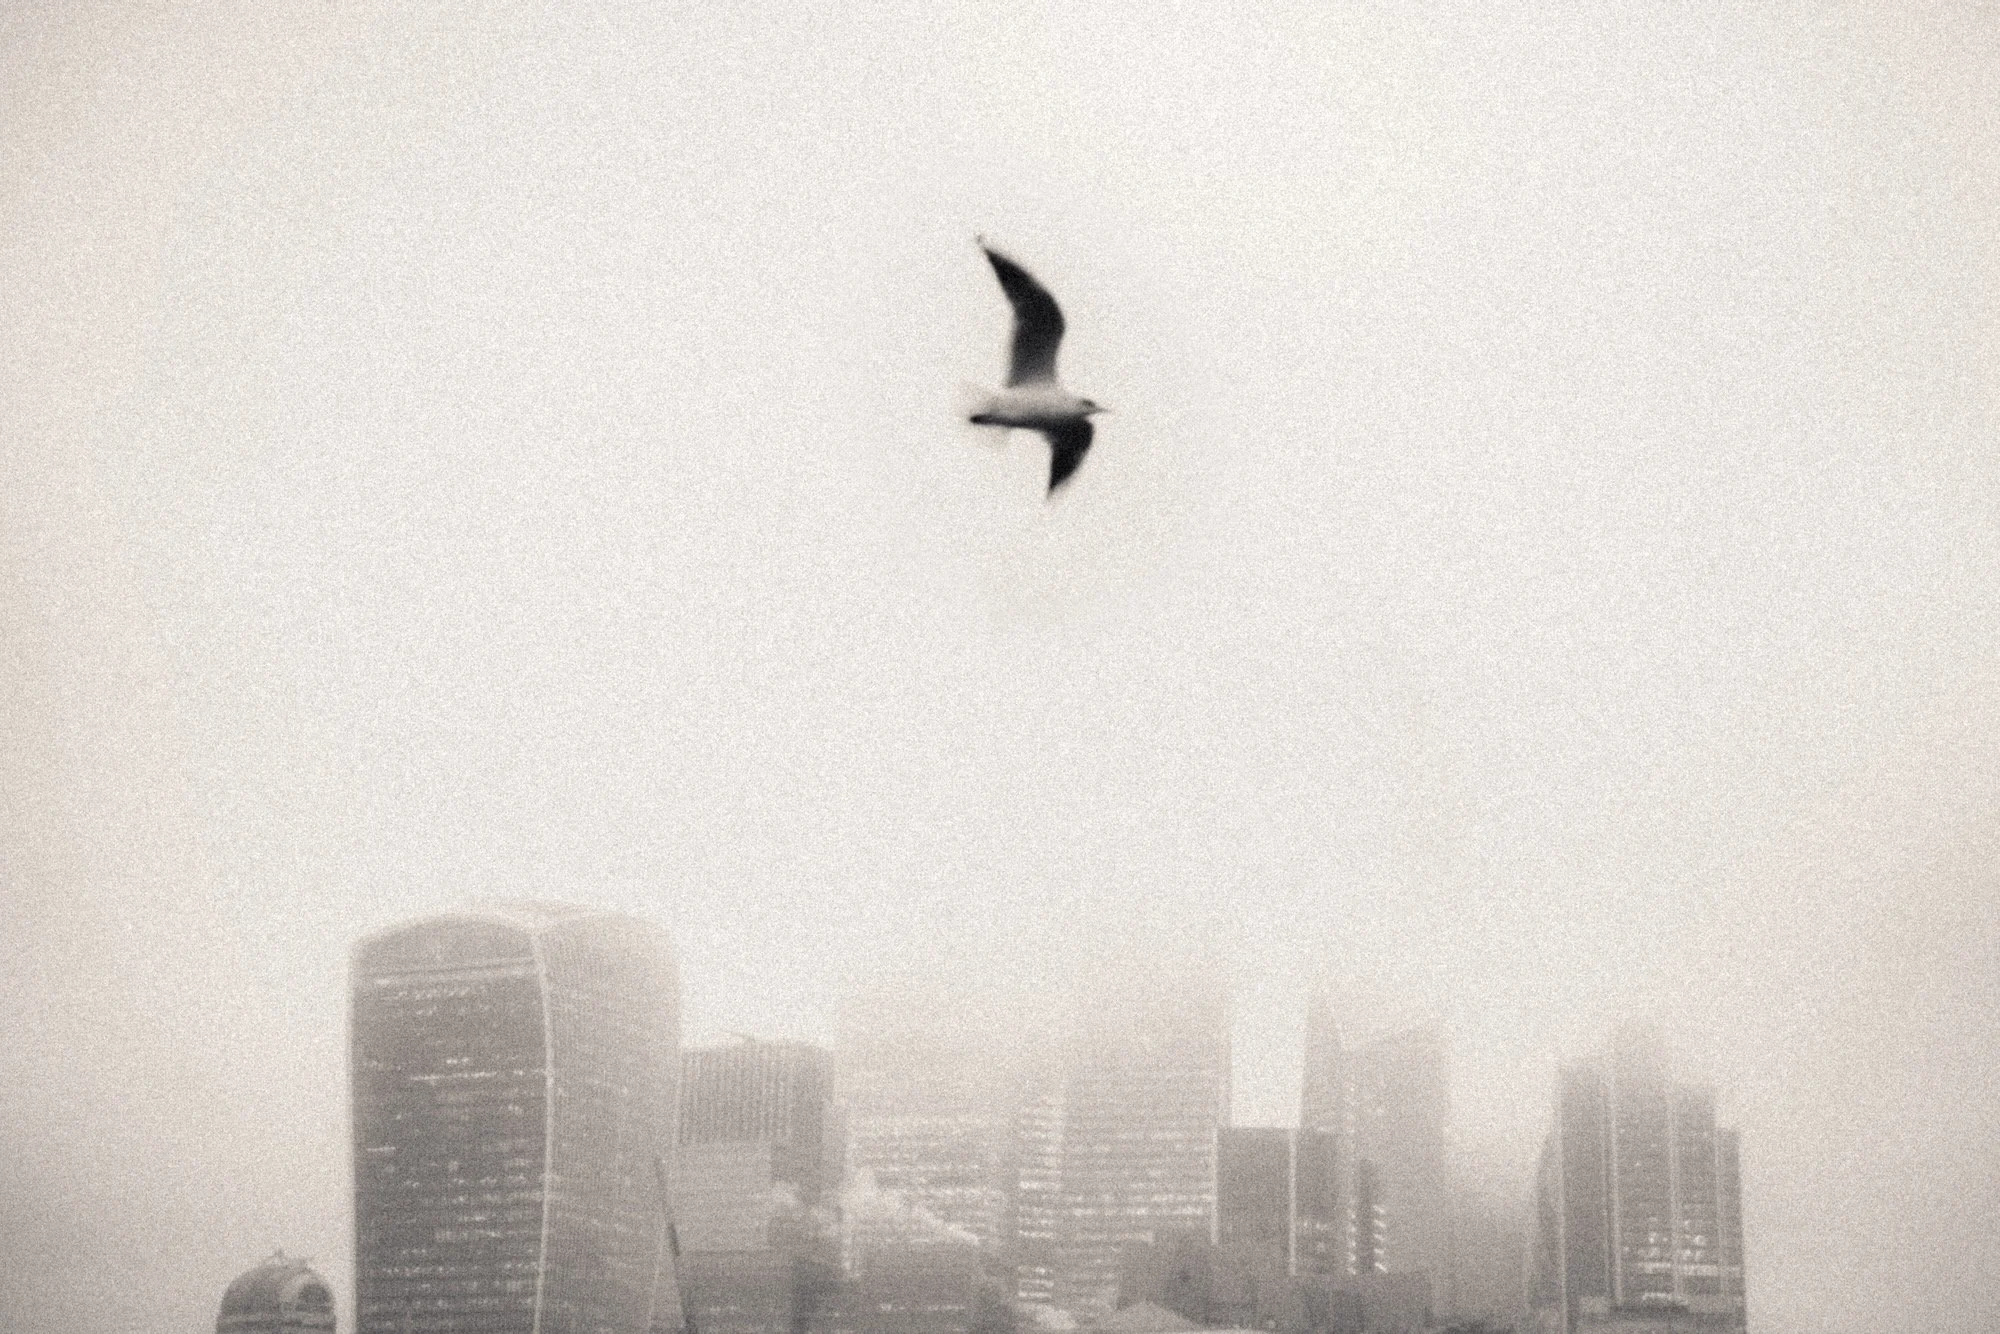
Brighten up
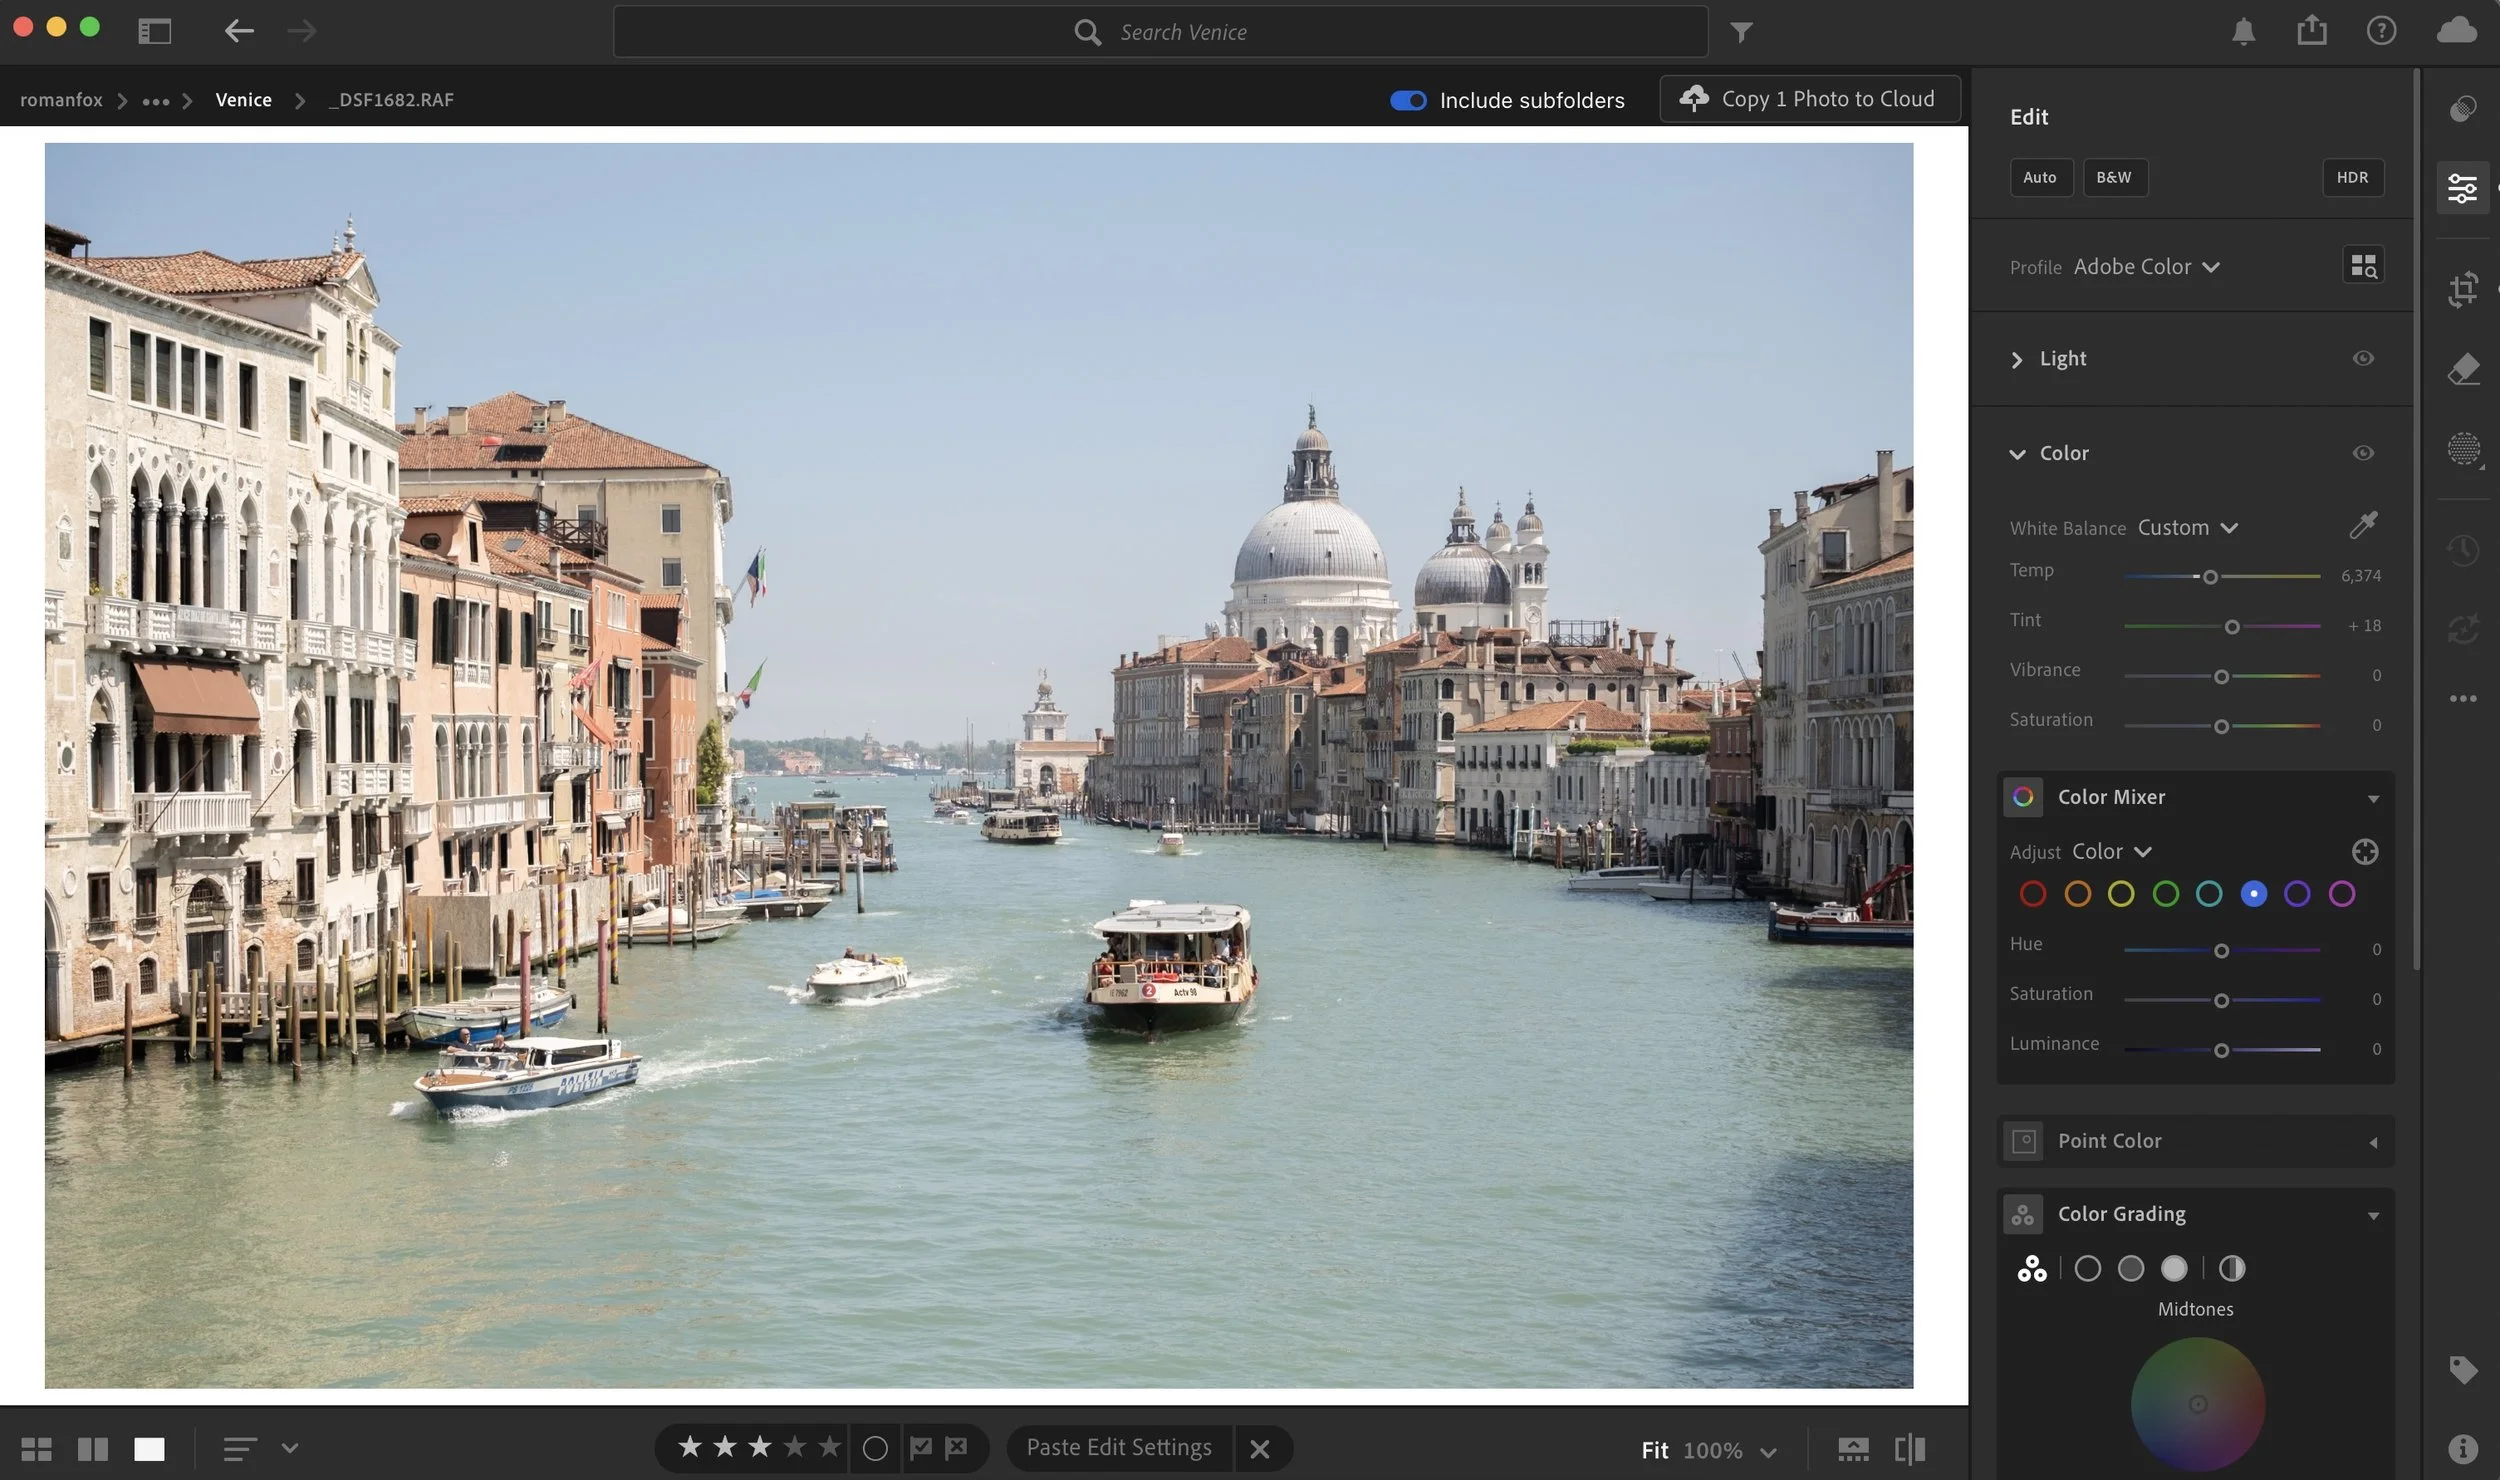
Almost all cameras will significantly underexpose a cloudy day in order to preserve highlight detail in the sky. I suggest overexposing by around 0.6 to even 1 stop. This can be done in camera or in editing if shooting with RAW files. Overexposing allows you to bring much needed detail to the darker parts of the image, lift the mood of the entire scene, and reduce some of the sky detail that, in most cases, would only harm the overall result. Some people will argue that this can blow out the sky, and I have no issues with that unless you need to preserve all the shades of grey for whatever reason.
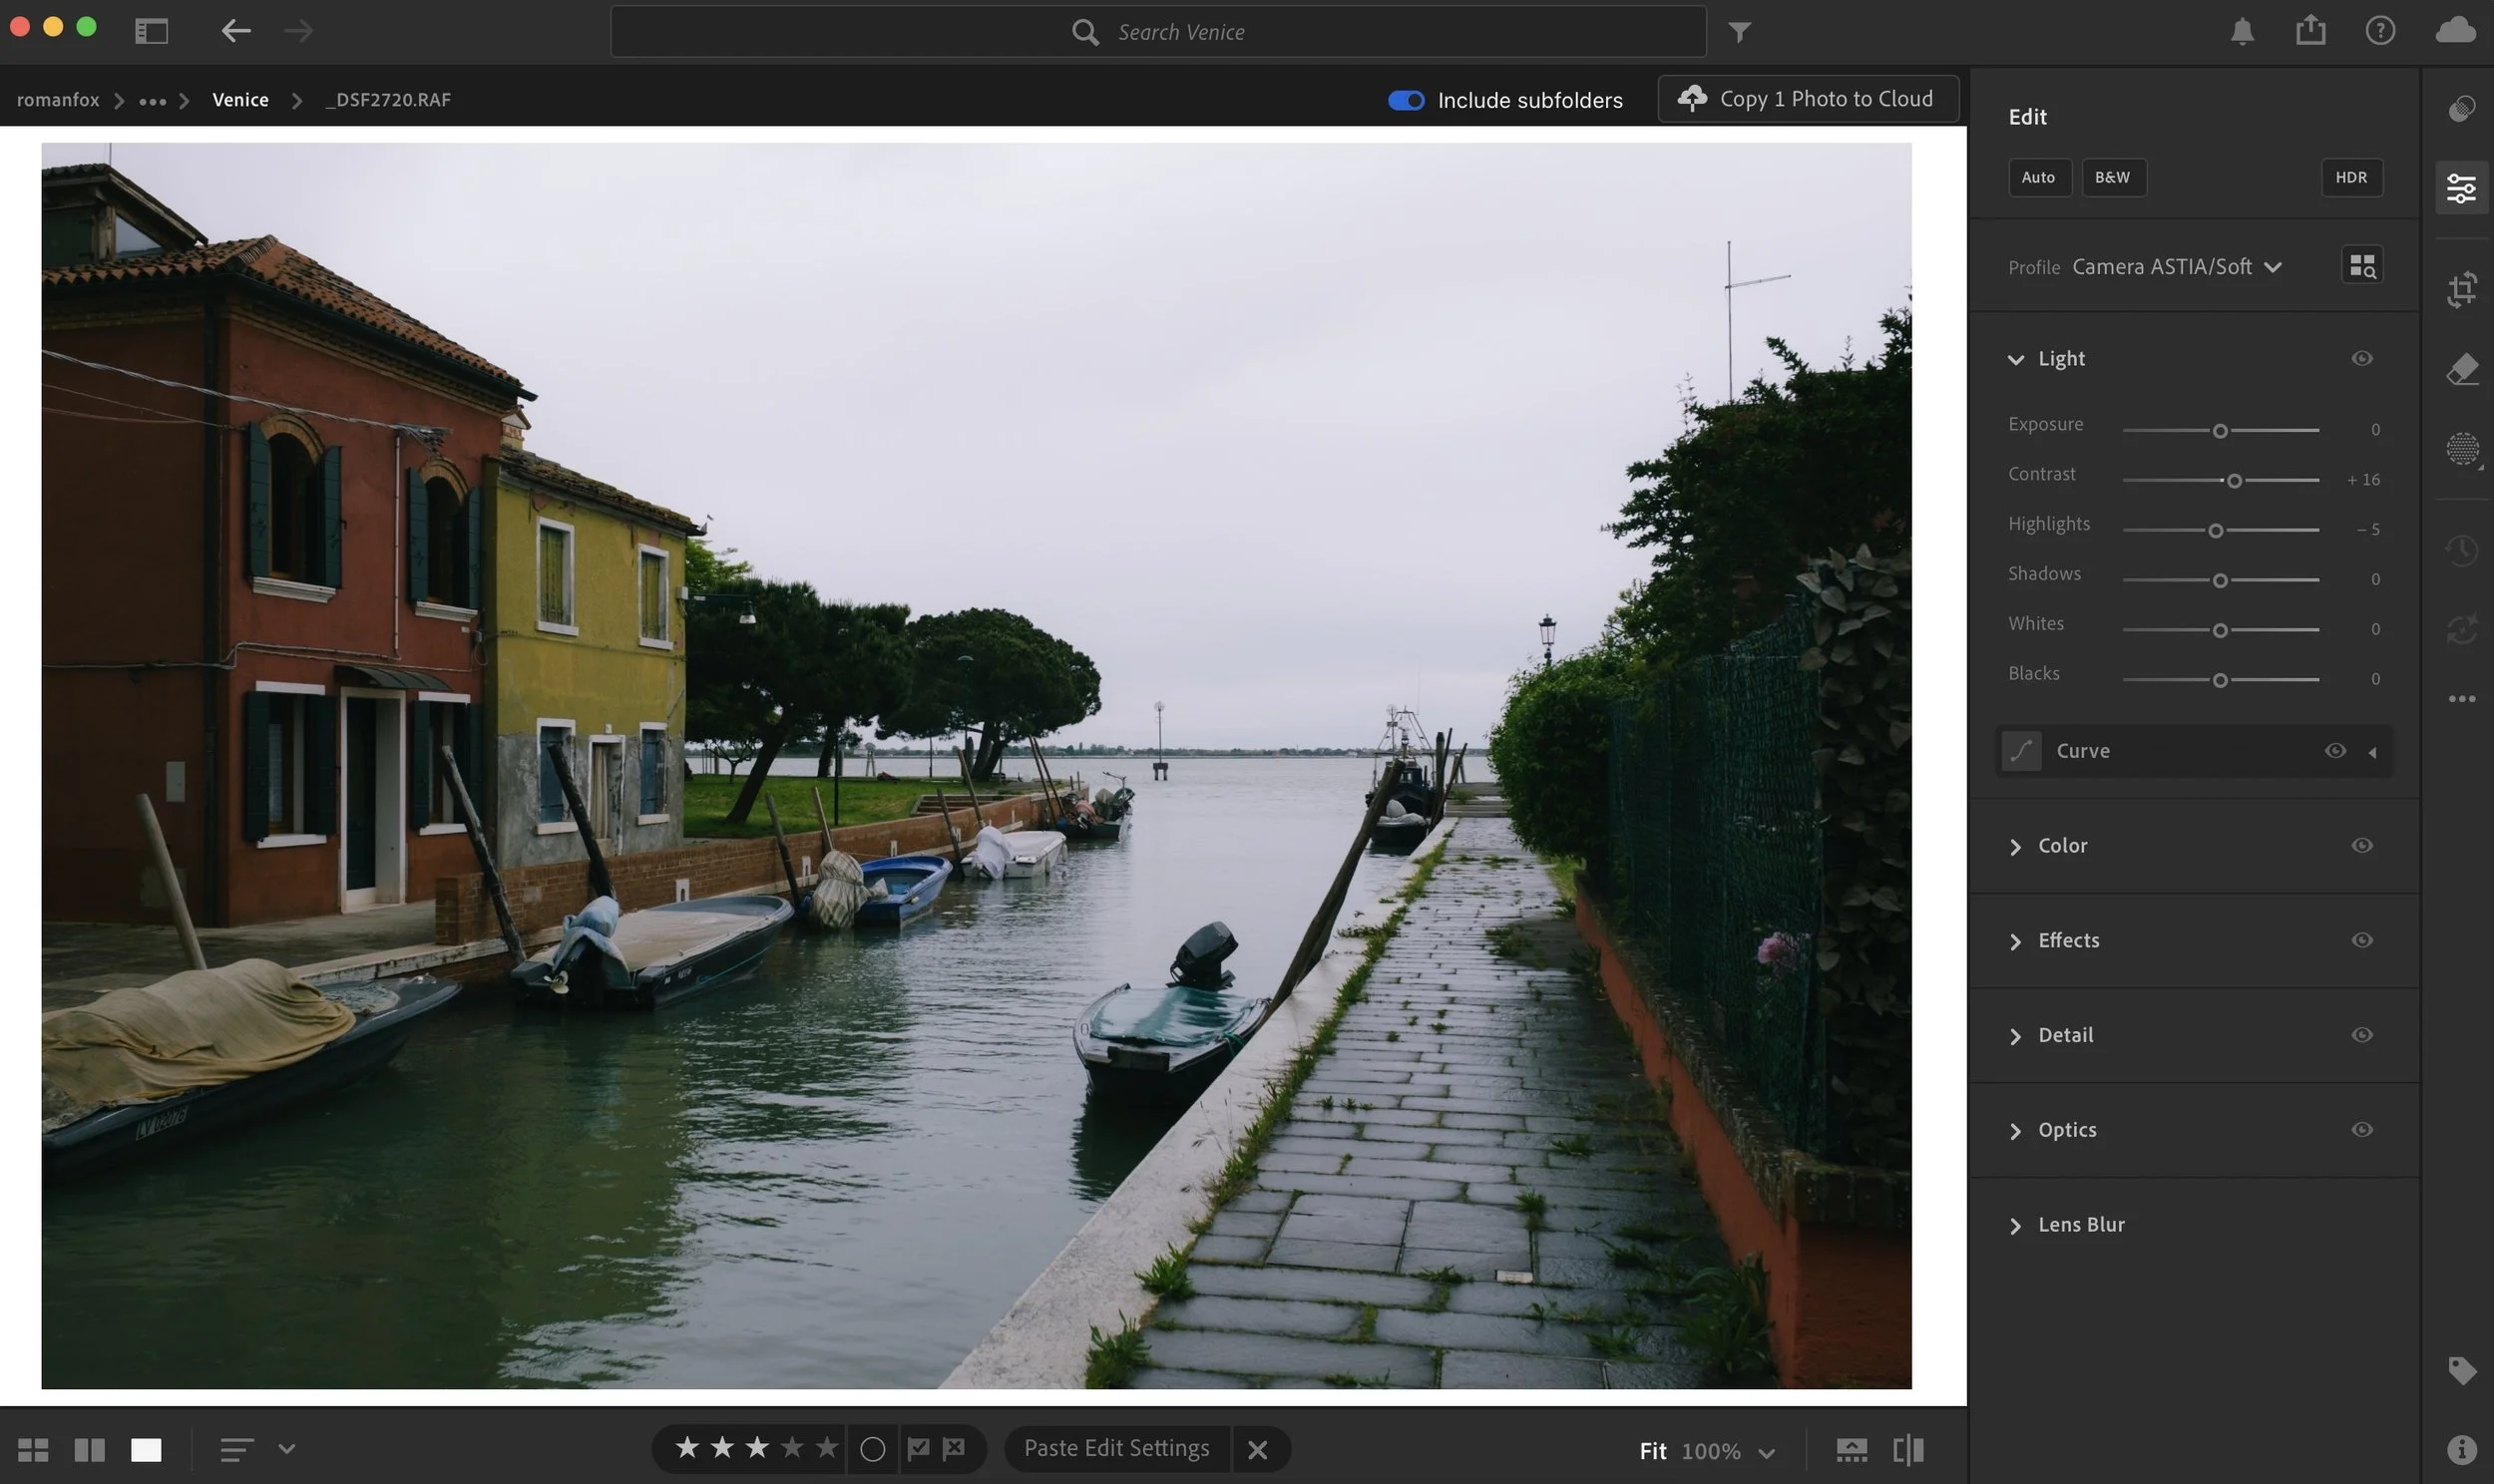
The camera underexposed this shot by exposing for the sky
This looks much better
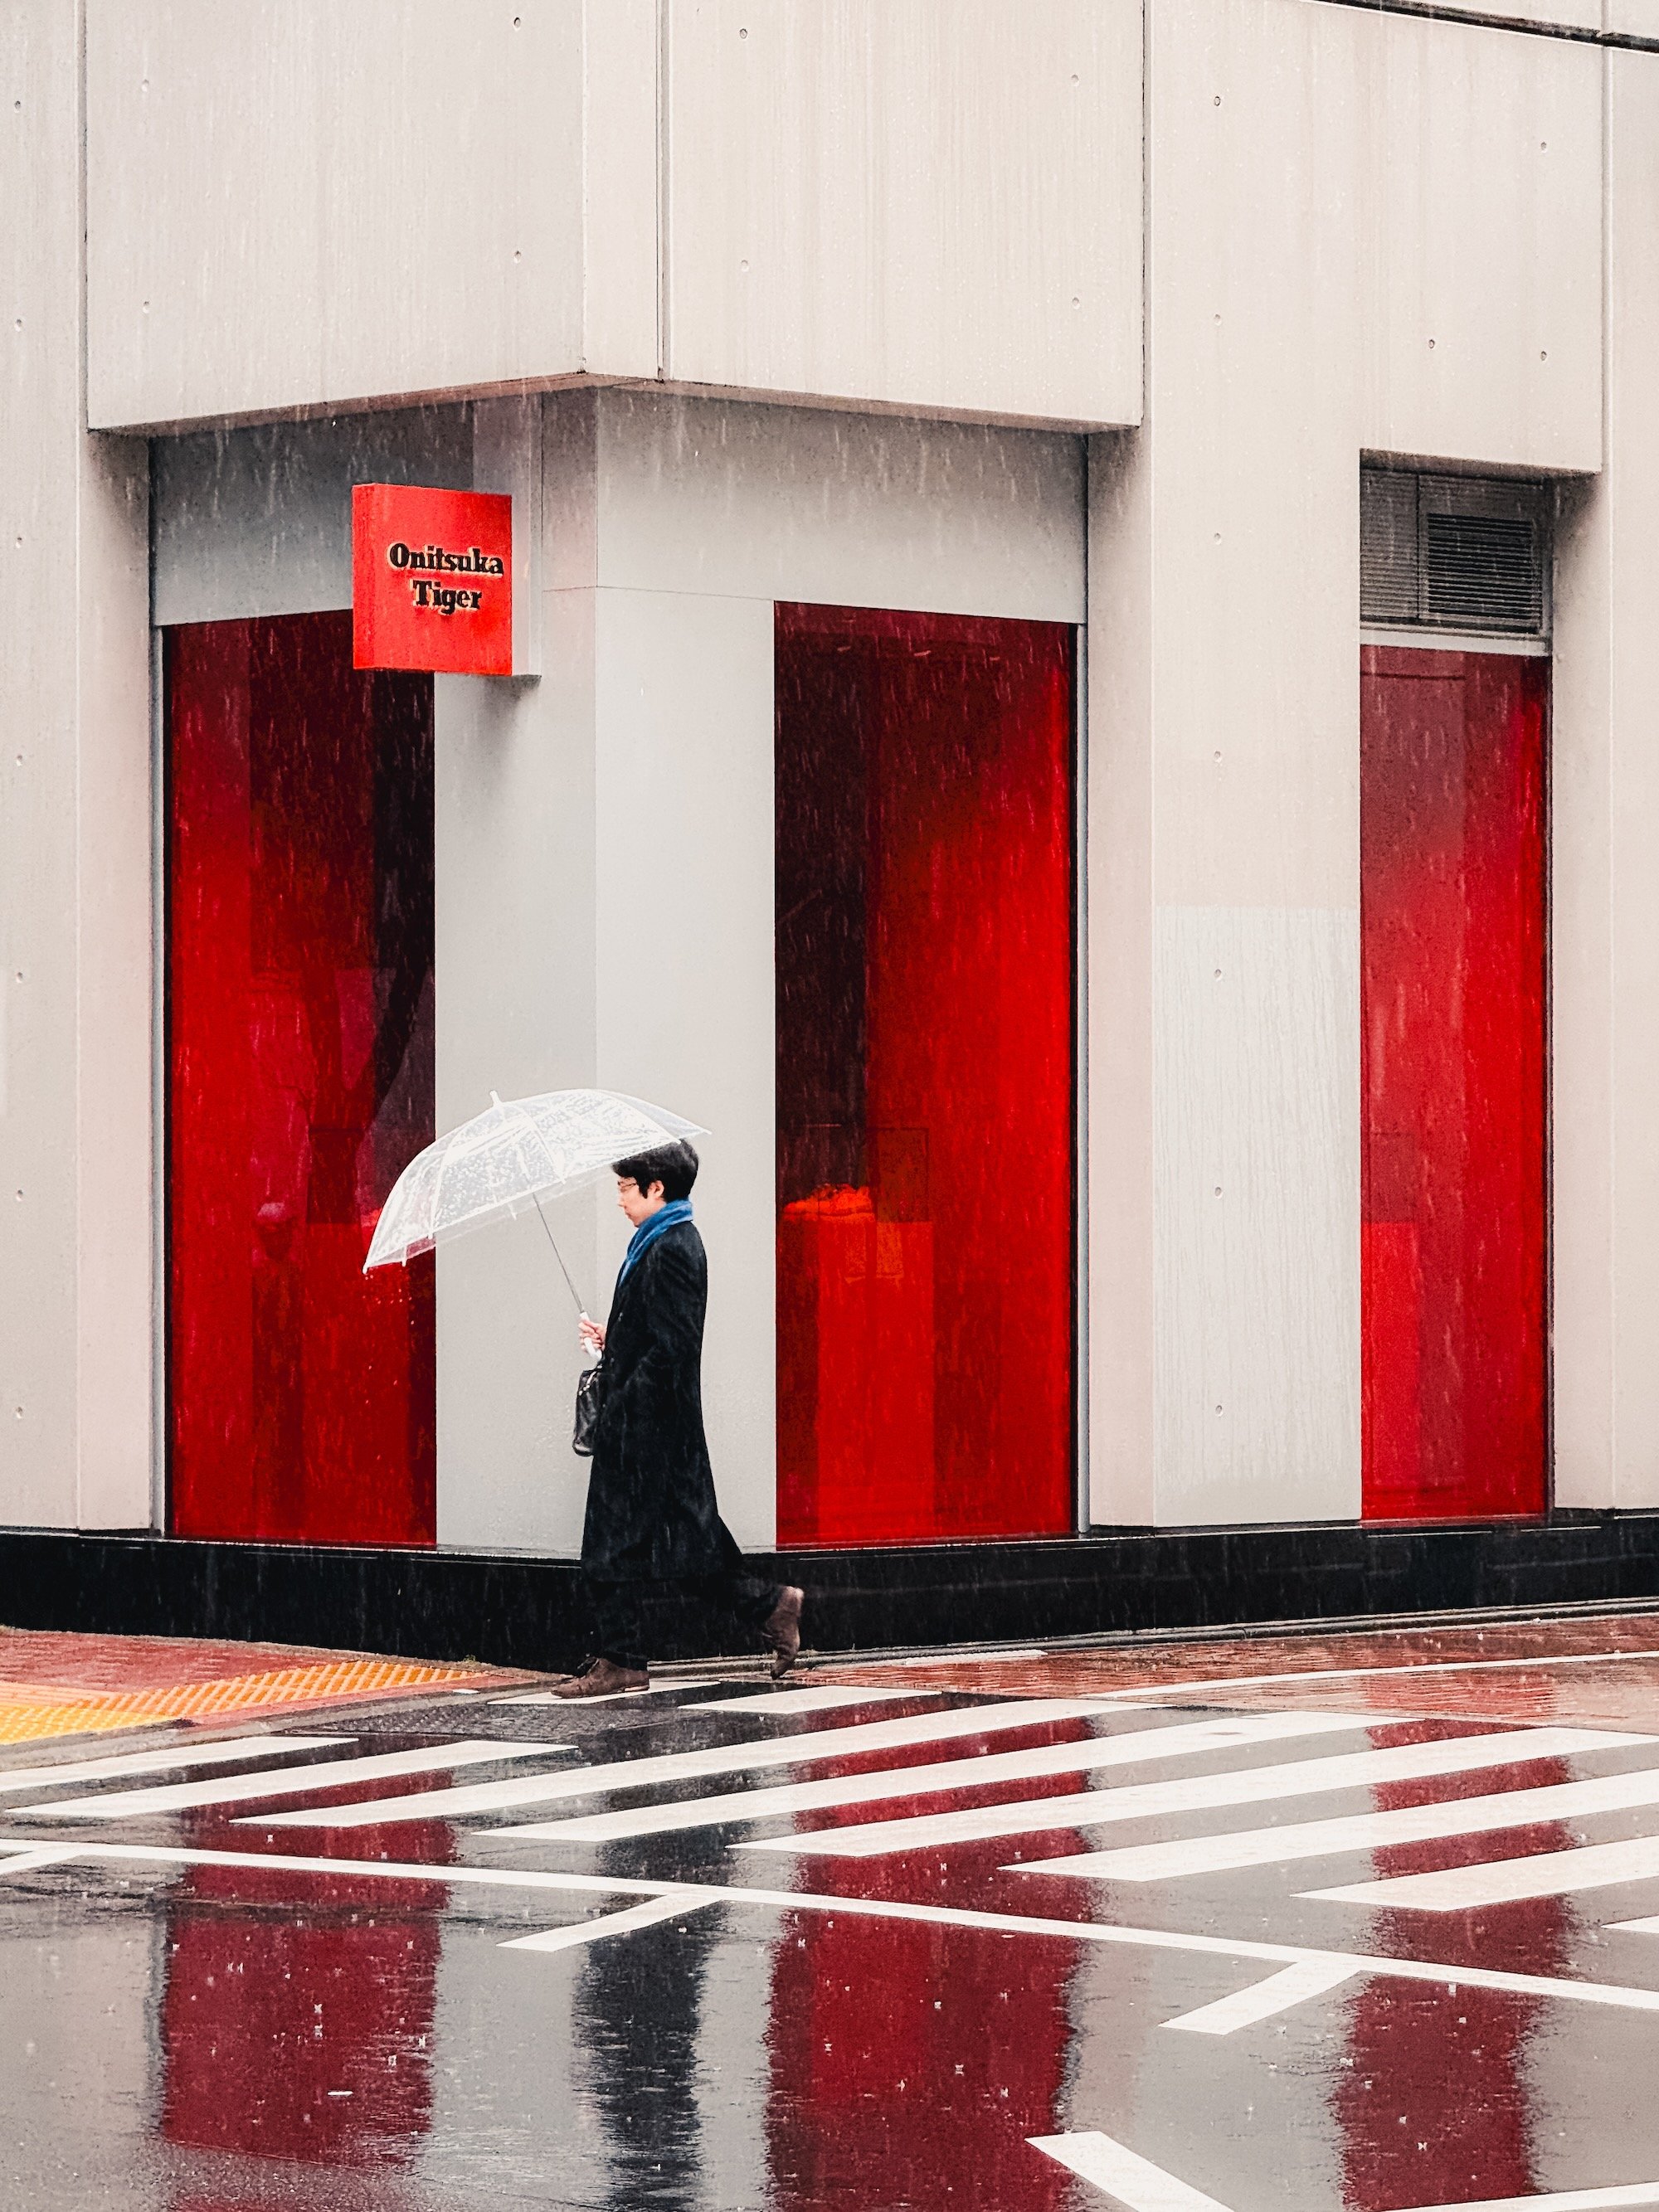
Colour is your friend
With the absence of sunlight, you will also notice a drop in the overall vibrancy of the scene. Looking out for colourful objects is a good place to start building a photo from. Try to seek out colour and see if you can create an image around it. Of course, not all colourful items will make for great subjects, but it’s a habit worth getting into.
Go black and white
To contradict the previous point, removing all colour can turn a dull scene into something much more creative. By going black and white, your attention now focuses on the composition, contrast, and overall mood of the image. You also have more creative freedom to push tones in directions that would simply ruin a colour photo. Unless you need a monochromatic shot, such as during blue hour, give black and white photography a go.
If you’re finding this blog helpful, and wish to learn much more, please check out my book about photography below.

My Little Photography Book is everything I know about photography in one concise place. This book is designed to save you time and share years’ worth of knowledge in an easy-to-follow format. Think of this as a workshop and a course in one affordable 300-page package.
This book covers psychology, gear, lighting, composition, storytelling, style, and a lot more. In other words, I’ve emptied my photography brain into this PDF. As always, keep in mind that this is simply my approach to photography, and everything I share is from my own experience.
The book is a digital PDF download and comes in two flavours. Two page spread and single page. The spread might be better for landscape viewing and printing, while the single page is more suited for vertical scrolling on a phone or tablet. The total download will be just over 100mb with each PDF being around 50mb.
This book has been in the making since mid-2017 and is by far my most involved project to date. This is also entirely done by myself from scratch. All the writing, editing, formatting, everything… it’s all me with no external input. I really do hope you like it, and as always, I welcome any feedback.
Please note that due to the nature of digital products, refunds are generally not accepted. However, if you experience any issues, feel free to contact me and I’ll review your situation individually. You are welcome to use this product for personal or commercial projects, but you may not copy, distribute, or resell the files in their original or modified form.
Finally, being a digital product means free updates when new chapters become available. The last update was in February 2025 to V2.
Thank you so much for your support
Much Love
Rome
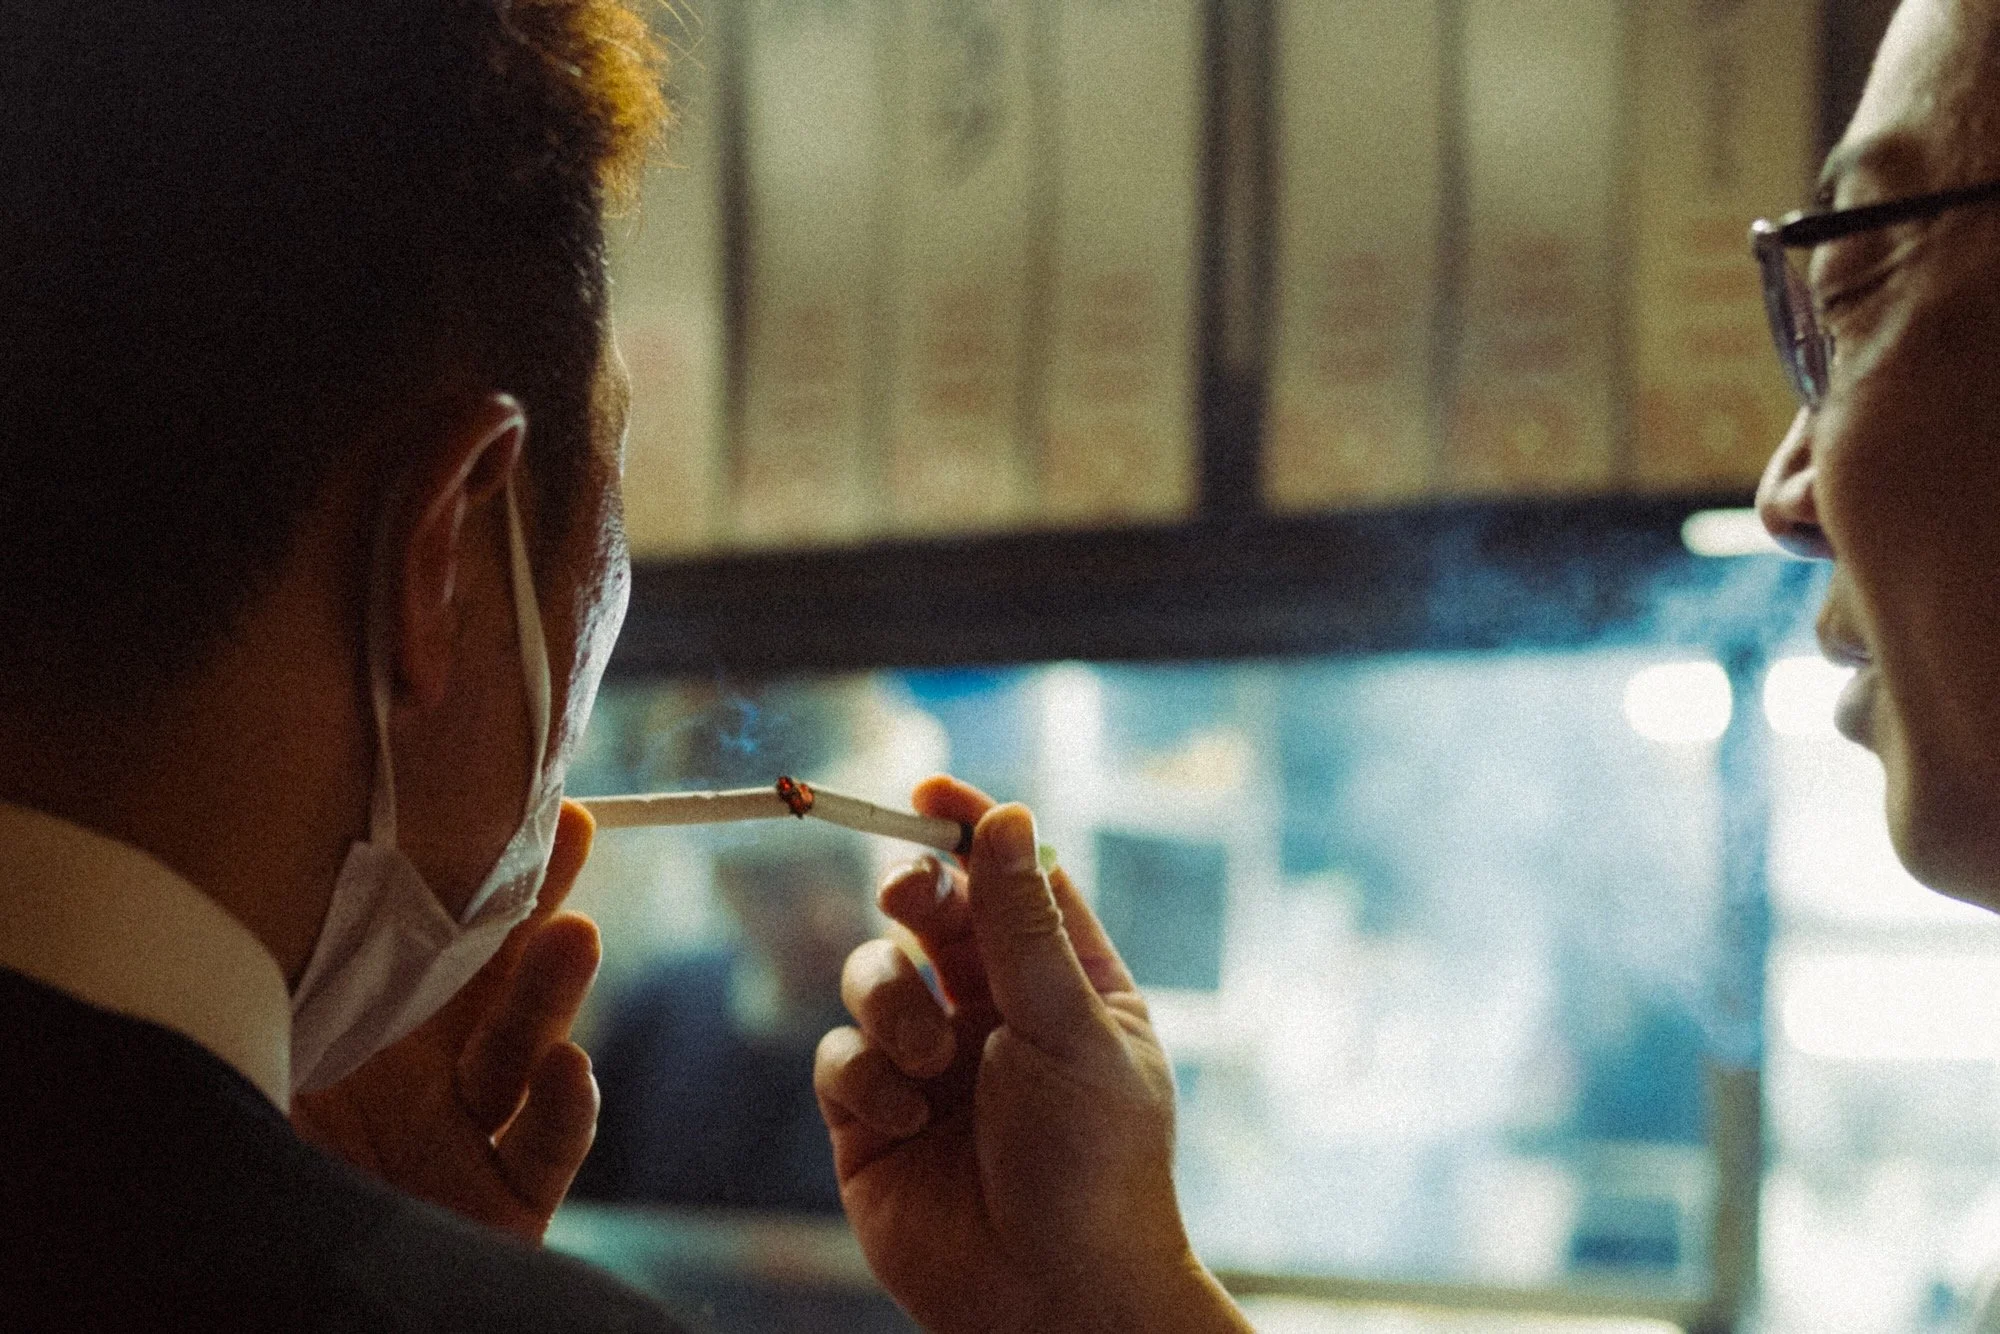
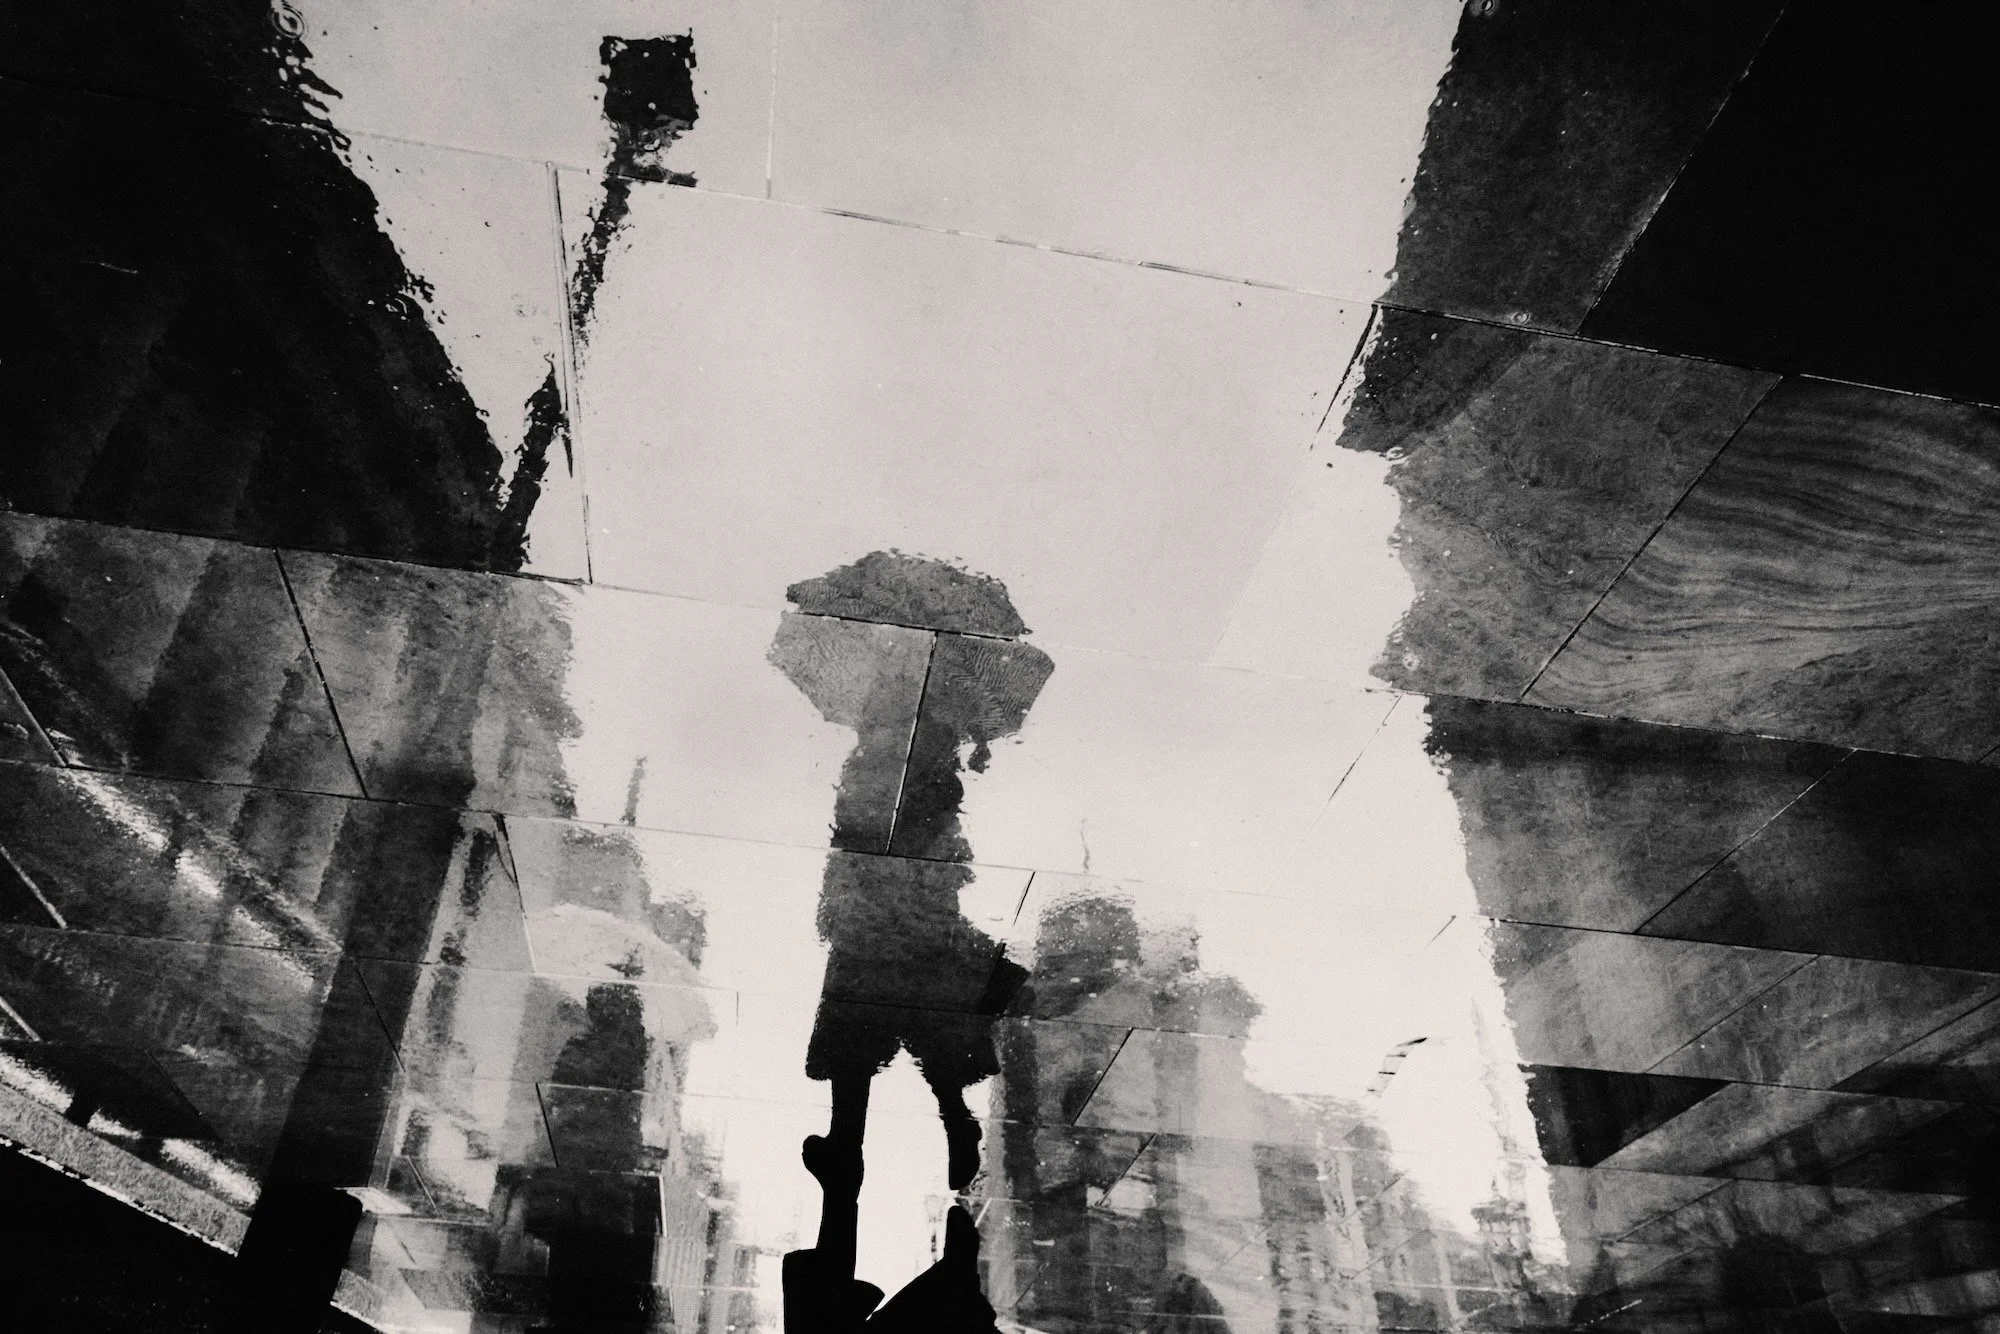
Low light
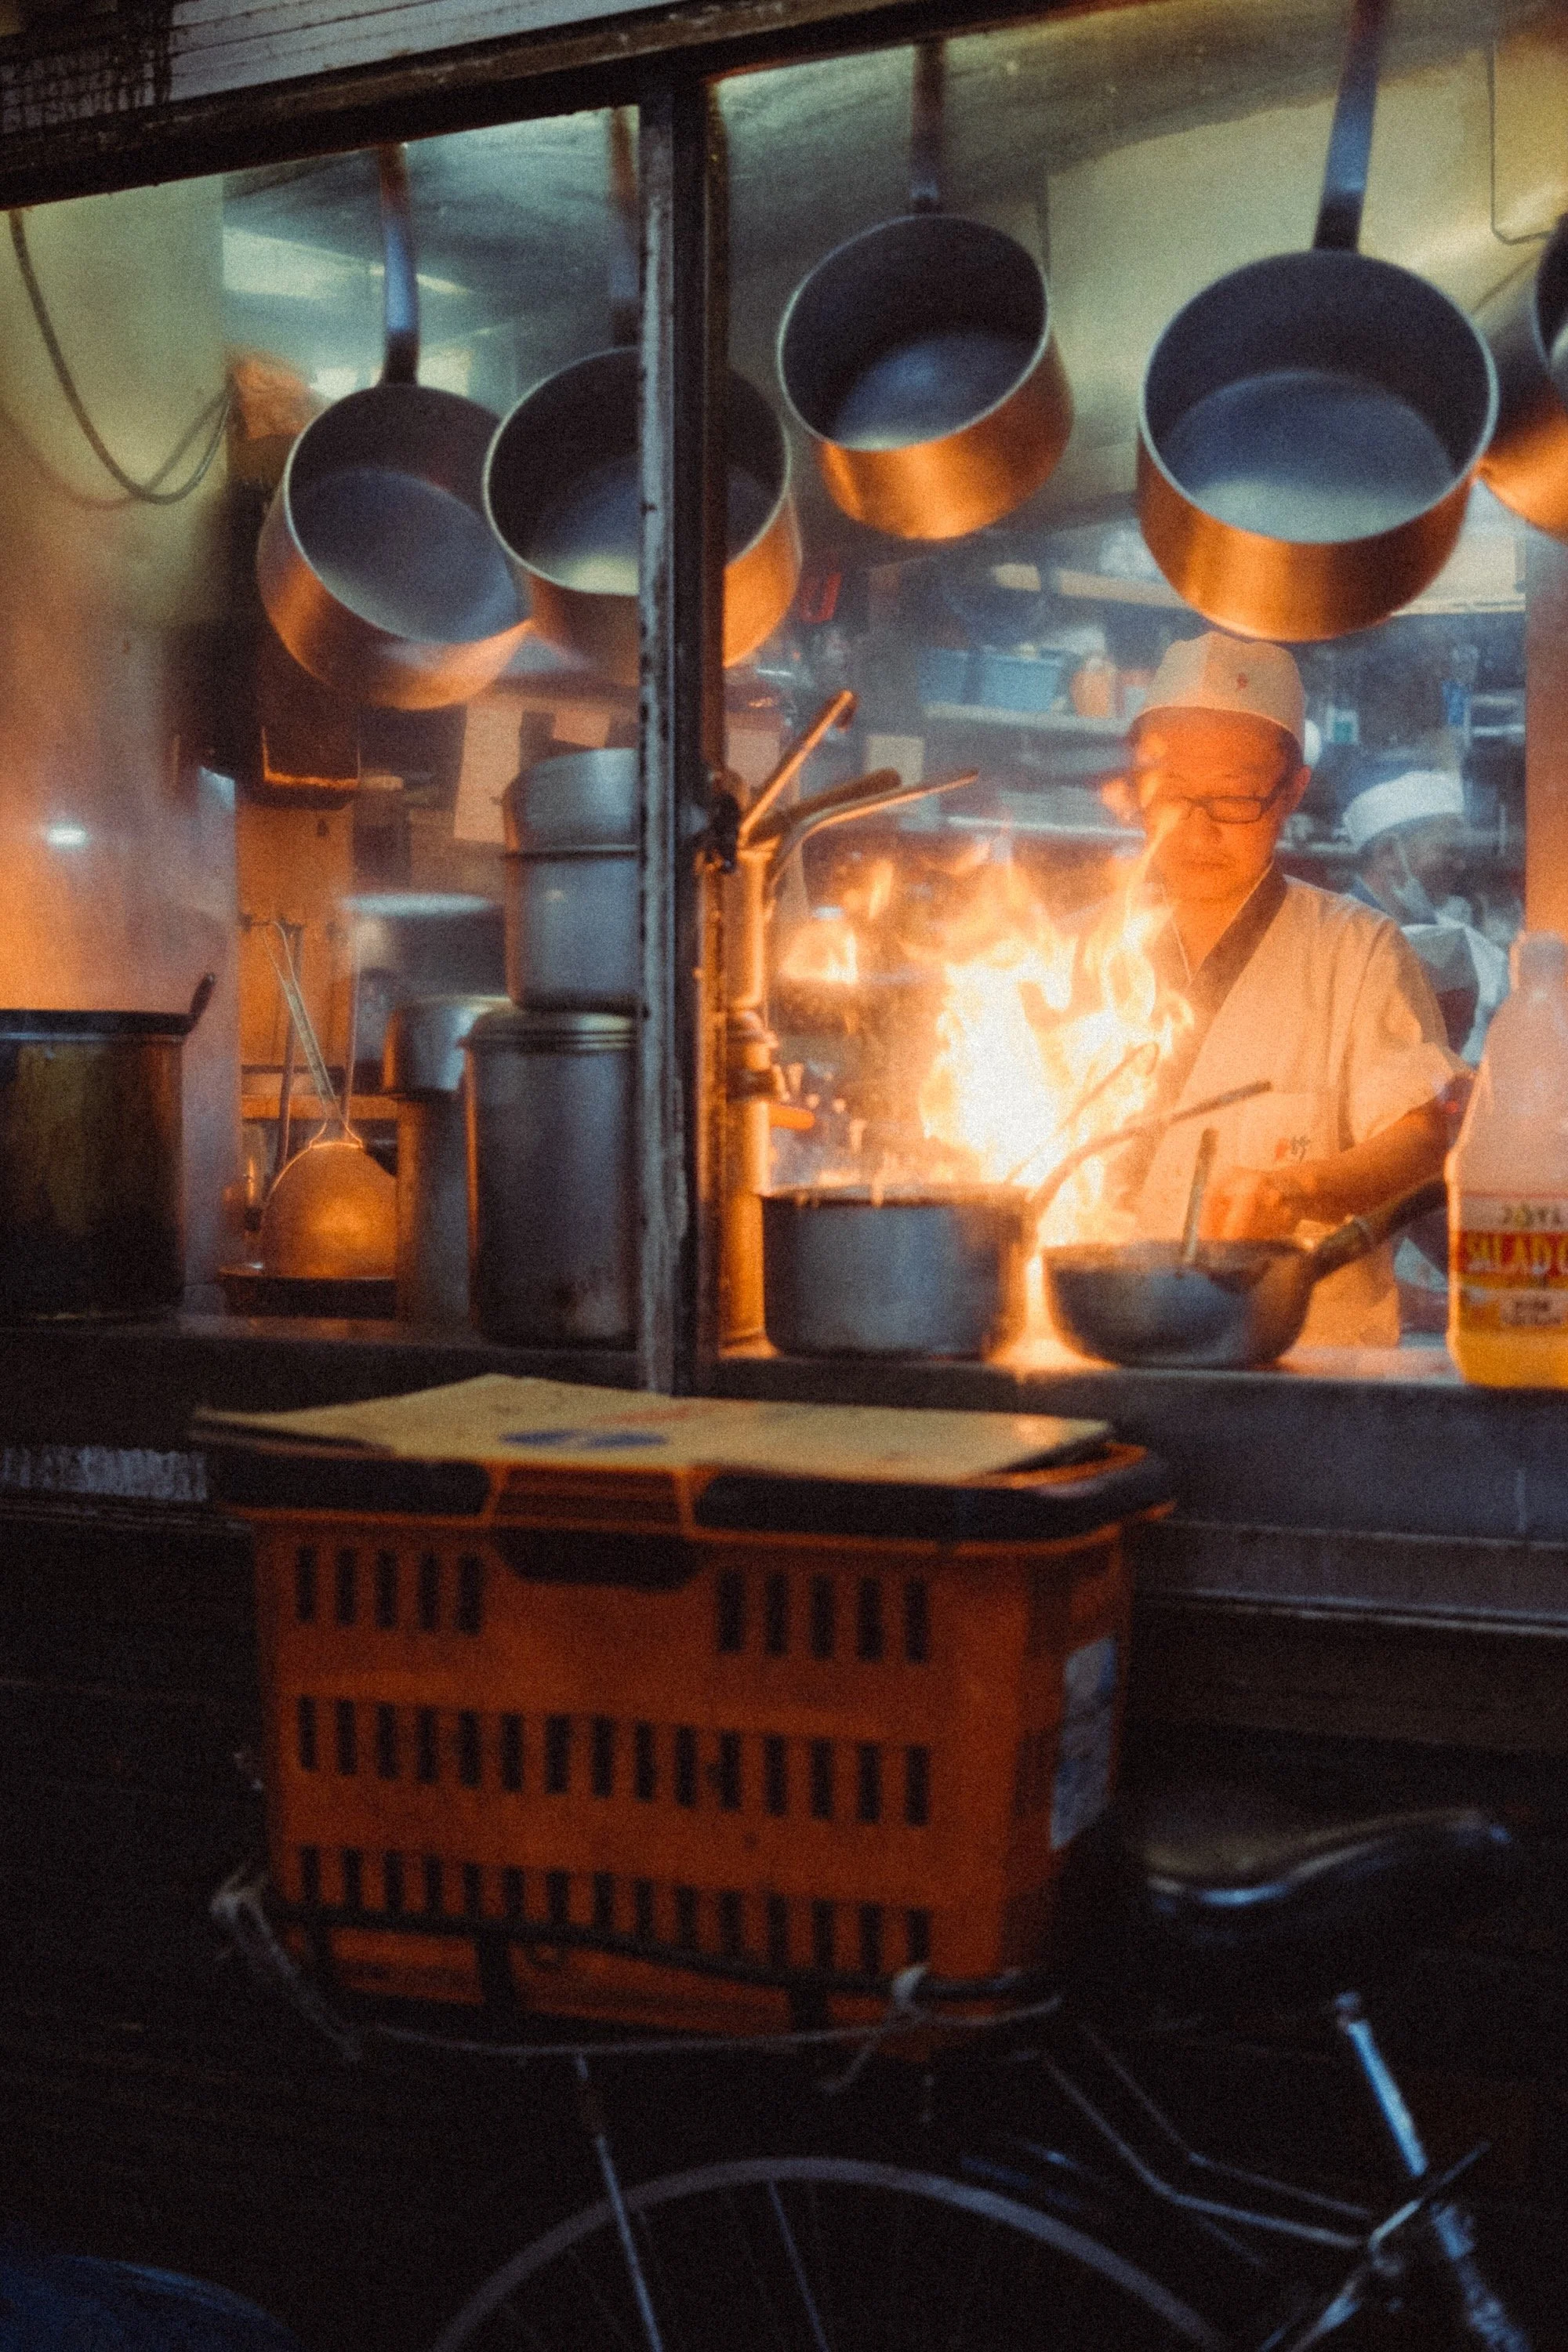
Underexpose
The first rule of low light photography is to underexpose. I prefer to do this in camera and will typically go down to minus 1 stop for most scenarios. Underexposing will help preserve the highlights and bring the image to a more natural exposure level, given that cameras tend to overexpose night scenes.
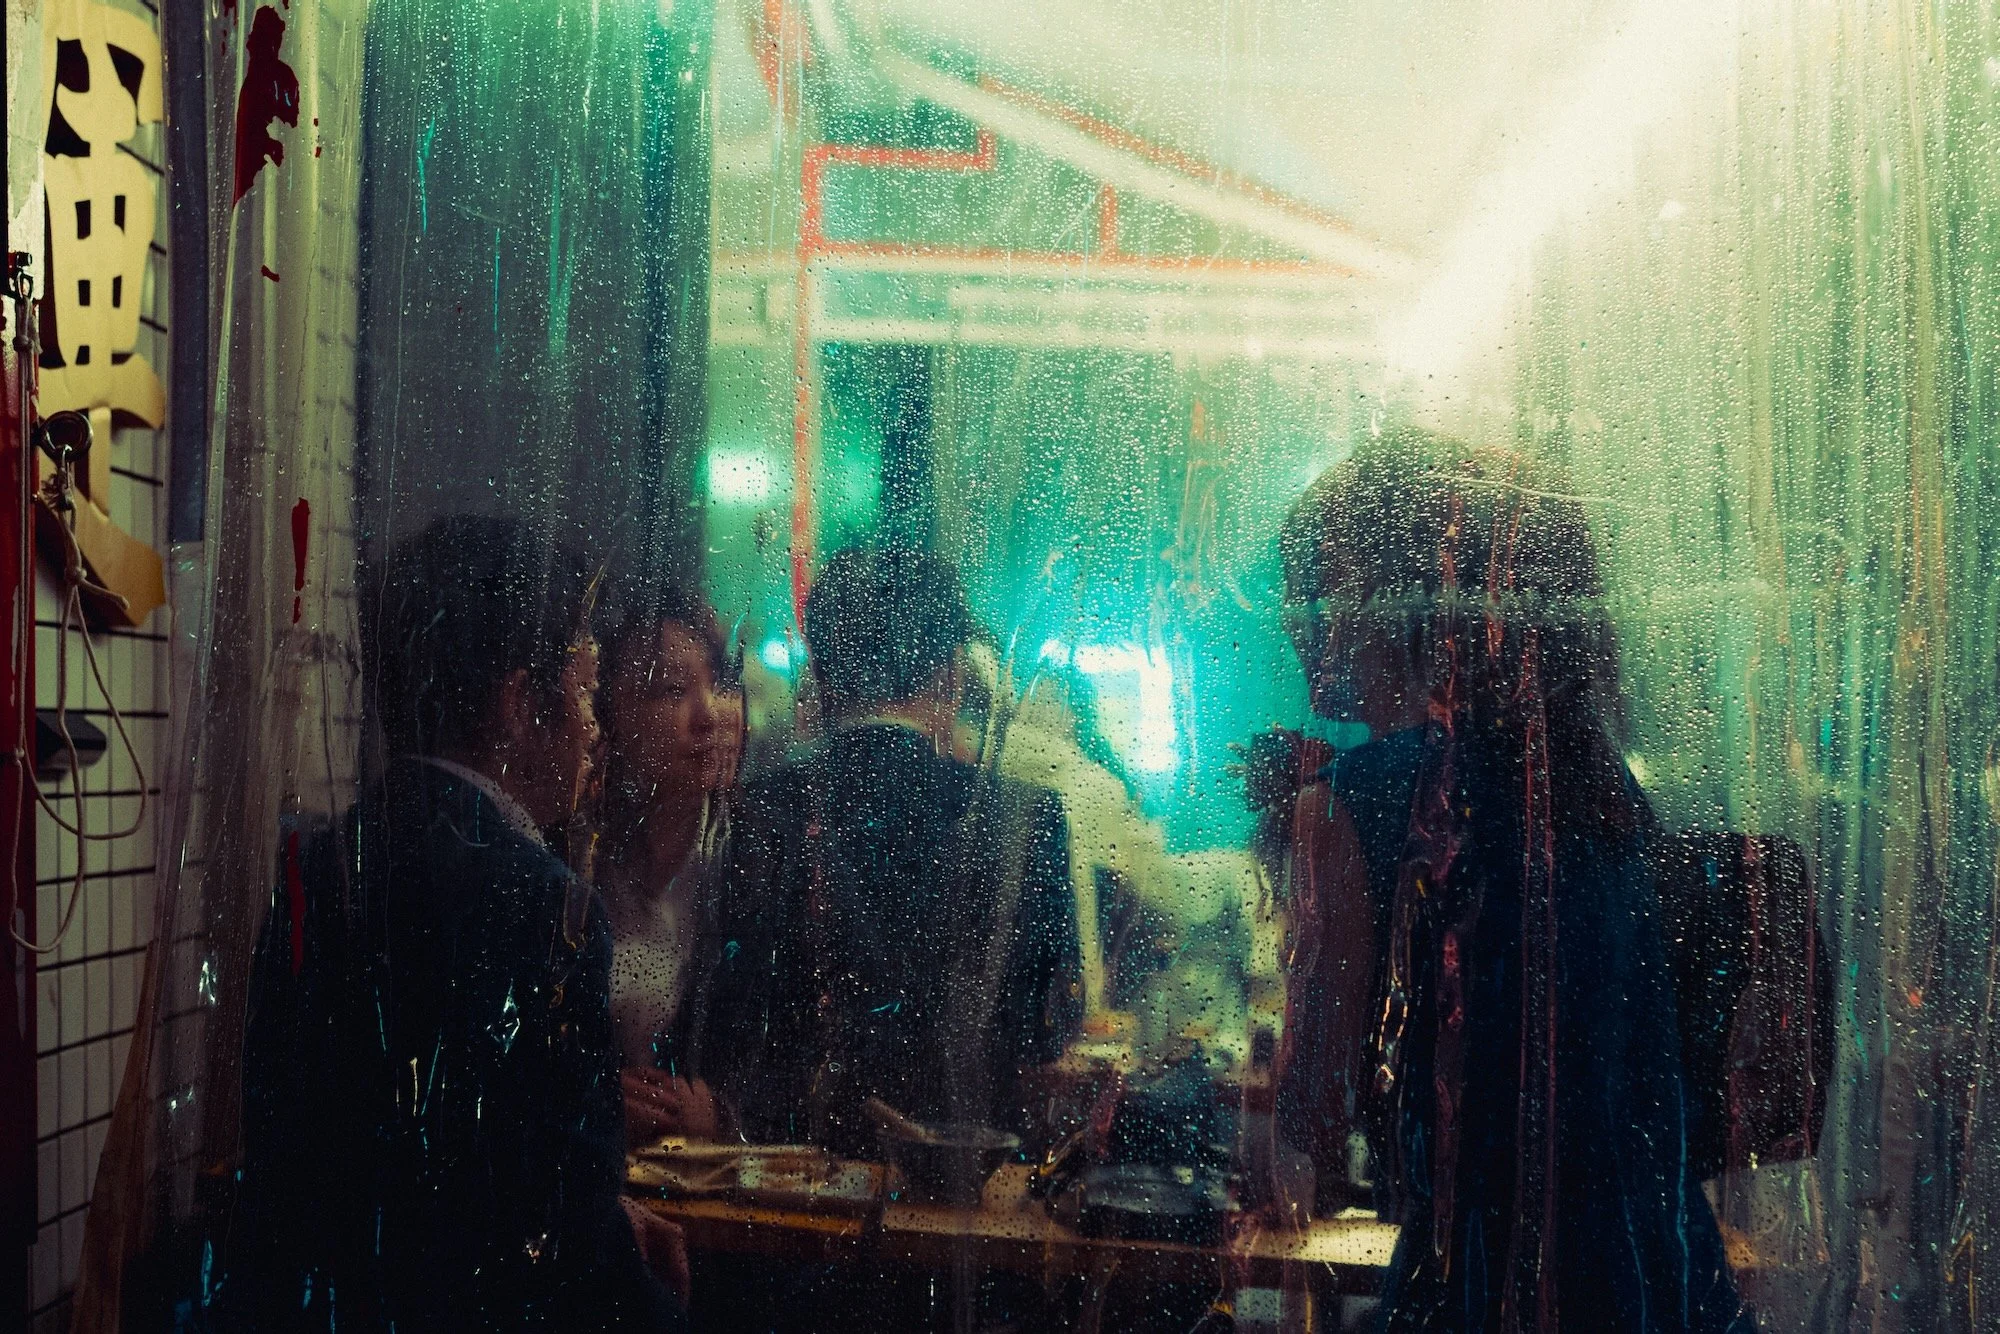
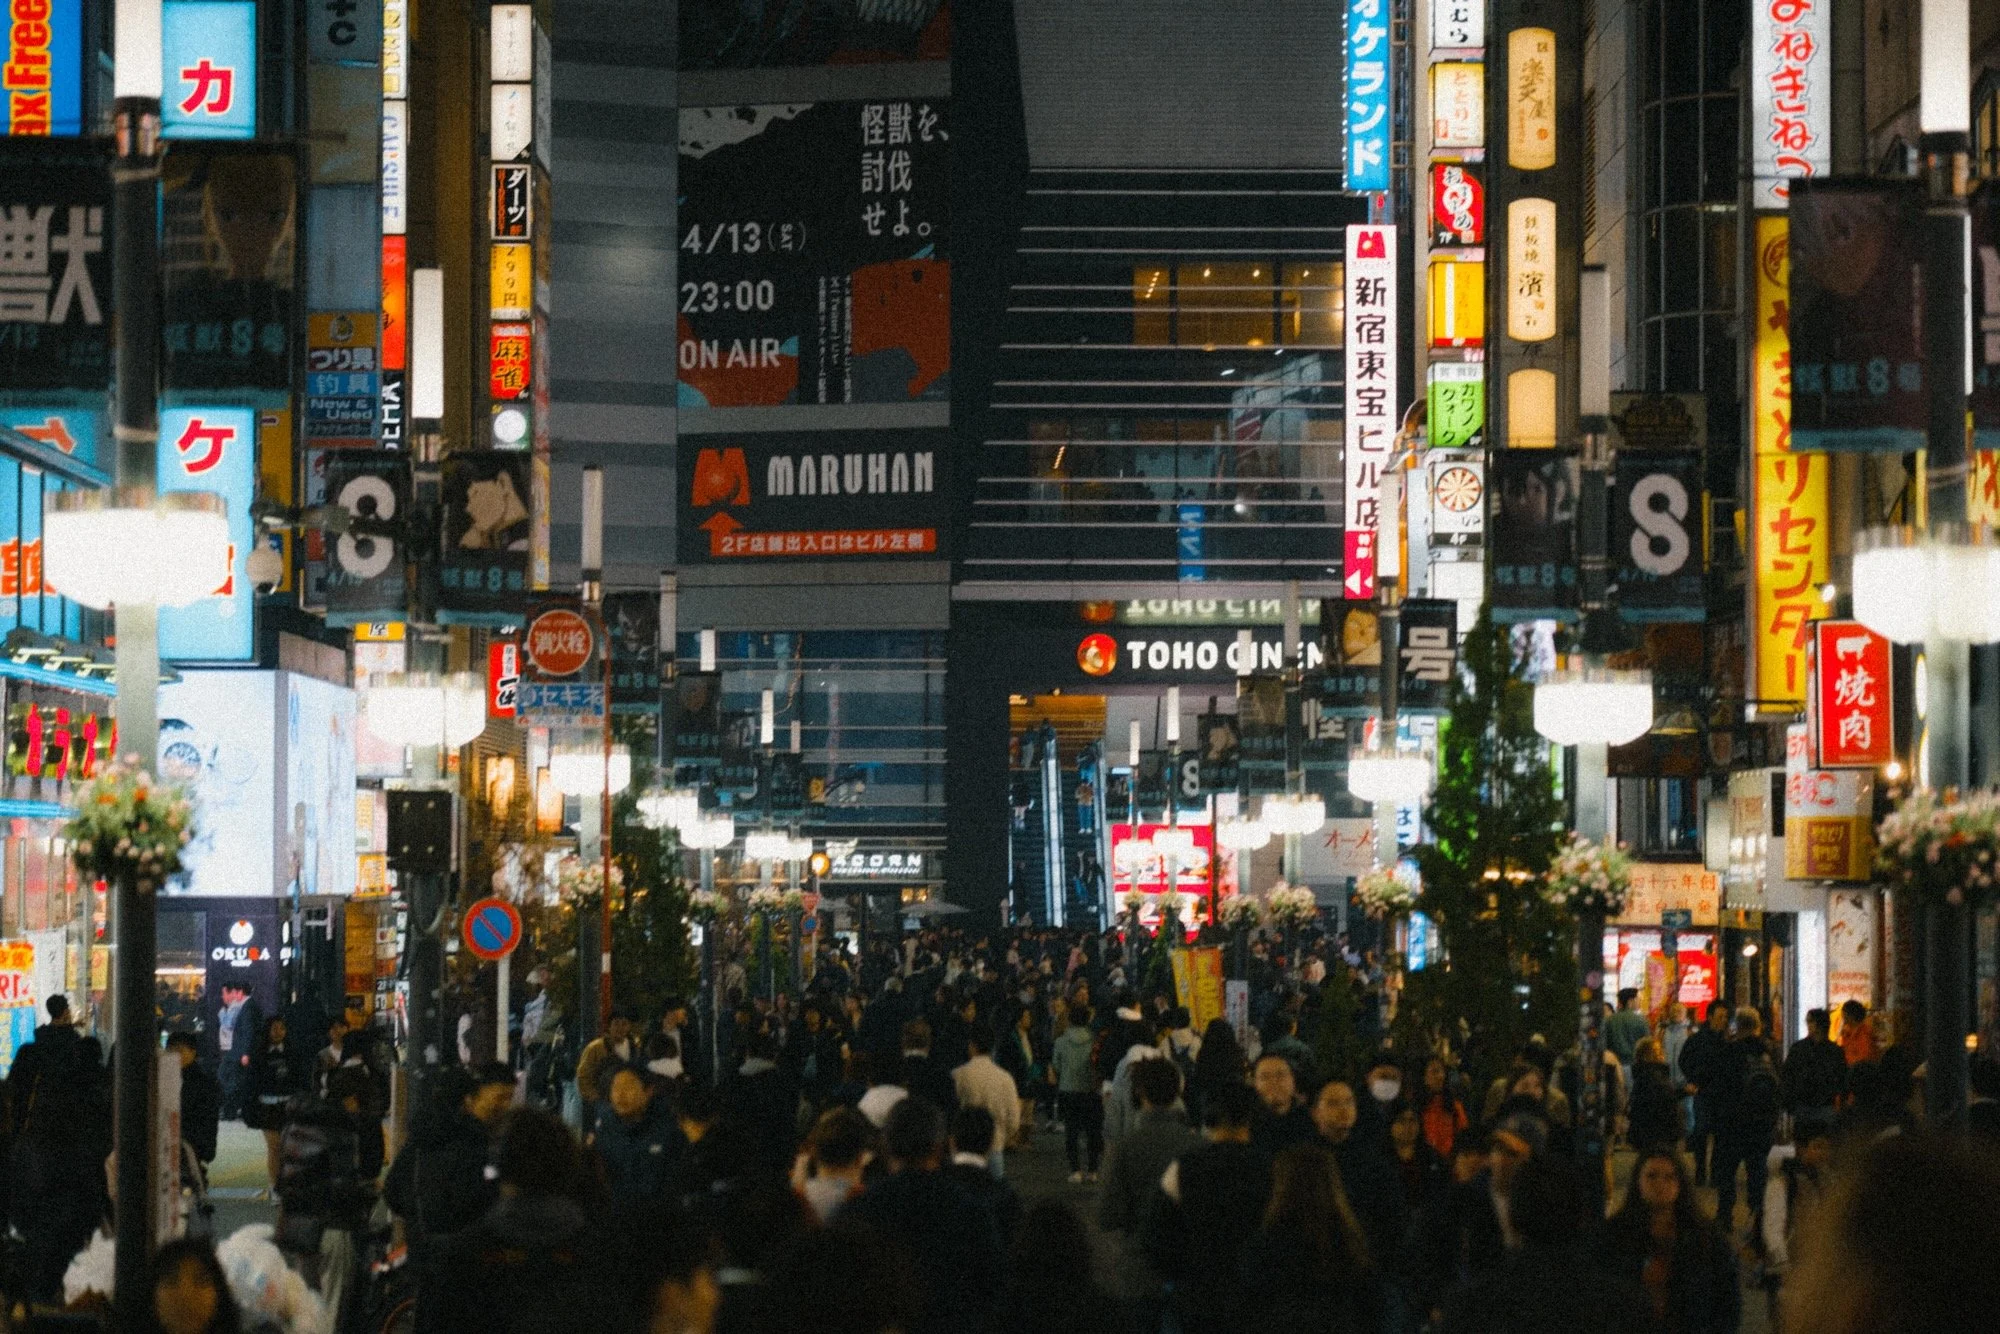
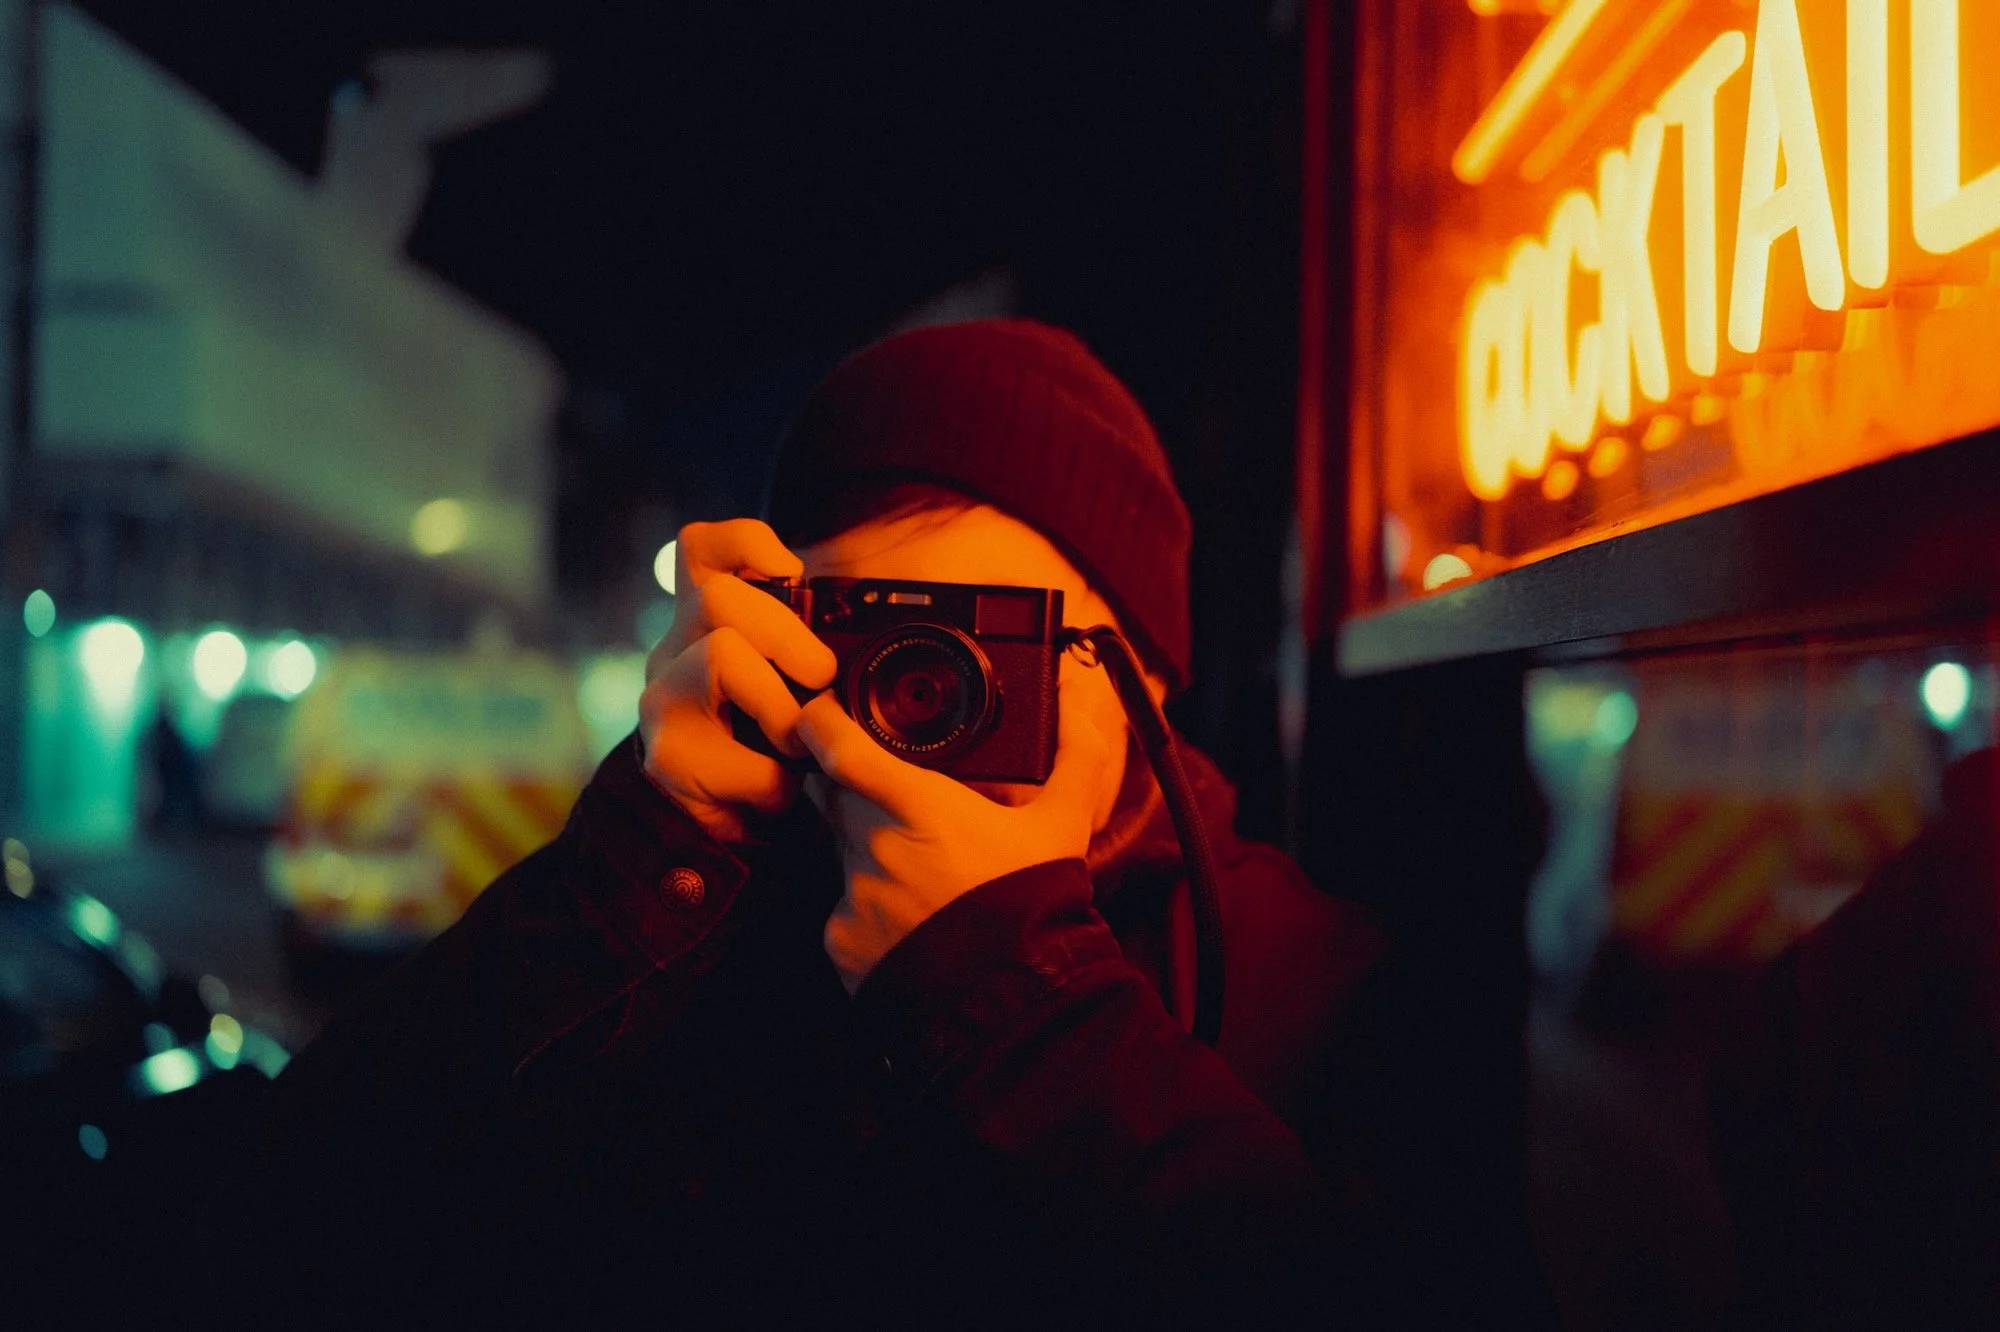
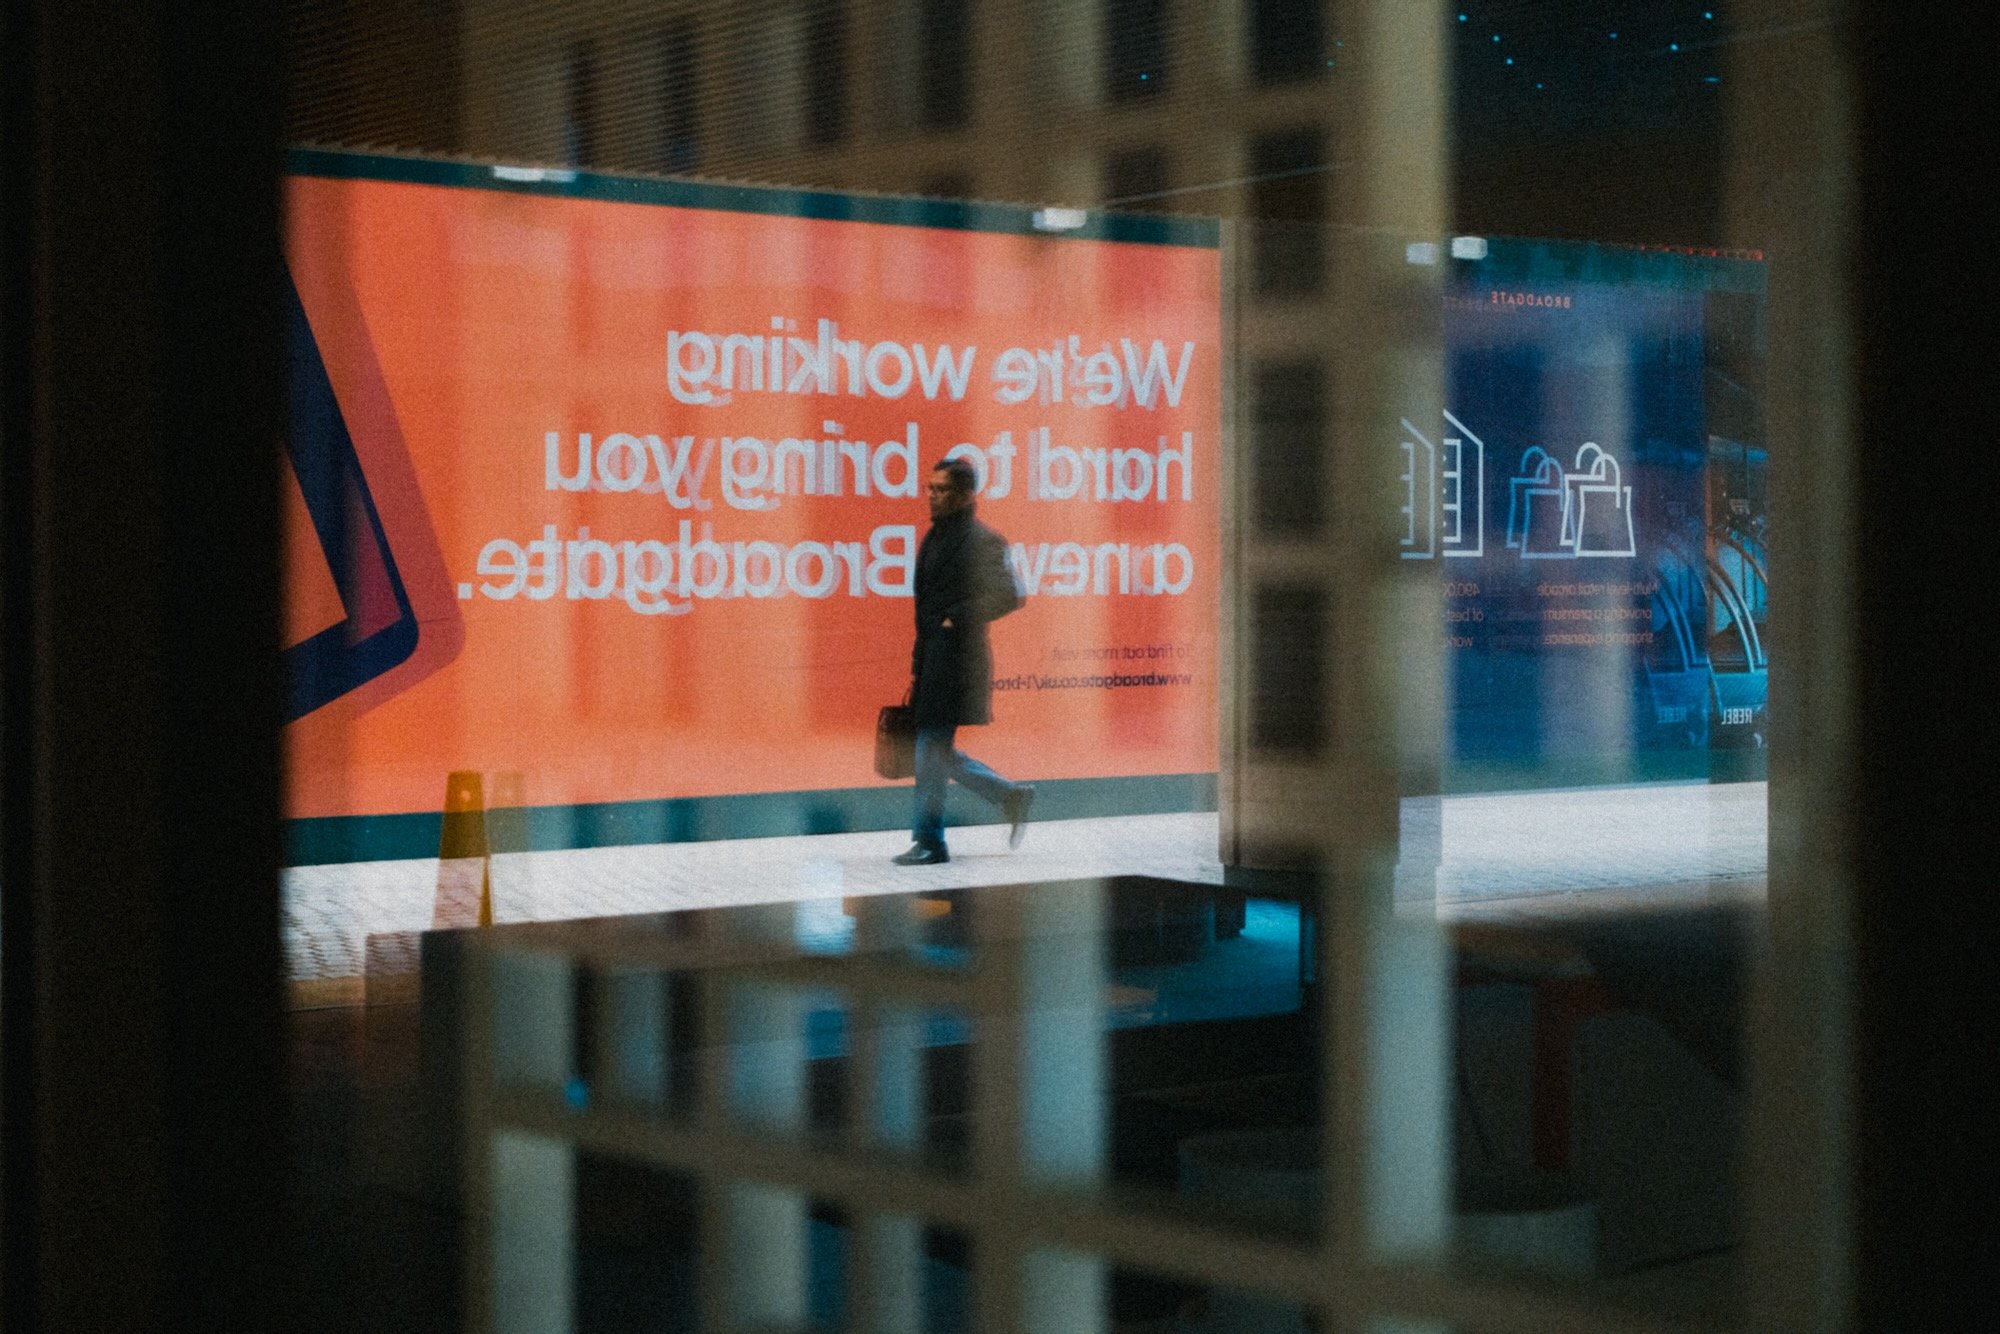
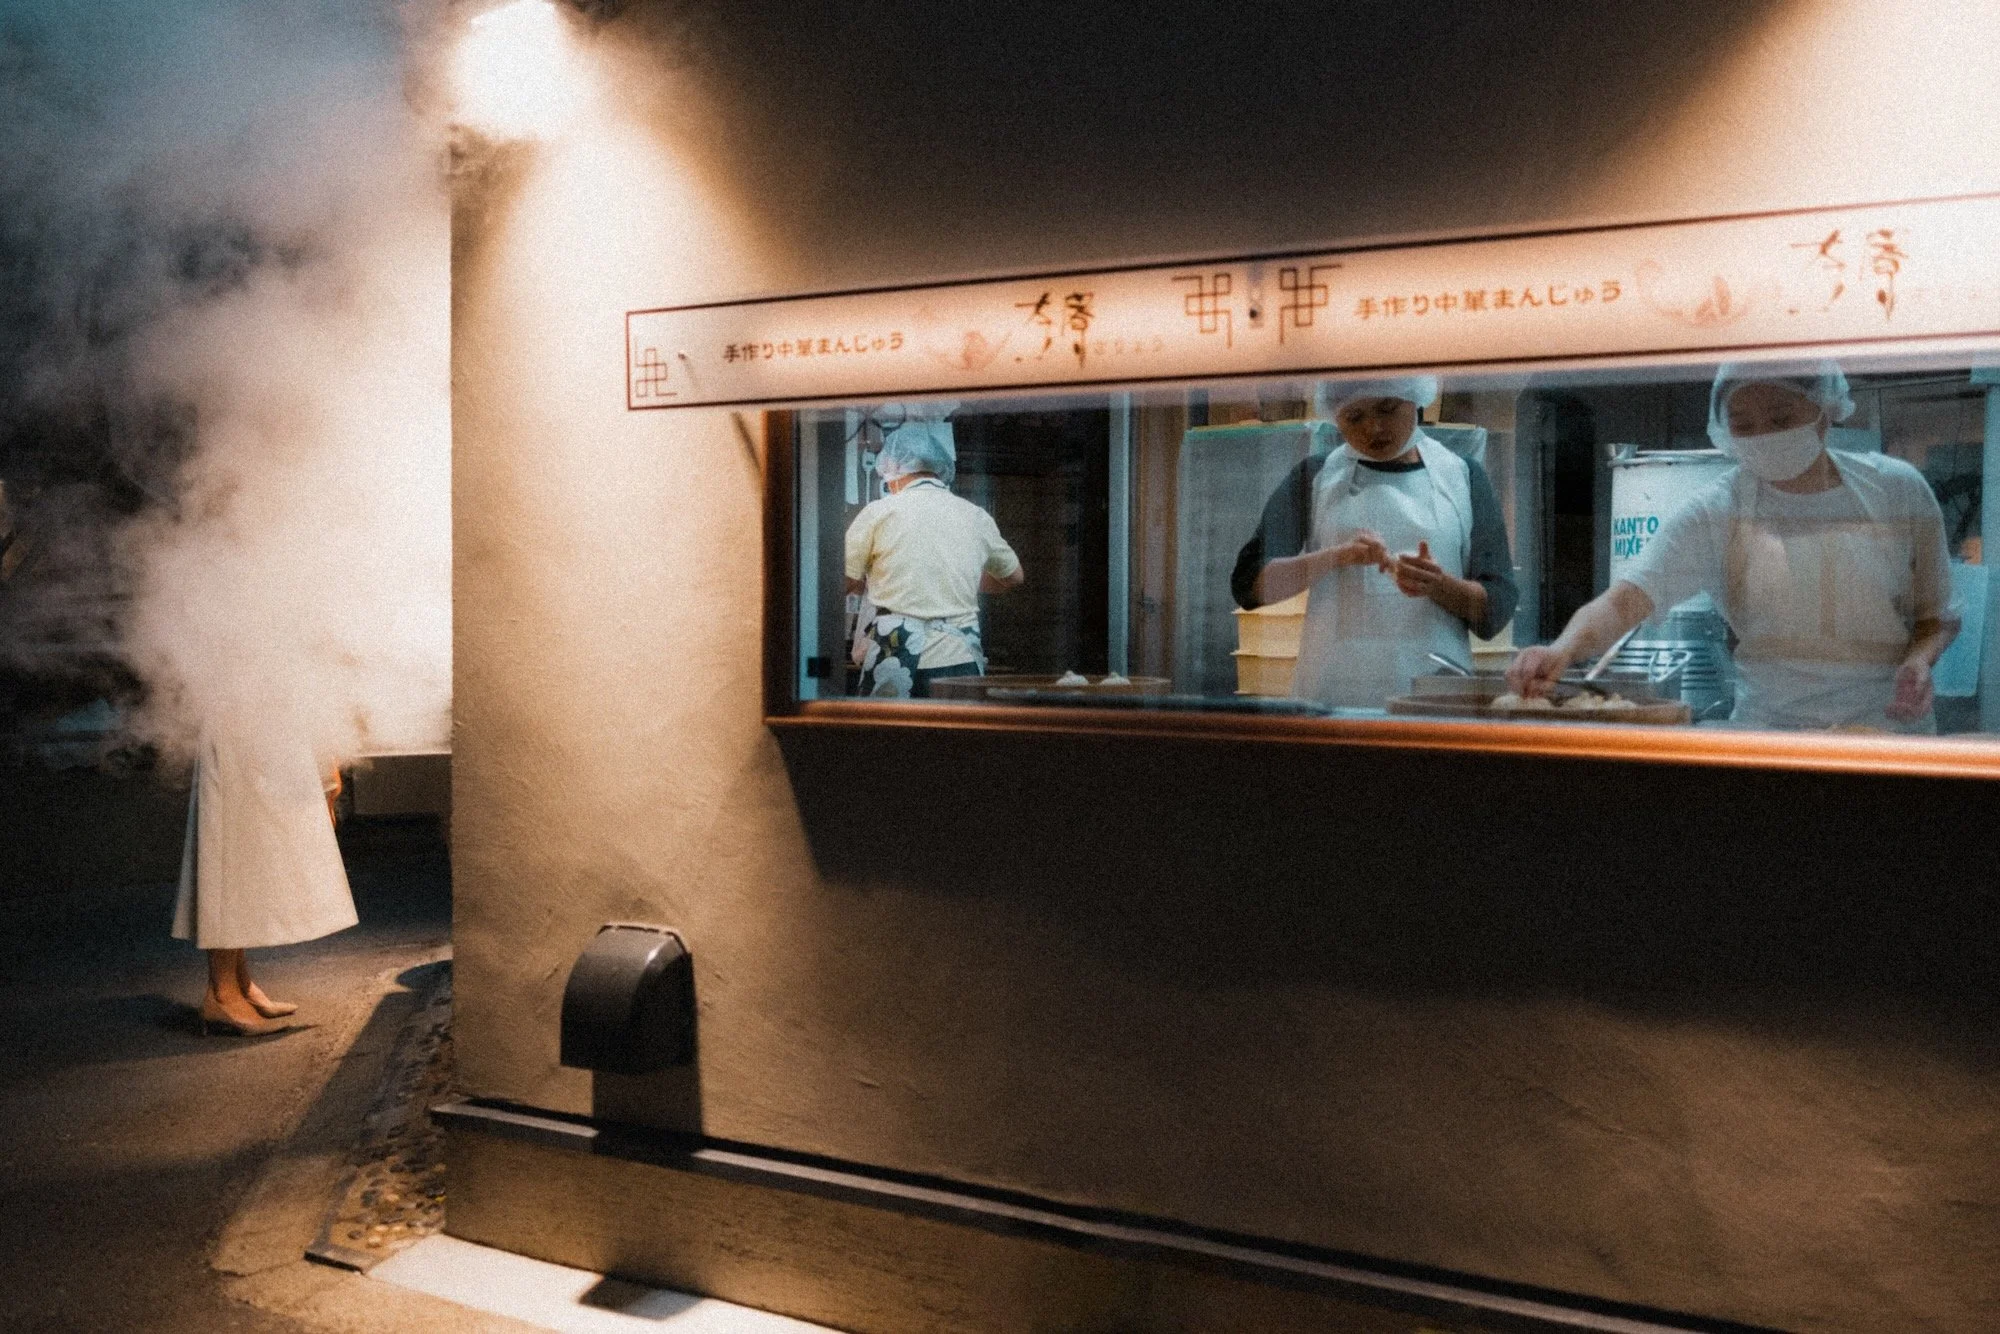
Be a moth
Photography requires light, and when it’s scarce, you need to work harder to seek it out. At night, you want to look for locations that have a lot of light. This could be street lamps, shop windows, neon signs, heavy traffic, or any place that emits as much light as possible.
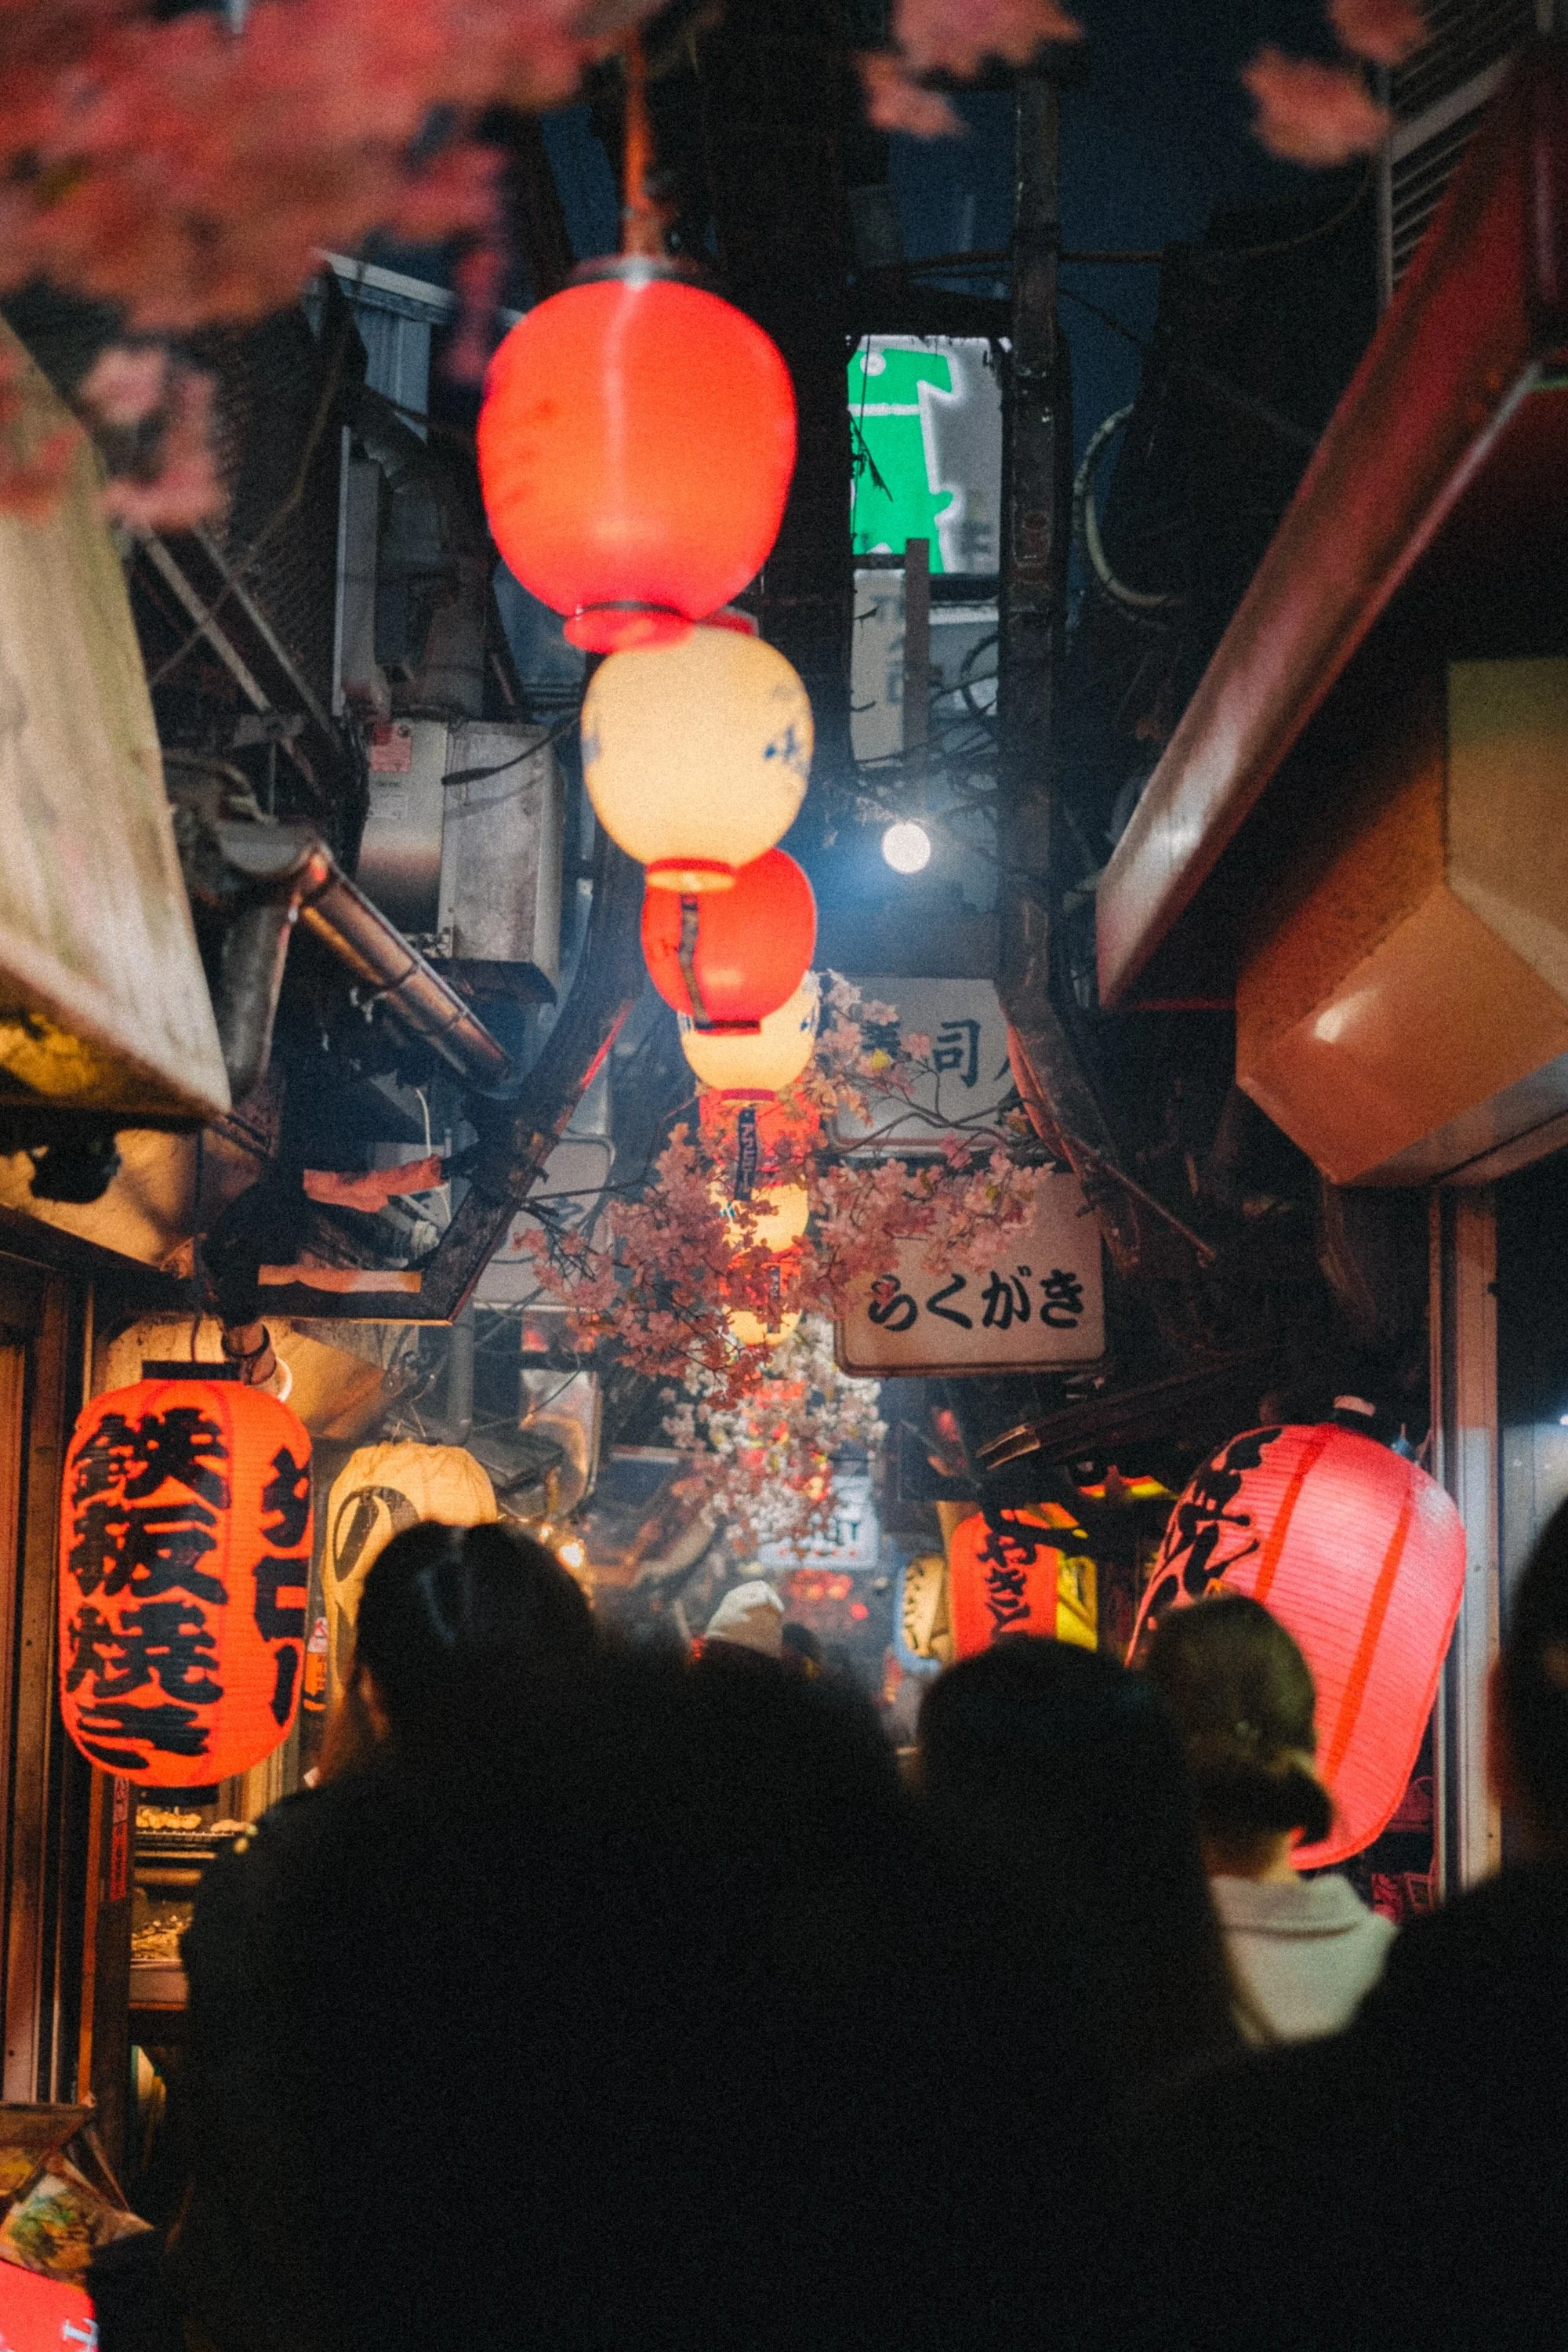
Get closer
Night scenes can be messy. You have many small light sources, loads of reflections, and a ton of detail that can get overwhelming, especially in a busy city. When shooting at night, I like to get closer and find smaller compositions within a larger scene. This isn’t for every shot, but for at least 75% of them. I do this by either physically moving closer or using a longer lens of 50mm and above.