
The Best DaVinci Resolve iPad Workflow
In this blog, I will talk about my video workflow using DaVinci Resolve on an iPad Pro. Before getting into the details, there are a few things I need to share. This isn’t a blog about whether it’s possible to edit from an iPad (of course it is) or if the desktop version is better. This is simply my approach to making videos on an iPad using DaVinci Resolve. I make YouTube videos and short video clips for social media. Nothing I do requires crazy effects or advanced editing, and my goal is to keep the workflow as simple as possible. This current workflow has been tried and tested over six months while travelling.

Gear
I’m using DaVinci Resolve Studio 19 on an M4 11” iPad Pro with a 2TB SSD. I also have the Magic Keyboard and an Apple Pencil. Lastly, I have an 8TB Samsung SSD for all video footage and a conventional HDD for backing up.


Shooting
This blog isn’t about video capture, but all my footage is shot in 4K 16:9 in ProRes. If there is no ProRes option, I shoot in H265 All-Intra with at least a 350 Mbps bit rate. I always shoot in LOG and keep the frame rate at 25 if in the EU and any 50 Hz country, or 30 if in America and countries that run on 60 Hz.

Files App Folder Structure
The first step is to create a folder structure in the Files app. This is where you will store all the original media and make project backups. If you have enough internal storage, you can keep this on your iPad or store it on an SSD. If you use an SSD, I recommend using a fast one. This is how I set up my folder structure:
A Roll
B Roll
Photos
Music
Sound Effects
Voiceover
Assets
Project Backups
Note: Depending on the video type, I rename A Roll and B Roll to location names or camera names.
Before populating the folders, I duplicate this folder structure and save it as a template for future projects. Then, I import all the media and rename the folders as appropriate.

DaVinci Project Structure
On the desktop version, you can drag folders from the Files app straight into DaVinci, and it will automatically create the correct bins. However, I am yet to figure out if that’s possible on the iPad app, so we have to do this manually. First, create a new project and then click on the gear icon at the bottom right. This is where you can set your project settings, such as resolution, frame rate, and so on.

Next, head over to the media tab and, under Master, create a series of new bins to mimic those you’ve made in the Files app. After that, proceed to import all the video clips into each bin. To save time, you can also duplicate the project as a template before you import any footage for the future.

Enabling the Edit Page
To get the most out of this app, you need to enable the Edit page. By default, this is turned off because it’s not fully ported over to the iPad app, but it still works as intended. To do this, open up the keyboard shortcuts using CMD+OPT+K.

Then head over to the Workspace tab and select Show Page. Assign a custom button to the Edit page and click Save. Now, when you press that key, you will unlock the Edit page and have more control and options.

Video Editing
This isn’t a blog about video editing specifically, so I will keep it brief. I first create a new timeline and leave Use Project Settings ticked unless I want it to be different for some reason.

I then place my main A Roll clip, trim it down, and place B Roll on top. Photos and graphics also go on top, while sound goes underneath. The one thing I always do when making progress is hit CMD+S to save my work. DaVinci auto-saves, but I like to do it manually as well.

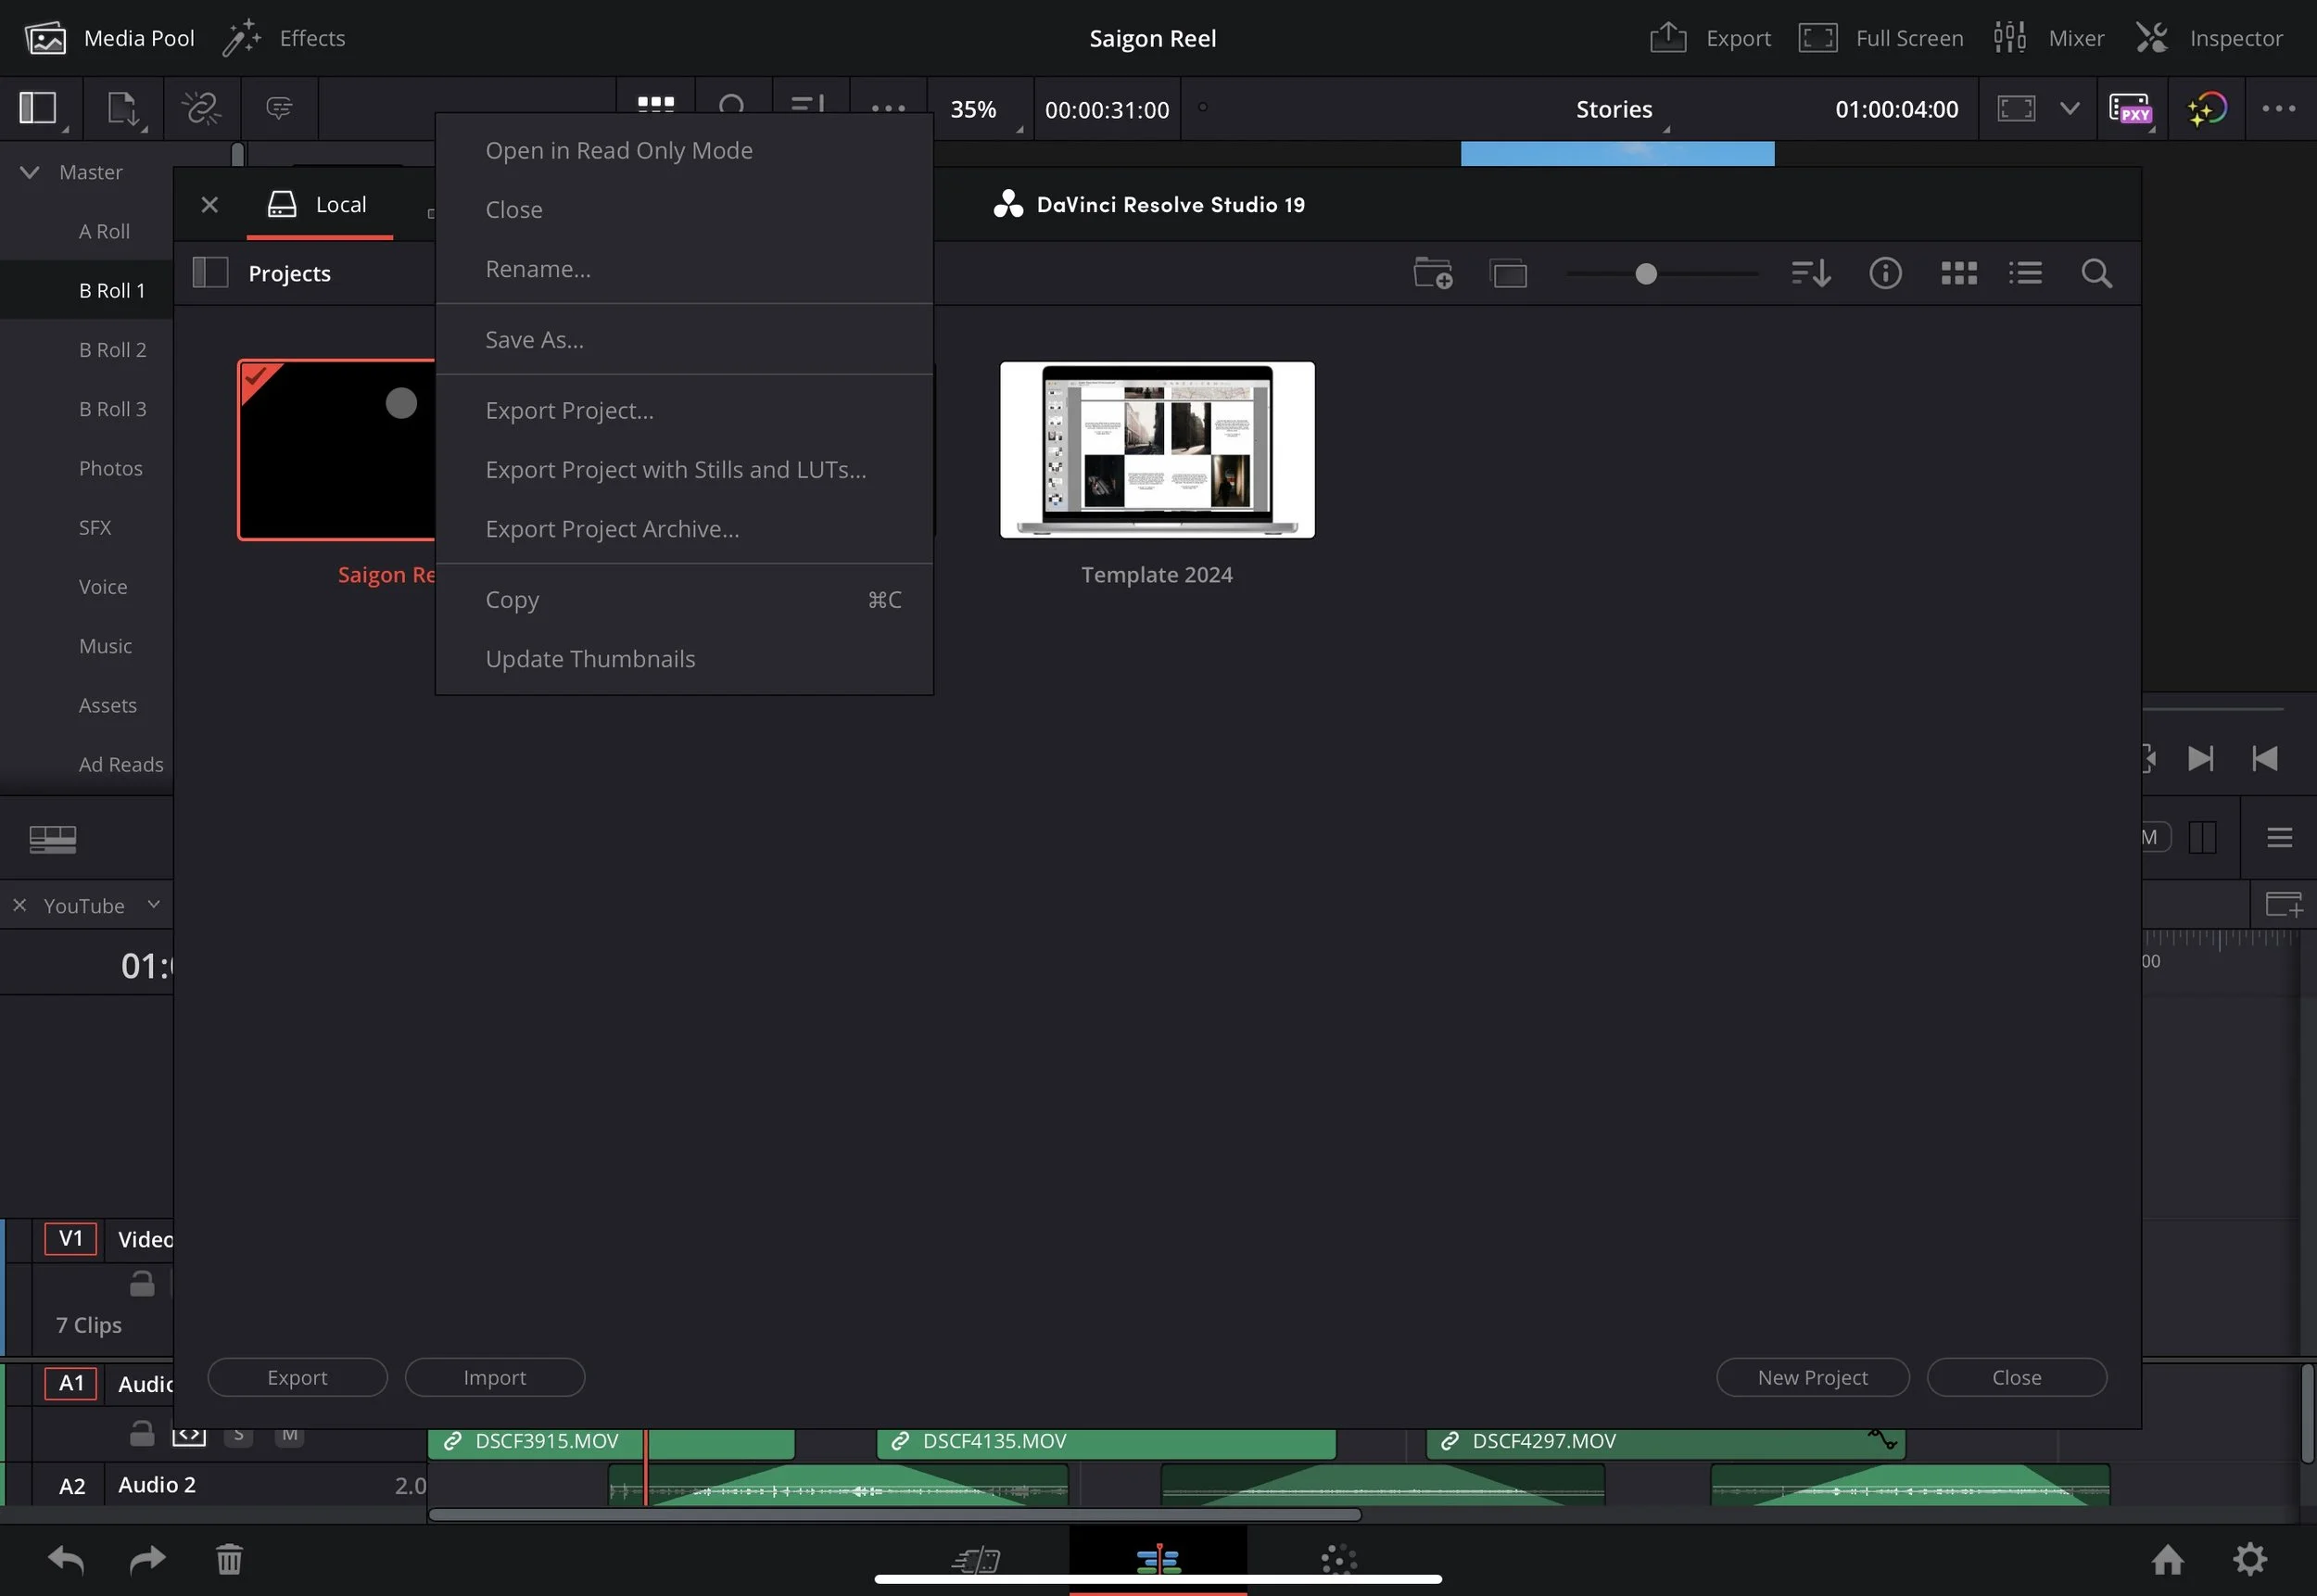
Whenever significant progress has been made or I need to take a break from editing, I return to the Projects page and export the project with all stills and LUTs into the folder on the Files app. This acts as a fail-safe in case the app ever corrupts.
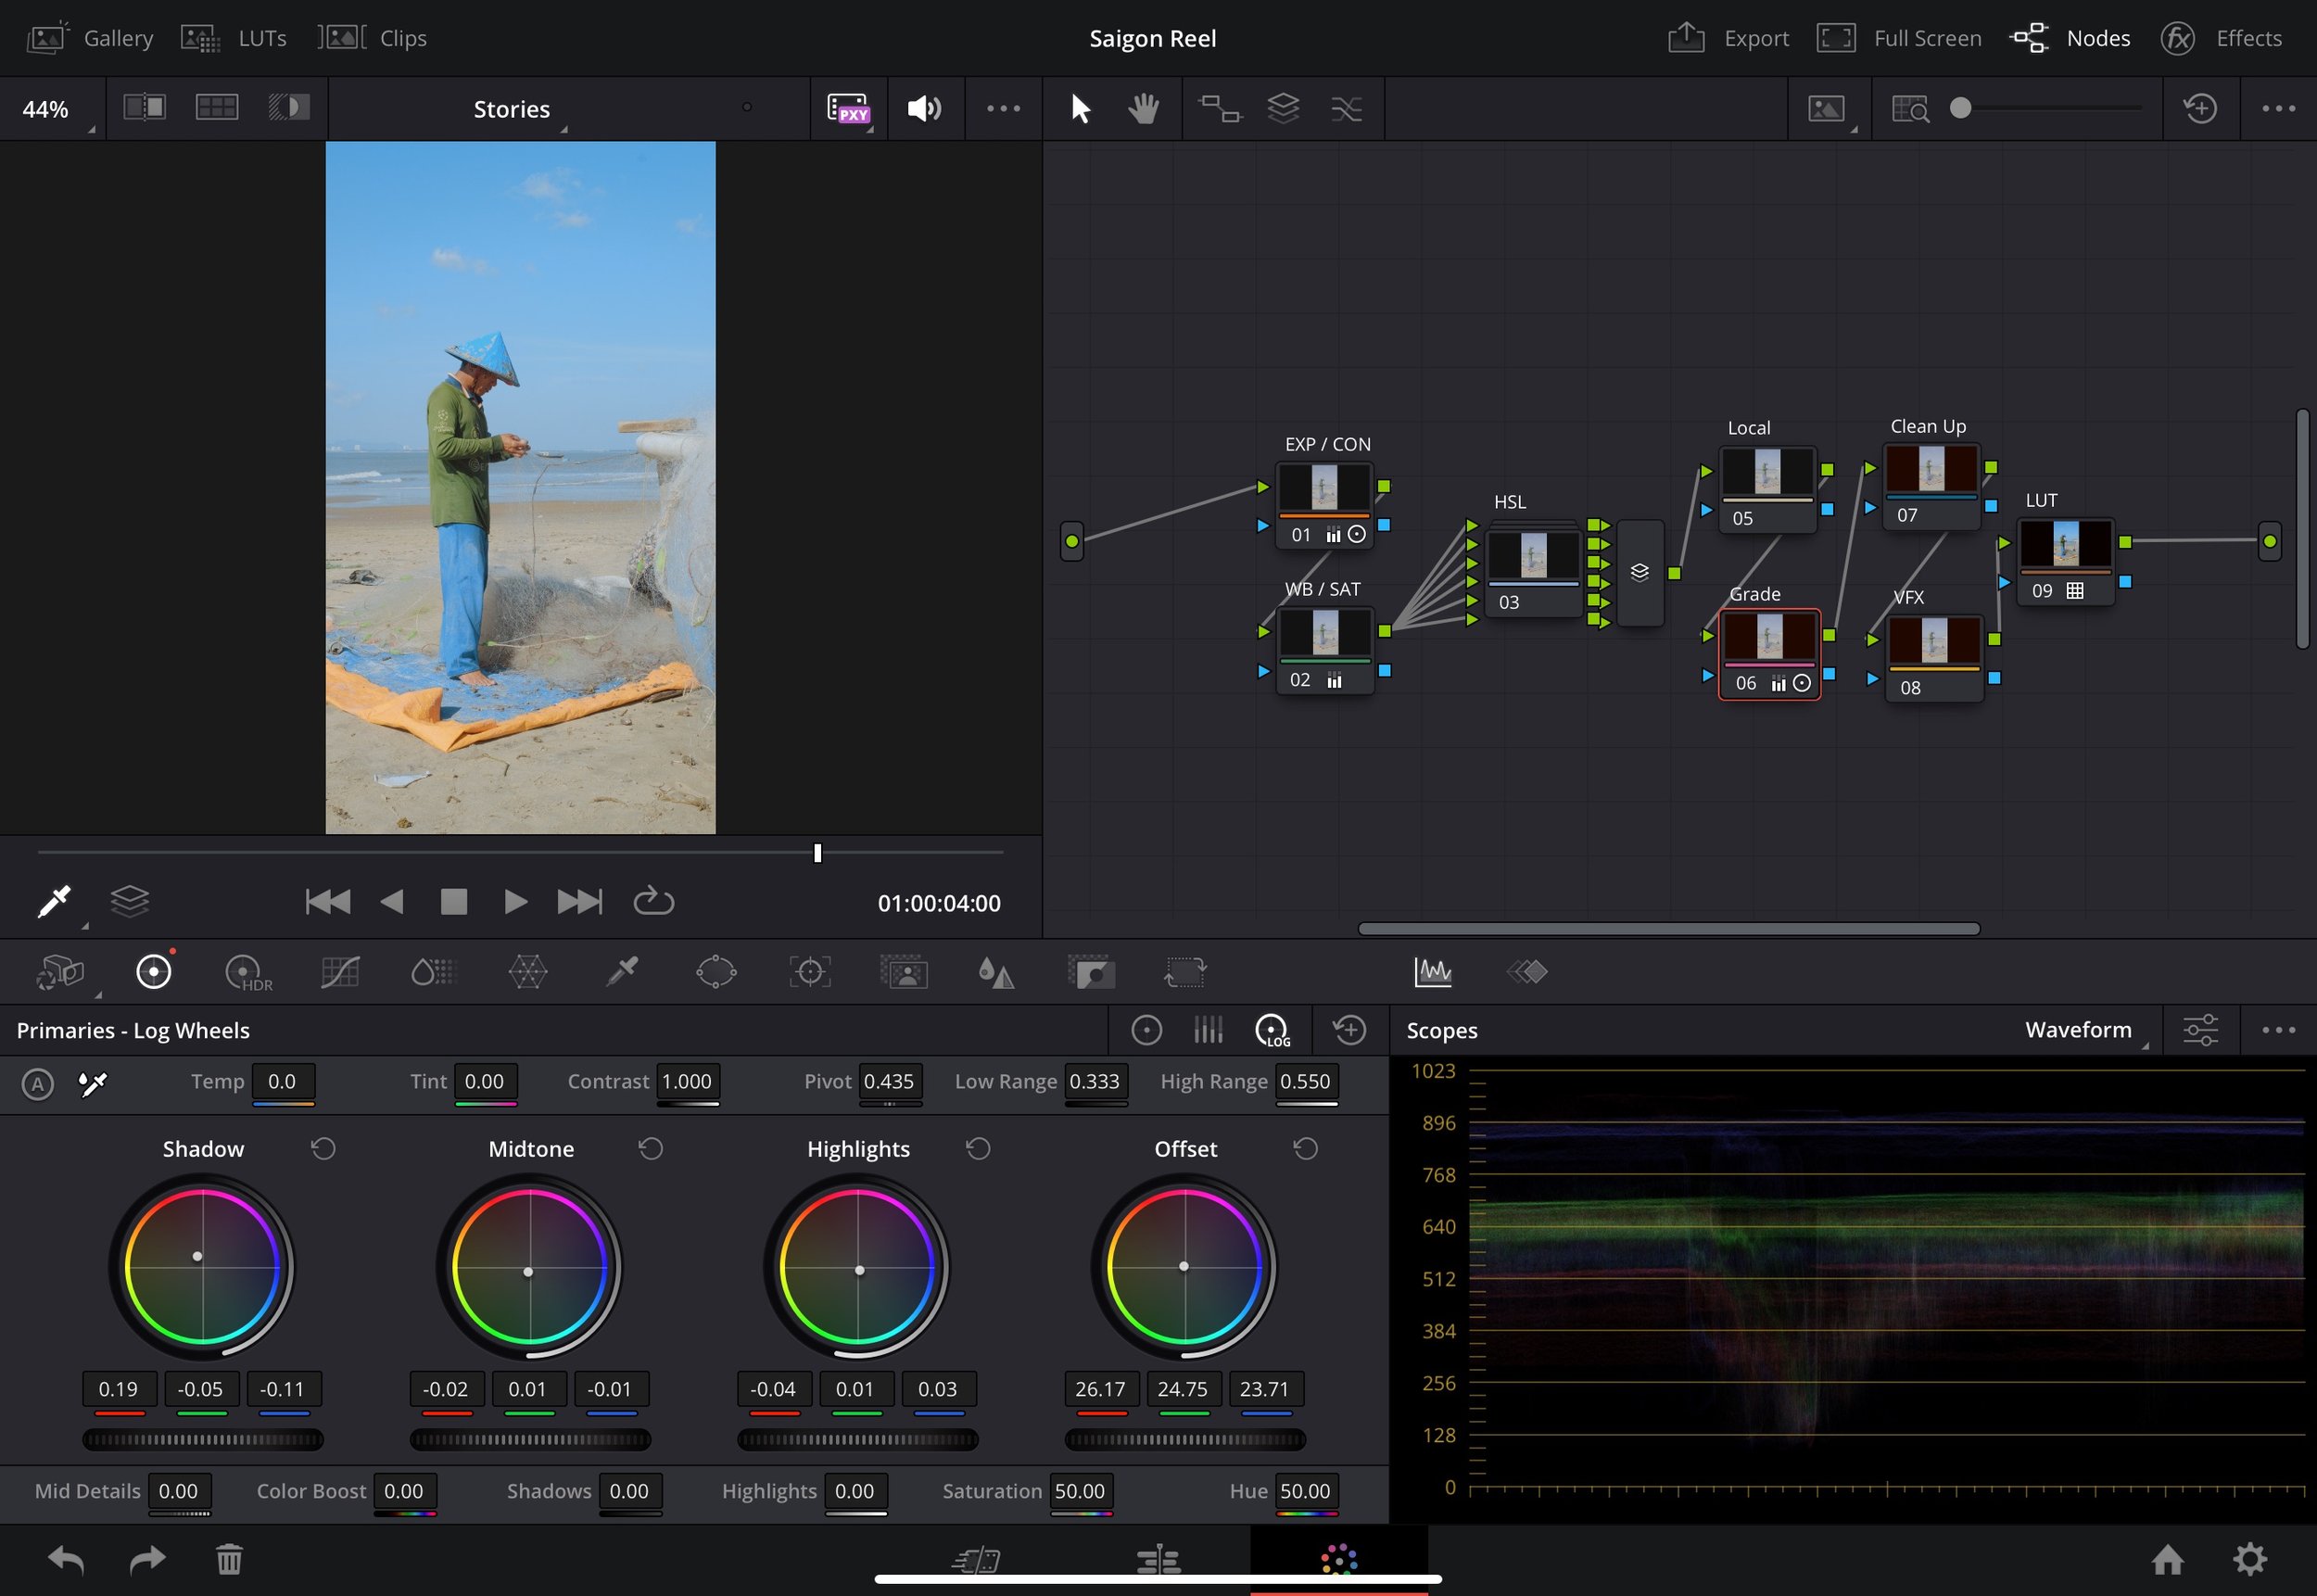
Once the rough timeline is complete, I head over to the Colour Grading tab and begin building a node tree for each clip. This isn’t a guide to grading in DaVinci, but I’ll share the node tree I use below. This might not be the most correct way of doing things, but it works for me:
EXP / CON - Exposure and compensation
WB / SAT - White balance and saturation
HSL - A group of adjustments targeting individual colours
Local - Local adjustments
Grade - Colour grade
Clean Up - Fixing any issues and final touch-ups
VFX - Effects such as film grain or halation
LUT - LUT to convert from LOG to REC709
I create a base edit and copy it across all clips. If performance drops, I return to the Cut page and change to a lower resolution. Just remember to switch back before exporting.

Exporting & Backup
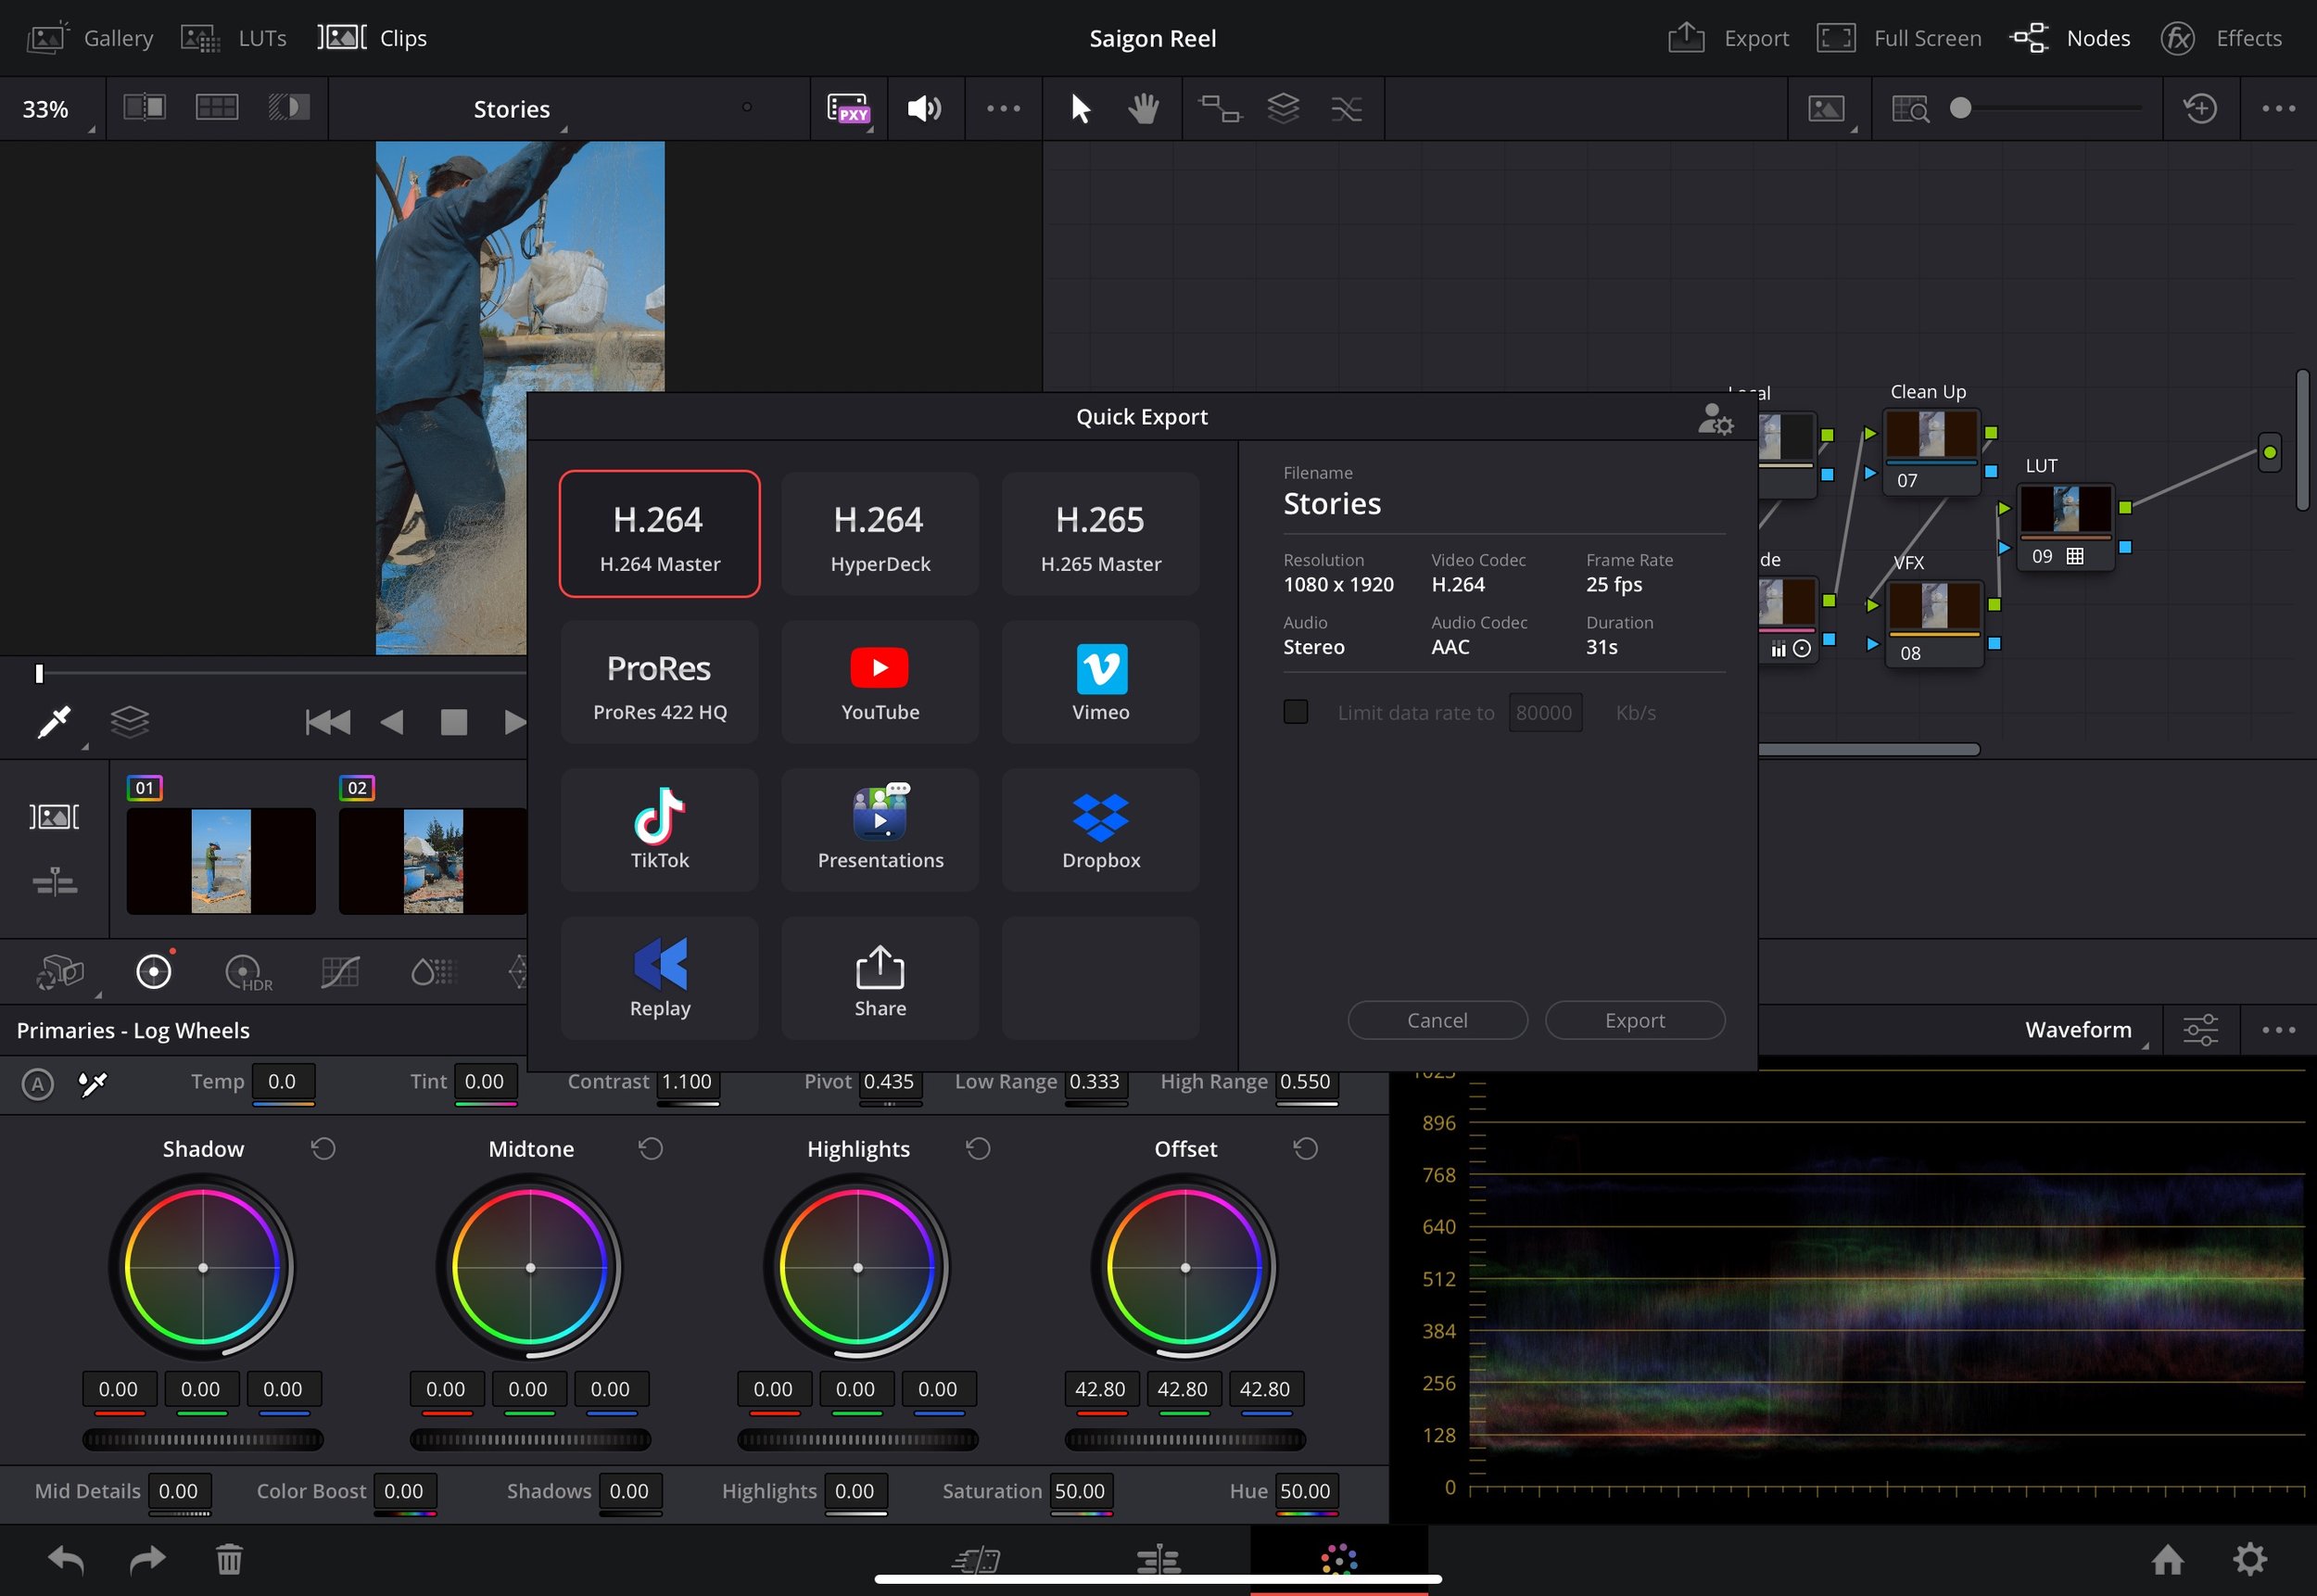
I usually export two copies. The first is a standard 4K H264 file for uploading to social media. The second is a high-quality ProRes file for long-term backup on an external HDD.
If I know the project is complete and I will never need to revisit it, I delete it from DaVinci. I then keep only the B Roll I might use again and move it to the 8TB SSD mentioned earlier. The rest gets deleted.















Instead of telling you how these will change your life, I would rather be practical and answer the most common questions that people tend to have when buying presets.
What are presets?
They are editing settings that are saved in a file and can be applied to any image.
Why do people buy presets?
Sometimes because they like the work of the photographer and want that style for their own photos. Mostly because they would like to see how other people edit and learn by reverse engineering the presets. Other times it’s just to support their favourite photographers, thank you!
What’s the overall style of these presets?
- Filmic
- Warm
- Soft
- Bright
What are these presets suitable for?
Street & Travel Photography
Some Nature (with further editing)
Some Portraits (with extensive editing)
Do I actually use these?
Yes. This is the same pack I use right now for all my editing. This isn’t a pack made just to sell.
Do these presets get updated?
Yes, as my style changes, these presets will also be updated. Any time a new update is available, you will get a free update via email. Of course you also keep all the old presets in case you prefer the older looks. Only presets purchased from 2025 onwards will receive the updates.
What file types are these presets for?
- All RAW files
- JPEGs & TIFFs (not recommended)
What camera brands are these presets for?
These were designed around Fujifilm, Sony, and Leica sensors. With that said, they will work with all camera brands. While there might be differences due to individual camera colour science, the overall feel of the preset will carry over.
Will these work with JPEG files?
Yes, but you will need to reduce the intensity and make further edits. I strongly recommend editing RAW files.
Are these one click edits?
95% No. You would need to do some basic adjustments as each image is different. These adjustments can include exposure, colour balance etc. In 5% of cases you can just apply and leave it alone.
Do I need to know how to edit?
You need to have a basic understanding of adjusting exposure, highlights, shadows, etc. A more comprehensive editing skillset will let you get the most out of them.
How many presets are included?
10 in the main pack and 24 in the extras pack
Why two packs?
The main pack is what I use for 99% of my edits and is kept small to reduce wasted time scrolling through presets. The extras pack is everything I don’t use often.
What software do I need?
These presets will work with any of the following:
- Photoshop (adobe camera raw)
- Lightroom Classic
- Lightroom Desktop
- Lightroom Mobile
Will these presets work with free versions of the above software?
You need to research and double check before buying. These presets were designed for the full paid versions.
Will these presets work with very old versions of the above software?
You need to research and double check before buying. These presets were designed on and for the latest software.
What file type do I get?
XMP
What else do I get?
- Comprehensive PDF guide
Can I modify these and turn them into my own?
Yes! In fact I encourage you to modify them and play around. Use these to help you get your own style.
I have more questions…. What do I do?
Make a cup of tea and drop me an email on hello@snapsbyfox.com
Please note that due to the nature of digital products, refunds are generally not accepted. However, if you experience any issues, feel free to contact me and I’ll review your situation individually. You are welcome to use this product for personal or commercial projects, but you may not copy, distribute, or resell the files in their original or modified form.
Finally I want to say a massive thank you for supporting me. Buying these presets is the most direct way you can support my work.
Thank you!