Leica Q3 43 - Aperture Priority Explained
In this blog, I’ll share how to shoot in Aperture Priority on your Leica Q3 and Q3 43. This blog will hopefully answer some questions and give you more confidence with your Q3. If you find this blog helpful, want to support my work, and are eager to learn more about your Leica Q3, check out my full camera guide for the Q3 and Q3 43 below. Finally, these are the settings that work for me. They’re not necessarily the best or the “correct” ones, because there’s no such thing. Read through the blog, try out different settings, keep what works for you, and disregard the rest.

**Updated for firmware version 4.0
This Leica Q3 43 set-up guide is designed to save you time and get your camera set up and working just like I do. While the guide is for the Q3 43, pretty much all of it will carry over to the Q3 28mm camera too.
You will learn what the major features do and why I chose to set them in a certain way. I will show you how to assign the buttons and custom menus in order to have the most important features at your fingertips. Finally, I will walk you through how I expose and focus.
This guide is not a replacement for your user manual and does not cover 100% of the features. It covers the features that, in my experience, 90% of the people use 90% of the time. This is based on years of photography and video experience.
This guide is best suited for those who want to be up and running quickly with a tried-and-tested set-up.
This is a digital download and not a physical product. The download is around 23mb.
Please note that due to the nature of digital products, refunds are generally not accepted. However, if you experience any issues, feel free to contact me and I’ll review your situation individually. You are welcome to use this product for personal or commercial projects, but you may not copy, distribute, or resell the files in their original or modified form.
Finally, I want to say a massive thank you for supporting me. Buying this guide is the most direct way you can support my work, thus allowing me to make more videos, photos, and tutorials for you.
Thank you for your support!
Enabling Aperture Priority
To enable Aperture Priority, make sure the shutter dial is set to “A”, the ISO is set to Auto ISO and the aperture dial is set in any number. For now set it to f/4.

Aperture Value
I usually start at f/4 as I find it the best balance between what’s in focus and what’s out. This also makes it easier to quickly let more light in by going to f/2 or close the aperture down to f/8 to reduce the light. If I want a soft image or more out-of-focus elements, f/2 is my choice. If I want more in focus, f/8 is a good option. Sometimes I will go to f/11 if the light is really bright or I need maximum depth of field.

Auto ISO
If you plan to shoot solely in manual mode, feel free to skip this bit. If you’ve ever taken a photo that came out blurry or with excessive motion blur, chances are the Auto ISO feature was partly to blame. Auto ISO allows you to set the exposure parameters for the camera, specifically the maximum ISO value and minimum shutter speed. Many people might naturally want a lower max ISO to keep the image noise-free, but in turn, they force the camera into a low shutter speed, inducing motion blur. My max ISO is set to 12,500. While the camera rarely goes that high, it’s nice knowing that ceiling is there. Of course, you will have some noise, but with AI de-noise in most editing programs, this is no longer an issue. I’d much rather have some noise to clean up than a ruined shot due to motion blur. When it comes to minimum shutter speed, I change it depending on the situation. Here’s a rough guide:
Daytime - 1/250s
Low light - 1/125s
Shutter speed priority - 1/500s

Exposure Compensation
This allows you to set a global exposure depending on the scene you’re shooting. In some cases under exposing is required, whilst other scenarios call for an over exposed photo. This isn’t a rule but I found the following to work for me:
Sunny - (0)
Cloudy - (+0.6)
Low Light - (-1)

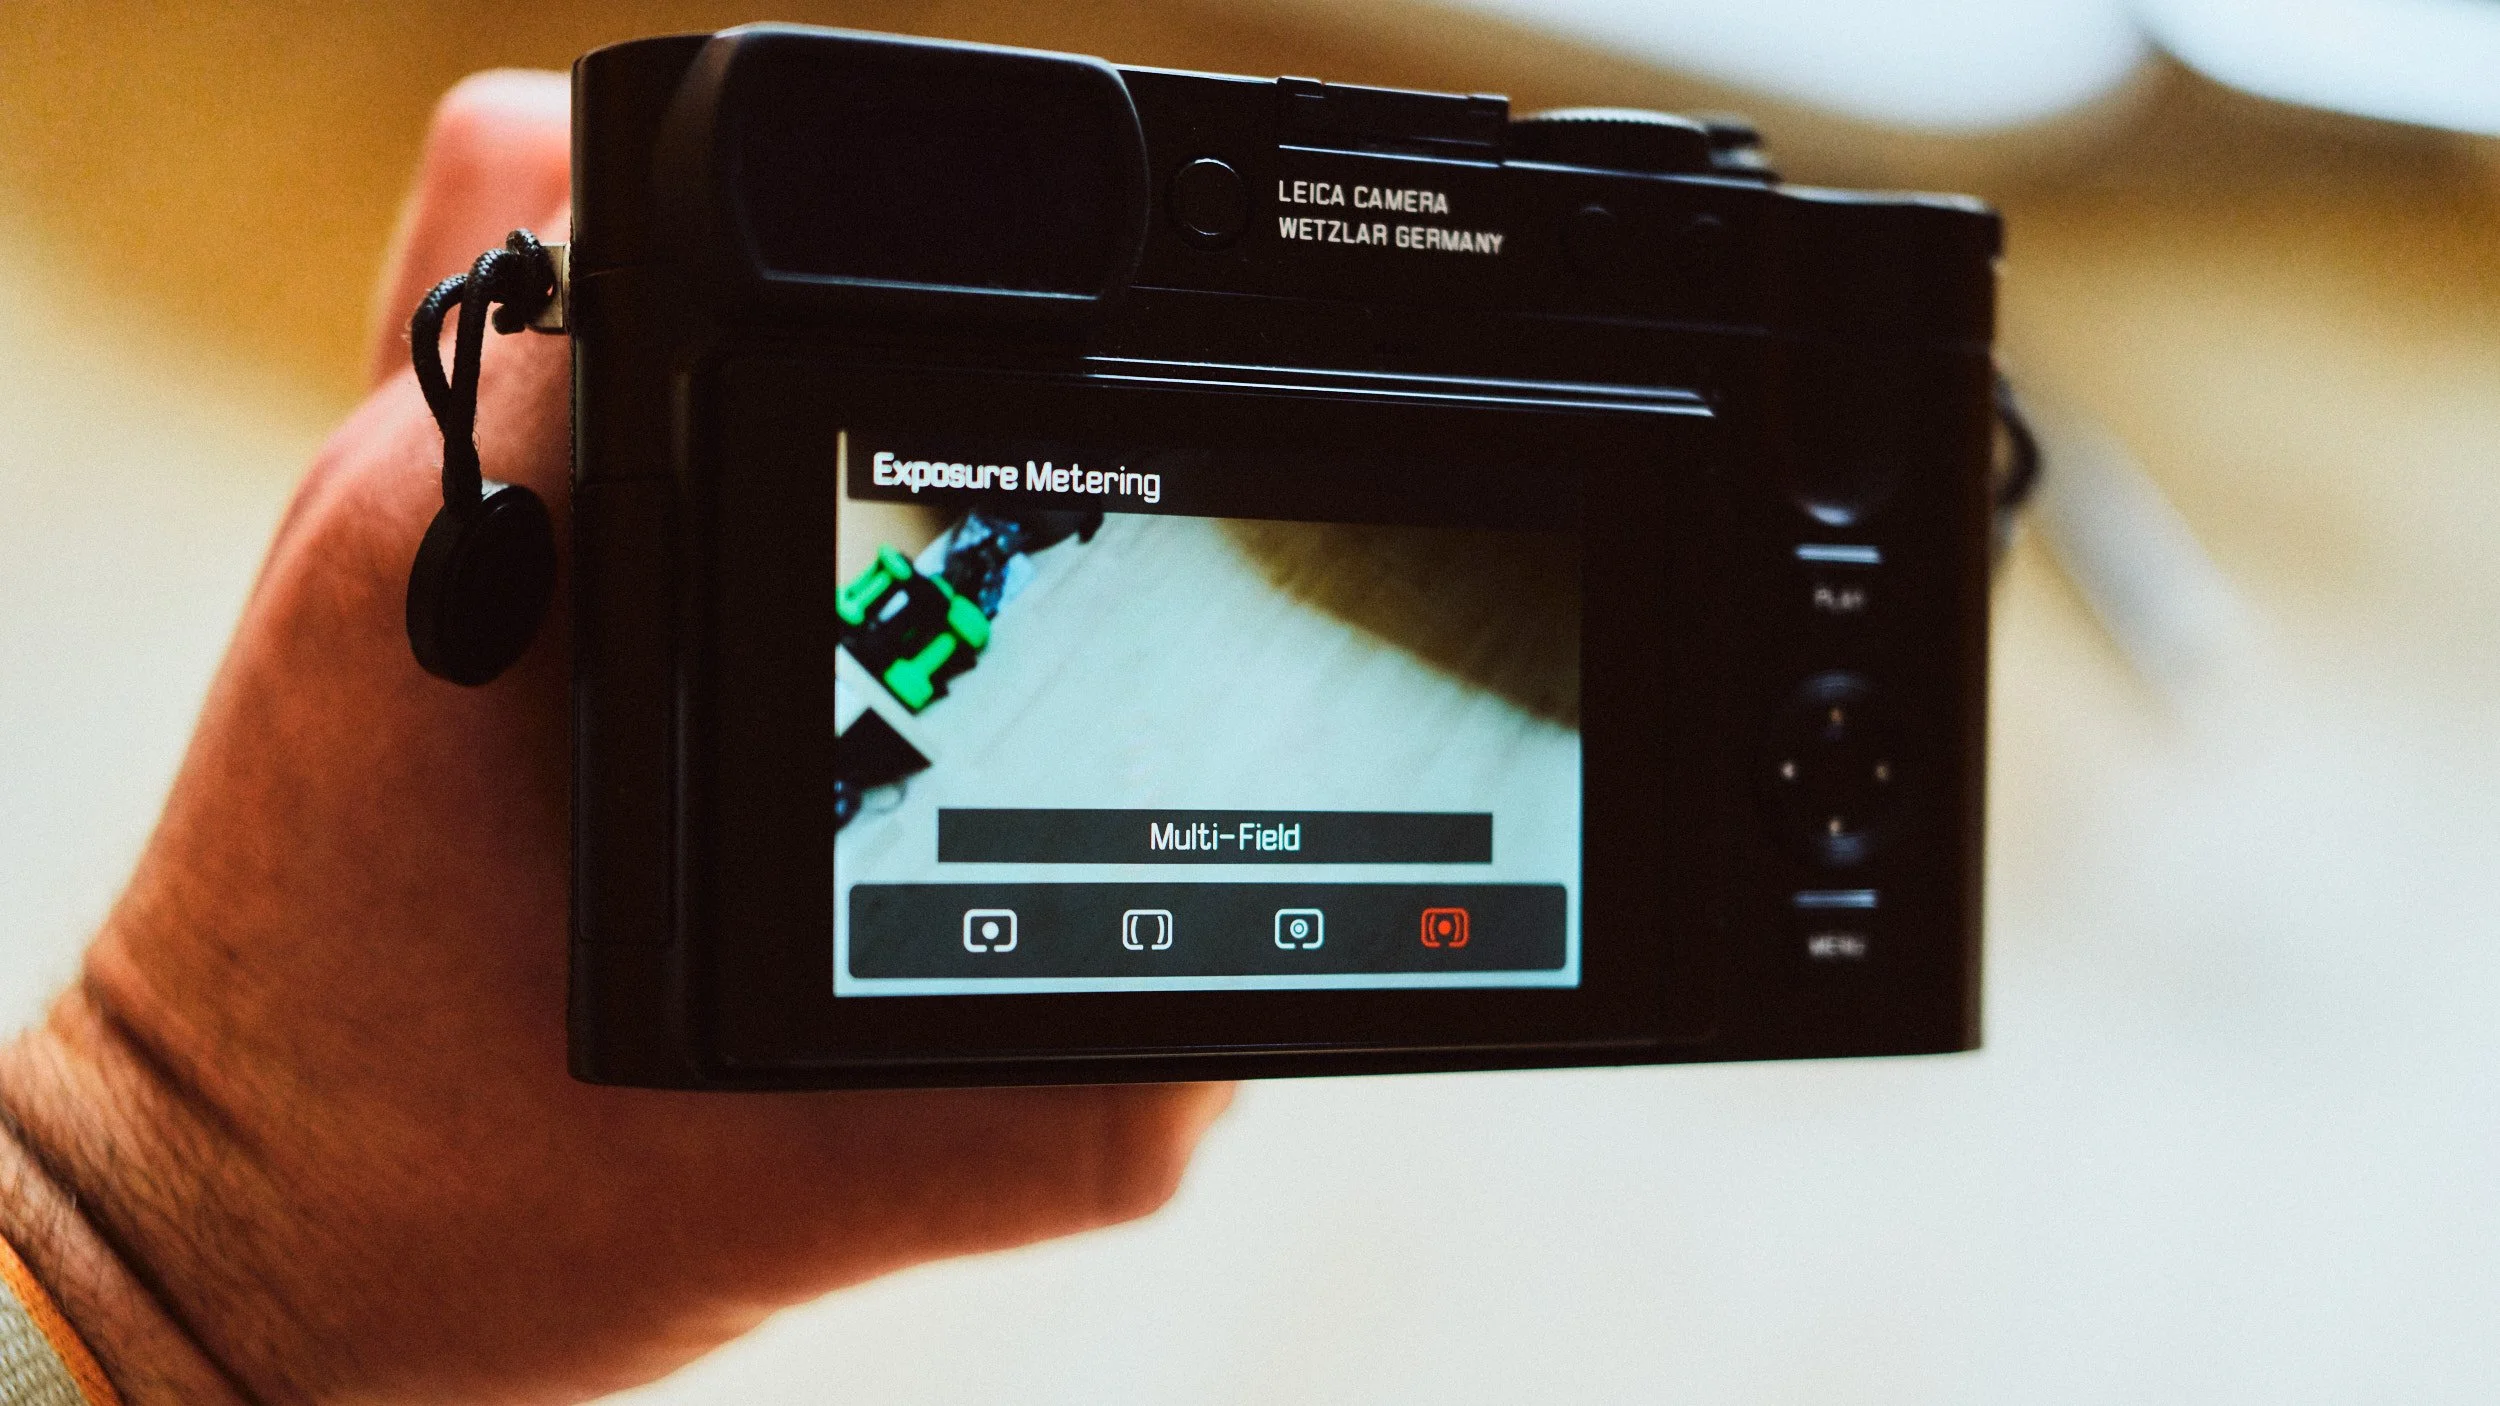
Exposure Metering
If you’re shooting in any mode other than full manual, you’ll have access to Exposure Metering, which determines how the camera exposes the scene. While there are several useful modes, I personally favour Multi Metering. This gives you a good overall exposure based on the whole scene. Another good option is Highlight Metering. This mode ensures that highlights are properly exposed at all times, reducing the risk of blown-out details. Additionally, it makes it much easier to achieve that dramatic highlight-and-shadow look directly in-camera.
AEL (Auto Exposure Lock)
This feature allows you to lock the exposure and then recompose the shot without it changing again. I use this very frequently, especially when I am waiting for a subject or for something to happen. I have mine set to also lock the focus (AEL+AFL). This ensures the camera is locked while I wait for something to happen. This means that when the moment comes to take a photo, the camera has fewer tasks to do, and the look is already locked.