
How To Ruin Your Photo Edit
In this blog, I will talk about 5 ways in which you can ruin your photo edit. When we start editing, it can be tempting to slide every adjustment to the max in order to get new and crazy results. Equally, it can be tempting to adjust every single parameter available, because why not? However, as you become more experienced, you will realize that more doesn’t always mean better. Now, let’s go through the most common ways one can wreck a photo edit.

Over-Sharpening
The second easiest way to ruin your photo is by over-sharpening it. Yes, I understand there’s an obsession with pin-sharp images; however, it’s worth remembering that when you sharpen a photo, you’re not actually making it sharper. Instead, you’re making it appear sharper by boosting edge contrast. A common side effect of over-sharpening is the image starting to look noisy, crunchy, and generally unpleasant. My suggestion is to first try and get a sharp image in-camera. Check out this blog for more info. Secondly, use the mask feature to only sharpen the very fine edges and not the entire image. Finally, if you need to sharpen, do so until you think it looks right, and then back off about 25%.

Normal sharpening with 80% mask

Excessive sharpening
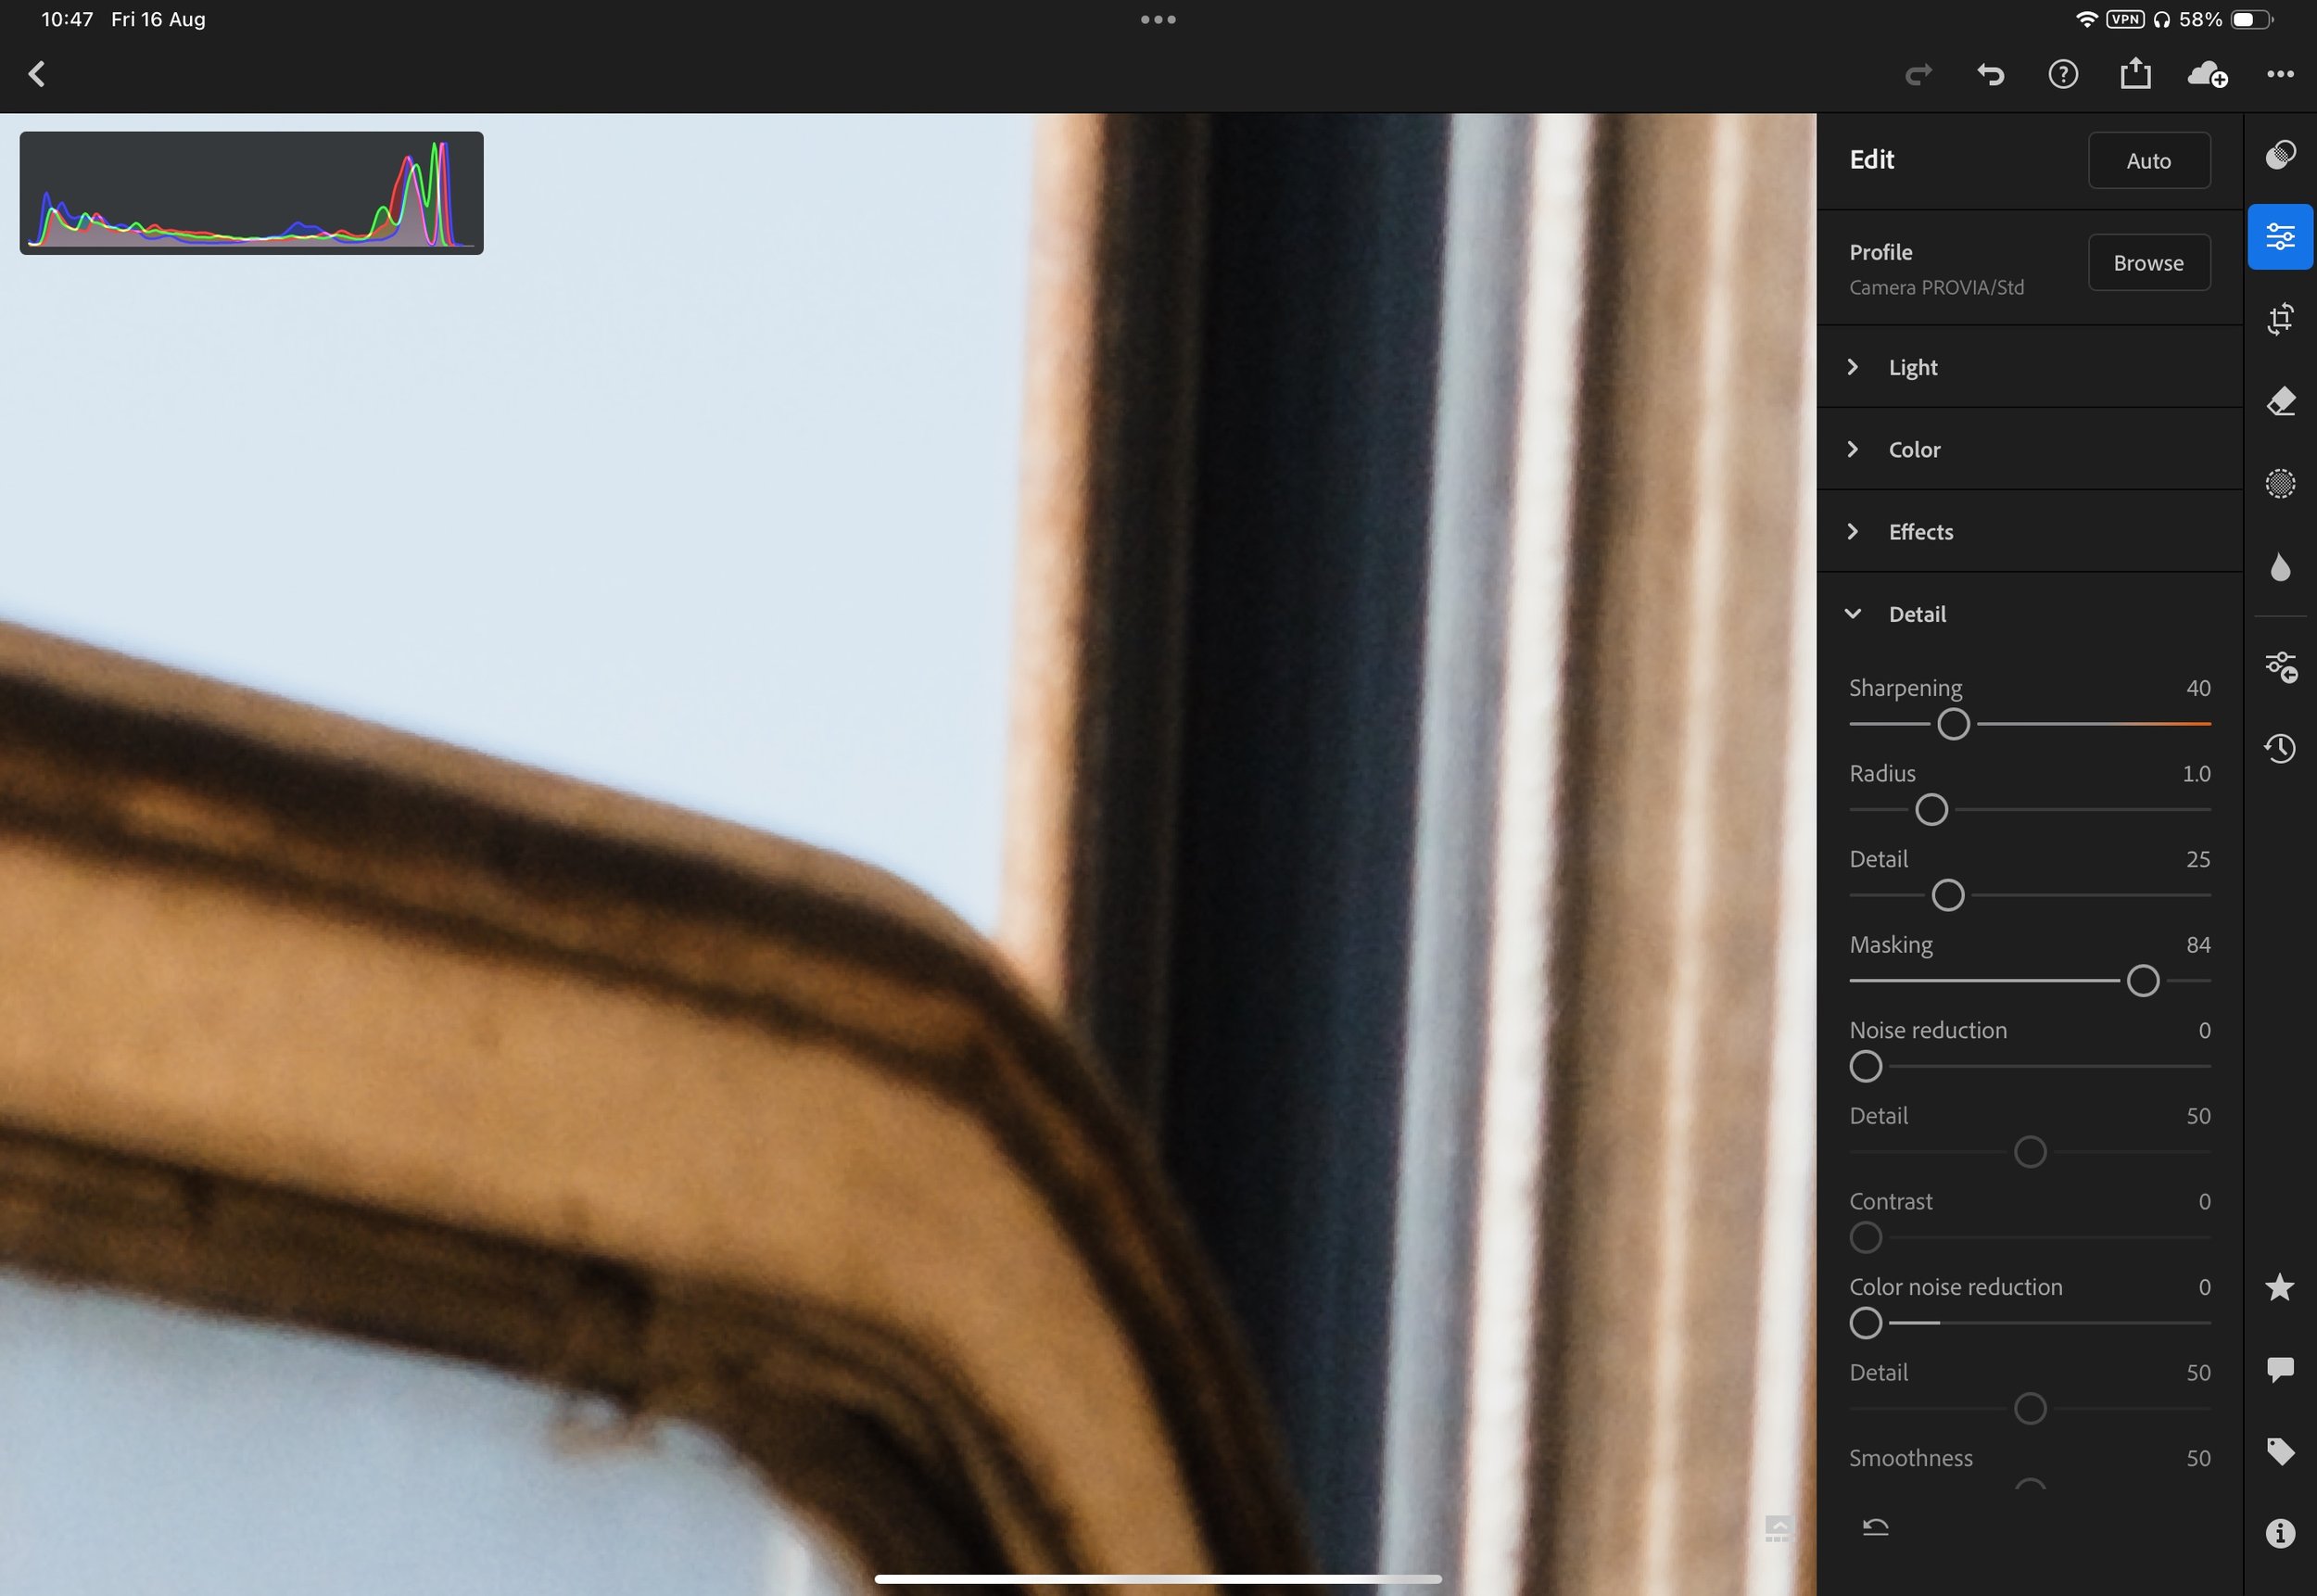
Normal sharpening with 80% mask
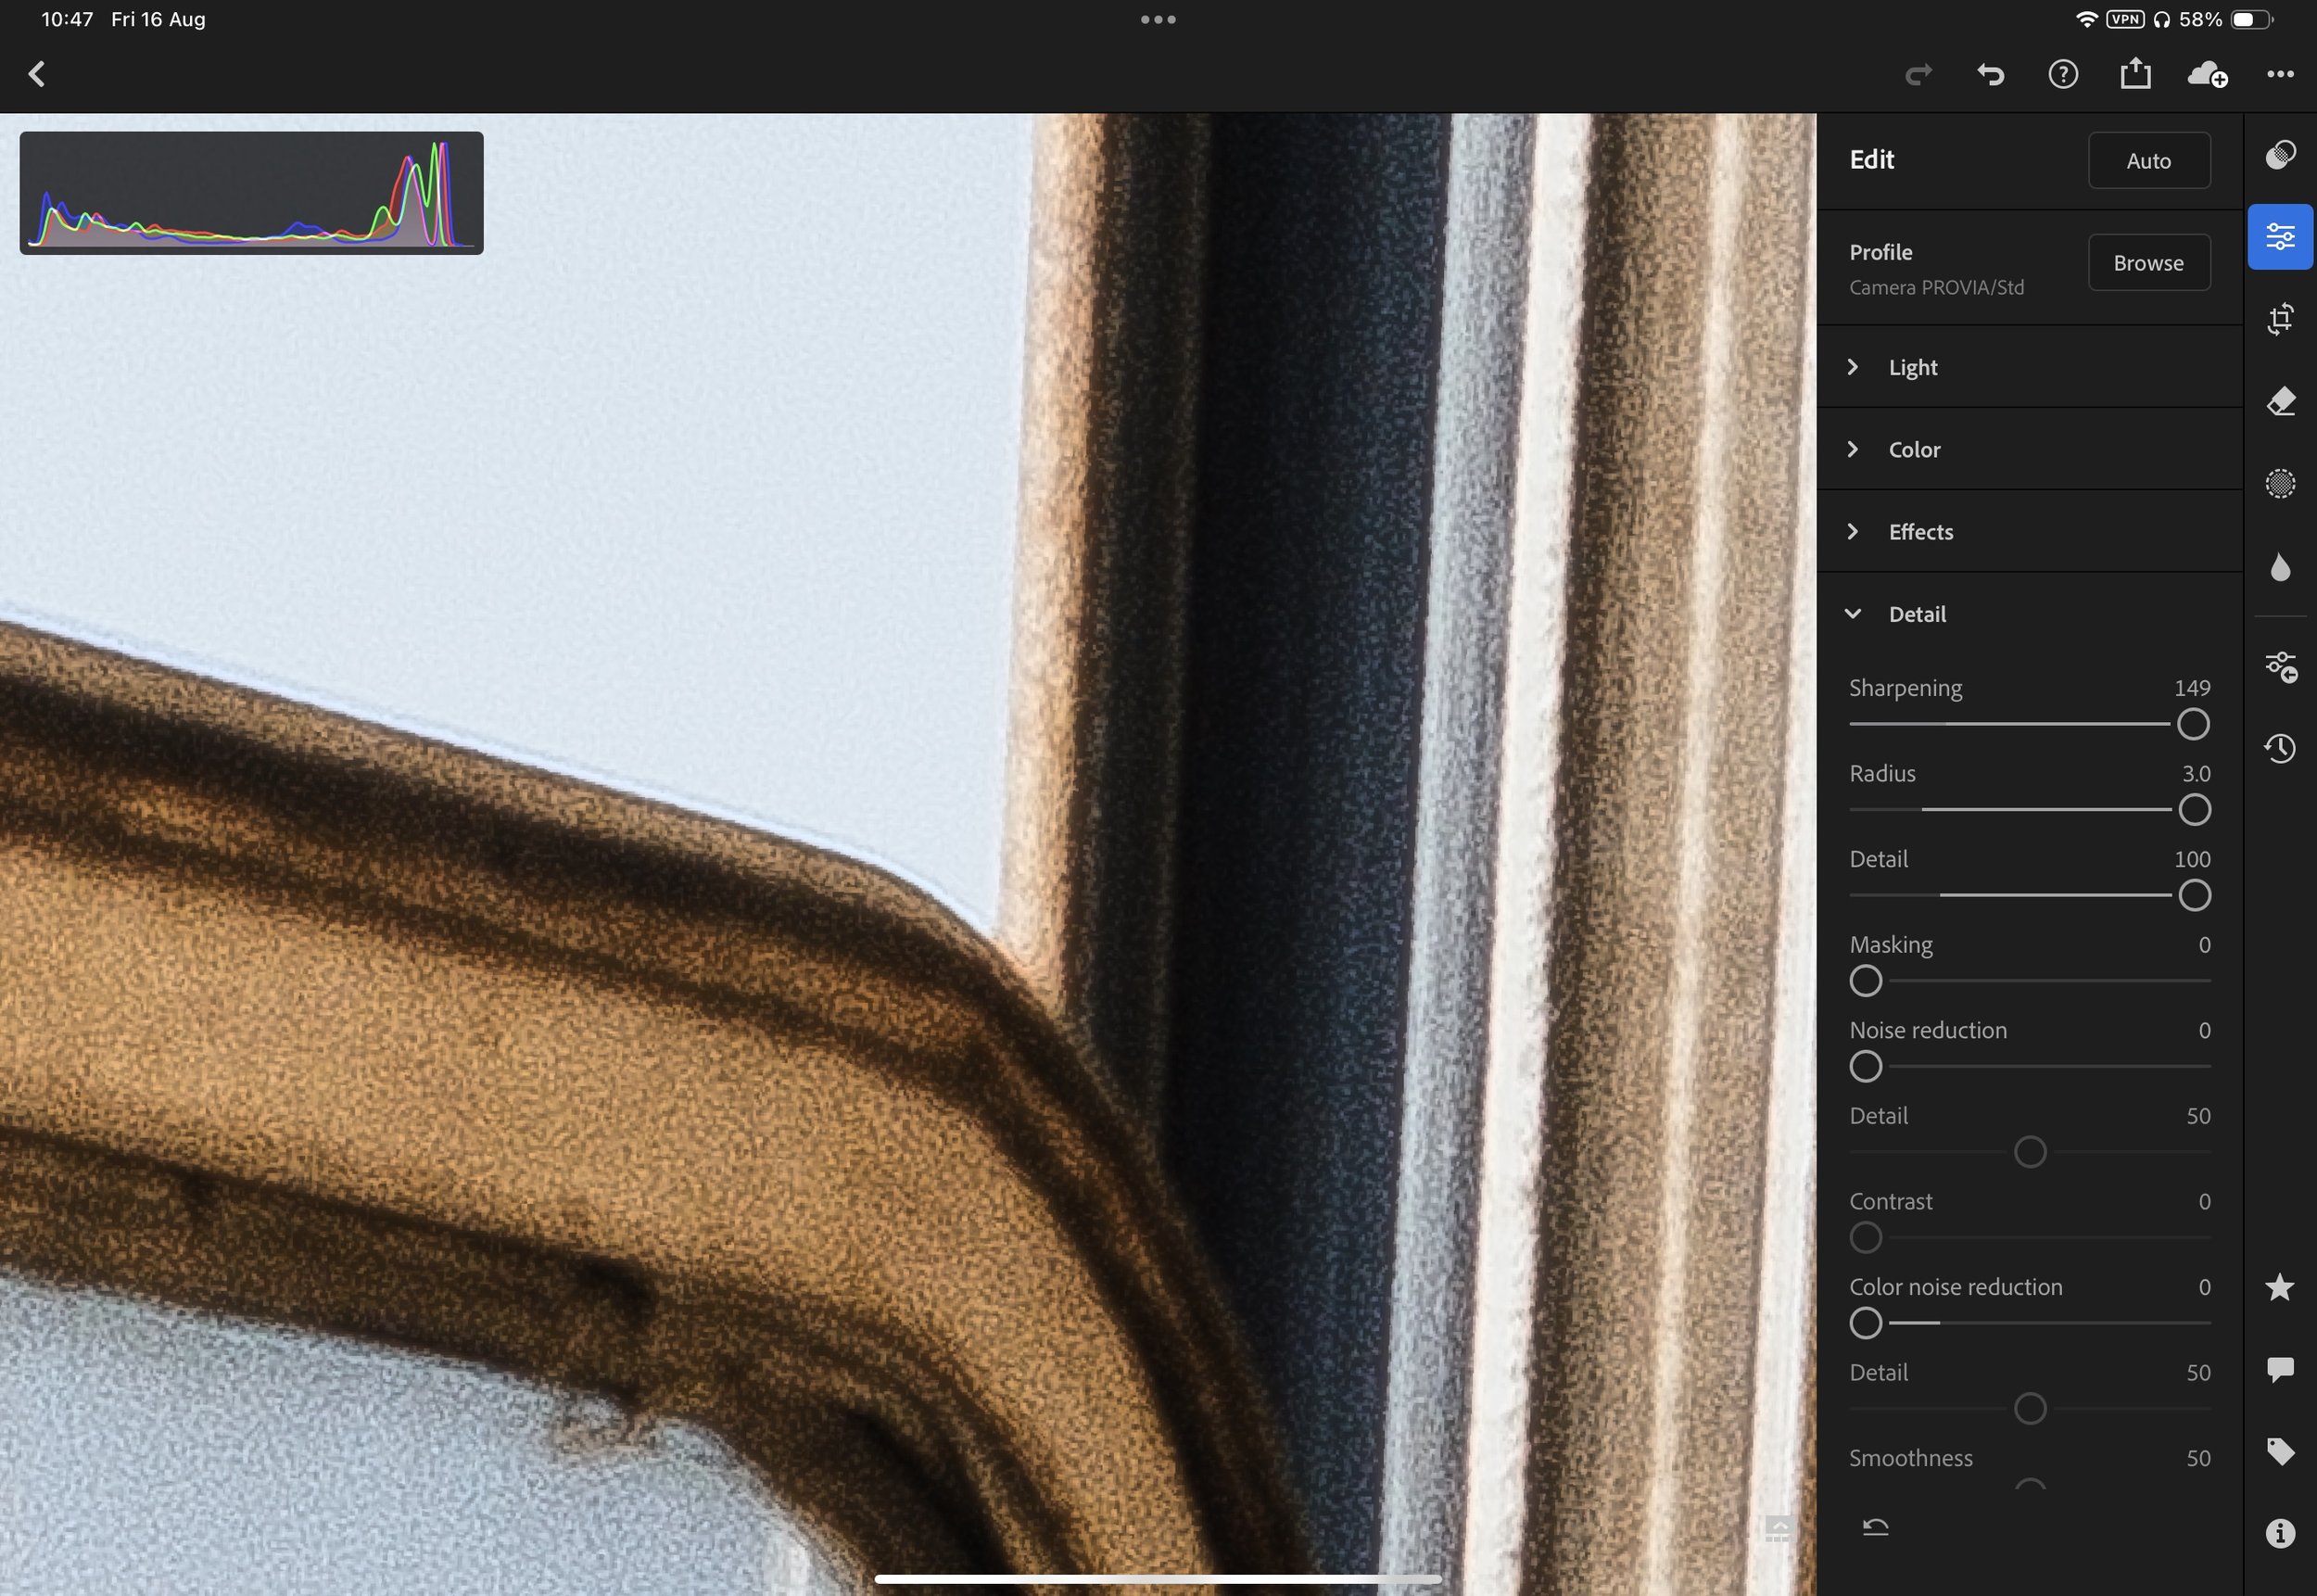
Excessive sharpening with no mask

Mask overlay

Excessive sharpening with 90% mask
Excessive Clarity
The easiest way to ruin a photo is by adding too much clarity. Think of this as sharpening on steroids. Clarity adds definition, shape and can bring out the quieter parts (such as clouds) of the photo if done modestly. However, just like sharpening, if you overdo it, you will ruin the photo by introducing noise, artefacts, and a crunchy appearance. You can also overdo negative clarity and make the image look blurry rather than tastefully soft. Personally, I apply (-15) global clarity and then selectively apply around (+20) local clarity, but only where it’s really needed, using a brush.

Normal clarity

Excessive clarity
Too Much HDR
It’s not uncommon to get cameras that can capture a vast portion of the dynamic range in even the most contrasty environments. Although this is amazing for editing flexibility, too many people make the mistake of bringing out every single possible detail. Below are two photos, one edited to reveal all details, while the other is edited differently. Of course, this is subjective, but I feel the photo with more contrast is the more pleasing image. Just because you have 100 stops of dynamic range doesn’t mean you need to use every single one of them.

Normal HDR

Excessive HDR
Prioritising the Histogram
The histogram is an amazing tool to help judge the exposure value of the photo we’re looking at. However, it’s important to remember that a histogram is nothing more than a mathematical representation of where the exposure sits. It doesn’t reflect any creative inputs or situational awareness. For example, it doesn’t adjust for the fact the photo might have been taken on an extremely bright day or into direct light. It equally might not reflect a photo taken during blue hour or a moody edit. You often hear that the histogram must sit in the middle, thus the photo is “properly” exposed; however, as you can see, this can result in a rubbish outcome if context and creative direction are not taken into account. So how do I use the histogram? I simply use it to see where the limit for pure white and pure black is. That way, when I edit a shot on a bright sunny day, I increase the exposure until the histogram hits the limit, and then I back off a touch. This allows me to have the brightest photo possible without blowing anything out. The same can be done for darker edits too.
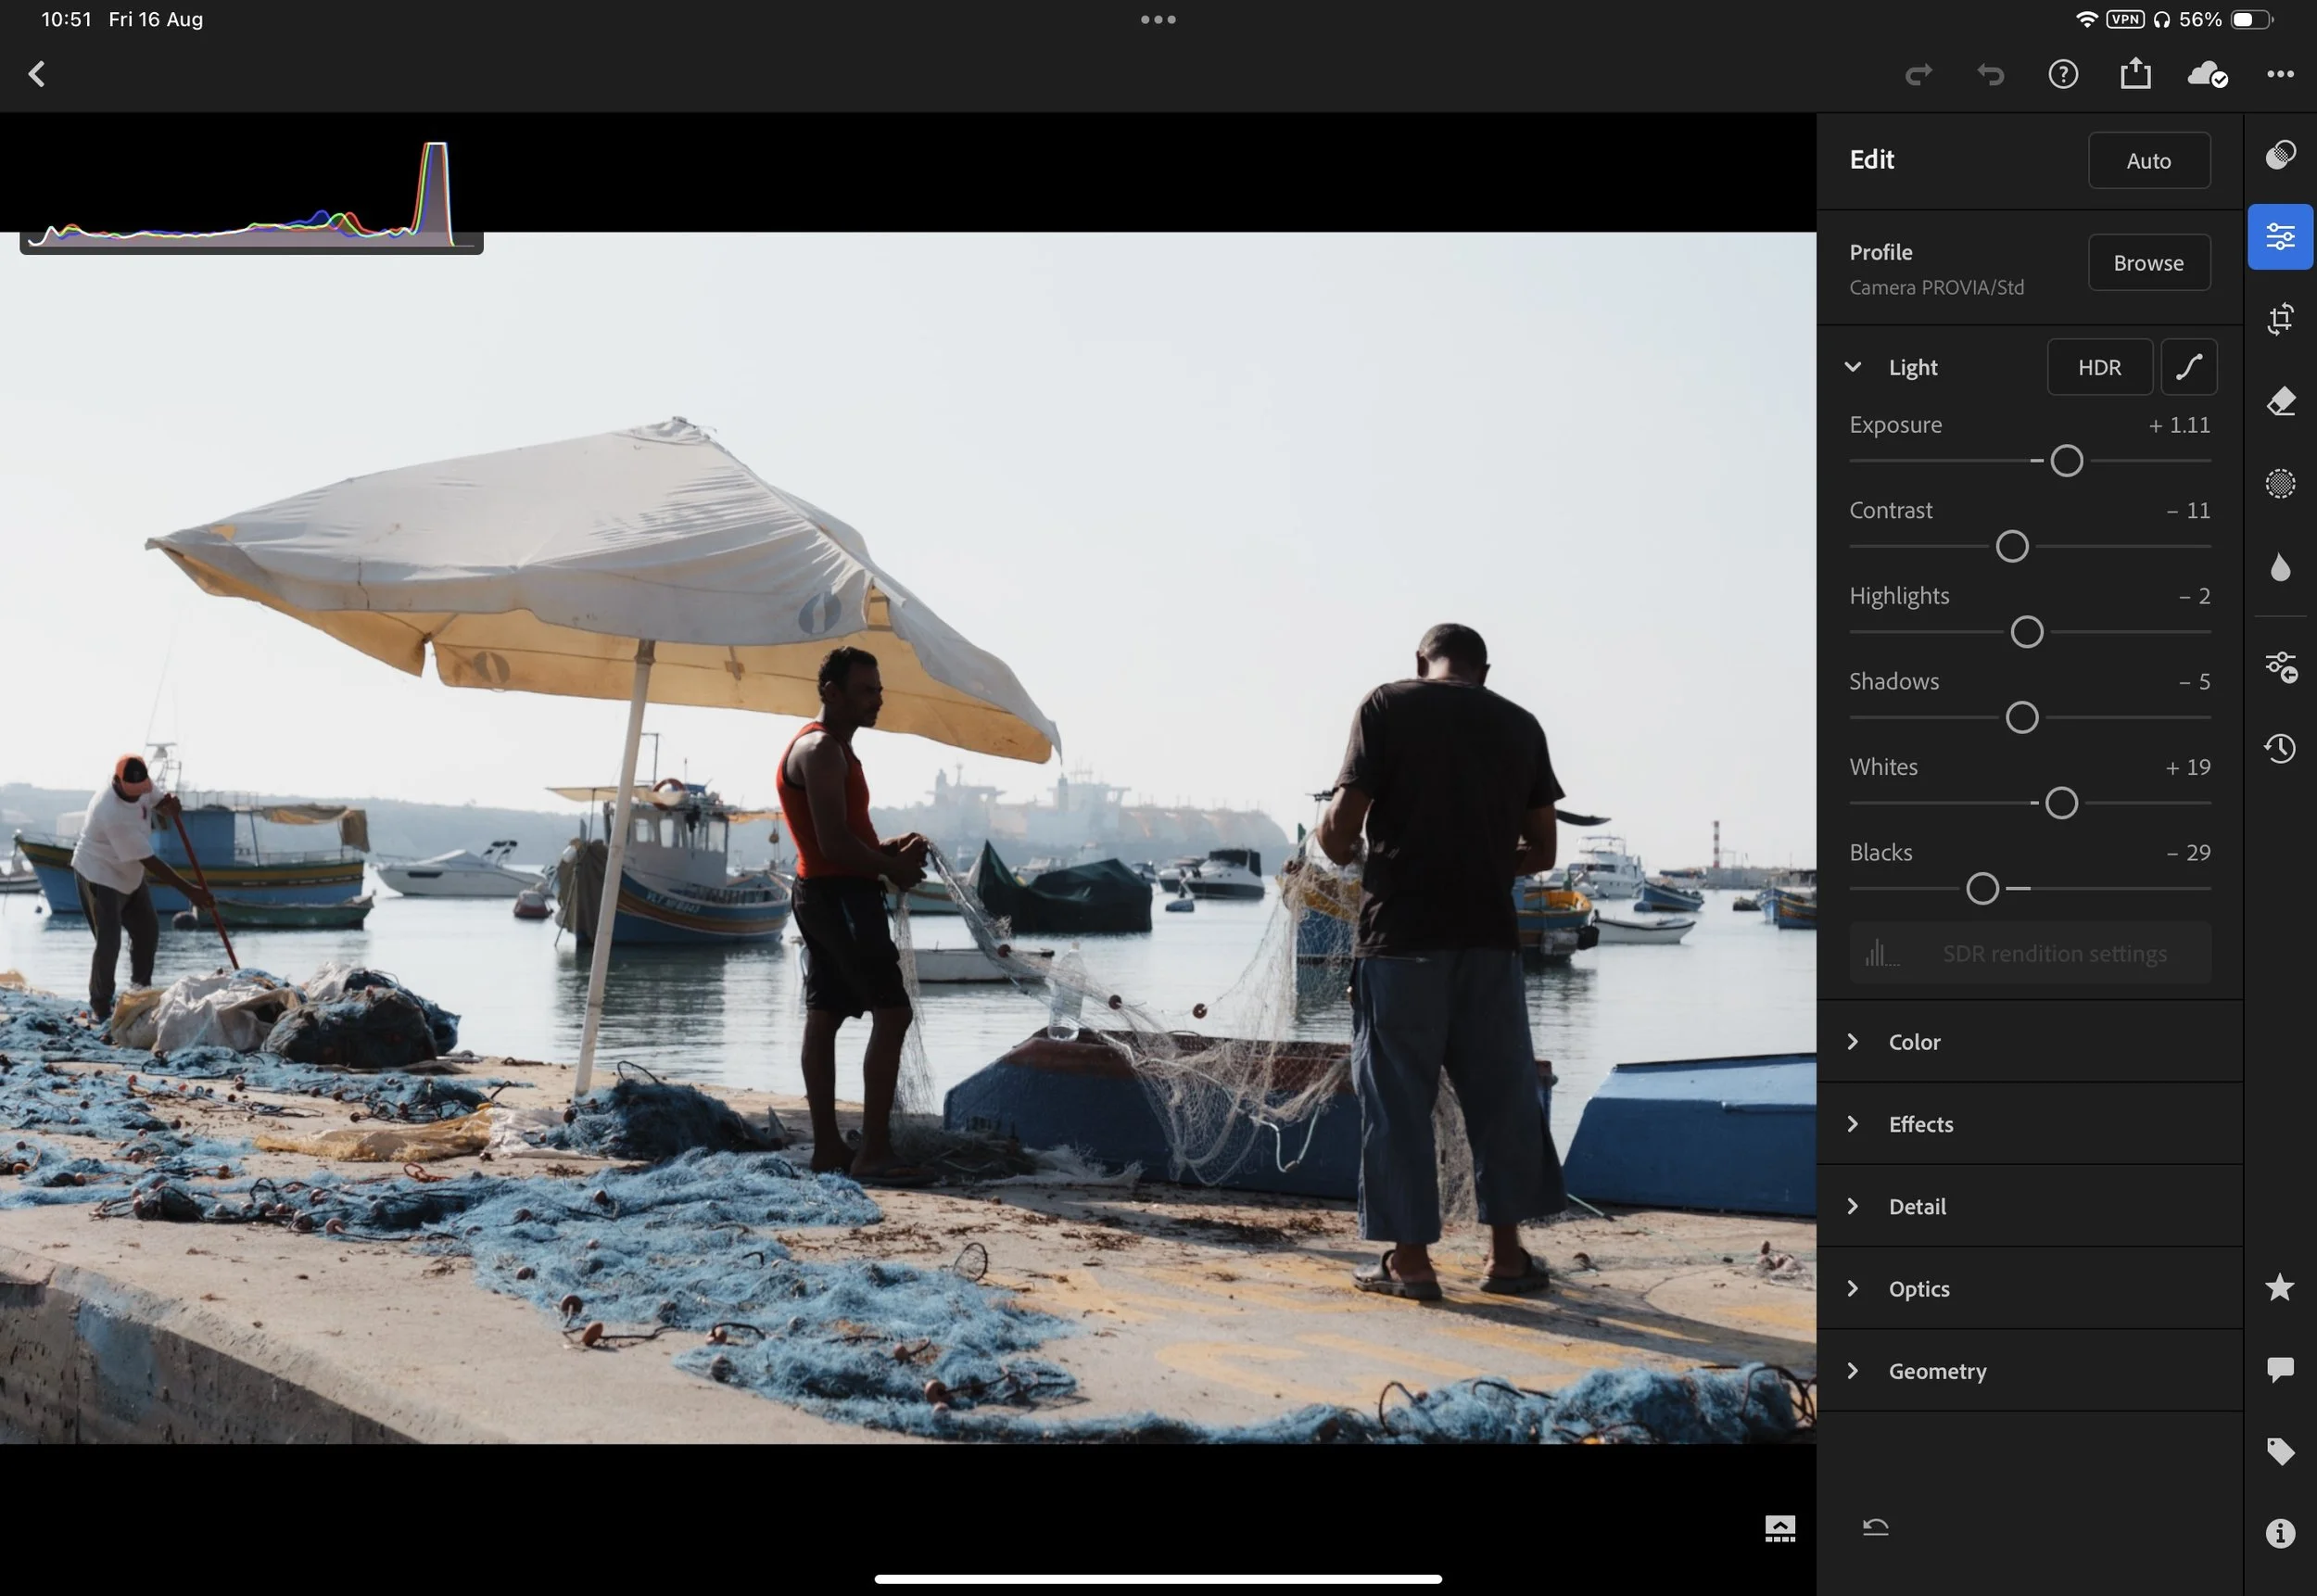
Photo looks good but histogram suggests overexposure

Photo looks flat but histogram suggests good exposure

Photo looks good but histogram suggests overexposure

Photo looks good but histogram suggests underexposure
Creating a Colour Salad
Last but not least, let’s talk about colour. As it stands, Lightroom has over 5 different ways one can adjust colour. Other apps, like Capture One, have even more. Although this is amazing as it allows us to pick the most suitable method for the job, it also can create the temptation to use all these methods all at once. I remember when I started editing, I felt like I needed to mess with everything. It took me a while to learn that this might not be the best approach. When you start using all these colour settings simultaneously, you can easily create a mess. Think of it like mixing different coloured paint. Two to three different colours can create something unique, but start adding more and more different tones, and soon enough, you will end up with a muddy mess. Same for editing. Try your best to only use what is essential, and don’t feel like you need to use a tool just because it’s there.

Minimal colour edit
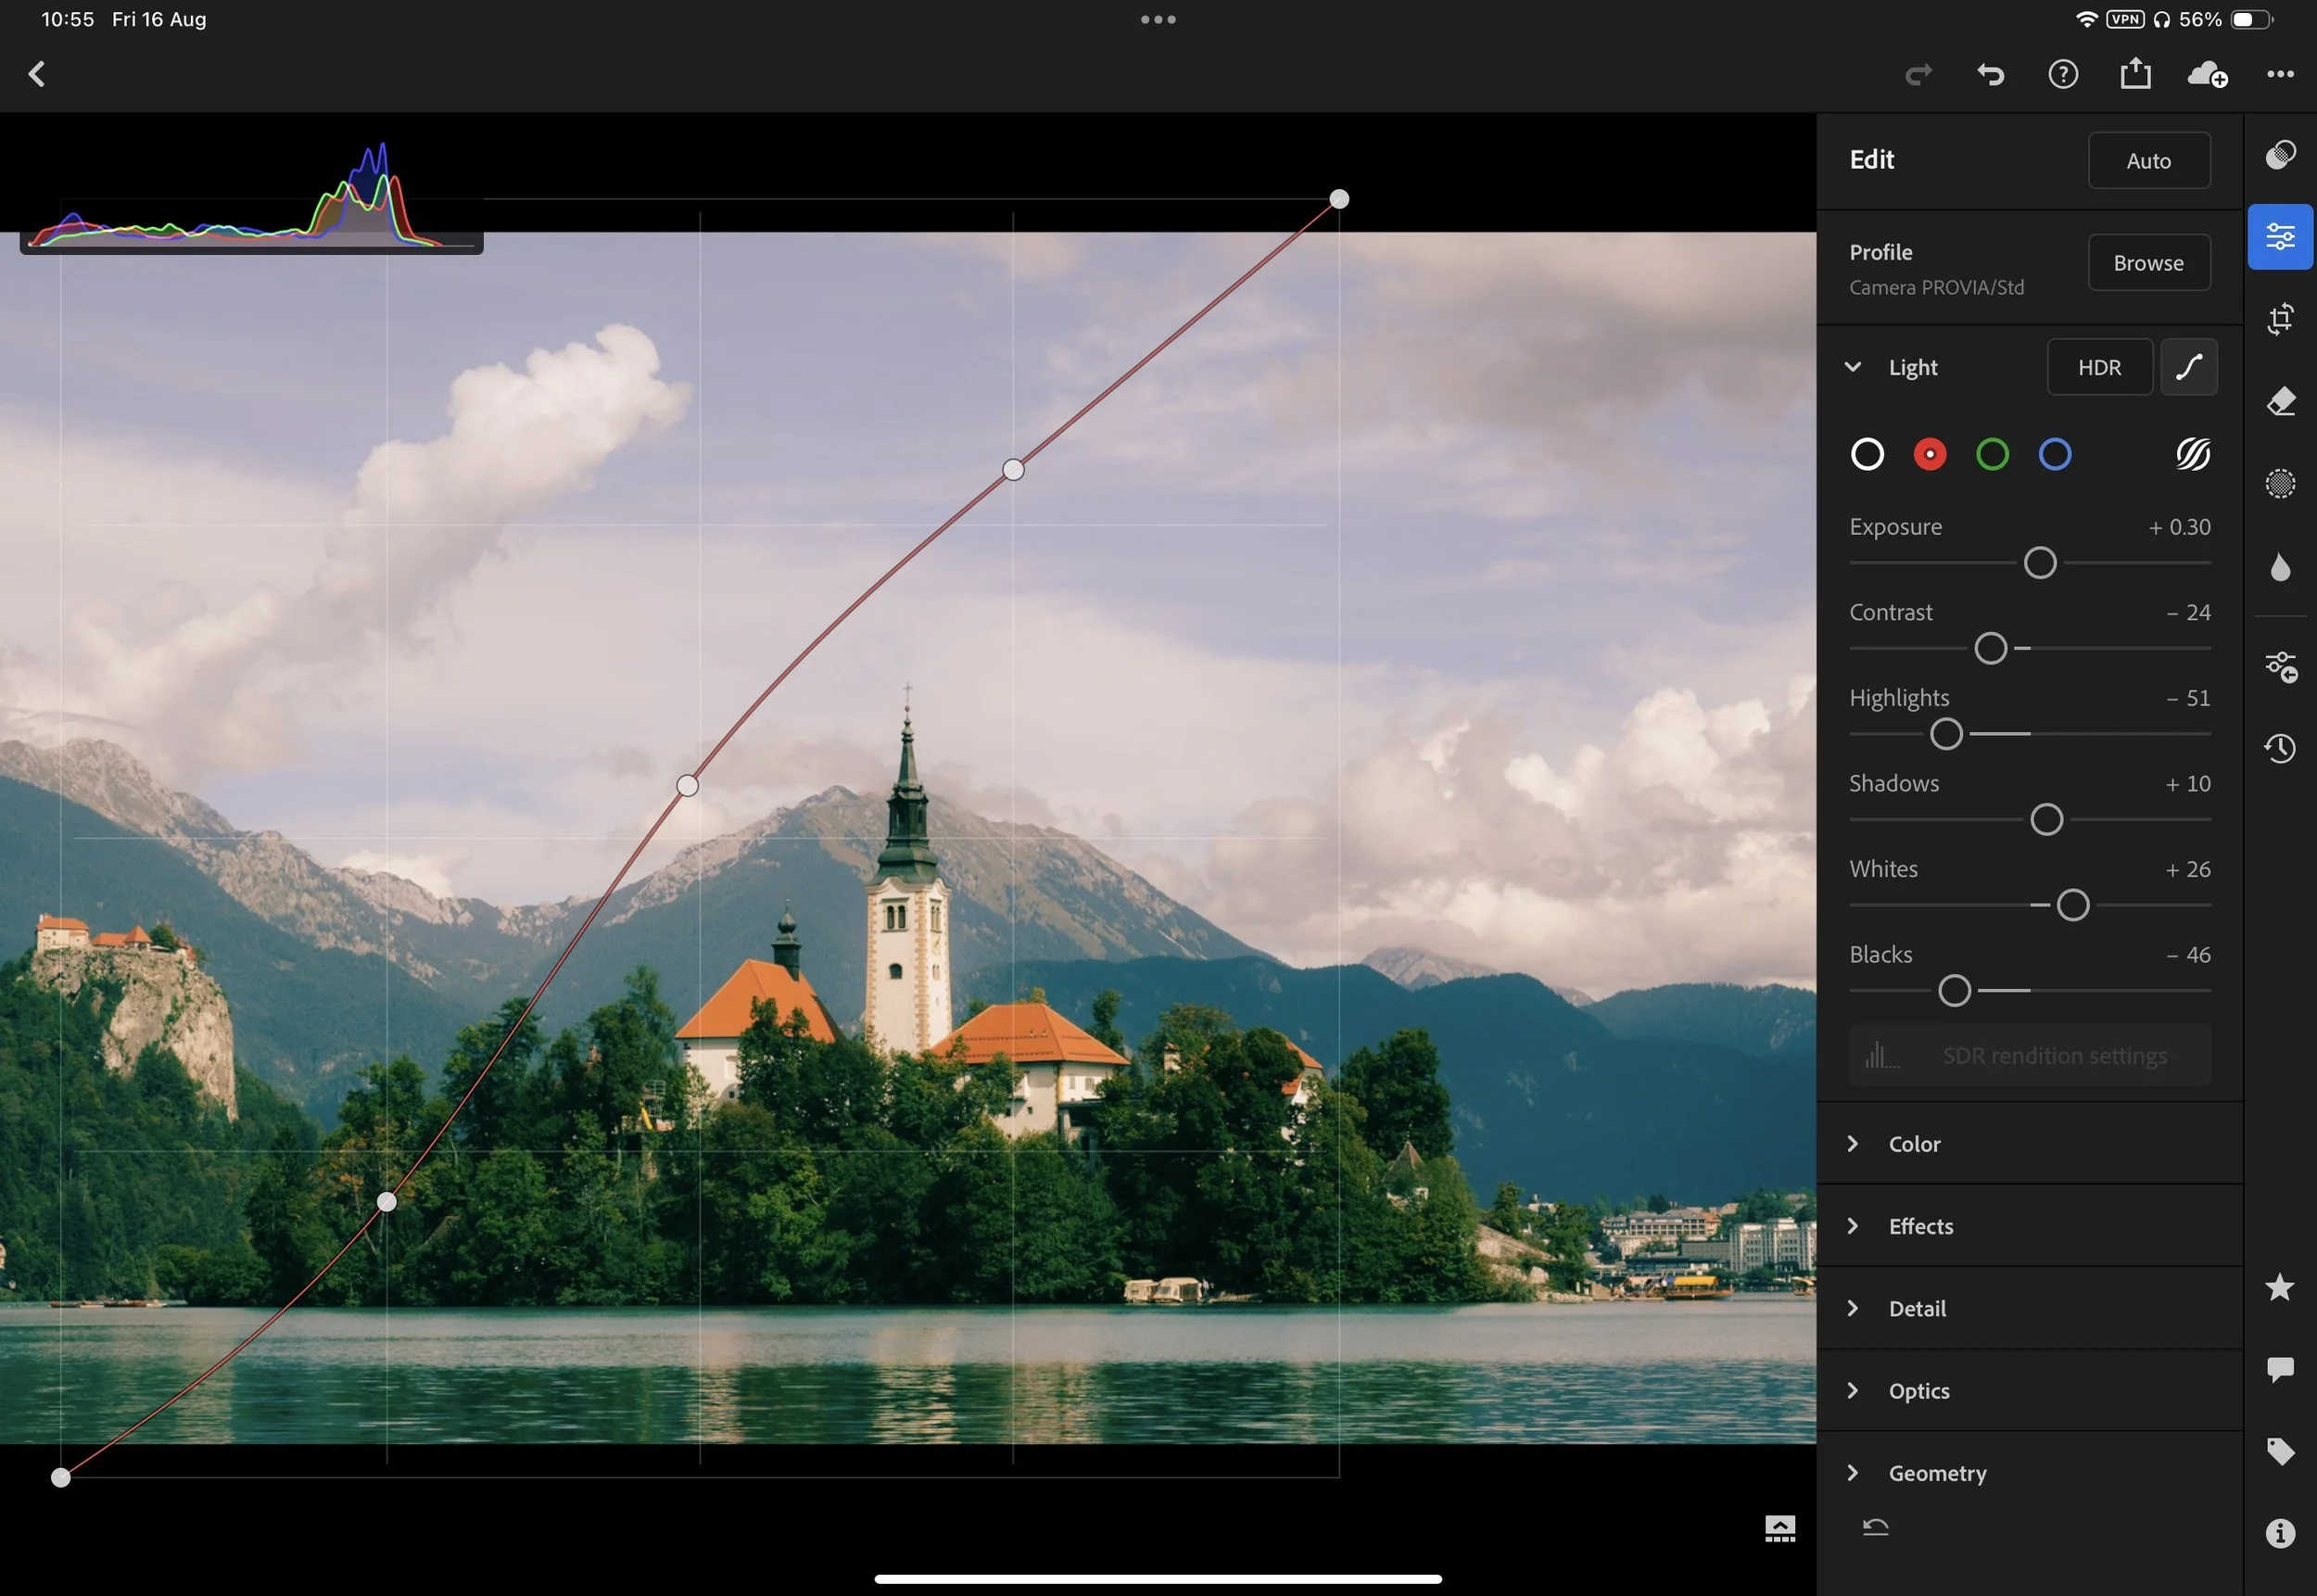
Colour curves

Split toning

HSL
If you found this blog helpful and wish to learn more about photography & travel while having direct access to me, please consider joining my Patreon community.














Instead of telling you how these will change your life, I would rather be practical and answer the most common questions that people tend to have when buying presets.
What are presets?
They are editing settings that are saved in a file and can be applied to any image.
Why do people buy presets?
Sometimes because they like the work of the photographer and want that style for their own photos. Mostly because they would like to see how other people edit and learn by reverse engineering the presets. Other times it’s just to support their favourite photographers, thank you!
What’s the overall style of these presets?
- Filmic
- Warm
- Soft
- Bright
What are these presets suitable for?
Street & Travel Photography
Some Nature (with further editing)
Some Portraits (with extensive editing)
Do I actually use these?
Yes. This is the same pack I use right now for all my editing. This isn’t a pack made just to sell.
Do these presets get updated?
Yes, as my style changes, these presets will also be updated. Any time a new update is available, you will get a free update via email. Of course you also keep all the old presets in case you prefer the older looks. Only presets purchased from 2025 onwards will receive the updates.
What file types are these presets for?
- All RAW files
- JPEGs & TIFFs (not recommended)
What camera brands are these presets for?
These were designed around Fujifilm, Sony, and Leica sensors. With that said, they will work with all camera brands. While there might be differences due to individual camera colour science, the overall feel of the preset will carry over.
Will these work with JPEG files?
Yes, but you will need to reduce the intensity and make further edits. I strongly recommend editing RAW files.
Are these one click edits?
95% No. You would need to do some basic adjustments as each image is different. These adjustments can include exposure, colour balance etc. In 5% of cases you can just apply and leave it alone.
Do I need to know how to edit?
You need to have a basic understanding of adjusting exposure, highlights, shadows, etc. A more comprehensive editing skillset will let you get the most out of them.
How many presets are included?
10 in the main pack and 24 in the extras pack
Why two packs?
The main pack is what I use for 99% of my edits and is kept small to reduce wasted time scrolling through presets. The extras pack is everything I don’t use often.
What software do I need?
These presets will work with any of the following:
- Photoshop (adobe camera raw)
- Lightroom Classic
- Lightroom Desktop
- Lightroom Mobile
Will these presets work with free versions of the above software?
You need to research and double check before buying. These presets were designed for the full paid versions.
Will these presets work with very old versions of the above software?
You need to research and double check before buying. These presets were designed on and for the latest software.
What file type do I get?
XMP
What else do I get?
- Comprehensive PDF guide
Can I modify these and turn them into my own?
Yes! In fact I encourage you to modify them and play around. Use these to help you get your own style.
I have more questions…. What do I do?
Make a cup of tea and drop me an email on hello@snapsbyfox.com
Please note that due to the nature of digital products, refunds are generally not accepted. However, if you experience any issues, feel free to contact me and I’ll review your situation individually. You are welcome to use this product for personal or commercial projects, but you may not copy, distribute, or resell the files in their original or modified form.
Finally I want to say a massive thank you for supporting me. Buying these presets is the most direct way you can support my work.
Thank you!