How I Organise Video Footage
In this blog I will briefly describe how I organise all my video footage. As well as photos I take a lot of videos when travelling and soon it can pile up. These videos can be used as B-Roll for future YouTube videos, reels or simple moving photographs for posting on socials. Please note that I do this for a living therefore can justify more premium products. You can do the same for half the cost.
Gear & Software
Let’s start with the equipment and software I use. The main program for video editing and storage is Final Cut. Although there are many others out there, Final Cut is the most complete and straight forward for me. I will talk in more detail on how I organise everything later in the blog. As for laptop I use an M2 Max MacBook Pro. I opted out for a 4TB SSD internal storage for live projects. This allows me to work on 2-3 large video projects without running into memory issues.

As for storage there are two hard drives:
Samsung Evo 8TB SSD - This is my main video archive drive. It’s not the fastest SSD but at 8TB can hold years worth of videos and is still plenty fast enough to browse, skim and download.
WD 4TB HDD - This is a backup to the SSD. At the moment they only make 4TB portable drives so I need two to fully backup the SSD. Some may ask why I haven’t gone down the large NAS or tower route and the answer is simple. Cost and portability. The HDD is easy to throw in my bag and use anywhere without external power. Can’t do that with a NAS or a large tower.


Video Library
I create a new Final Cut library for every destination, event or project. For example Tokyo will be its own library. Unlike many people I make sure to keep the video files inside the library and not have them linked to another location. This keeps things nice and tidy. Inside the library I will make new events which are folders where I can store video files. I will name these events based on different criteria however usually it’s based on different areas or something in common such as people, travel etc.
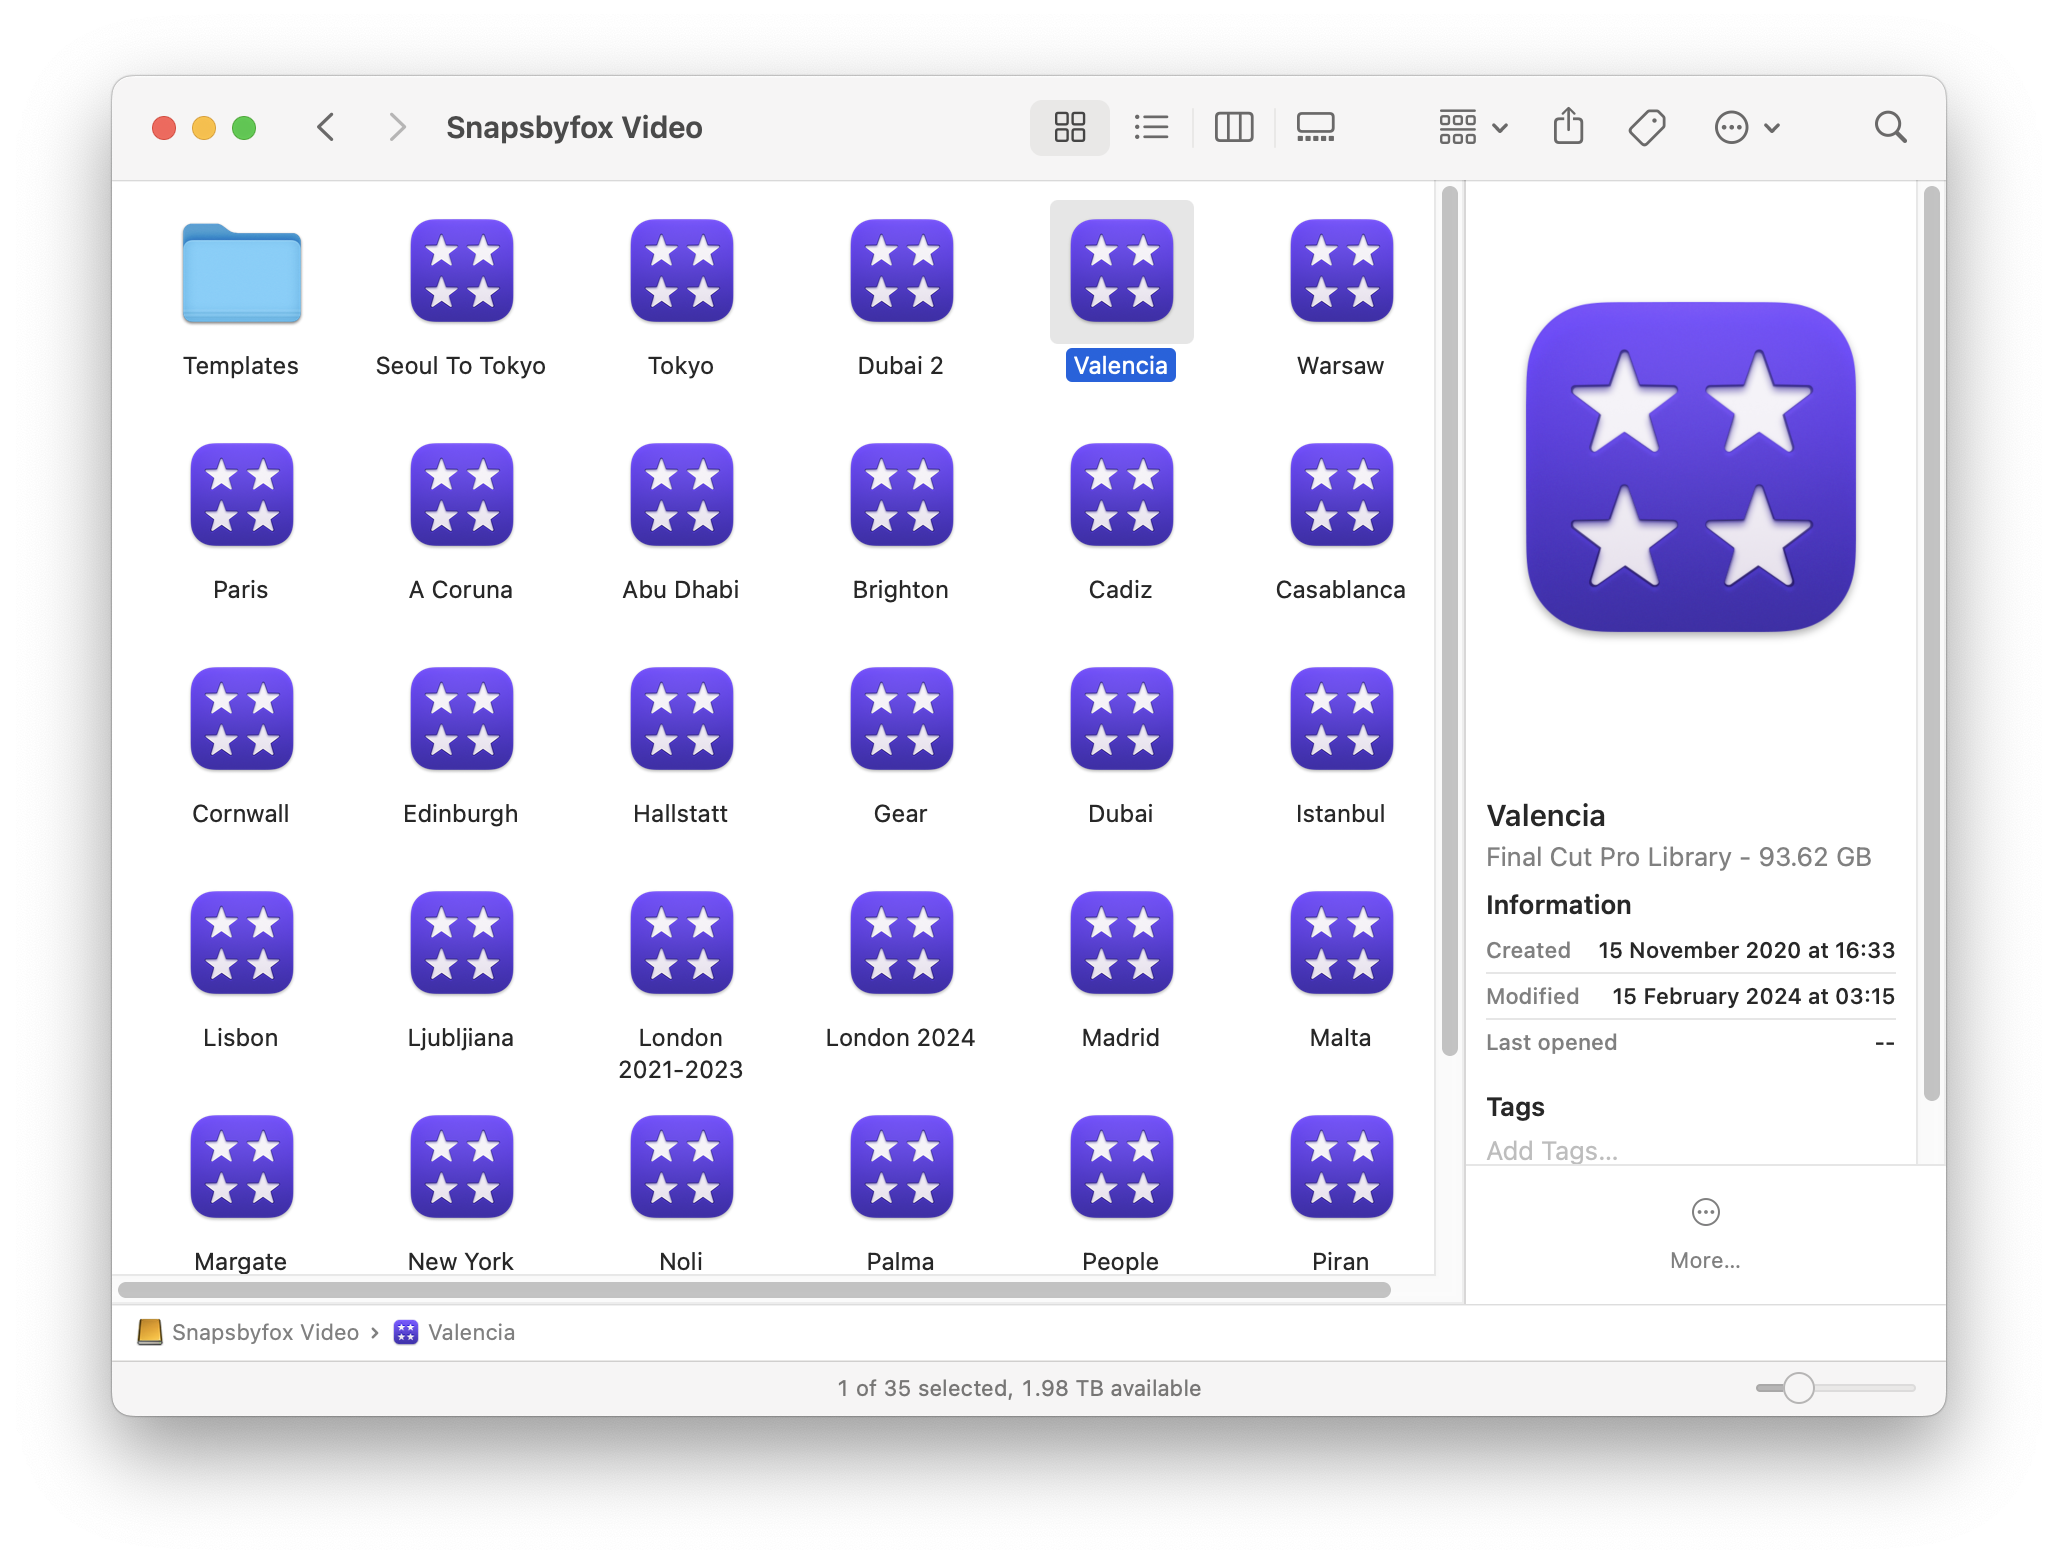
There is one event that always stays on top called “To Sort”. This acts like an inbox where I import all video files into. I then sort the clips and delete the rubbish ones. After that I organise the library by moving the good clips to their respective folders.
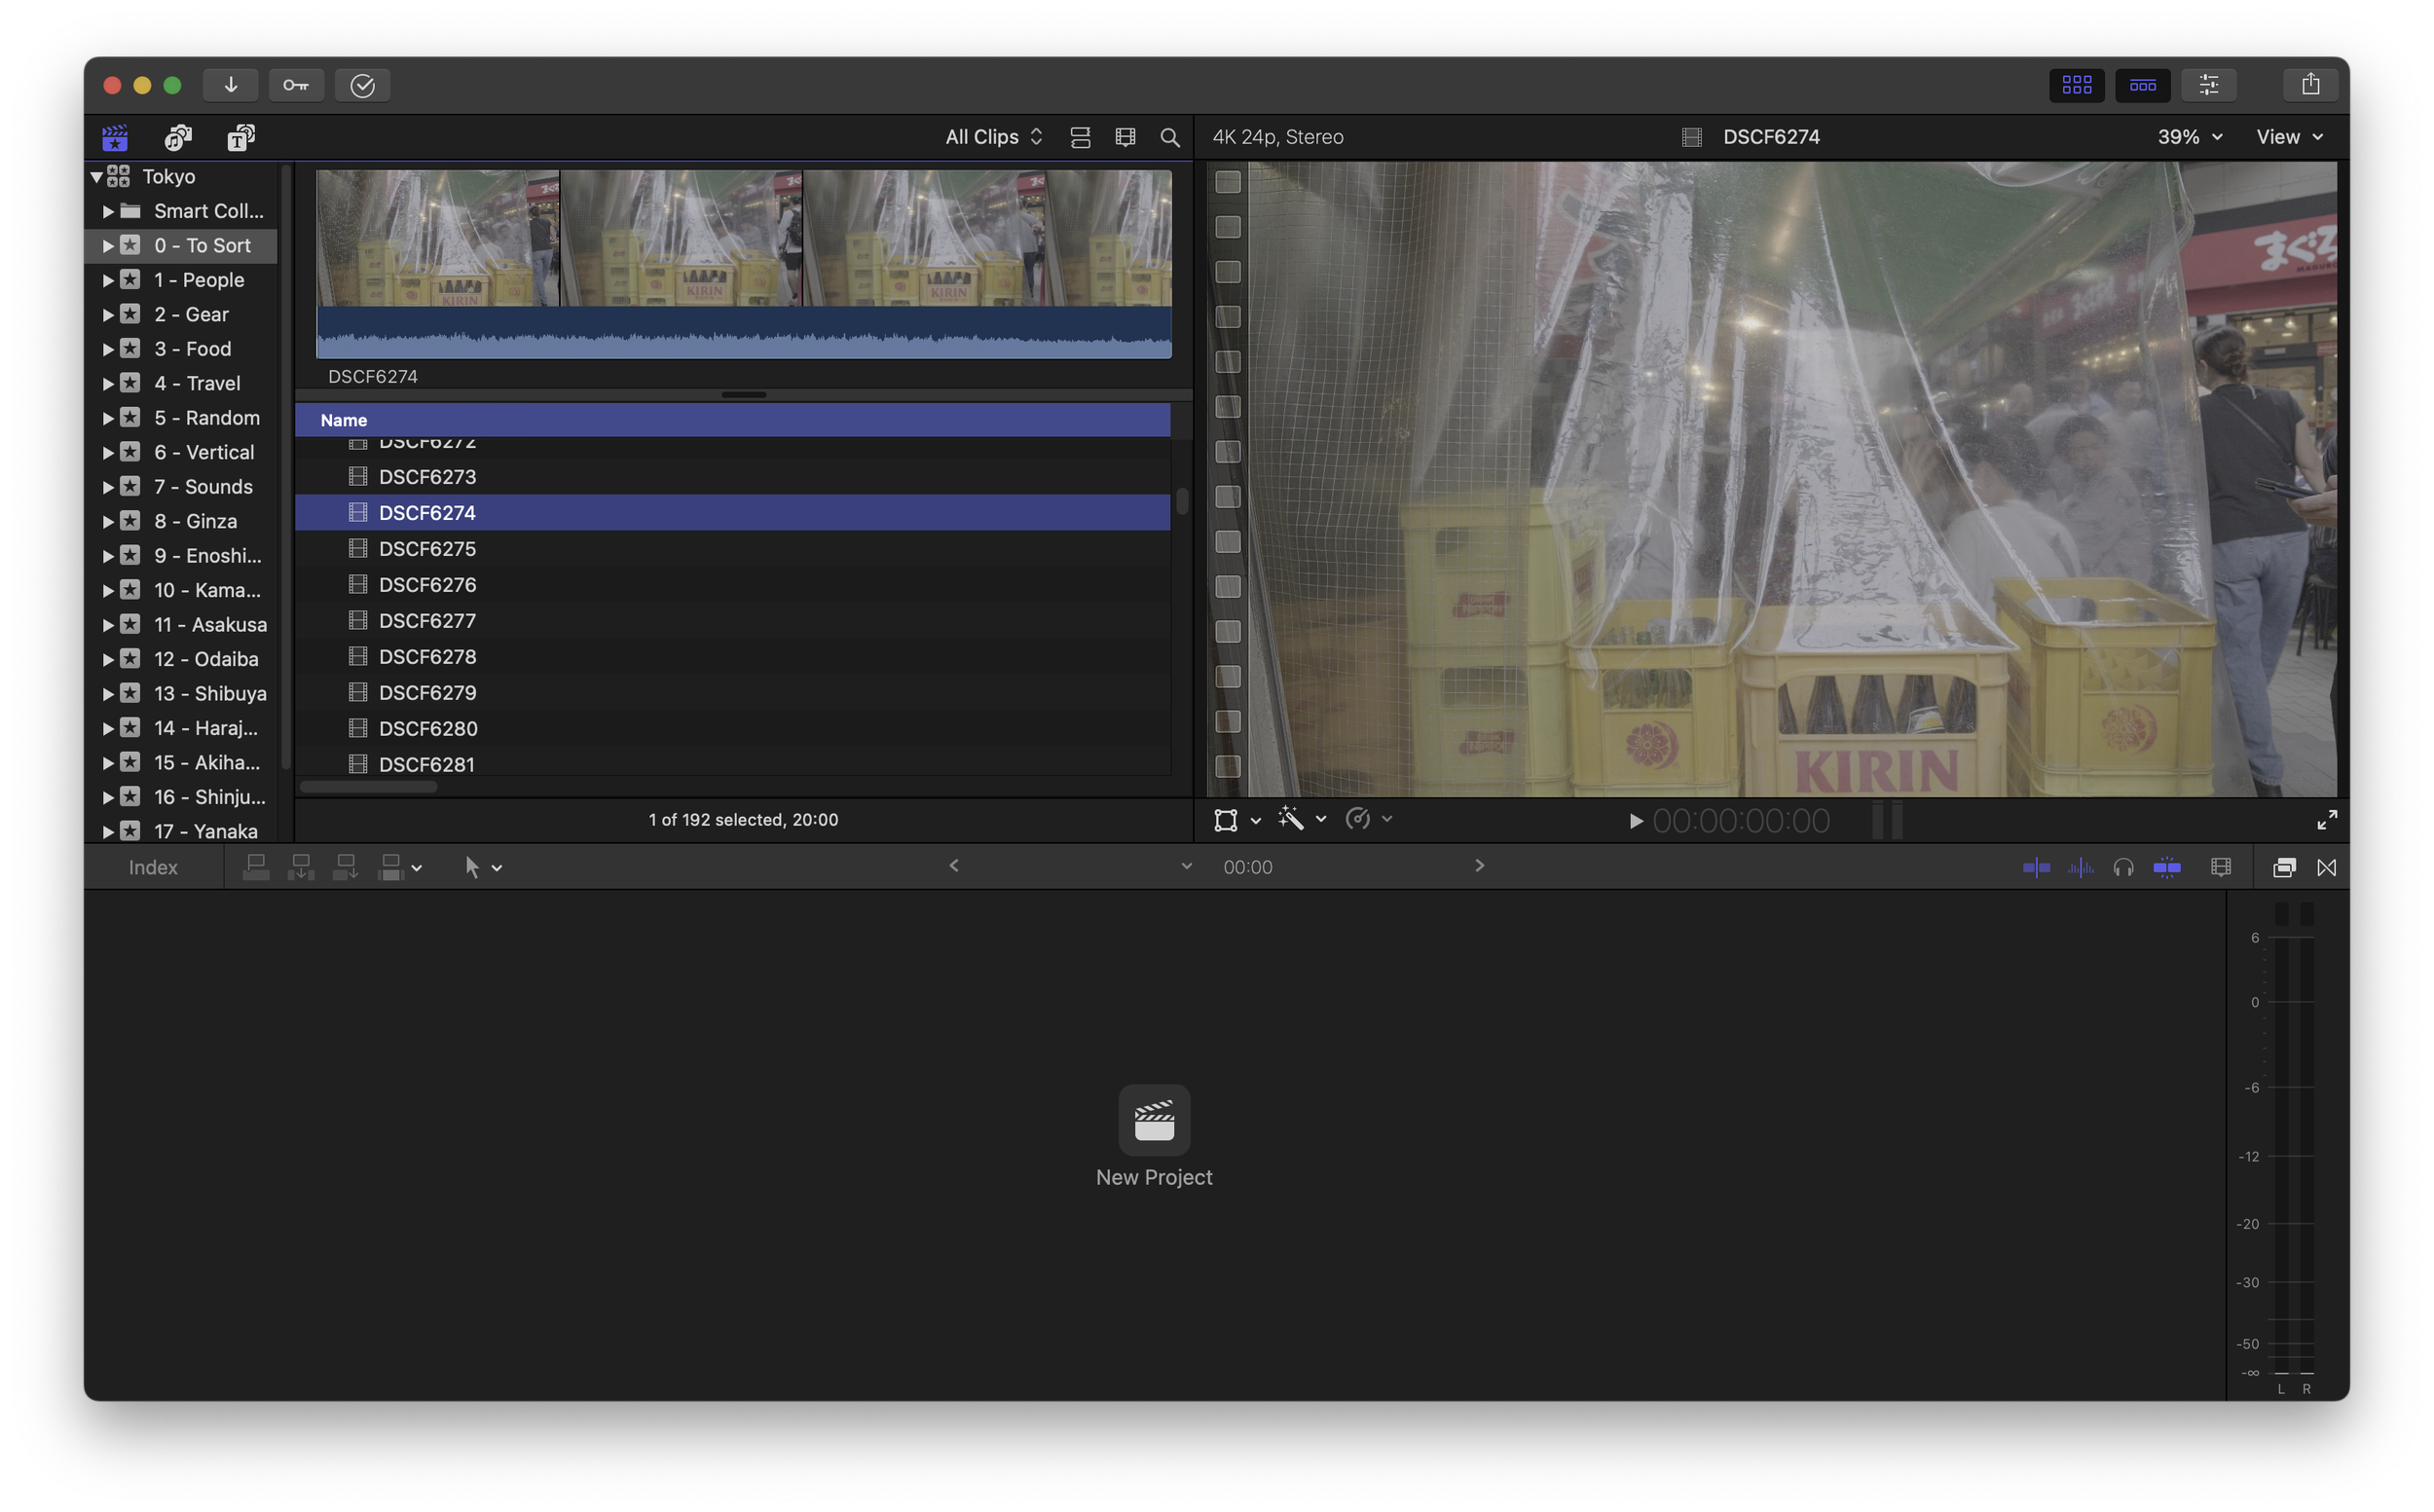
Finally there is a smart collection that is split into frame rates. I made a new smart collection for each frame rate.


That’s really about it. The goal was always to have an easy system that doesn’t take me ages to organise and navigate. Now when I need a specific video I just open the relevant library, navigate to the required folder, skim the videos to find what I want and simply drag the clip into my current project.