
iPhone Only Photography Workflow (Adobe Lightroom)
Not long ago, I shared my Lightroom photography workflow, which you can read here. One of the questions I received was how that workflow differs for iPhone-only photographers. In this blog, I will share my iPhone photography workflow. Specifically, I will talk about the entire process using the iPhone as my only device.

Gear
The beauty of iPhone photography is that the setup is pretty minimal. I only use the phone and don’t bother with any accessories.

Although all my photos live in the Adobe Cloud, I use a 4TB SanDisk SSD for offline backup and access. I am aware that some people have had issues with this brand of drives. I’ve used this drive for over 3 years with no issues, so I can’t comment.

Software
My main raw photo storage, organising, and editing software is Lightroom. It comes with 1TB of storage, which for the foreseeable future is enough. After that, I can just upgrade or think of how to remove some photos offline, perhaps a topic for the future. The Adobe Cloud allows me to access and edit my files on any device and on the web. The downside is you’re trapped in a monthly subscription and dependency on Adobe Cloud. This is something I am still not 100% with, but I guess it’s the world we live in today.

When it comes to social media, I have an app called Unfold which allows me to make custom layouts for stories and posts.

As for photo capture apps, I only use the default Apple app. I am sure there are alternatives that can take a photo and make you a cup of tea, but the default works well for me.

Working on iPhone vs. on Mac
There are two ways to go about editing iPhone photos. The first way is to do everything natively on the phone. The second way is to transfer the photos to your Mac for editing on a bigger screen. I personally prefer the second option because editing or even culling on an iPhone screen is the most eye-straining task imaginable. Not to mention you simply can’t study your photo as well on a small phone screen compared to a laptop. It’s also worth mentioning that the desktop version of the app has more editing features and tools. The mobile version is more than enough to get everything done though.

Library
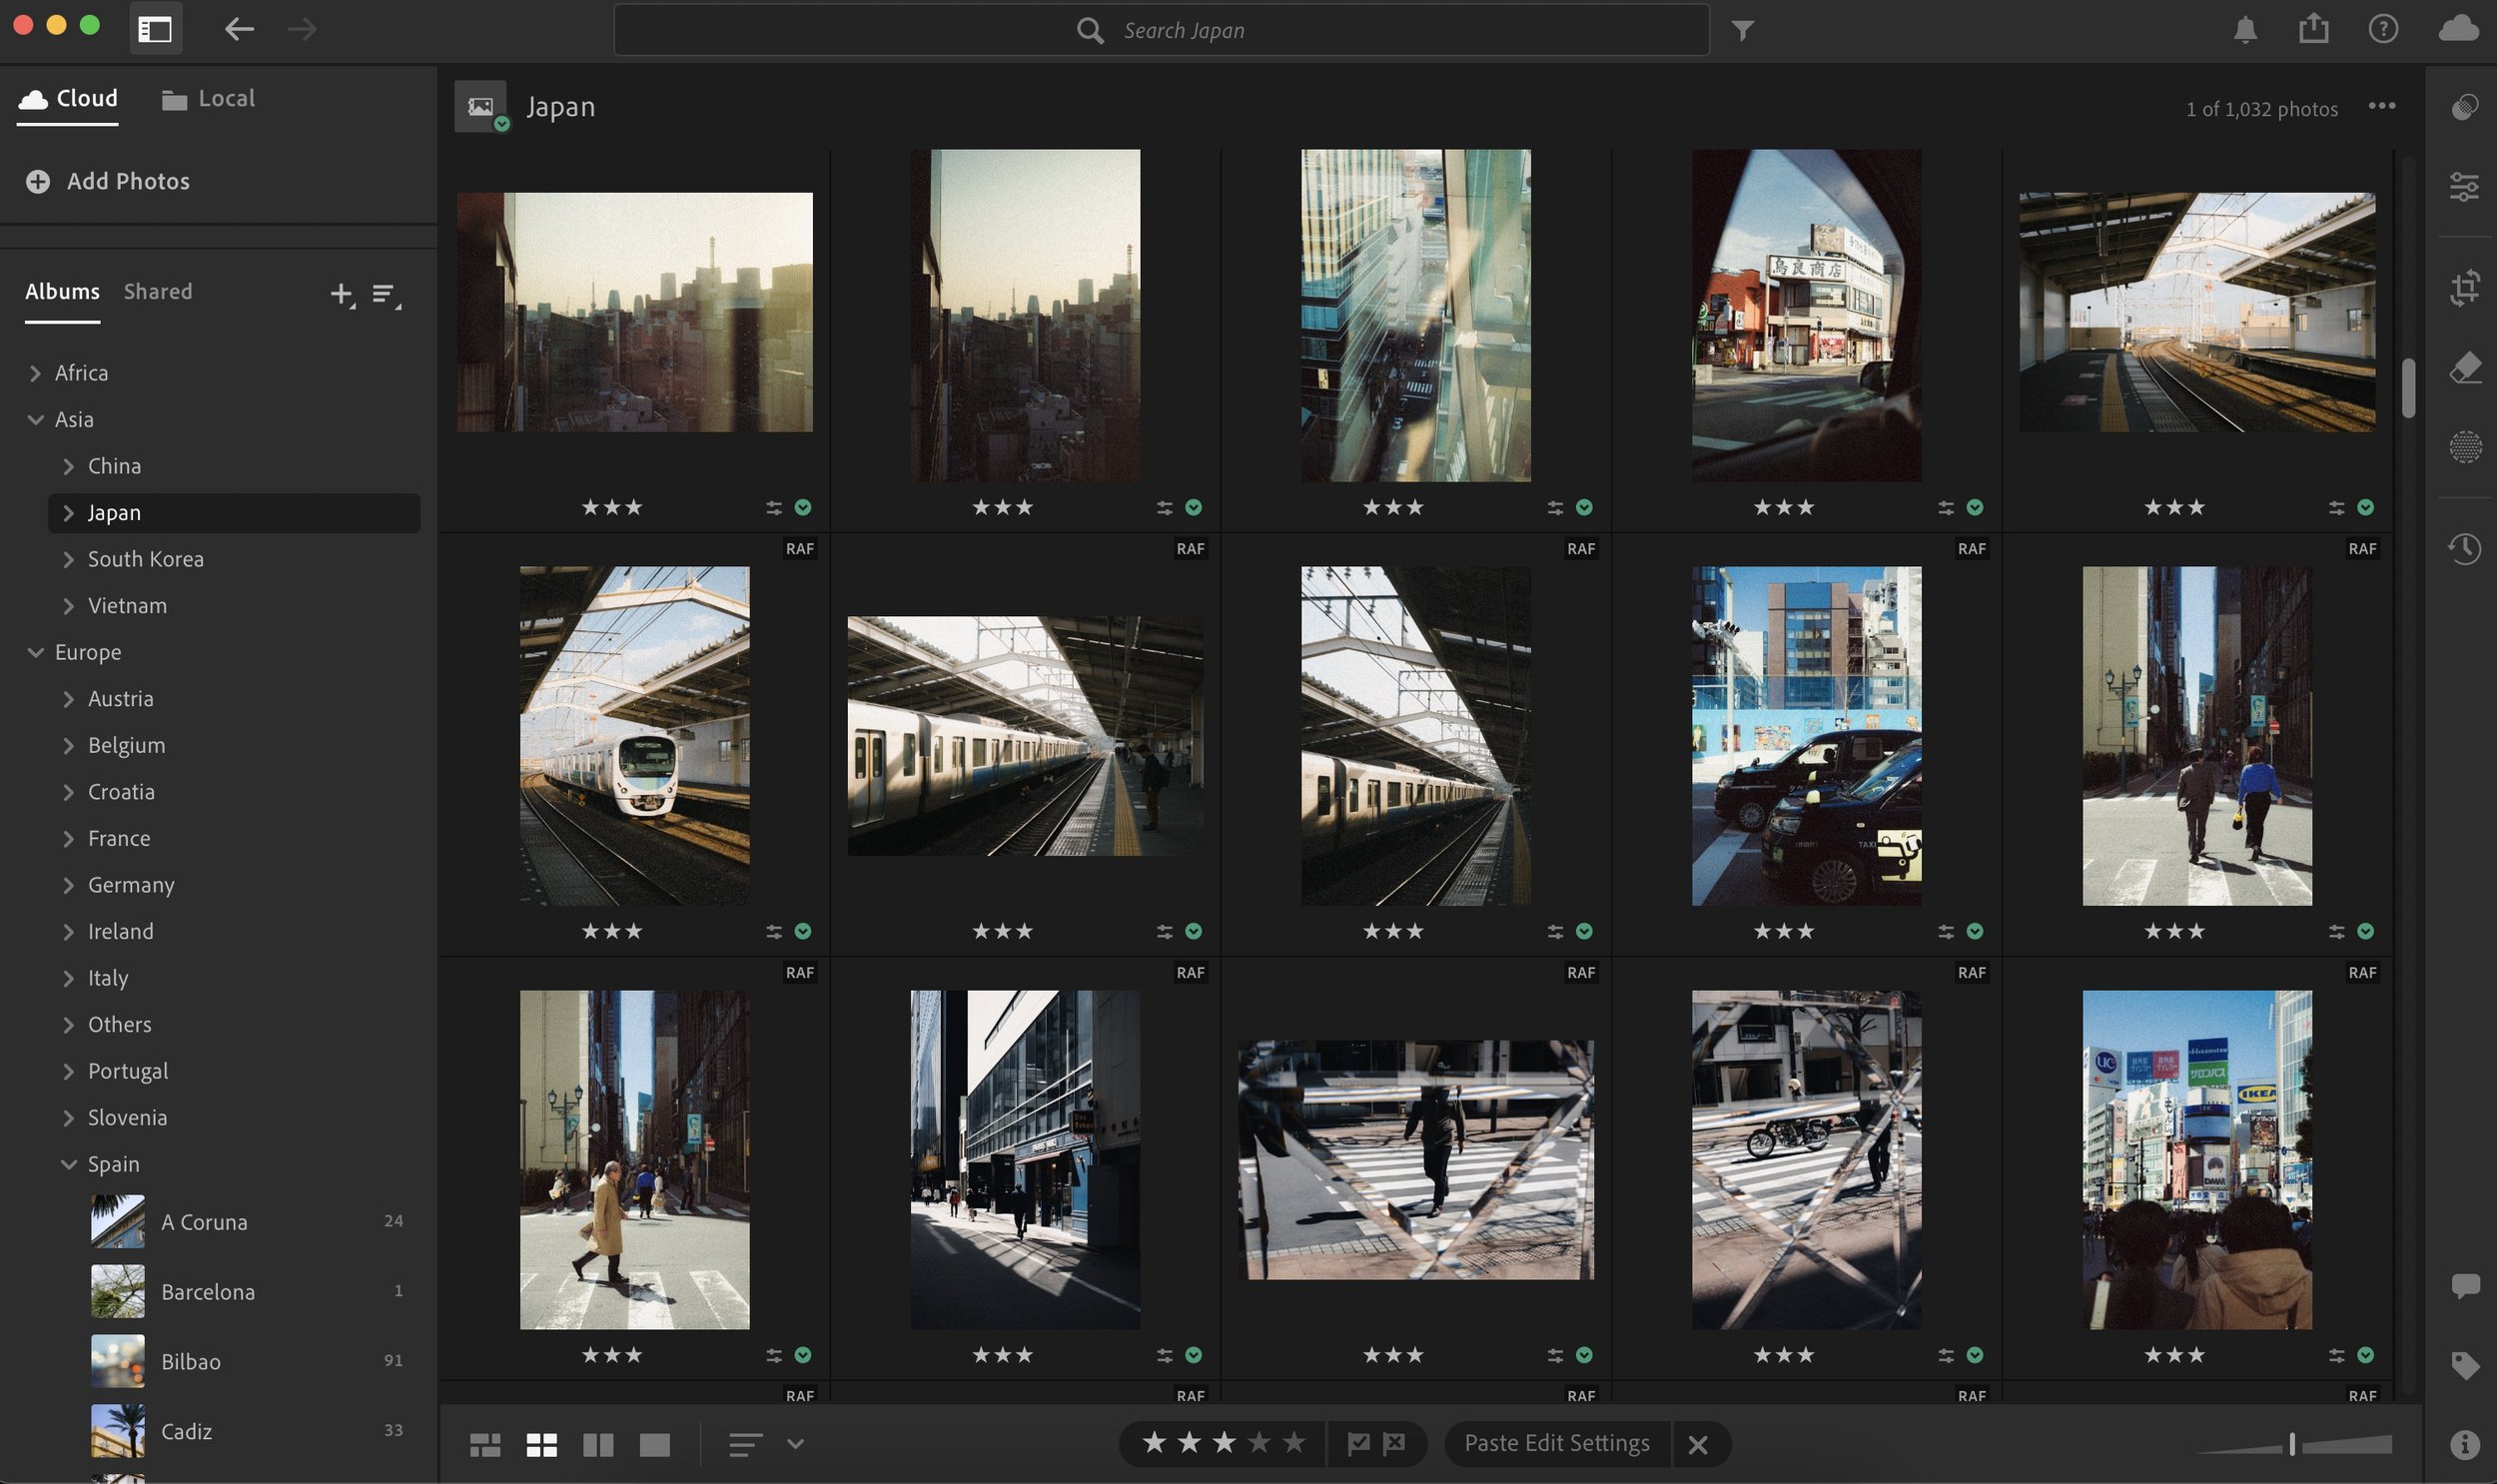
Everything lives in one library because that’s how Lightroom works now. I wish I could make multiple libraries, but as things stand, it’s not an option.

All my photos are then organised into folders, sub-folders, and albums. Given that my main photography at this moment is travel-based, my library is organised geographically. It is broken down into continents, then into countries, and finally into cities or major events.

I used to be big into keywording, but these days, thanks to AI, there isn’t much point given you can just search for what you want in Lightroom and Apple Photos. Finally, all the photos are rated as follows:
5 stars is what you’d call a banger, and I only really get 10 of them a year.
4 stars is a very good photo.
3 stars is good.
2 is acceptable.
1 is if the photo sucks but it could be useful for something someday, such as a blurry background for a digital booklet I’m working on.

Step 1 - Capture, Offloading & Culling
Assuming that you’re using the native app, all your photos will go into the camera roll. Most people keep their camera roll full of 1000s of photos; however, I keep mine totally empty because I treat it like an SD card in a camera. On my phone, the camera roll is only for photos that I need to do something with.

I then begin the process of culling. There are two ways to do this. The first way is by culling in the Photos app - this means less to import but a less streamlined culling process. The second way is to import everything and then cull in Lightroom. I personally prefer the second option because it’s less hassle.

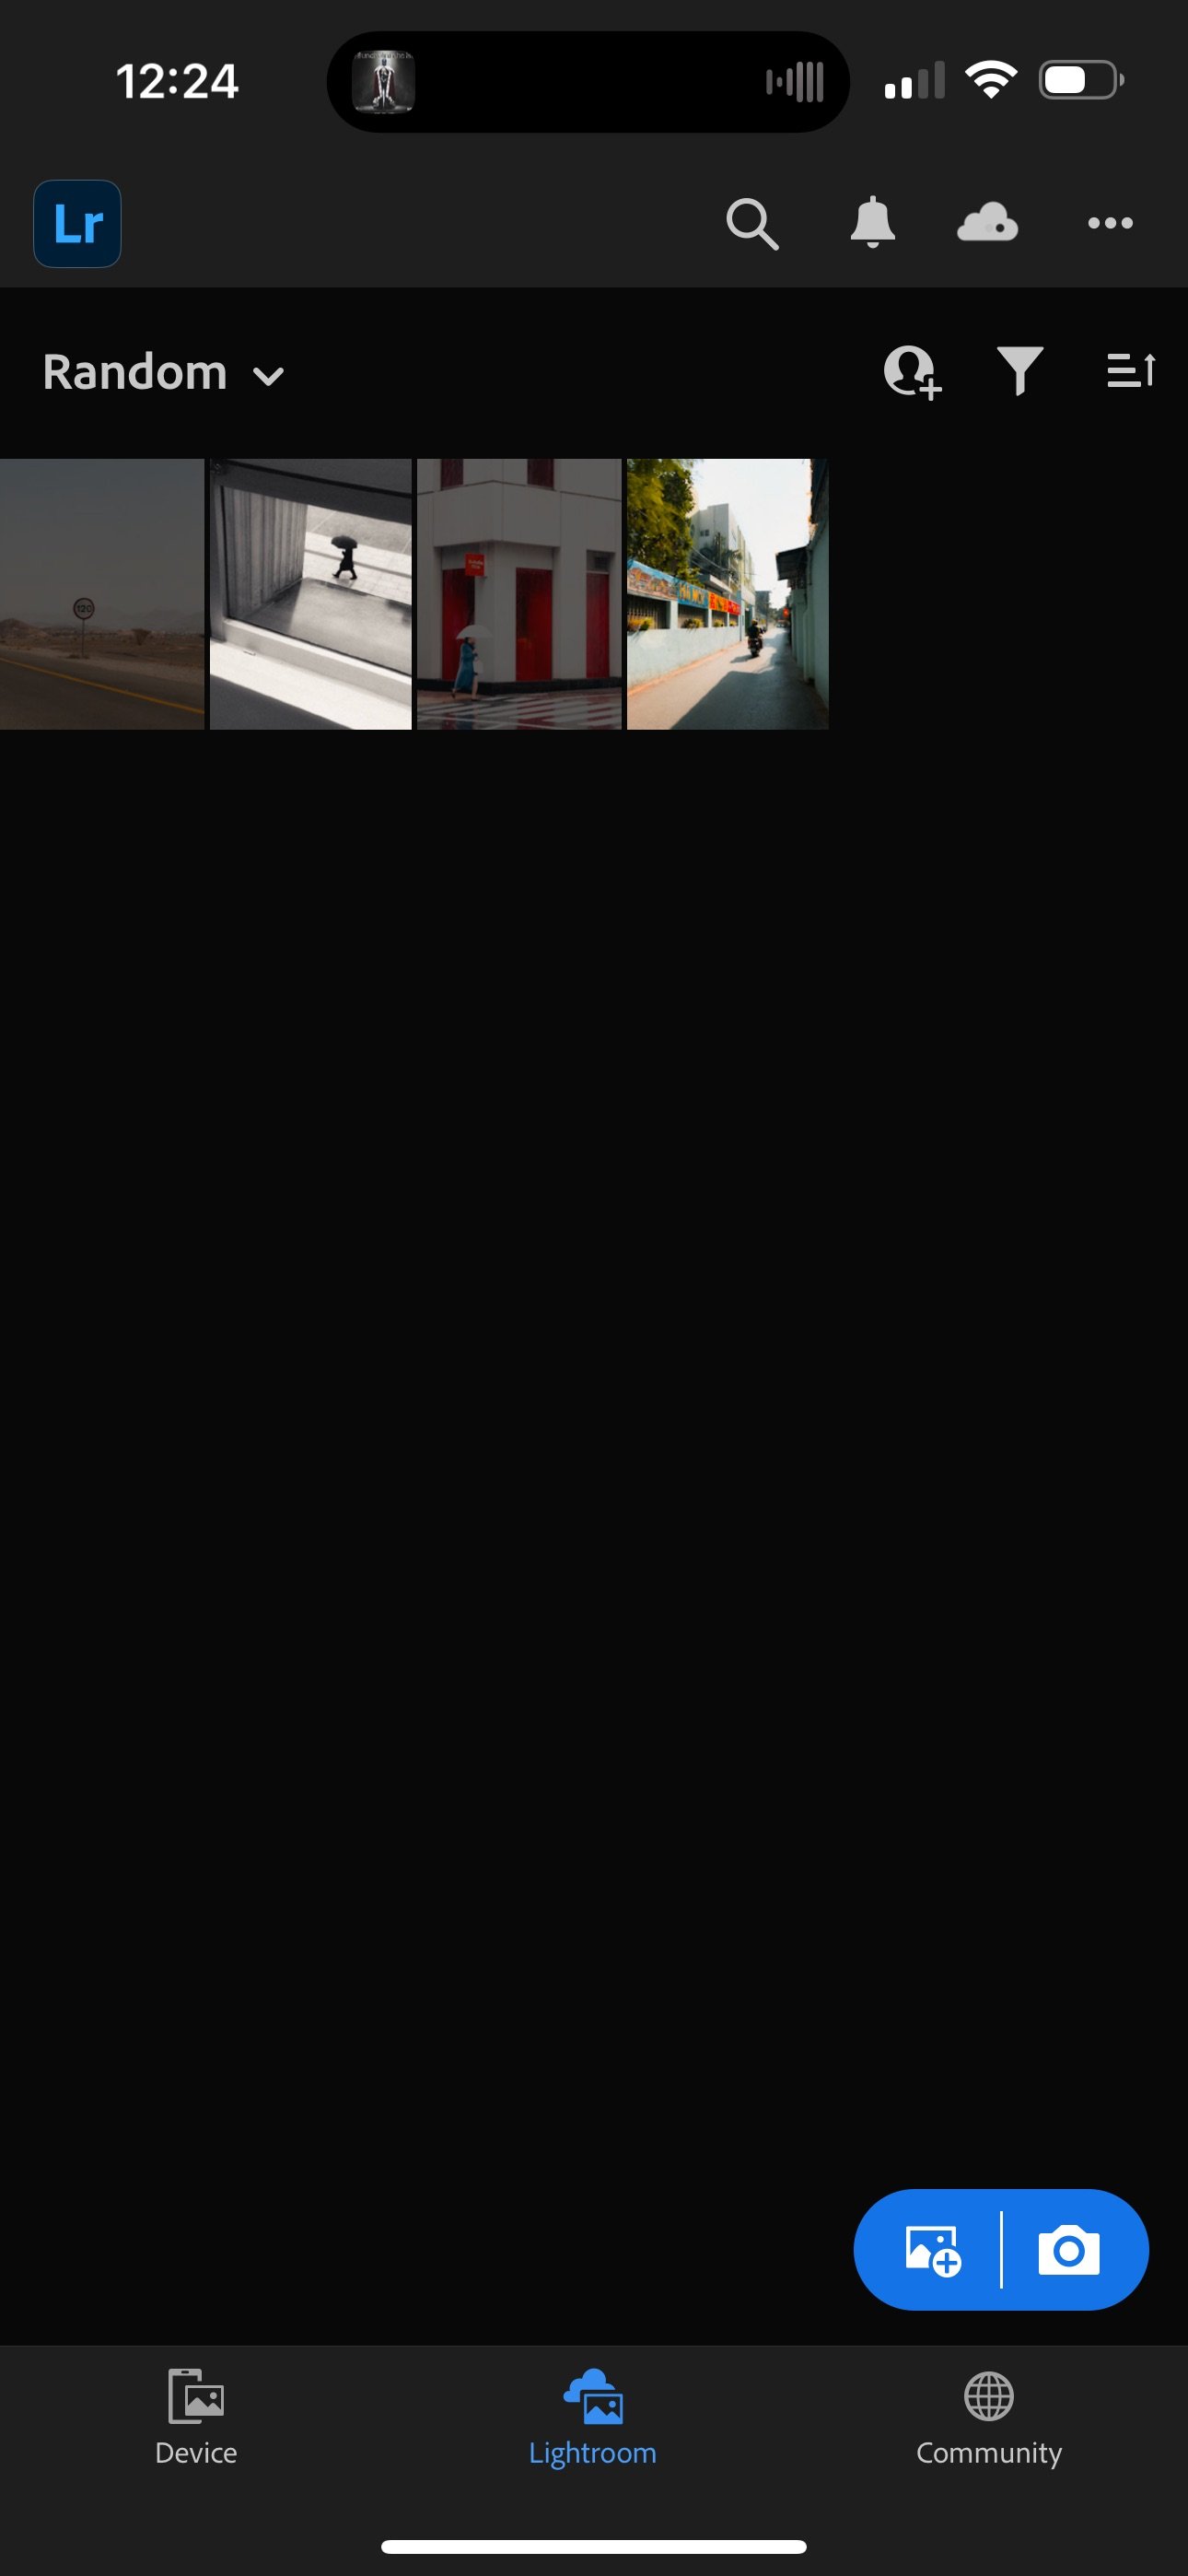
One thing I do before importing a lot of photos is disable the cloud sync. The last thing I want to do is start uploading 500 files into the cloud when I know most will be deleted.

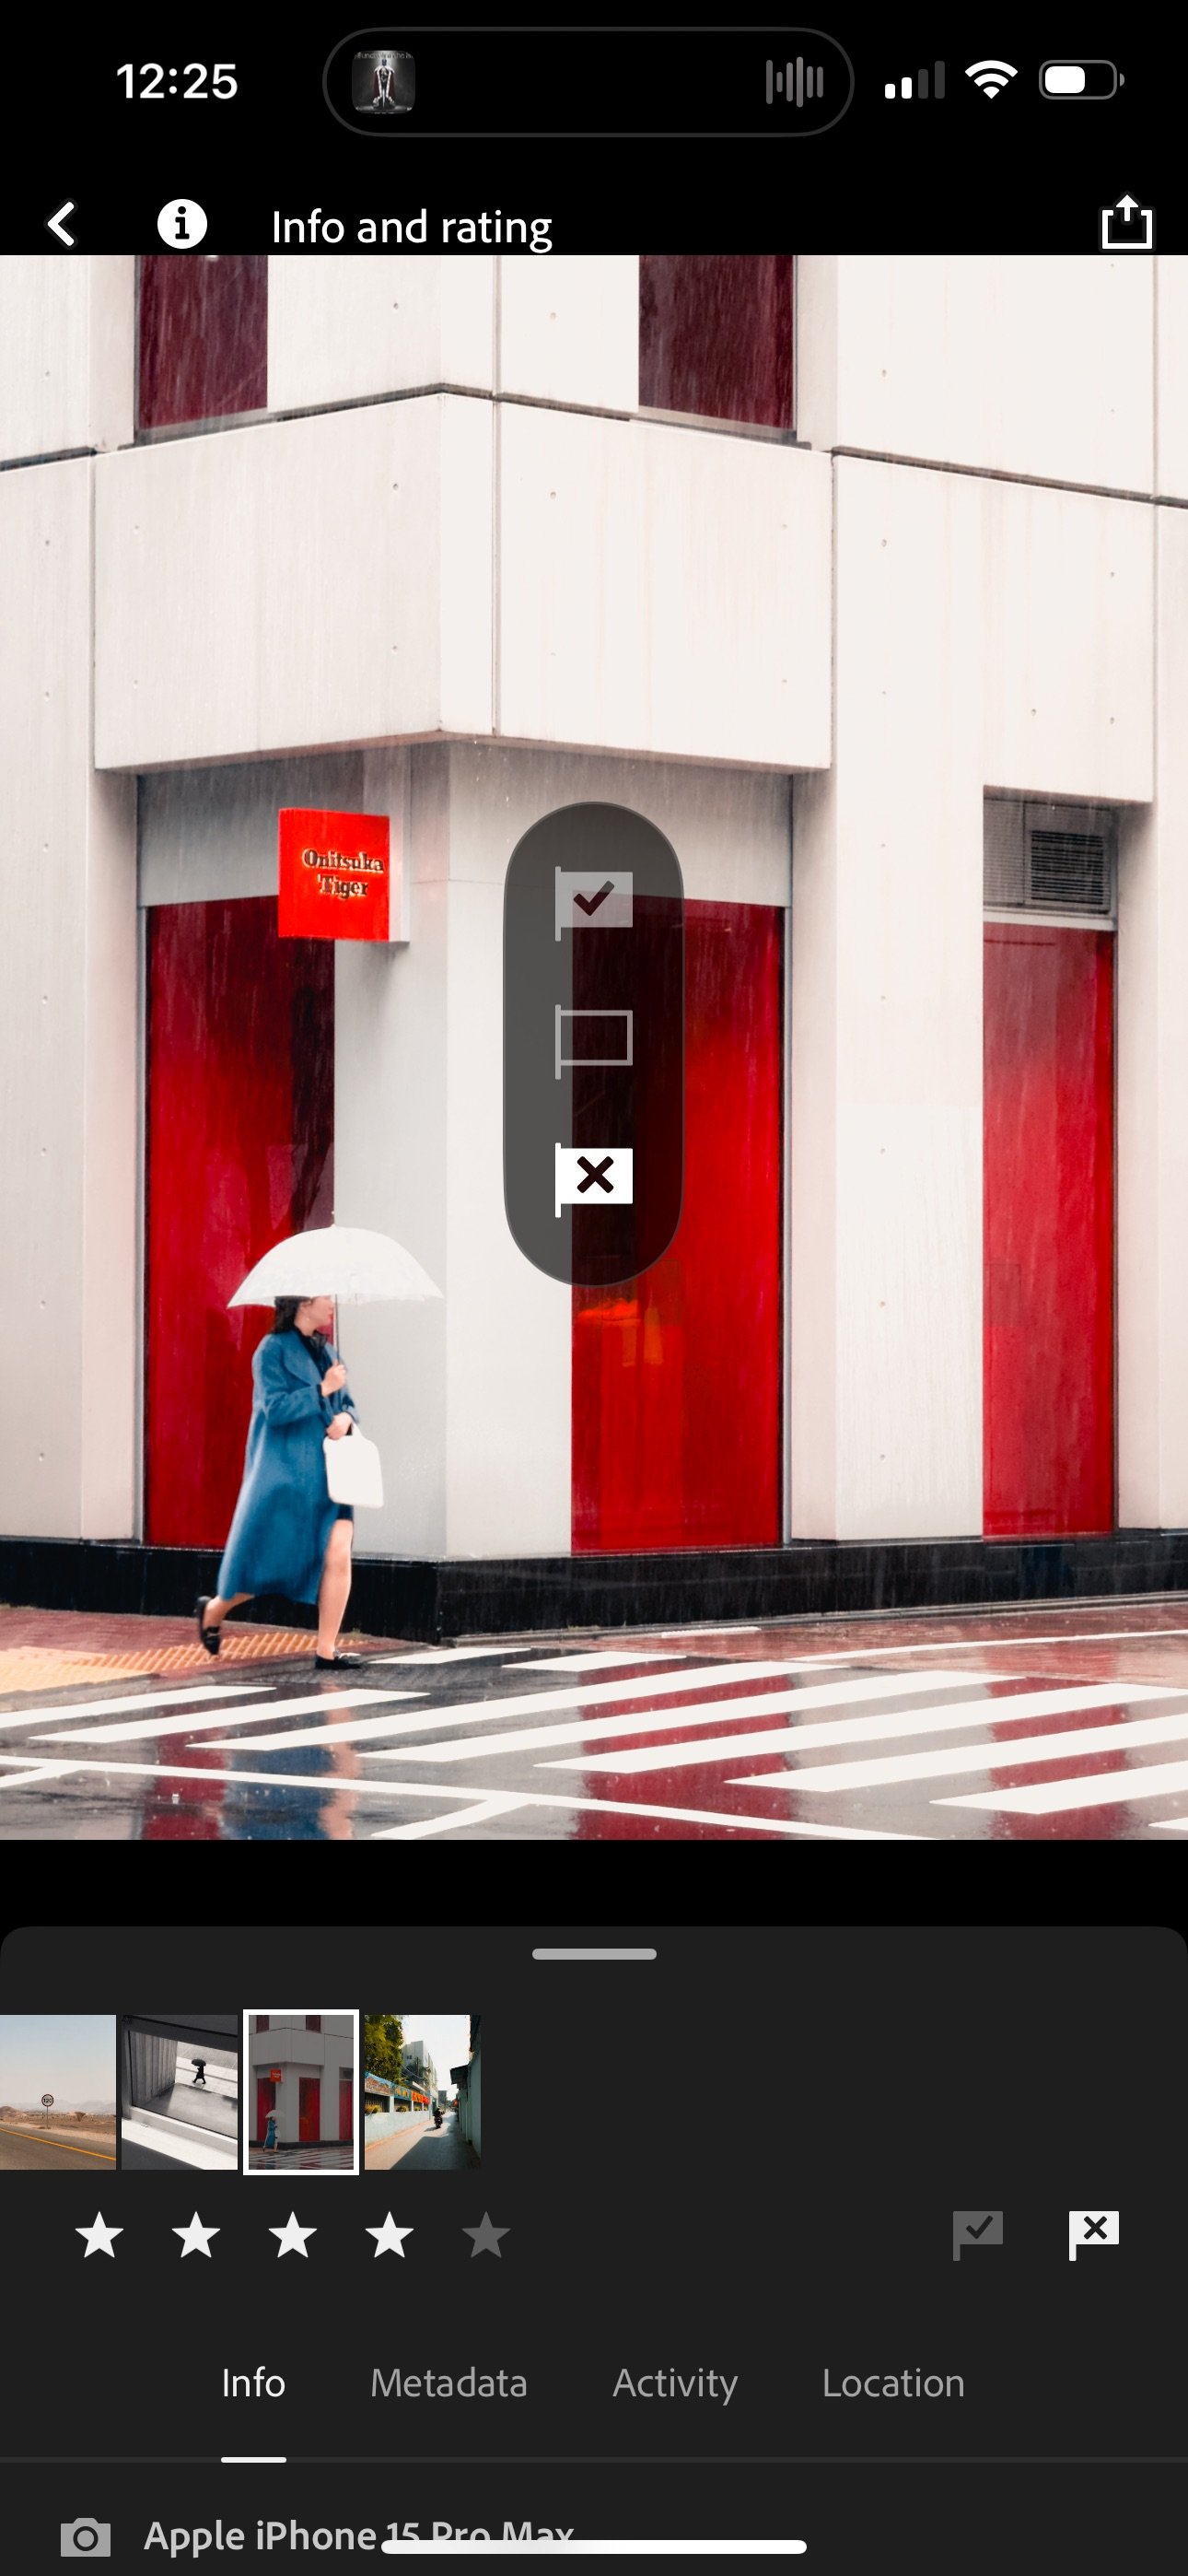
This will be a whole separate post, but I generally cull very simply. If I feel no connection to the photo, I mark it rejected. If there is a burst, I pick 2 or 3 of my favourite frames and reject the rest. If there are multiple shots of the same thing, I inspect each one and pick the best one. My definition of the best one is either the composition is better in camera, the focus is more accurate, or maybe the light was a bit better. Usually, if I imported 500 photos, I would keep around 50 of them and delete the rest. Once culled, I delete all the rejected items and at this point switch sync back on.
Step 2 - Editing
When it comes to editing, I have three stages I would go through. The first step involves applying one of my presets on each image and seeing in which direction I would like to take it. I will also make any exposure and white balance adjustments to see how the image will roughly look. This process usually eliminates around 25% of the photos.

The second stage involves full editing. This is where I take my time and really try to get the most out of the photo. This can be time-consuming; however, on average, it also removes another 25% of images which didn’t make the cut. Then I will leave my phone for an hour or so, or even sometimes a day. When I come back, I usually notice some mistakes. Usually, these mistakes include over-editing or just getting the colours and exposure completely wrong. When looking at your edits with fresh eyes, it is much easier to spot issues. This process will involve re-editing some images and even deleting another 10% or so. Once this is done, I will go through each image and rate it from 1 to 5 stars and assign keywords. The final step is to empty the deleted folder and enable sync again.

Step 3 - Exporting & Sharing
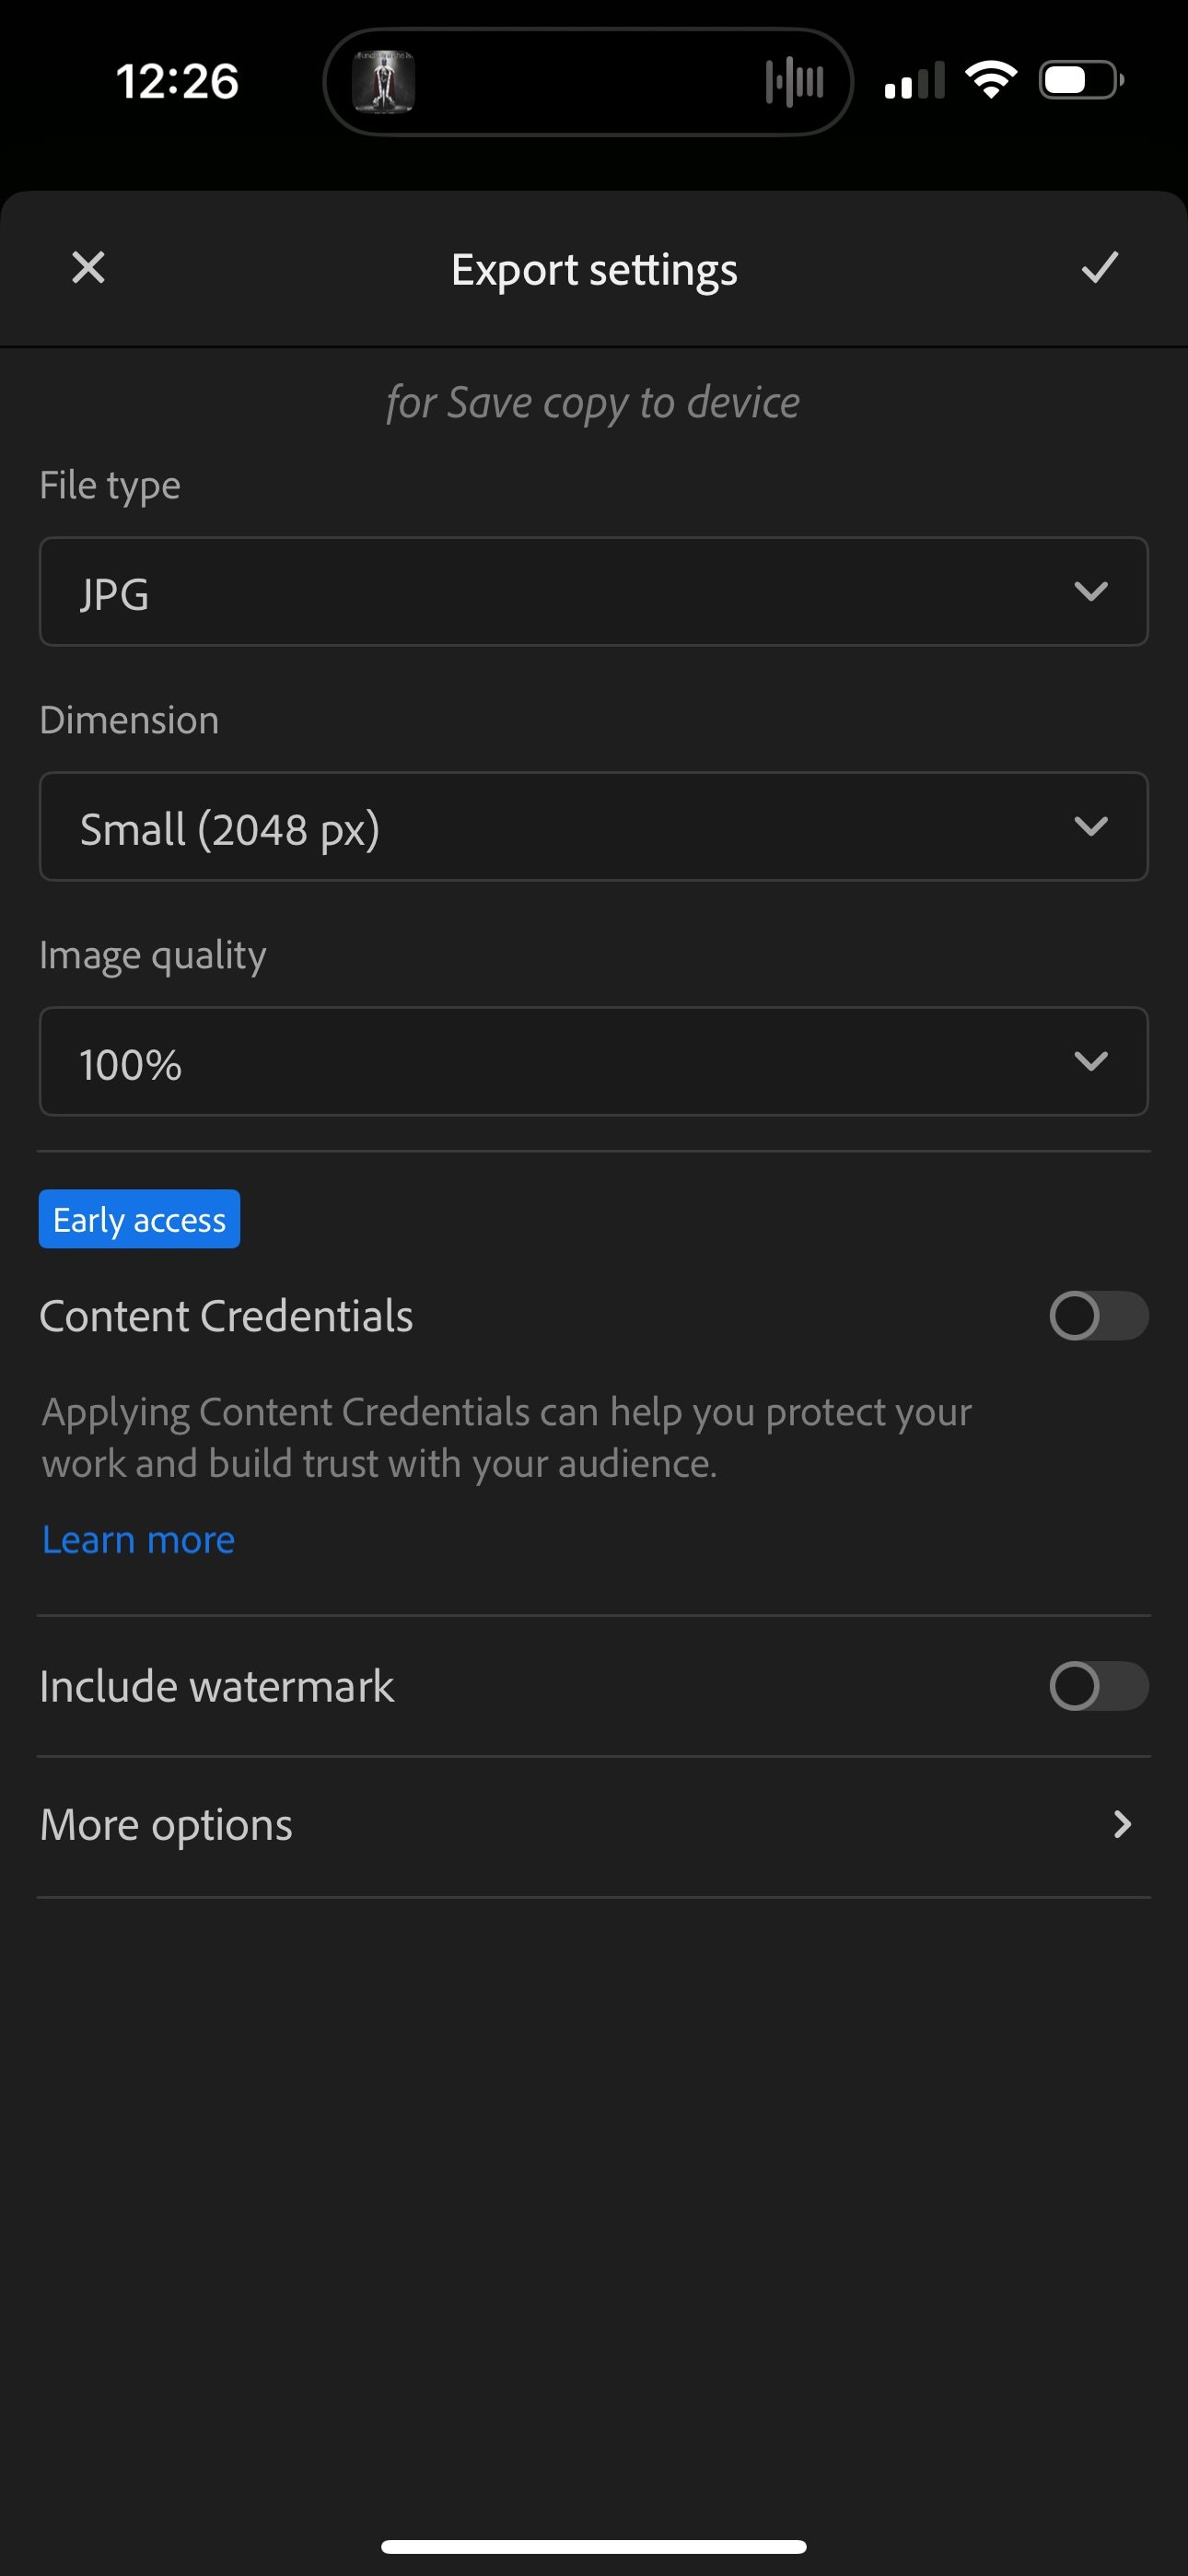
I will typically export twice. The first export will be a full-size max-quality JPEG. This is the file that will be shared to social media and imported into my SSD.
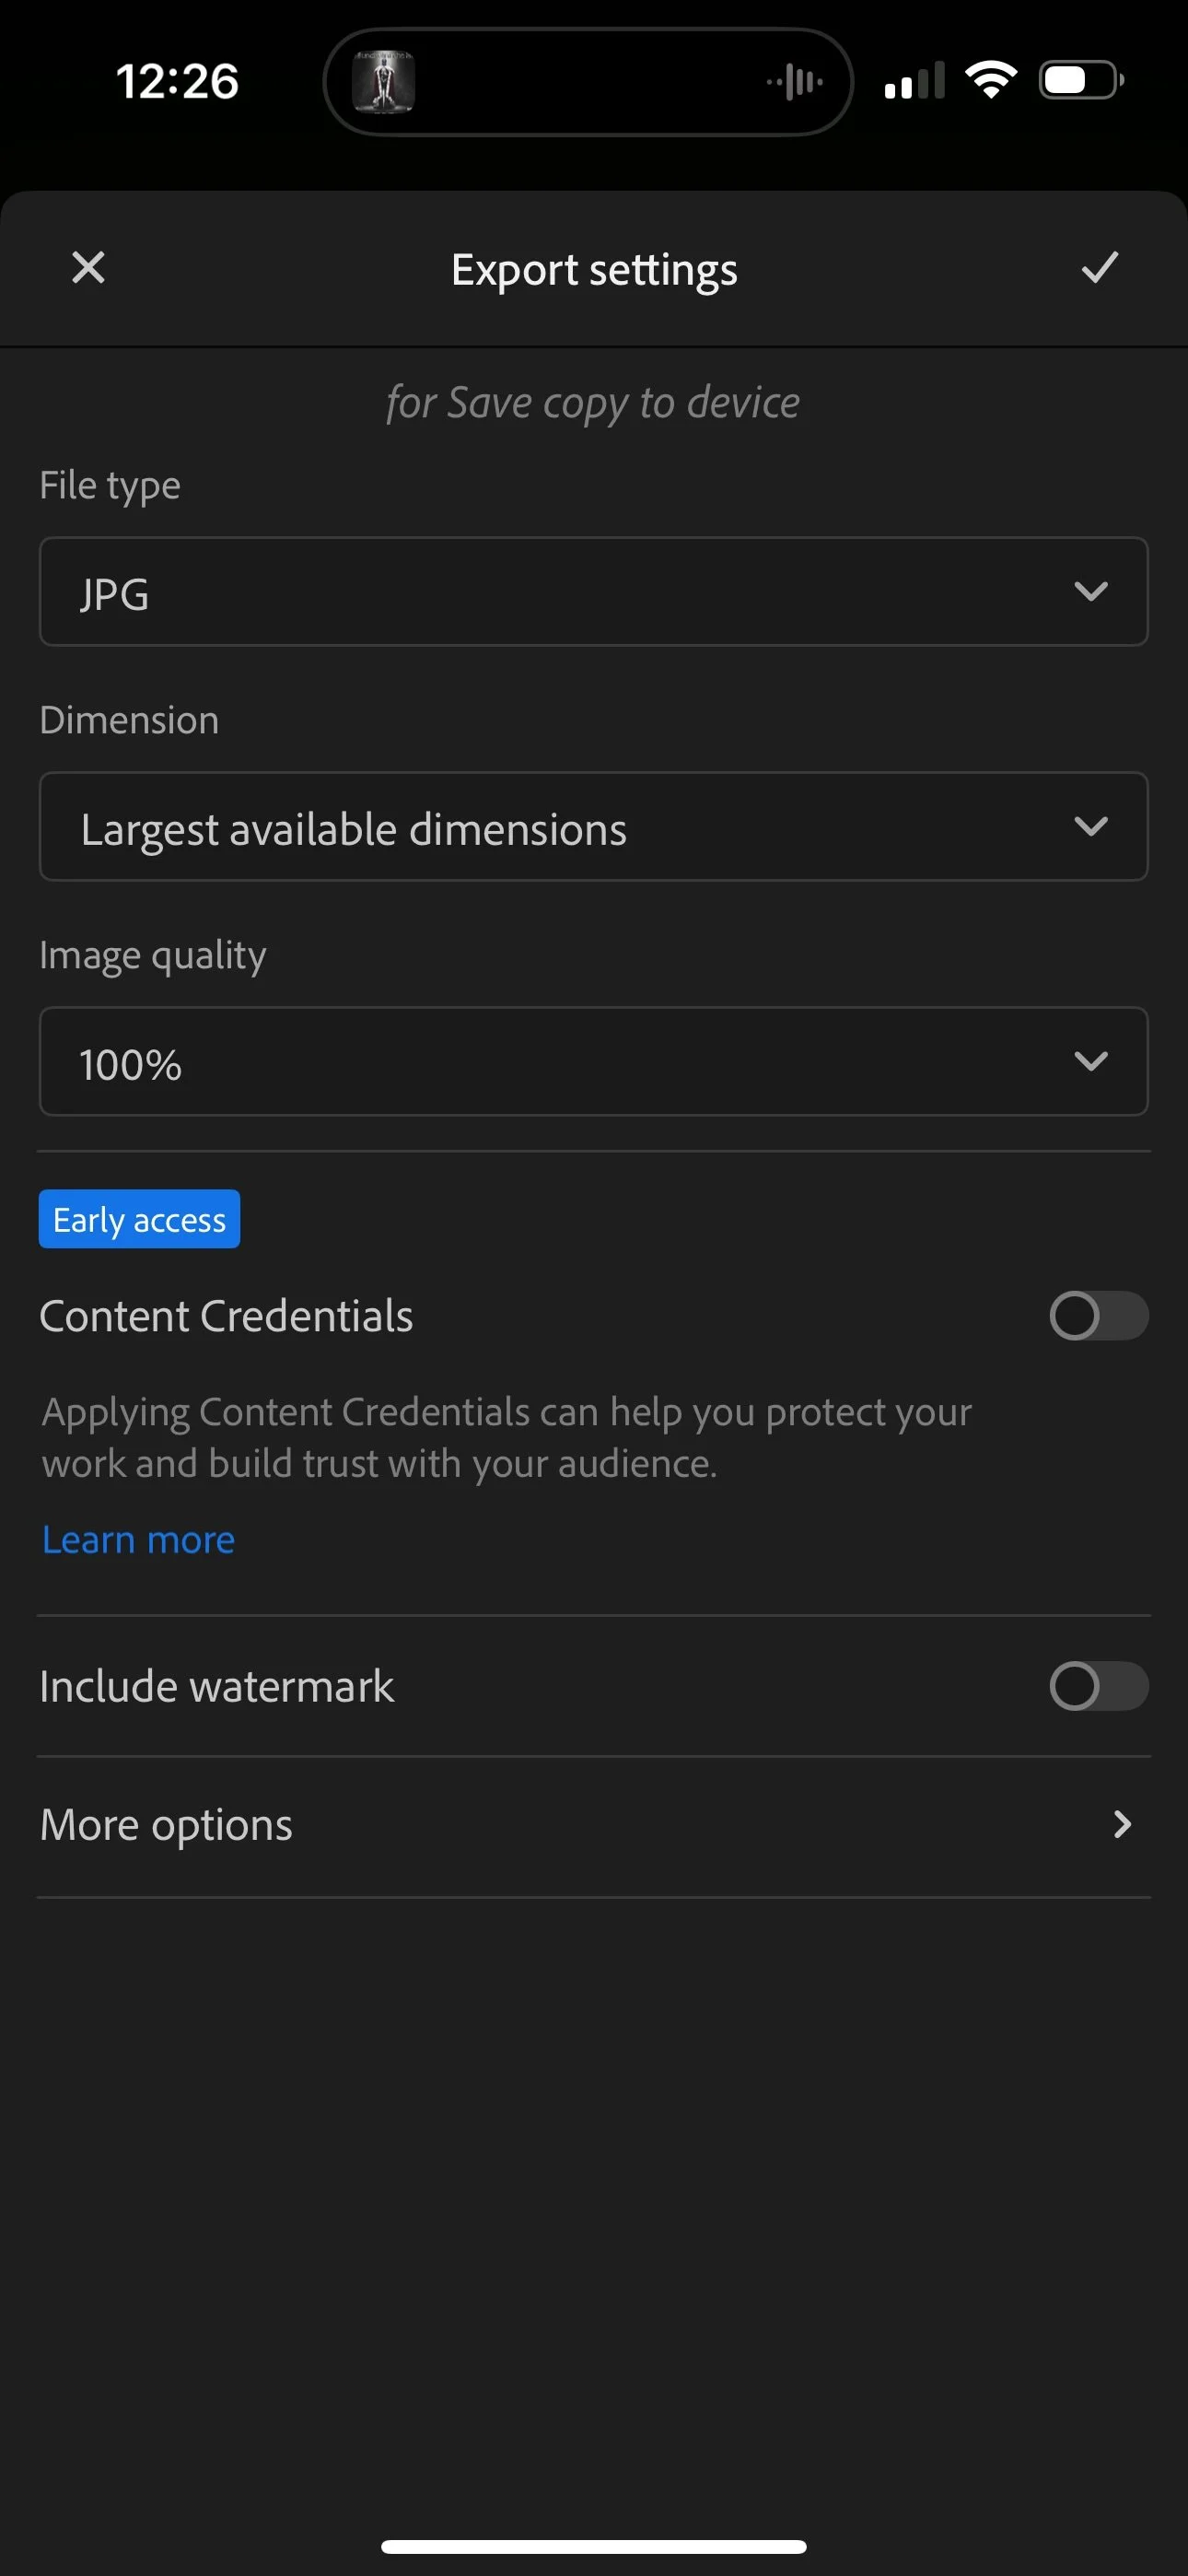

The second export will be a lower-resolution file that I will use for my website, blog, and newsletter.
Step 4 - Backing Up
The last step in this workflow is a physical local backup. However, this isn’t just a normal backup; it is also designed to act as my offline library that can be accessed on any device. The whole thing is stored on my SSD, so it is fast and easy to access. The filing structure is identical to my Lightroom catalogue. However, when you get into each folder, you would find the images are split into a further 3 folders:
One is RAW and has all the original RAW files inside.
One is JPEG and has all the final edited full-size JPEG files.
One is DNG, which is an Adobe RAW format but has all the edits inside.
So between all these files, I am literally covered for everything. Once all this is done, the whole process is finished, and I can move on to taking more photos.















Instead of telling you how these will change your life, I would rather be practical and answer the most common questions that people tend to have when buying presets.
What are presets?
They are editing settings that are saved in a file and can be applied to any image.
Why do people buy presets?
Sometimes because they like the work of the photographer and want that style for their own photos. Mostly because they would like to see how other people edit and learn by reverse engineering the presets. Other times it’s just to support their favourite photographers, thank you!
What’s the overall style of these presets?
- Filmic
- Warm
- Soft
- Bright
What are these presets suitable for?
Street & Travel Photography
Some Nature (with further editing)
Some Portraits (with extensive editing)
Do I actually use these?
Yes. This is the same pack I use right now for all my editing. This isn’t a pack made just to sell.
Do these presets get updated?
Yes, as my style changes, these presets will also be updated. Any time a new update is available, you will get a free update via email. Of course you also keep all the old presets in case you prefer the older looks. Only presets purchased from 2025 onwards will receive the updates.
What file types are these presets for?
- All RAW files
- JPEGs & TIFFs (not recommended)
What camera brands are these presets for?
These were designed around Fujifilm, Sony, and Leica sensors. With that said, they will work with all camera brands. While there might be differences due to individual camera colour science, the overall feel of the preset will carry over.
Will these work with JPEG files?
Yes, but you will need to reduce the intensity and make further edits. I strongly recommend editing RAW files.
Are these one click edits?
95% No. You would need to do some basic adjustments as each image is different. These adjustments can include exposure, colour balance etc. In 5% of cases you can just apply and leave it alone.
Do I need to know how to edit?
You need to have a basic understanding of adjusting exposure, highlights, shadows, etc. A more comprehensive editing skillset will let you get the most out of them.
How many presets are included?
10 in the main pack and 24 in the extras pack
Why two packs?
The main pack is what I use for 99% of my edits and is kept small to reduce wasted time scrolling through presets. The extras pack is everything I don’t use often.
What software do I need?
These presets will work with any of the following:
- Photoshop (adobe camera raw)
- Lightroom Classic
- Lightroom Desktop
- Lightroom Mobile
Will these presets work with free versions of the above software?
You need to research and double check before buying. These presets were designed for the full paid versions.
Will these presets work with very old versions of the above software?
You need to research and double check before buying. These presets were designed on and for the latest software.
What file type do I get?
XMP
What else do I get?
- Comprehensive PDF guide
Can I modify these and turn them into my own?
Yes! In fact I encourage you to modify them and play around. Use these to help you get your own style.
I have more questions…. What do I do?
Make a cup of tea and drop me an email on hello@snapsbyfox.com
Please note that due to the nature of digital products, refunds are generally not accepted. However, if you experience any issues, feel free to contact me and I’ll review your situation individually. You are welcome to use this product for personal or commercial projects, but you may not copy, distribute, or resell the files in their original or modified form.
Finally I want to say a massive thank you for supporting me. Buying these presets is the most direct way you can support my work.
Thank you!