
How To Get The Best Colours Out Of Hasselblad RAW Files (Adobe Lightroom)
In this blog, I will share a few ways I use Adobe Lightroom to get the best colours out of Hasselblad RAW files. These are the methods that work for me and reflect how I edit. There are, of course, other ways to adjust colour in Lightroom, so what I’m sharing here is based on personal preference rather than objective fact. It’s worth noting that some of the features mentioned are only available on the desktop version of Lightroom, not the mobile app.

Profiles
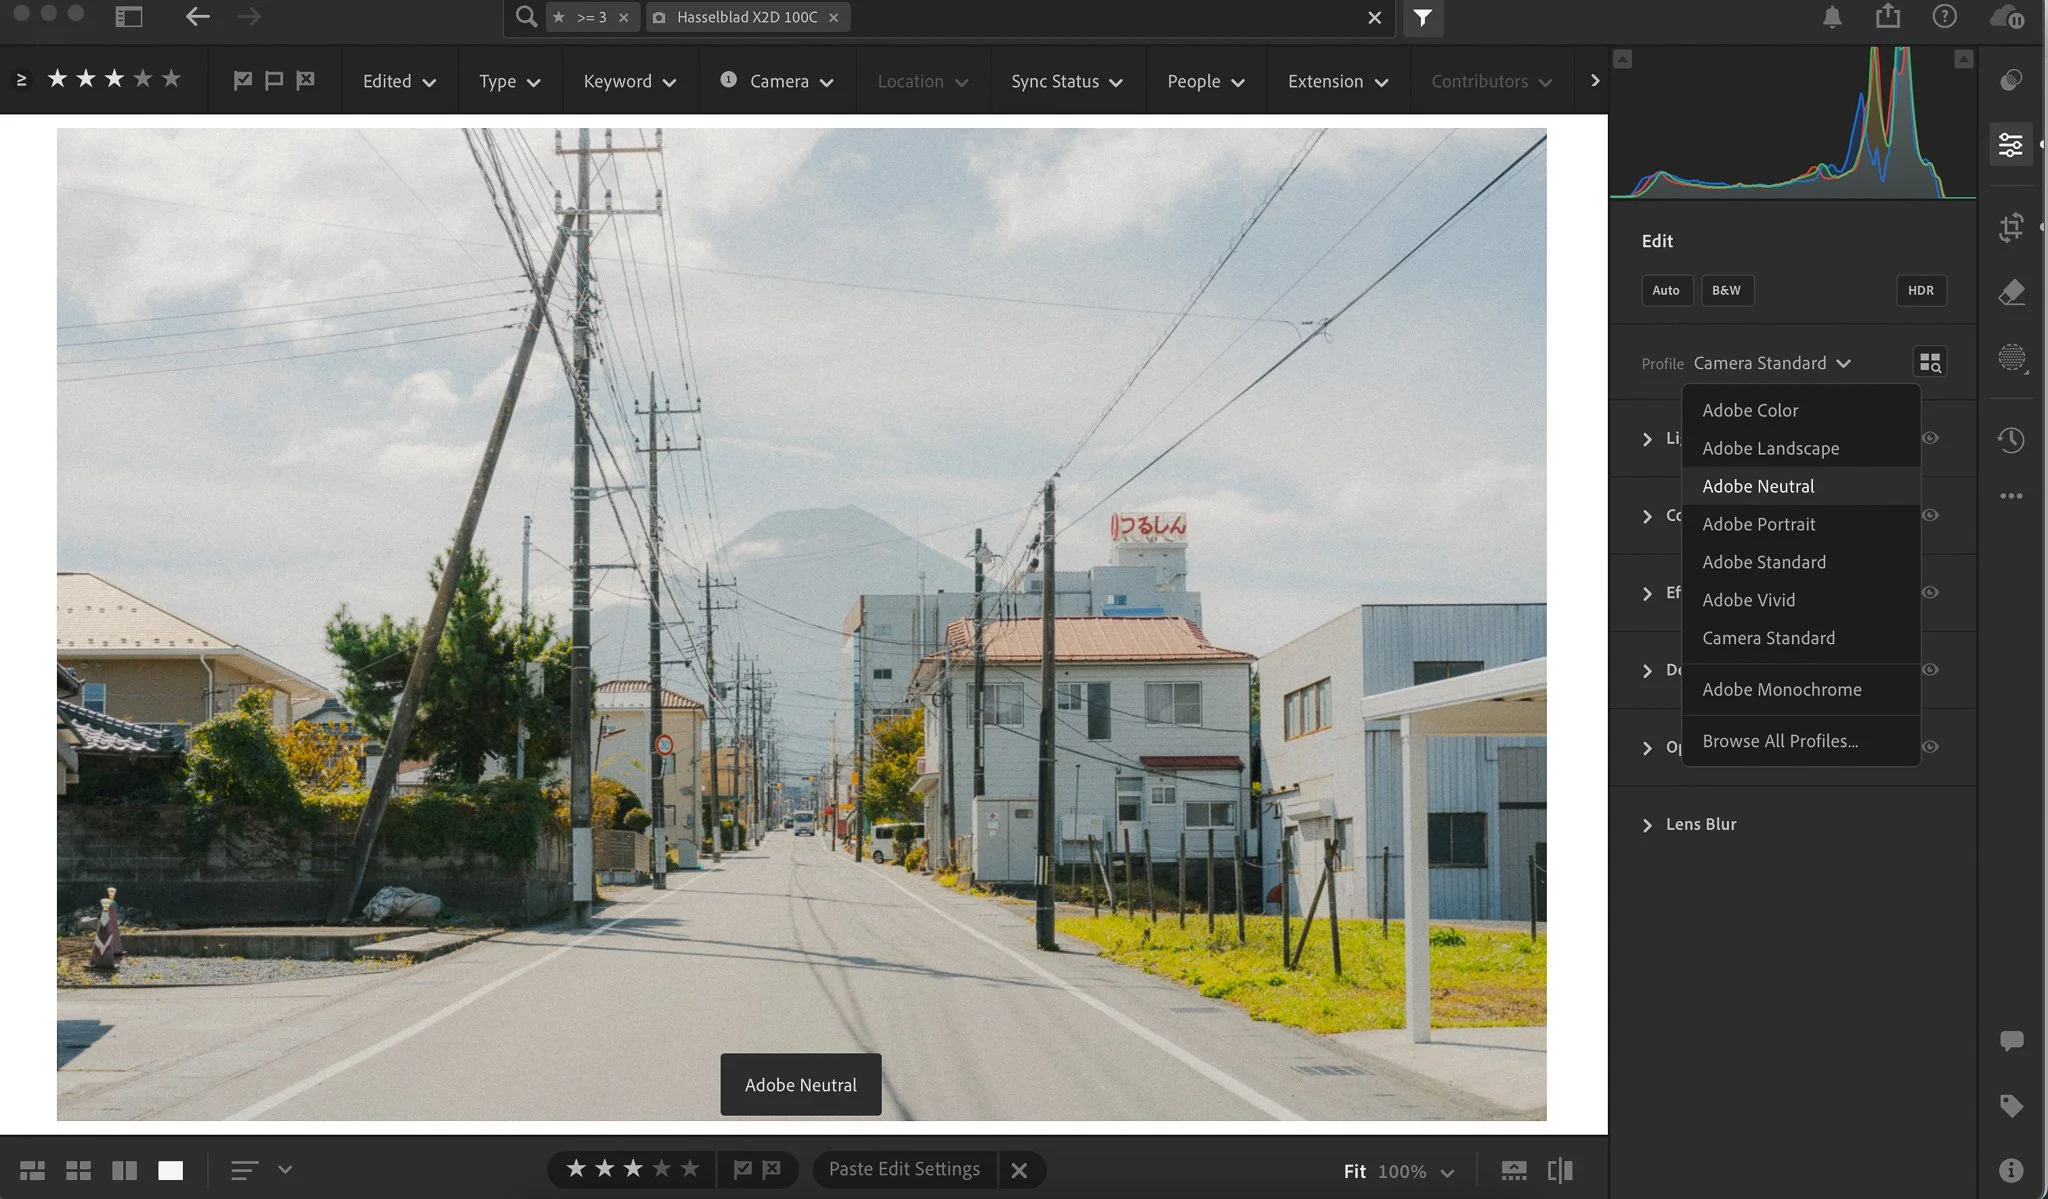
The first and most impactful way to get the best out of Hasselblad RAW files is to experiment with the profiles, which can be found at the very top of the editing panel. When working with a Hasselblad RAW file, you’ll unlock a custom profile exclusive to the Hasselblad cameras. This seems to be a somewhat neutral profile designed to be your starting point. This is Adobe’s interpretation and the result will differ from Hasselblad’s own software, Phocus. I always recommend making this adjustment early in the editing process, as it can set the tone for your edit and save time. Alongside the Hasselblad profile, you’ll also find Adobe’s own profiles, which offer a different aesthetic and might be a better choice if you need to match shots from different cameras.



Point Colour
This is my favourite tool in Lightroom, although sadly it’s only available on the desktop version (at the time of writing). The Point Colour tool lets you select specific colours in your image and adjust their hue, saturation, and luminance. Global adjustments often leave certain areas needing a little extra tweaking—perhaps the overall tone of the image is just right, but the bright red rooftops or skin tones look unnatural. With Point Colour, you can fine-tune these details without affecting larger colour groups. The range tool adds even more precision, allowing you to control how specific or broad your colour selection is.


Colour Mixer (HSL)
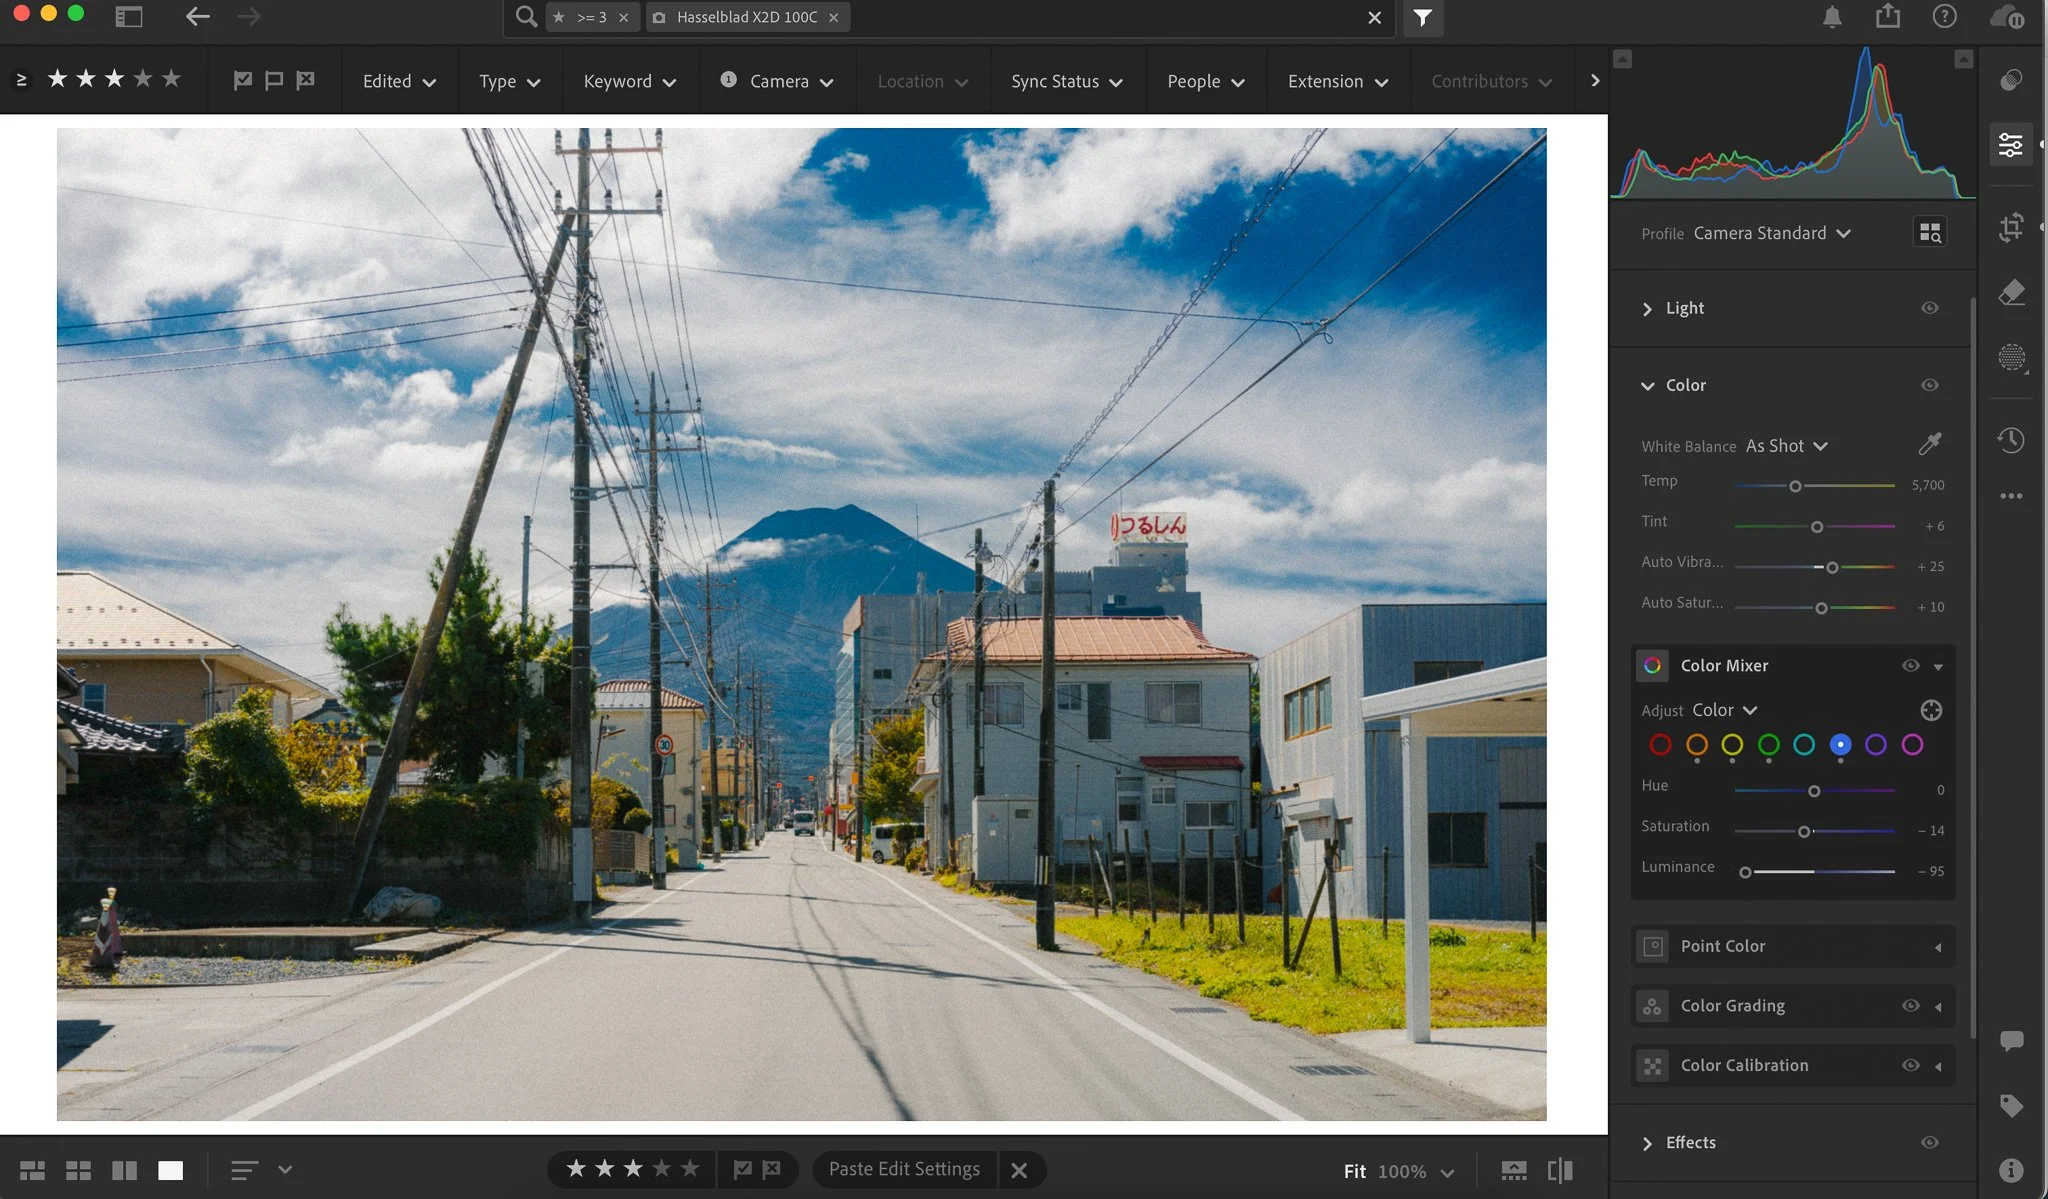
HSL (Hue, Saturation, Luminance) is a tool I use on every single image without exception. In essence, it allows you to modify the hue, saturation, and brightness of all the main colours. It works similarly to Point Colour but is much broader, grouping many smaller shades under categories such as red, yellow, and green. HSL is one of the most powerful tools for transforming the overall look and feel of a photo. For a vintage cinematic feel, you could shift your reds towards orange and your blues towards teal. If your image has too many clashing colours, try bringing the warm tones (yellow, red, orange) closer together and do the same for the cool tones (blue, cyan, purple). There’s no definitive science to this—it’s an artistic process that depends entirely on the specific image and your creative preferences.



Camera Calibration
Camera Calibration is another powerful feature that, frustratingly, is missing from the mobile version of Lightroom (at the time of writing). Each colour in an image is built from the RGB channels: red, green, and blue. Camera Calibration lets you adjust the emphasis on each channel. For example, you might want more reds and fewer blues or a greenish undertone. Unlike HSL, which shifts a specific colour and all its shades, Camera Calibration tweaks the very foundation of how colours are rendered. This tool can be used to match colours from different cameras, harmonise tones, or add a unique stylistic touch. An easy starting point for many edits is to move the red primary slider to the right, the blue primary slider to the left, and add a touch of green.


Colour Grading
While this tool doesn’t necessarily alter your colours, it adds a colour grade over the image, which can change how the colours are perceived. Colour Grading is an opportunity to get creative—you can opt for a bold, stylised grade or something more subtle. Personally, I like to introduce blues, reds, or greens into the shadows and warmer orange tones into the highlights. The tool is straightforward to use: simply select the hue and intensity for the shadows, midtones, and highlights. You can also tweak the luminance, which I rarely adjust for shadows or highlights but often increase for midtones to give the image a slight lift. Finally, the balance and blending controls let you fine-tune the overall effect to achieve the desired result. For more precise control, you can use the Curves tool. I don’t use it much hence no mention of it in this blog.




















Instead of telling you how these will change your life, I would rather be practical and answer the most common questions that people tend to have when buying presets.
What are presets?
They are editing settings that are saved in a file and can be applied to any image.
Why do people buy presets?
Sometimes because they like the work of the photographer and want that style for their own photos. Mostly because they would like to see how other people edit and learn by reverse engineering the presets. Other times it’s just to support their favourite photographers, thank you!
What’s the overall style of these presets?
- Filmic
- Warm
- Soft
- Bright
What are these presets suitable for?
Street & Travel Photography
Some Nature (with further editing)
Some Portraits (with extensive editing)
Do I actually use these?
Yes. This is the same pack I use right now for all my editing. This isn’t a pack made just to sell.
Do these presets get updated?
Yes, as my style changes, these presets will also be updated. Any time a new update is available, you will get a free update via email. Of course you also keep all the old presets in case you prefer the older looks. Only presets purchased from 2025 onwards will receive the updates.
What file types are these presets for?
- All RAW files
- JPEGs & TIFFs (not recommended)
What camera brands are these presets for?
These were designed around Fujifilm, Sony, and Leica sensors. With that said, they will work with all camera brands. While there might be differences due to individual camera colour science, the overall feel of the preset will carry over.
Will these work with JPEG files?
Yes, but you will need to reduce the intensity and make further edits. I strongly recommend editing RAW files.
Are these one click edits?
95% No. You would need to do some basic adjustments as each image is different. These adjustments can include exposure, colour balance etc. In 5% of cases you can just apply and leave it alone.
Do I need to know how to edit?
You need to have a basic understanding of adjusting exposure, highlights, shadows, etc. A more comprehensive editing skillset will let you get the most out of them.
How many presets are included?
10 in the main pack and 24 in the extras pack
Why two packs?
The main pack is what I use for 99% of my edits and is kept small to reduce wasted time scrolling through presets. The extras pack is everything I don’t use often.
What software do I need?
These presets will work with any of the following:
- Photoshop (adobe camera raw)
- Lightroom Classic
- Lightroom Desktop
- Lightroom Mobile
Will these presets work with free versions of the above software?
You need to research and double check before buying. These presets were designed for the full paid versions.
Will these presets work with very old versions of the above software?
You need to research and double check before buying. These presets were designed on and for the latest software.
What file type do I get?
XMP
What else do I get?
- Comprehensive PDF guide
Can I modify these and turn them into my own?
Yes! In fact I encourage you to modify them and play around. Use these to help you get your own style.
I have more questions…. What do I do?
Make a cup of tea and drop me an email on hello@snapsbyfox.com
Please note that due to the nature of digital products, refunds are generally not accepted. However, if you experience any issues, feel free to contact me and I’ll review your situation individually. You are welcome to use this product for personal or commercial projects, but you may not copy, distribute, or resell the files in their original or modified form.
Finally I want to say a massive thank you for supporting me. Buying these presets is the most direct way you can support my work.
Thank you!