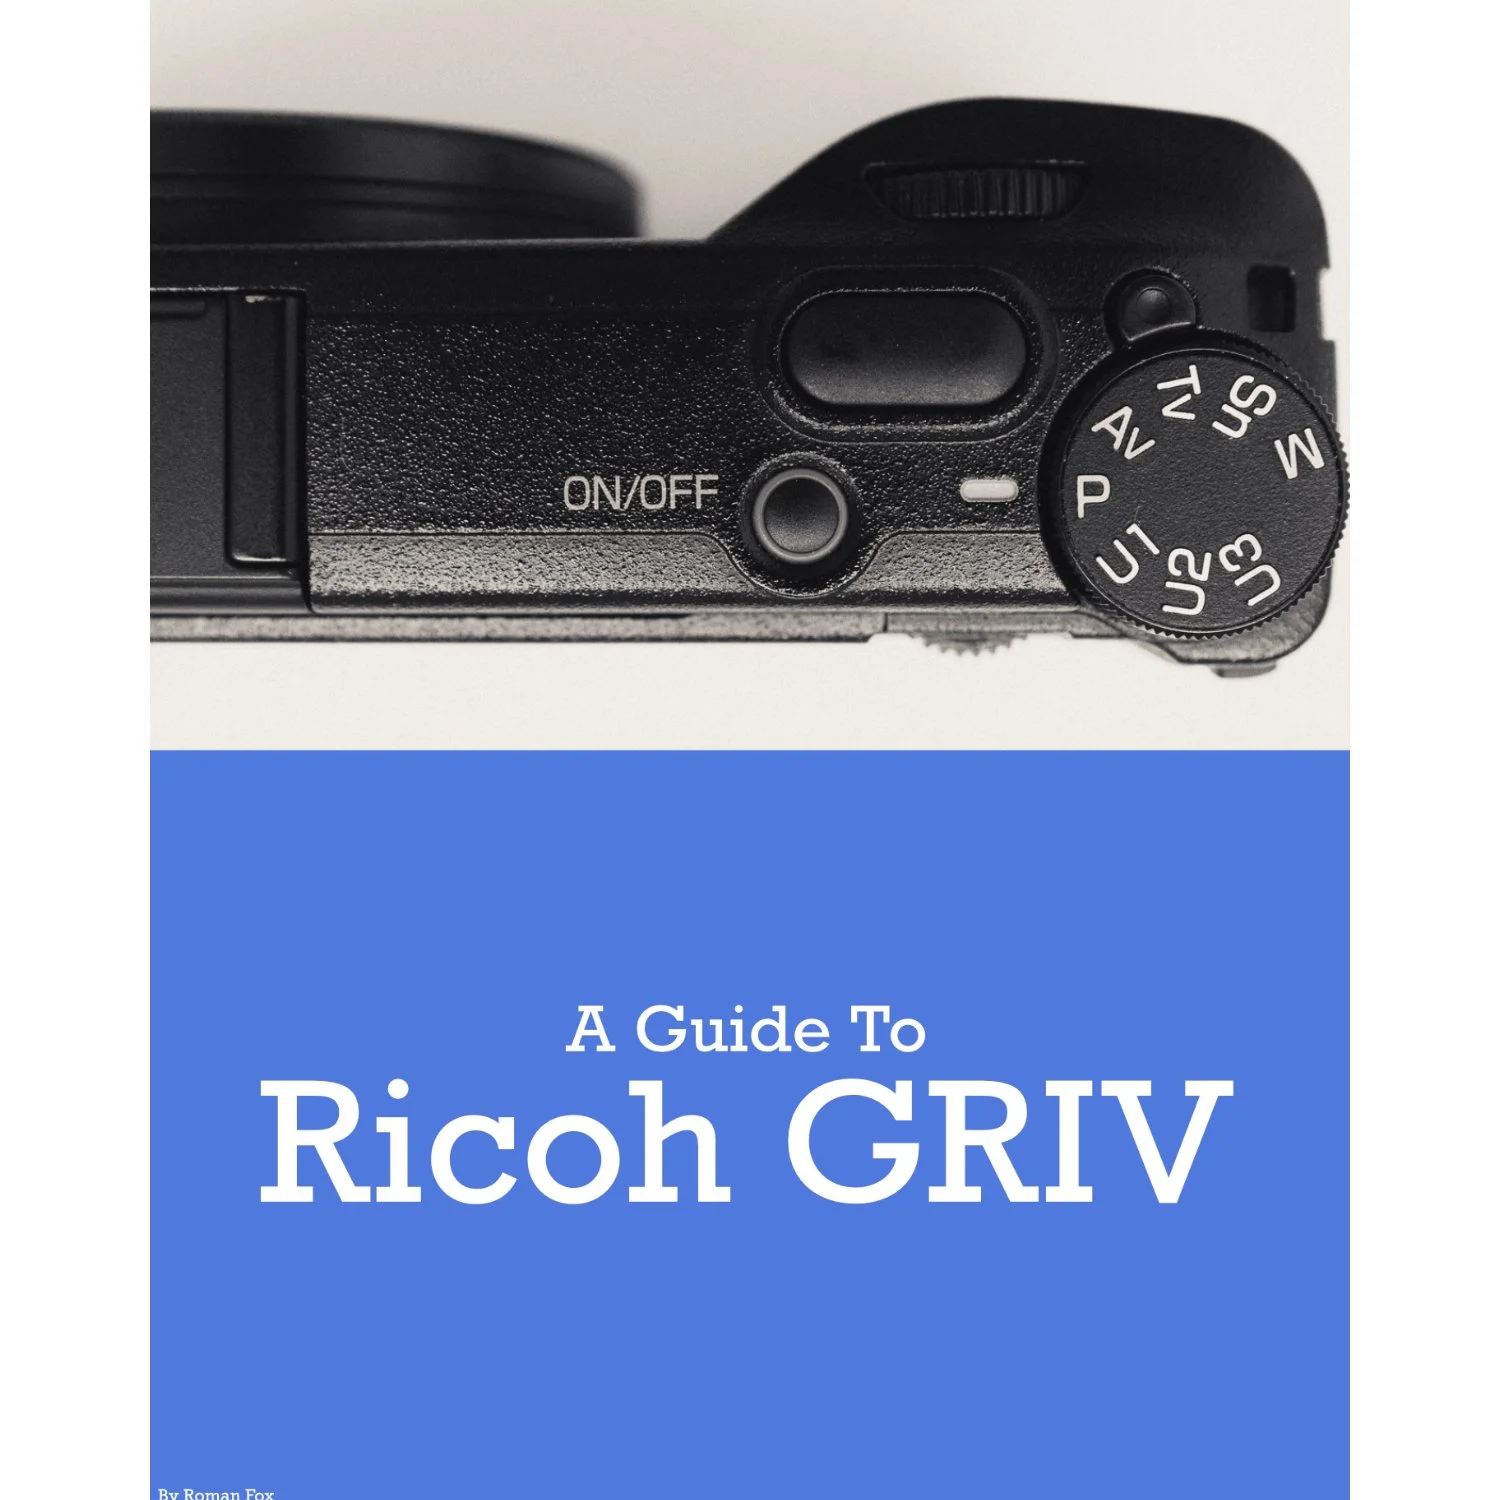
Hassleblad X2D 100C Set Up & Best Photography Settings
In this blog, I will share my settings for the Hasselblad X2D 100C camera. These are the settings I’ve been using for the last six months and, after much trial and error, found these to be the best for street and travel photography. Please be advised that this is what works for me and my use case. If you’re a studio-only portrait photographer, the setup will most likely be very different. This blog will only cover the main settings that make the biggest difference to the camera and ones I personally adjust.
General Settings
Let’s first set up the camera using the settings in the main menu. To do this, press the menu button twice to skip the quick menu and go into the main one. We will work backwards and start in the ‘General’ menu.

Touch
Given the lack of a joystick, I leave touch enabled and set the touchpad area to ‘Right’ with sensitivity set to ‘Medium’.
Custom Buttons
This is my custom button setup:
AF/MF - Crop Mode (cycle through built-in crop modes)
ISO/WB - Focus Mode (change between autofocus and manual focus)
M - Exposure Mode (change between manual, aperture, or shutter priority)
Wheel Click - Zoom In (punch in to check focus)
Lens Control Ring - AV (adjust aperture)
Custom Overlays
These are the displays I have set up. I don’t keep everything on as I prefer a minimal setup. Below is what I have ON. Everything not mentioned is OFF:
Exposure Info
Grid + Exposure Info
Spirit + Exposure Info
Power
One of the downsides of the Hasselblad is that it’s not the fastest camera to switch on. For that reason, I prefer to keep it on for longer at the expense of battery life. Here are my power settings:
Display Off - 5m
Power Off - 30m
Top tip - when the camera is on, press the power button once to turn the screen off and save some battery without actually switching off. This makes for a much faster wake-up time. When the camera is off, press the power button once to see the battery level.
Crop Modes
The X2D offers a bunch of crop modes. I don’t use them all and below is a list of the ones I do:
65:24 XPan
1:1 (6x6)
5:4 (4x5)
3:2 Crop (24x36)
Quality
There is no point using anything other than the best, so I set it to RAW and 16-bit.
Focus
While the X2D doesn’t have the best AF system, the following settings should make the most of it:
AF Point Size - Large
Reset Focus Point - Never (you can do that yourself by pressing the X button)
AF Result Sound - Off
MF Assist - Focus Peaking
Peaking Colour - Orange
Touch AF - On
Move AF Point - On
Move AF Point for EVF - On (this is very important since the camera does not have a joystick)
Exposure
Here is where we can set up the exposure parameters. For travel and street photography, I suggest doing the following:
Reset After Exposure - Off
Reset After Reboot - Off
Electronic Shutter - Off
True Exposure - Off
Shutter Speed Limit - 1/250 (This number is sufficient for wider lenses up to 55mm. For longer lenses such as 90mm+, I suggest using 1/ 250. This will be the lowest shutter speed the camera will use when shooting in Aperture Priority or Program Mode).
ISO Max 6400
ISO Min 64
Exposure Simulation - A/S/P/Auto/M
With the main menu set up, let’s move to the splash screen. This is the first quick menu that you get when you press the menu button once. We will work from top to bottom, left to right. For this, you need to use the touch screen.
White Balance
I have this set to Auto and find the camera does a fantastic job. If you’re shooting in difficult conditions, then changing it to the most appropriate preset might yield better results.
Focus Mode
We have this already set to a custom button, so no need to touch it.
Face Detection
By default, I have it always off as I seldom take photos of people. If I were to shoot someone, I would use the manual mode.
Change Settings
While this isn’t something I would personally do, if you tap on the ISO, shutter speed, or aperture, you can change the values.
Exposure Mode
We have this already set to a custom button, so no need to touch it.
Metering Method
I have this set to Centre Weighted as I find it gives the most balanced exposure. Spot is too erratic for my liking.
Drive Mode
I set it to continuous drive, especially if shooting moving subjects.
With the camera now set up, let me talk you through my methodology for exposing and focusing using the X2D.

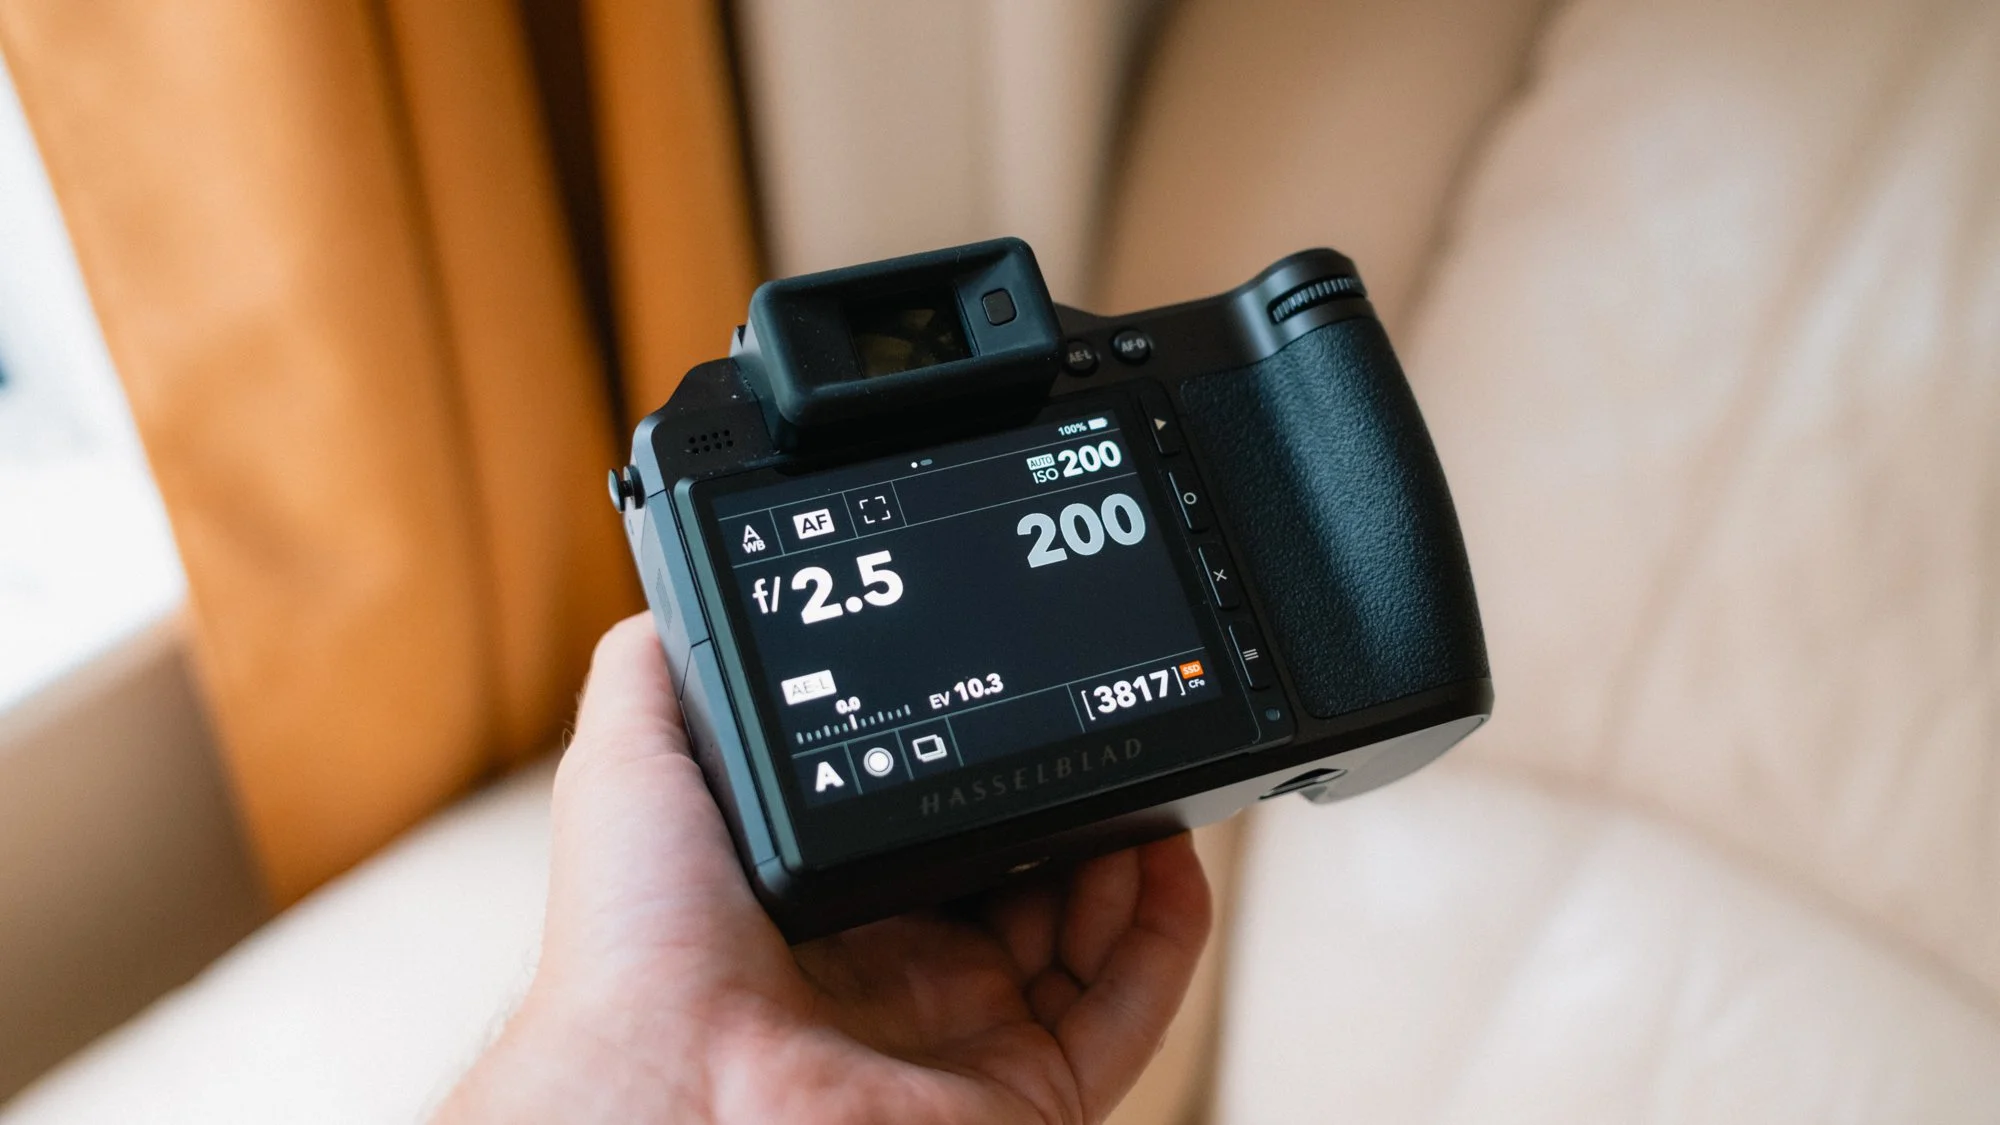
Aperture Priority
My main method of shooting is using aperture priority. This gives me direct access to how my image appears. For most scenes, I am somewhere around f/8. If I want the most light or more background blur, then f/2.5 is my go-to. If I want everything in focus or to minimise the light coming in, f/16 - f/22 is a good place to be.

Shutter Priority
I shoot in shutter priority if I’m shooting at night or I want a slow shutter speed effect. At night, I already know I will be wide open, so I’d rather control the shutter speed and adjust it depending on the light and situation. I will try to keep it around 1/125 but will go lower if possible. Another scenario is motion blur where I either pan with the subject, or want motion blur in the subject. For this I would start with 1/30 shutter speed and adjust as needed.

Focusing
Earlier on we set up the ISO/WB button to toggle between AF and MF. The cool thing with the X2D is that even if you’re in MF, you can press the AF-D button on the back to trigger AF once and lock on your subject. This effectively turns the camera from shutter focus to back button focus, perfect for focusing and recomposing without having to keep holding the shutter button down. I use this about 30% of the time. 50% of the time I focus normally using the shutter button. The rest of the time I will place the lens into manual focus mode and focus 100% manually. Note that on XCD lenses, if you move the ring into manual focus, the AF-D back button trick won’t work.